

Maintaining the pristine condition of your Tesla’s interior is more than just an aesthetic choice; it’s a crucial aspect of preserving its long-term value and enhancing your daily driving experience. With its unique blend of high-tech components and premium materials—from vegan synthetic leather to expansive touchscreen displays—a Tesla demands a thoughtful approach to cleaning, one that goes beyond the methods used for conventional vehicles. Understanding these specific requirements and employing the right techniques and products can make all the difference, ensuring that luxurious feel remains intact without risking damage to sensitive surfaces.
This in-depth guide is designed to equip Tesla owners with the practical, actionable knowledge needed to keep their vehicle’s cabin looking fresh and flawless. We’ve meticulously gathered the best practices and product recommendations directly from experts and Tesla’s own guidelines, focusing on efficiency, safety, and material preservation. Our goal is to demystify the cleaning process, providing clear, step-by-step instructions that address every key area of your Tesla’s interior, helping you protect your investment and enjoy a comfortable, inviting space every time you get behind the wheel.
From initial preparation to tackling specific surfaces, we’ll walk you through the most effective ways to maintain that showroom sparkle. You’ll learn how to choose the correct cleaning agents, what precautions to take, and how to approach each unique material—be it vegan leather, Alcantara, wood trim, or glass—with the care it deserves. Get ready to transform your Tesla’s interior cleaning routine from a chore into a seamless, rewarding practice that pays dividends in both appearance and resale value.
1. **Start with Thorough Preparation: Clear Out and Vacuum**Before any serious cleaning can begin, a fundamental first step is to completely clear out your Tesla’s interior. This means removing all items from floor mats, the center console, door pockets, and even any removable rubber inserts. Having a designated box or container nearby can significantly streamline this process, ensuring that everything is organized and ready to be put back once the cleaning is complete. This initial decluttering not only makes the subsequent cleaning steps more efficient but also prevents accidental damage to personal belongings or the car’s interior during the process.
Once the cabin is free of clutter, the next crucial step is a comprehensive vacuuming. A shop vacuum, ideally with a car cleaning kit that includes various attachments, is highly recommended for its ability to reach tight spaces and navigate the contours of your Tesla’s interior. Focus on thoroughly removing all loose dirt, crumbs, and debris from carpets, floor mats, and especially the often-overlooked crevices of your seats and inside the center console. Don’t worry if some stubborn particles remain in the carpets; we’ll address those with more targeted methods later, but this initial pass is essential for lifting the bulk of the surface grime.
This preparatory phase is not just about tidiness; it’s about creating a clean slate for deeper cleaning. By removing all obstructions and significant loose debris, you prevent the risk of scratching surfaces with trapped particles as you wipe or scrub. It sets the stage for a more effective and safer cleaning process, ensuring that the specialized products and techniques you apply next can work their magic without encountering unnecessary obstacles. Proper preparation truly lays the groundwork for achieving a truly pristine Tesla interior.
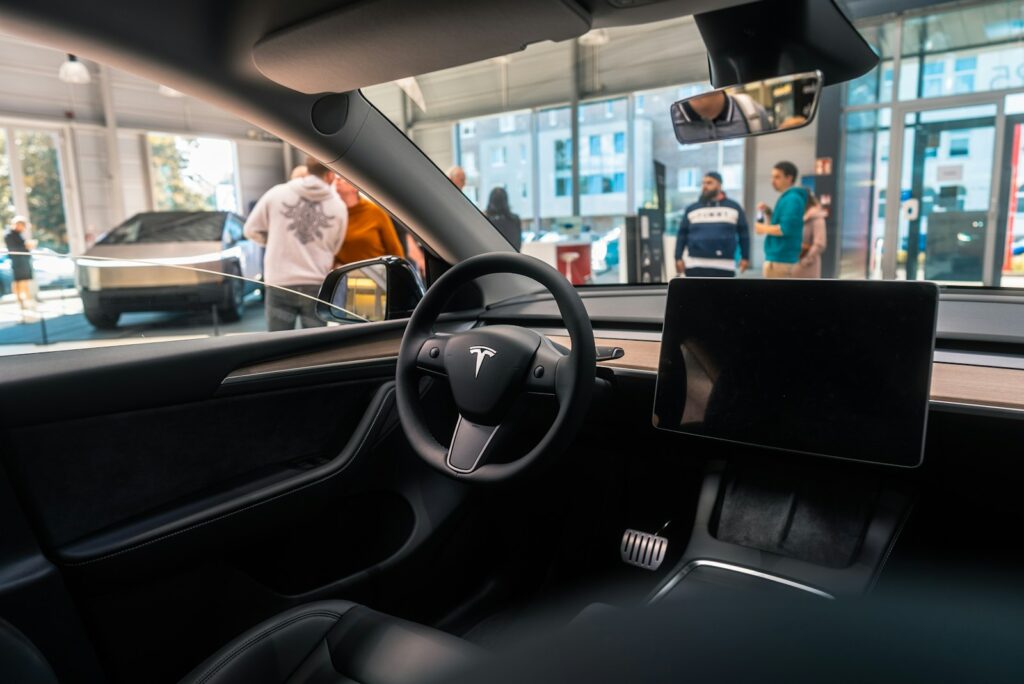
2. **Clean Your Dashboard with Precision**The dashboard, being a prominent and frequently touched area, demands a precise cleaning approach to maintain its sleek appearance without damaging sensitive components. Begin by powering off your Tesla to prevent any accidental inputs or system interruptions, a crucial precaution when working near delicate controls. For the initial pass, use a dry, soft microfiber cloth to gently wipe down the entire dashboard surface, avoiding excessive pressure on buttons and switches. This helps to remove the top layer of dust and ensures you don’t inadvertently spread grime.
For a deeper clean, especially around the vents, buttons, and switches, a detailing brush with soft bristles is indispensable. Vacuum the vents by brushing each fin while holding the vacuum nozzle nearby to immediately suck up dislodged dust. Apply the Sonax cleaner, or a similar pH-neutral interior cleaner, directly onto your soft brush—never spray directly onto the dashboard. Gently rub the brush on the dashboard and all relevant portions, paying meticulous attention to the smallest details on buttons and switches, but using only a minimal amount of cleaner on these sensitive parts to prevent overflow. For the gauge vessel, use a small amount of cleaner on a paper towel instead of a brush to avoid scratches, then immediately wipe the surface with a clean, absorbent microfiber towel.
To add a protective layer and a refined finish, spray Armor All protectant onto a clean towel (again, not directly on the dashboard) and glide it across the dashboard surface until all parts are evenly covered. This step not only enhances the visual appeal but also provides an additional barrier against future dust and UV exposure, contributing to the longevity of your dashboard’s materials. Remember, consistent care for this central display area significantly impacts the overall cleanliness and feel of your Tesla’s interior.
Read more about: Investor Alert: Unmasking the 15 High-Mileage Maintenance Traps That Can Sink Your Savings
3. **Detail Your Center Console Carefully**The center console is a high-traffic area in any vehicle, often accumulating dirt, spills, and debris, making its thorough cleaning essential for a truly pristine interior. After ensuring all contents have been removed, including any organizers or cupholder inserts, begin by using a toothbrush alongside your vacuum to dislodge and remove dirt from hard-to-reach crevices and seams. This small tool is remarkably effective at getting into the tightest spots that larger brushes or vacuum attachments might miss.
Next, apply an all-purpose cleaner directly to the center console surface. For ingrained dirt, gently rub the surface with a Scotch-Brite pad, making sure to apply minimal force. The key here is to use just enough pressure to lift the dirt without risking damage to the console’s finish, as Scotch-Brite can be abrasive if used too aggressively. For areas that the Scotch-Brite can’t reach, a Magic Eraser can be carefully employed to clean stubborn marks and dirt, ensuring a comprehensive clean across all surfaces of the console.
To achieve a deep clean and ensure no residue is left behind, utilize a steam cleaner. Glide the steam cleaner over the surface, but be mindful not to point it at one area for an extended period, especially near USB and power outlets, to prevent moisture damage. Conclude by wiping the entire center console with a clean microfiber towel, paying close attention to intricate details, to leave it spotless and dry. This meticulous approach ensures your center console, a focal point of the interior, remains immaculate and functional.
Read more about: Unleash Your Inner Mechanic: 15 Essential DIY Car Hacks to Save a Fortune on Maintenance
4. **Address Interior Door Panels Effectively**Door panels, like the center console, endure frequent contact and are prone to collecting dirt and smudges. To effectively clean them, start by completely opening the doors and removing all items from the door pockets. Use your vacuum cleaner to thoroughly remove any loose dirt or debris accumulated within these pockets, preparing the surface for a deeper clean. It’s also wise to cover the door controls with a towel to shield them from direct spray and excess moisture during the cleaning process.
Spray an all-purpose cleaner directly onto the door panel. Then, using a larger detailing brush, work the cleaner into the surface, including the inside of the door pockets, to agitate and lift embedded dirt. Repeat this process as needed until the surface appears clean and free of grime. For the more intricate areas around the controls and switches, switch to a smaller, softer brush and apply a small amount of all-purpose cleaner to it, carefully cleaning these delicate components without saturating them.
Once cleaning is complete, wipe down the entire surface of the door panel with a clean microfiber towel to remove any cleaner residue and dry the area. For an added layer of protection and to enhance the finish, spray Armor All protectant onto a separate clean towel and gently wipe the door panel. This step not only restores the panel’s aesthetic appeal but also provides a barrier against future wear and tear, contributing to the overall longevity and cleanliness of your Tesla’s interior.
Read more about: How to Uncover a Used Car’s Past: A Consumer’s Guide to Identifying Former Rentals, Taxis, and Police Vehicles

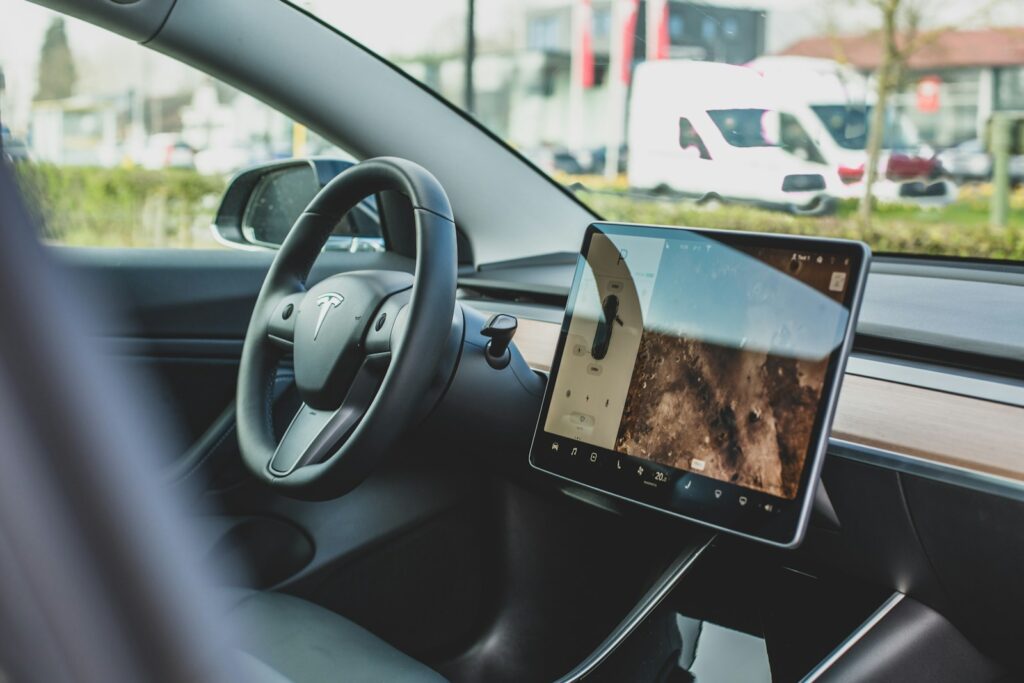
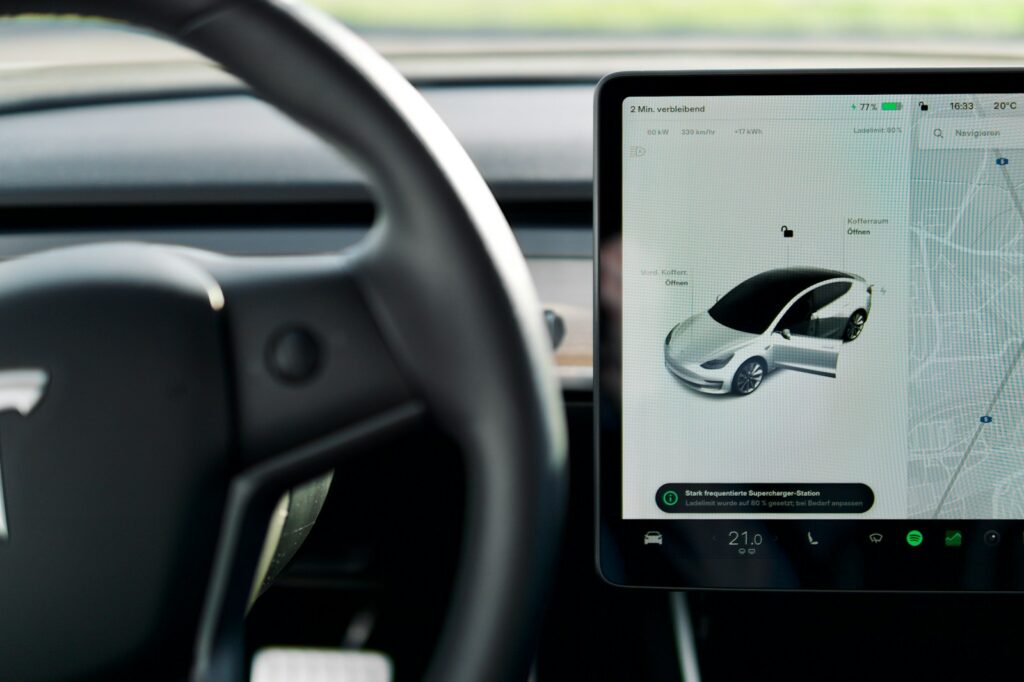
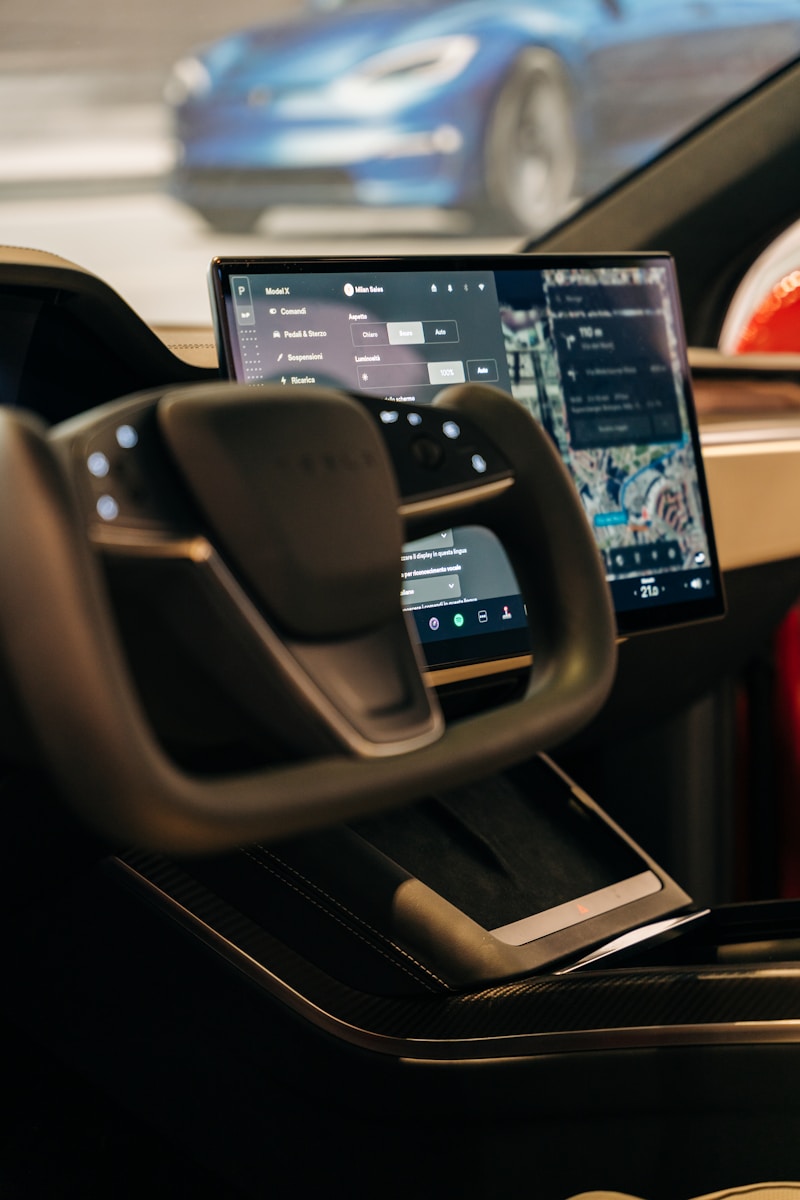
5. **Master the Art of Touchscreen Cleaning**Tesla’s large touchscreen display is arguably the most sensitive and visually impactful component of its interior, demanding extra care and the right technique to clean without causing damage. The first and most critical step is to enable Screen Clean Mode by navigating to Controls > Display > Screen Clean Mode. This action darkens the display, making dust and smudges easily visible, and temporarily disables screen inputs, preventing accidental changes to vehicle settings during cleaning.
For the actual cleaning, it is imperative to use only cloths specifically designed for electronics and monitors; a general-purpose microfiber towel or abrasive materials should be avoided. Lightly dampen this specialized screen cleaning cloth with a pH-neutral cleaner. Tesla explicitly recommends against using any cleaning solution, alcohol, or water directly on the screen. The Tesla owner’s manual specifically warns, “Do not use cleaners (such as a glass cleaner) or alcohol-based gel products (such as hand sanitizer) and do not use a wet wipe or a dry statically-charged cloth (such as a recently washed microfiber)” on the front and rear touchscreens. Wipe the screen gently in circular motions to remove dust and smudges, ensuring no liquid is sprayed directly onto the screen to prevent moisture damage to the sensitive electronics.
Once all foreign materials are wiped away and the screen is clear, exit Screen Clean Mode by pressing and holding the ‘HOLD TO EXIT’ prompt on the display. This careful, measured approach ensures that your touchscreen remains responsive, free of scratches, and visually flawless, maintaining the high-tech appeal of your Tesla’s cabin. Adhering to these specific guidelines is crucial to protect this vital and delicate component of your vehicle’s interior.
Read more about: Navigating the 2025 Certified Pre-Owned Truck Market: A Comprehensive Edmunds Guide to Smart Buying

6. **Deep Clean Carpets and Floor Mats**As the primary collectors of dirt, dust, and debris, your Tesla’s carpets and floor mats require a thorough, multi-step cleaning process to restore their pristine condition. Start by removing all floor mats from the car. If you have rubber or plastic mats, take them outside onto concrete and rinse them with a garden hose or pressure washer to dislodge thick layers of dust or mud from both sides. For stubborn dirt, dilute a cleaner and degreaser according to product label instructions, spray the mixture onto the mats, and scrub them vigorously with a stiff scrub brush until all dirt is removed. Rinse again with water, then apply liquid detergent, brush, rinse with clean water, and wipe dry with a clean cloth. Finish by spraying with a non-greasy rubber shine and wiping dry to leave them looking fresh.
For the vehicle’s interior carpet, begin by removing all floor mats and any other items on the floor. Use a powerful vacuum cleaner with nozzle attachments to pick up all dust and small debris, reaching into every crevice. Inspect the carpet for grease and stains. For targeted treatment, spray specific spots with a dedicated carpet stain and grease lifter, allowing it to penetrate for 15 to 20 seconds. Then, use a carpet brush to agitate the sprayed areas, working the cleaner into the fibers. Repeat this process until all dirty portions are adequately treated.
After brushing, use a clean bath towel to scrub the treated areas, effectively lifting the stain and grease out of the carpet. Redo this process as necessary until all lifted stains and dirt are gone. For areas with severe discoloration or deeply set stains, apply a carpet shampoo mixed with water and use the carpet brush as before. Follow up by using the vacuum to extract all excess cleaning materials and moisture. Finally, allow the carpet to air dry completely before reinstalling the floor mats. This comprehensive approach ensures your carpets are not just superficially clean but truly refreshed and free of embedded grime.
Read more about: Jalopnik Investigates: 12 Luxury Car Components That Buckle Under Winter’s Brutal Assault (And How to Keep Them Intact)

7. **Restore Your Seats (Vegan Leather & Cloth) to Perfection**Tesla seats, whether premium synthetic leather or standard cloth, require specific care to maintain their durability and appearance. For synthetic leather, also known as vegan leather, start by using a vacuum cleaner to meticulously suck up all dust and dirt that may have settled into the seams and crevices. This initial step prevents abrasive particles from scratching the surface during cleaning. Next, spray a diluted all-purpose cleaner directly onto spots that require cleaning. Using a soft brush, gently work the cleaner into the stain to lift it, being careful not to scrub too aggressively. Immediately wipe the area with a clean microfiber cloth. If the stain persists, repeat the process until it is completely gone. To protect the surface and maintain its suppleness, apply Armor All leather wipes or a dedicated vegan leather conditioner as a final step.
For cloth seats, it’s important to note that this procedure is for the seats themselves, not removable seat covers. Begin by vacuuming the entire seat to remove loose dust and debris. For spots with stains and dirt, spray hot water directly onto the affected areas. If the discolored area is large, spray hot water over the entire section. Allow it to sit for 10 to 15 seconds, then use the vacuum to suck up the hot water, pressing the nozzle down firmly to extract as much moisture as possible. This hot water extraction method is crucial for lifting deep-seated dirt.
If the stain is particularly stubborn, mix a small amount of liquid detergent with hot water and repeat the spraying and vacuuming process. Apply the mixture over the stain and use the vacuum cleaner to suck it up, ensuring firm pressure on the nozzle. Depending on the type and severity of the stain, this process may need to be repeated four to six times to achieve complete removal. The effectiveness of this method is significantly enhanced by using hot water, which helps to break down and lift the stains more efficiently than cold water. Always allow the seats to dry thoroughly after cleaning to prevent mildew or lingering moisture issues. Remember, Tesla’s warranty does not cover damage from improper cleaning solutions, so always use mild, non-detergent cleaners and test on a concealed area first, especially for white vegan leather seats where isopropyl alcohol can be a last resort only for specific stains, with extreme caution.
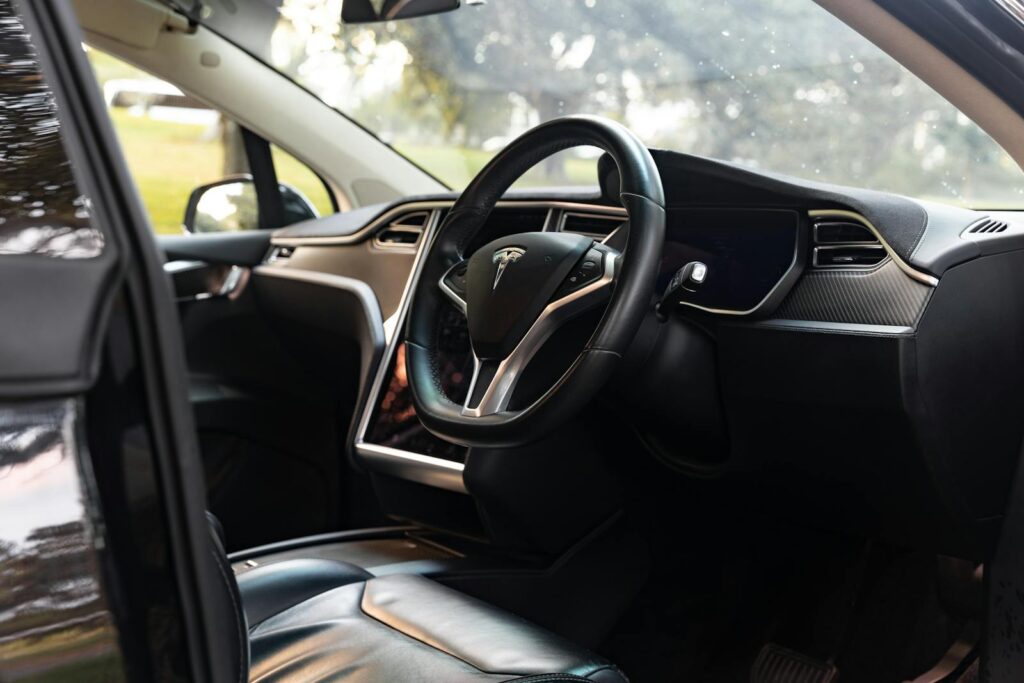
8. **Clean Your Steering Wheel for Optimal Grip and Hygiene**The steering wheel is one of the most frequently touched surfaces in your Tesla, making it a hotspot for grime and oils. Begin its thorough cleaning by wiping the entire steering wheel with a damp microfiber cloth. This initial pass helps to remove surface dust and loose debris, preparing the area for a deeper clean. Moving the steering wheel all the way out and adjusting its height can make accessing all areas much easier, ensuring no spot is missed.
For a more detailed cleaning, select a soft brush and spray an all-purpose cleaner directly onto its bristles. It is crucial to apply the cleaner to the brush rather than directly onto the steering wheel to prevent overspray onto the dashboard or touchscreen, which could cause damage. Carefully brush all areas of the steering wheel that require cleaning, paying meticulous attention to buttons, gaps, and grooves. Exercise caution with buttons to avoid accidental inputs and ensure the cleaner does not overflow into sensitive electronic components.
After agitating the dirt and grime with the brush and cleaner, promptly wipe the steering wheel with a clean microfiber cloth to remove all residues. For an added layer of protection and to maintain the material’s integrity, apply Armor All leather wipes. This not only helps to preserve the surface but also gives the steering wheel a fresh, clean feel. Consistent care for your steering wheel contributes significantly to both interior aesthetics and hygiene.
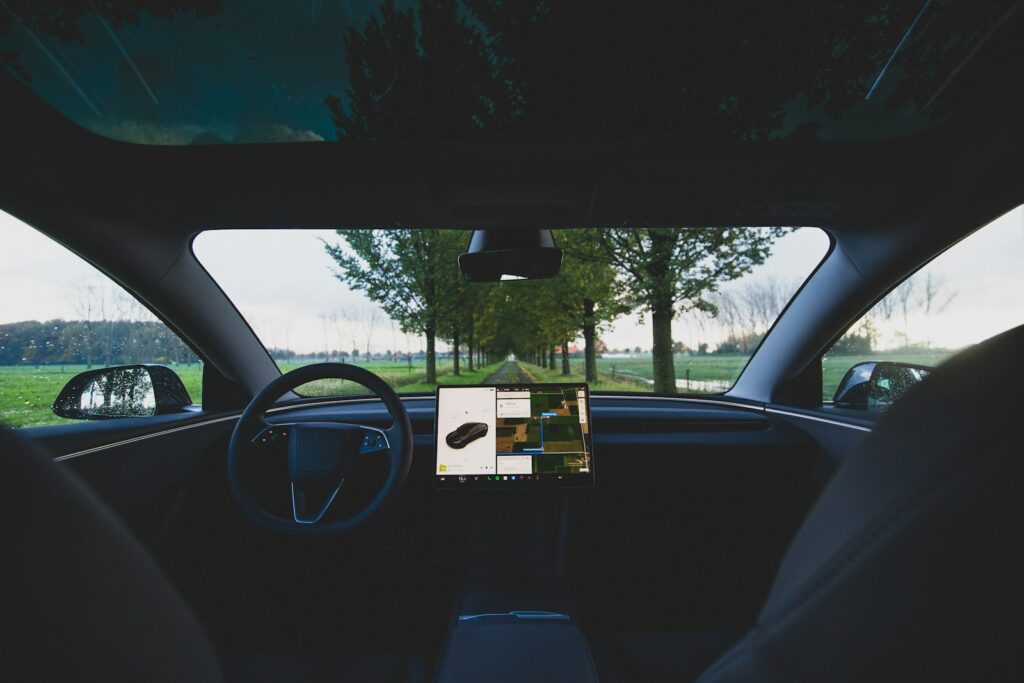
9. **Revitalize Your Headliner and Fabric Surfaces**Often overlooked, the headliner and other fabric surfaces can accumulate dirt, dust, and stains over time, particularly from contact with hands. Starting the cleaning process, gently wipe the headliner with a damp microfiber towel. This simple step can effectively remove light dust and refresh the surface without over-saturating the material.
For more stubborn dirt or stains, apply an all-purpose cleaner directly into a soft-bristled brush. Carefully rub the headliner with the cleaner-dampened brush, working to lift the embedded grime. For areas with hard-to-remove stains, a minimal amount of liquid detergent on a Scotch-Brite pad can be used with extreme care, gently rubbing against the stain. It’s essential to repeat this process across all affected areas where discoloration or stains are present.
Always ensure that sensitive components like interior lighting are protected before applying cleaners. Tesla recommends covering lights with masking tape, plastic film, or protective covers to prevent degradation or damage to lenses and components. Once cleaning is complete, wipe the entire surface with a clean microfiber cloth to remove any remaining residue and ensure the headliner dries evenly. As a final protective measure, apply Armor All Protectant, which helps to maintain the fabric’s appearance and offers a barrier against future soiling. Remember, avoiding smoking in your Tesla is key to preventing headboards from yellowing or darkening.
Read more about: Beyond the Wash: 14 Pro Secrets to Making Your Car’s Interior Look Brand New Again

10. **Achieve Crystal-Clear Interior Glass and Mirrors**Clean interior glass and mirrors are essential for optimal visibility and a pristine cabin experience. It is highly recommended to clean the interior glass after a comprehensive exterior car wash to ensure that your efforts are not undermined by external dirt. Begin by dry wiping the glass surfaces in a circular motion using a clean, dry microfiber towel. Focus on any visible spotted dirt or stains to lift loose particles before applying any liquids.
For embedded grime and more persistent marks, dampen a Magic Eraser with warm water, then squeeze out excess moisture thoroughly. Gently wipe the glass with the damp Magic Eraser in a circular motion, ensuring you don’t use excessive force or scrape the surface, as this can damage reflective coatings or heating elements. This method helps to lift stubborn residue without resorting to harsh chemicals directly on the glass.
Next, spray an ammonia-free glass cleaner onto a separate clean microfiber towel—never directly onto the glass. Wipe the glass with the dampened towel, using straight, vertical strokes to prevent streaking. Ensure the entire area is covered and free of smudges. Pay particular attention to the inside rearview mirror, cleaning it carefully to avoid damaging any integrated sensors or electronics. If the results are not satisfactory, the process can be repeated. For a truly pristine finish, you may also consider repeating the cleaning on the exterior side of the glass.
Read more about: Dashboard Dilemmas: Unpacking 11 Surprising Items That Can Get You Ticketed — And The Unseen Rules of Road Safety
11. **Maintain Your Tesla’s Door Seals for Longevity**The door seals, while often overlooked, play a critical role in keeping your Tesla’s interior protected from external elements like dust, moisture, and noise. Regular maintenance of these seals is essential to prevent them from degrading, which could lead to damage to surrounding surfaces or compromise the cabin’s integrity. It’s a simple yet crucial step in comprehensive interior care.
To clean your door seals effectively, use a damp cloth, preferably a soft microfiber towel. Gently wipe the entire surface of each door seal to remove any accumulated debris, dirt, or dust. Pay attention to the grooves and contact points, as these areas tend to collect the most grime. This straightforward action prevents excessive debris from accumulating, which can cause wear and tear when the doors are opened and closed.
Crucially, when cleaning door seals, avoid using alcohol wipes or any chemical products that could potentially deteriorate their protective coating. Harsh chemicals can dry out or compromise the material, leading to cracking or loss of elasticity over time. A simple damp cloth is usually sufficient for effective cleaning and preservation, ensuring your door seals remain pliable and functional for years to come.
Read more about: When Your Premium Coffee Machine Fails: A Comprehensive Guide to Troubleshooting, Repair, and Replacement

12. **Implement Regular Maintenance Practices for Lasting Cleanliness**Beyond one-off deep cleans, consistent, regular maintenance is the cornerstone of preserving your Tesla’s interior. Instituting a weekly cleaning routine, starting with a soft microfiber cloth for dusting all surfaces, helps prevent scratches and the buildup of grime. This proactive approach ensures that minor dust and debris are removed before they can become embedded or require more intensive cleaning.
Regularly vacuuming carpets, floor mats, and seats is also vital, focusing on seams and crevices where particles tend to settle. For synthetic leather seats, conditioning them every three to six months helps maintain their flexibility and prevents cracking, extending their lifespan and preserving their luxurious feel. Additionally, make it a point to check and clean air vents with a detailing brush to prevent dust accumulation, ensuring your cabin air remains fresh and systems operate efficiently.
Proactive habits are just as important as cleaning. Avoid eating or drinking inside your vehicle to minimize spills and stains. Organizing items within the glove compartment, center console, and trunk, along with keeping a small trash can, helps prevent clutter and littering. Simple measures, such as carrying a microfiber towel and a small brush for quick clean-ups during traffic, can significantly reduce the need for extensive future cleaning sessions, protecting your investment and enhancing your driving comfort.
Read more about: Mastering Your Oil Change: A Definitive DIY Guide to Engine Health and Avoiding Costly Mistakes

13. **Mastering Immediate Stain and Spill Treatment**No matter how careful you are, spills and stains are an inevitable part of vehicle ownership. The key to preventing permanent damage and preserving your Tesla’s pristine interior lies in immediate and correct treatment. Addressing liquids and chemical residues as soon as they occur is paramount; time is of the essence when it comes to stain removal.
When a spill happens, resist the urge to rub it, as this can spread the stain and push it deeper into the material fibers. Instead, blot liquids immediately with a clean, absorbent microfiber cloth. For stains on synthetic leather or Alcantara, apply a small amount of a pH-neutral cleaner to a microfiber cloth, then gently treat the affected area. Always test any cleaning solution on a small, hidden spot first to ensure it doesn’t cause discoloration or damage to the specific material.
For fabric surfaces like carpets or cloth seats, use an upholstery or carpet cleaner specifically formulated for automotive interiors, diligently following the product’s instructions. Tesla recommends using a soft cloth moistened with warm water and mild soap for general spills and stains, wiping in a circular motion, then drying immediately with a lint-free cloth. For white vegan leather seats, and only as a last resort, a soft cloth moistened with warm water and isopropyl alcohol can be used in a gentle circular motion, followed by cleaning off any residue with a damp cloth. This method should *not* be used on black seats, and aggressive or extended use of isopropyl alcohol can damage the material and void the warranty. After any stain removal, ensure the area is thoroughly dried with a clean, dry cloth to prevent moisture damage or mildew. Ultimately, swift, precise action is your best defense against lasting imperfections.
Read more about: Unlock Top Dollar: The Ultimate Popular Mechanics Guide to Boosting Your Car’s Resale Value Through Smart Detailing
Maintaining your Tesla’s interior doesn’t have to be a daunting task. By adopting these practical, step-by-step cleaning methods and integrating them into a routine, you safeguard your investment, ensure its longevity, and continually enhance your driving experience. The luxurious feel and sophisticated aesthetics of your Tesla are not just about initial design; they are also a testament to diligent care and attention. Embrace these practices, and you’ll enjoy a cabin that consistently reflects the innovation and quality your Tesla embodies, ride after ride, mile after mile.


