

Finding a scratch on your car’s paint job can be incredibly frustrating. It’s a common occurrence, unfortunately, with everything from stray branches and gravel to keys and parking mishaps leaving their mark. While you might initially think of a costly trip to a body shop, the good news is that many minor car paint scratches are entirely fixable right at home, saving you time and money.
Addressing these imperfections isn’t just about making your car look good, though aesthetics certainly play a big part. As Gareth Boyd, an experienced automotive blogger, wisely points out, “Getting them fixed isn’t just about maintaining your car’s aesthetics… Paint scratches can expose the underlying metal, leading to rust over time if left untreated.” This means a small scratch today could become a much bigger, more expensive problem tomorrow if ignored.
This comprehensive guide is designed to empower you with the knowledge and confidence to tackle a range of car paint scratches, from barely-there scuffs to deeper gouges. We’ll walk you through a series of simple, step-by-step instructions, drawing on expert advice to help you restore your car’s shine and protect its finish, making those pesky marks vanish for good.
1. **Understanding Car Scratches: Types and Severity Assessment**Before you can fix a scratch, you first need to understand what kind of scratch you’re dealing with. Accurately assessing the depth and type of damage is the crucial first step, as it dictates the appropriate repair method and the tools you’ll need. This initial evaluation will save you from using the wrong product or technique, which could potentially worsen the problem.
A simple yet effective way to check the depth of a scratch is to run your fingernail across it. If your nail can pass over the scratch without snagging, it generally means the damage is shallow and likely confined to the clear coat. This type of scratch is typically DIY-able. However, if your nail catches in the scratch, it indicates a deeper gouge, and while some deeper scratches can still be addressed at home, others might necessitate professional attention.
Car scratches generally fall into three common categories based on their depth. “Clear Coat Scratches” are the lightest, affecting only the clear, outermost layer of your car’s paint, and are often the easiest to fix. “Primer or Base Coat Scratches” are deeper; these impact the base coat or primer layer and may reveal the underlying metal of the car. The most severe are “Deep Paint Scratches,” which penetrate beyond the clear coat and base coat, reaching the actual metal body of the car, making them the most challenging to repair yourself.
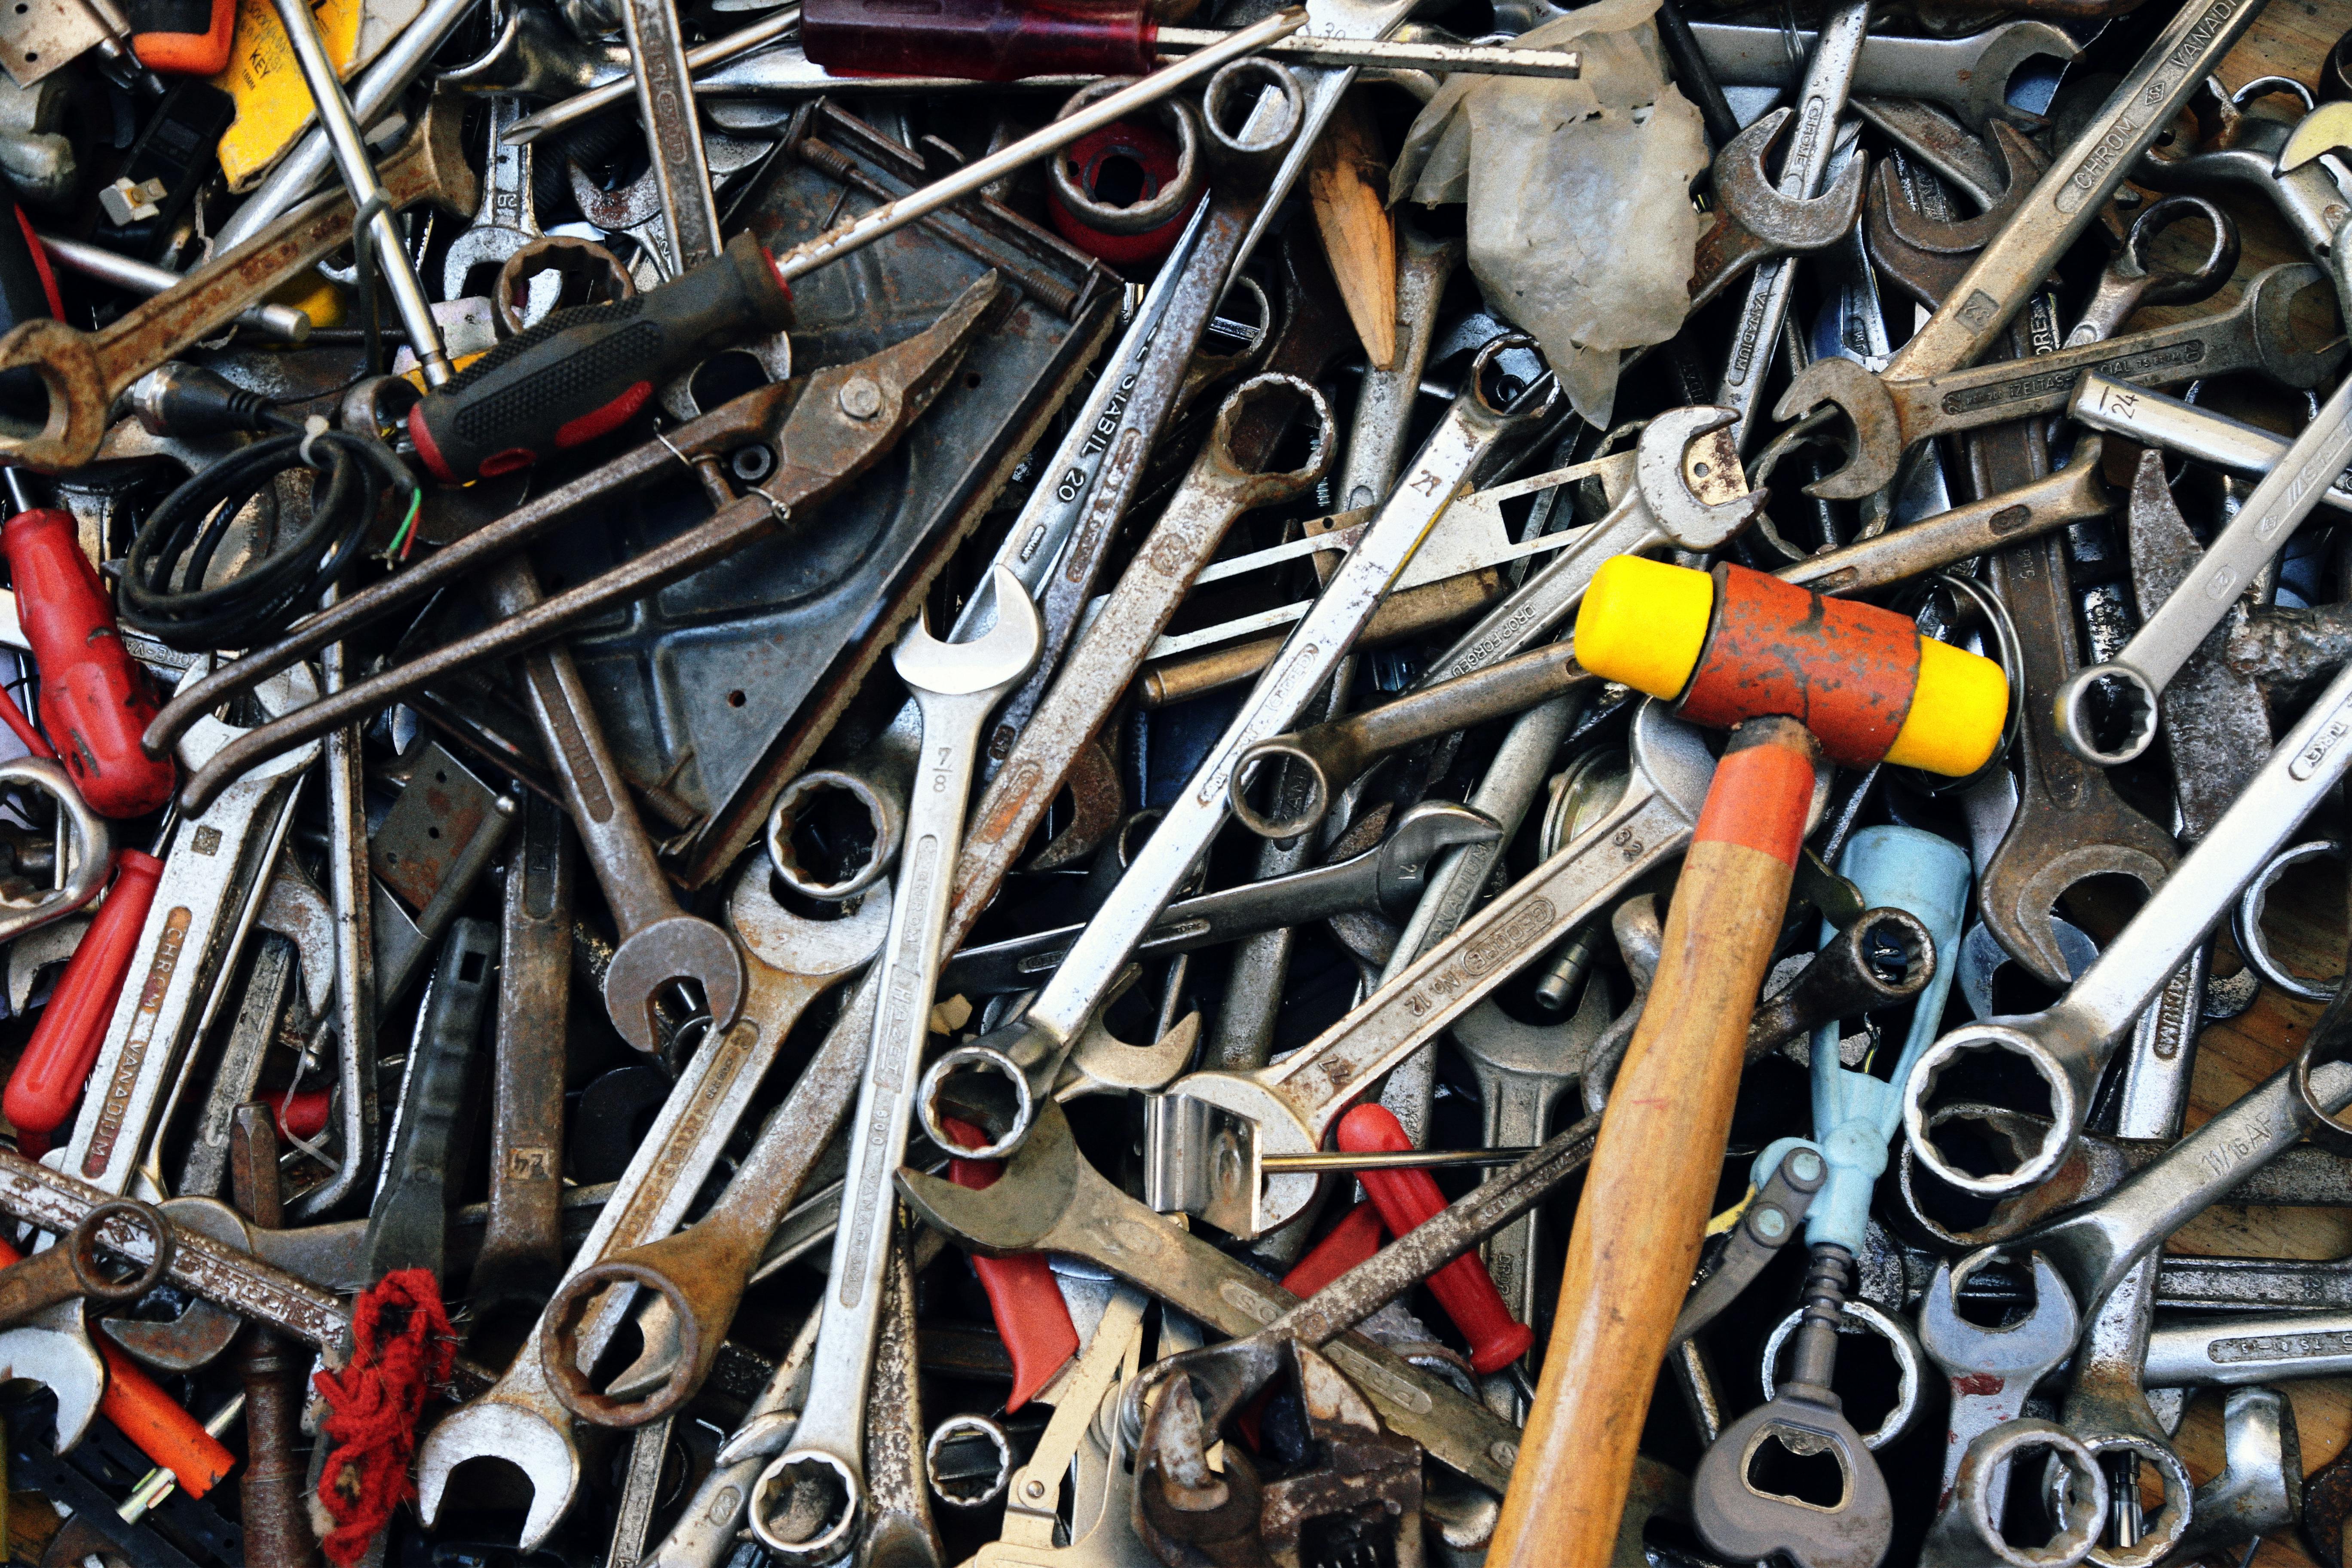
2. **Gathering Essential Tools and Materials**Having the right tools and materials on hand before you begin is paramount for a smooth and successful scratch repair. Just like any project, preparation is key, and ensuring you have all the necessary items will help streamline the process, prevent interruptions, and ultimately help you achieve professional-looking results without breaking your budget.
Your arsenal for scratch repair will typically include several key items. You’ll need soft microfiber cloths for cleaning and polishing, mild car wash soap for surface preparation, and potentially a paint touch-up pen or kit matched to your car’s color. Other essential materials might encompass primer if the scratch is deep, a clear coat pen or spray to restore the protective layer, and polishing compound for smoothing the finish. For more intensive repairs, sandpaper (e.g., 3000-grit), a scrubbing pad, and rubbing compound are also critical.
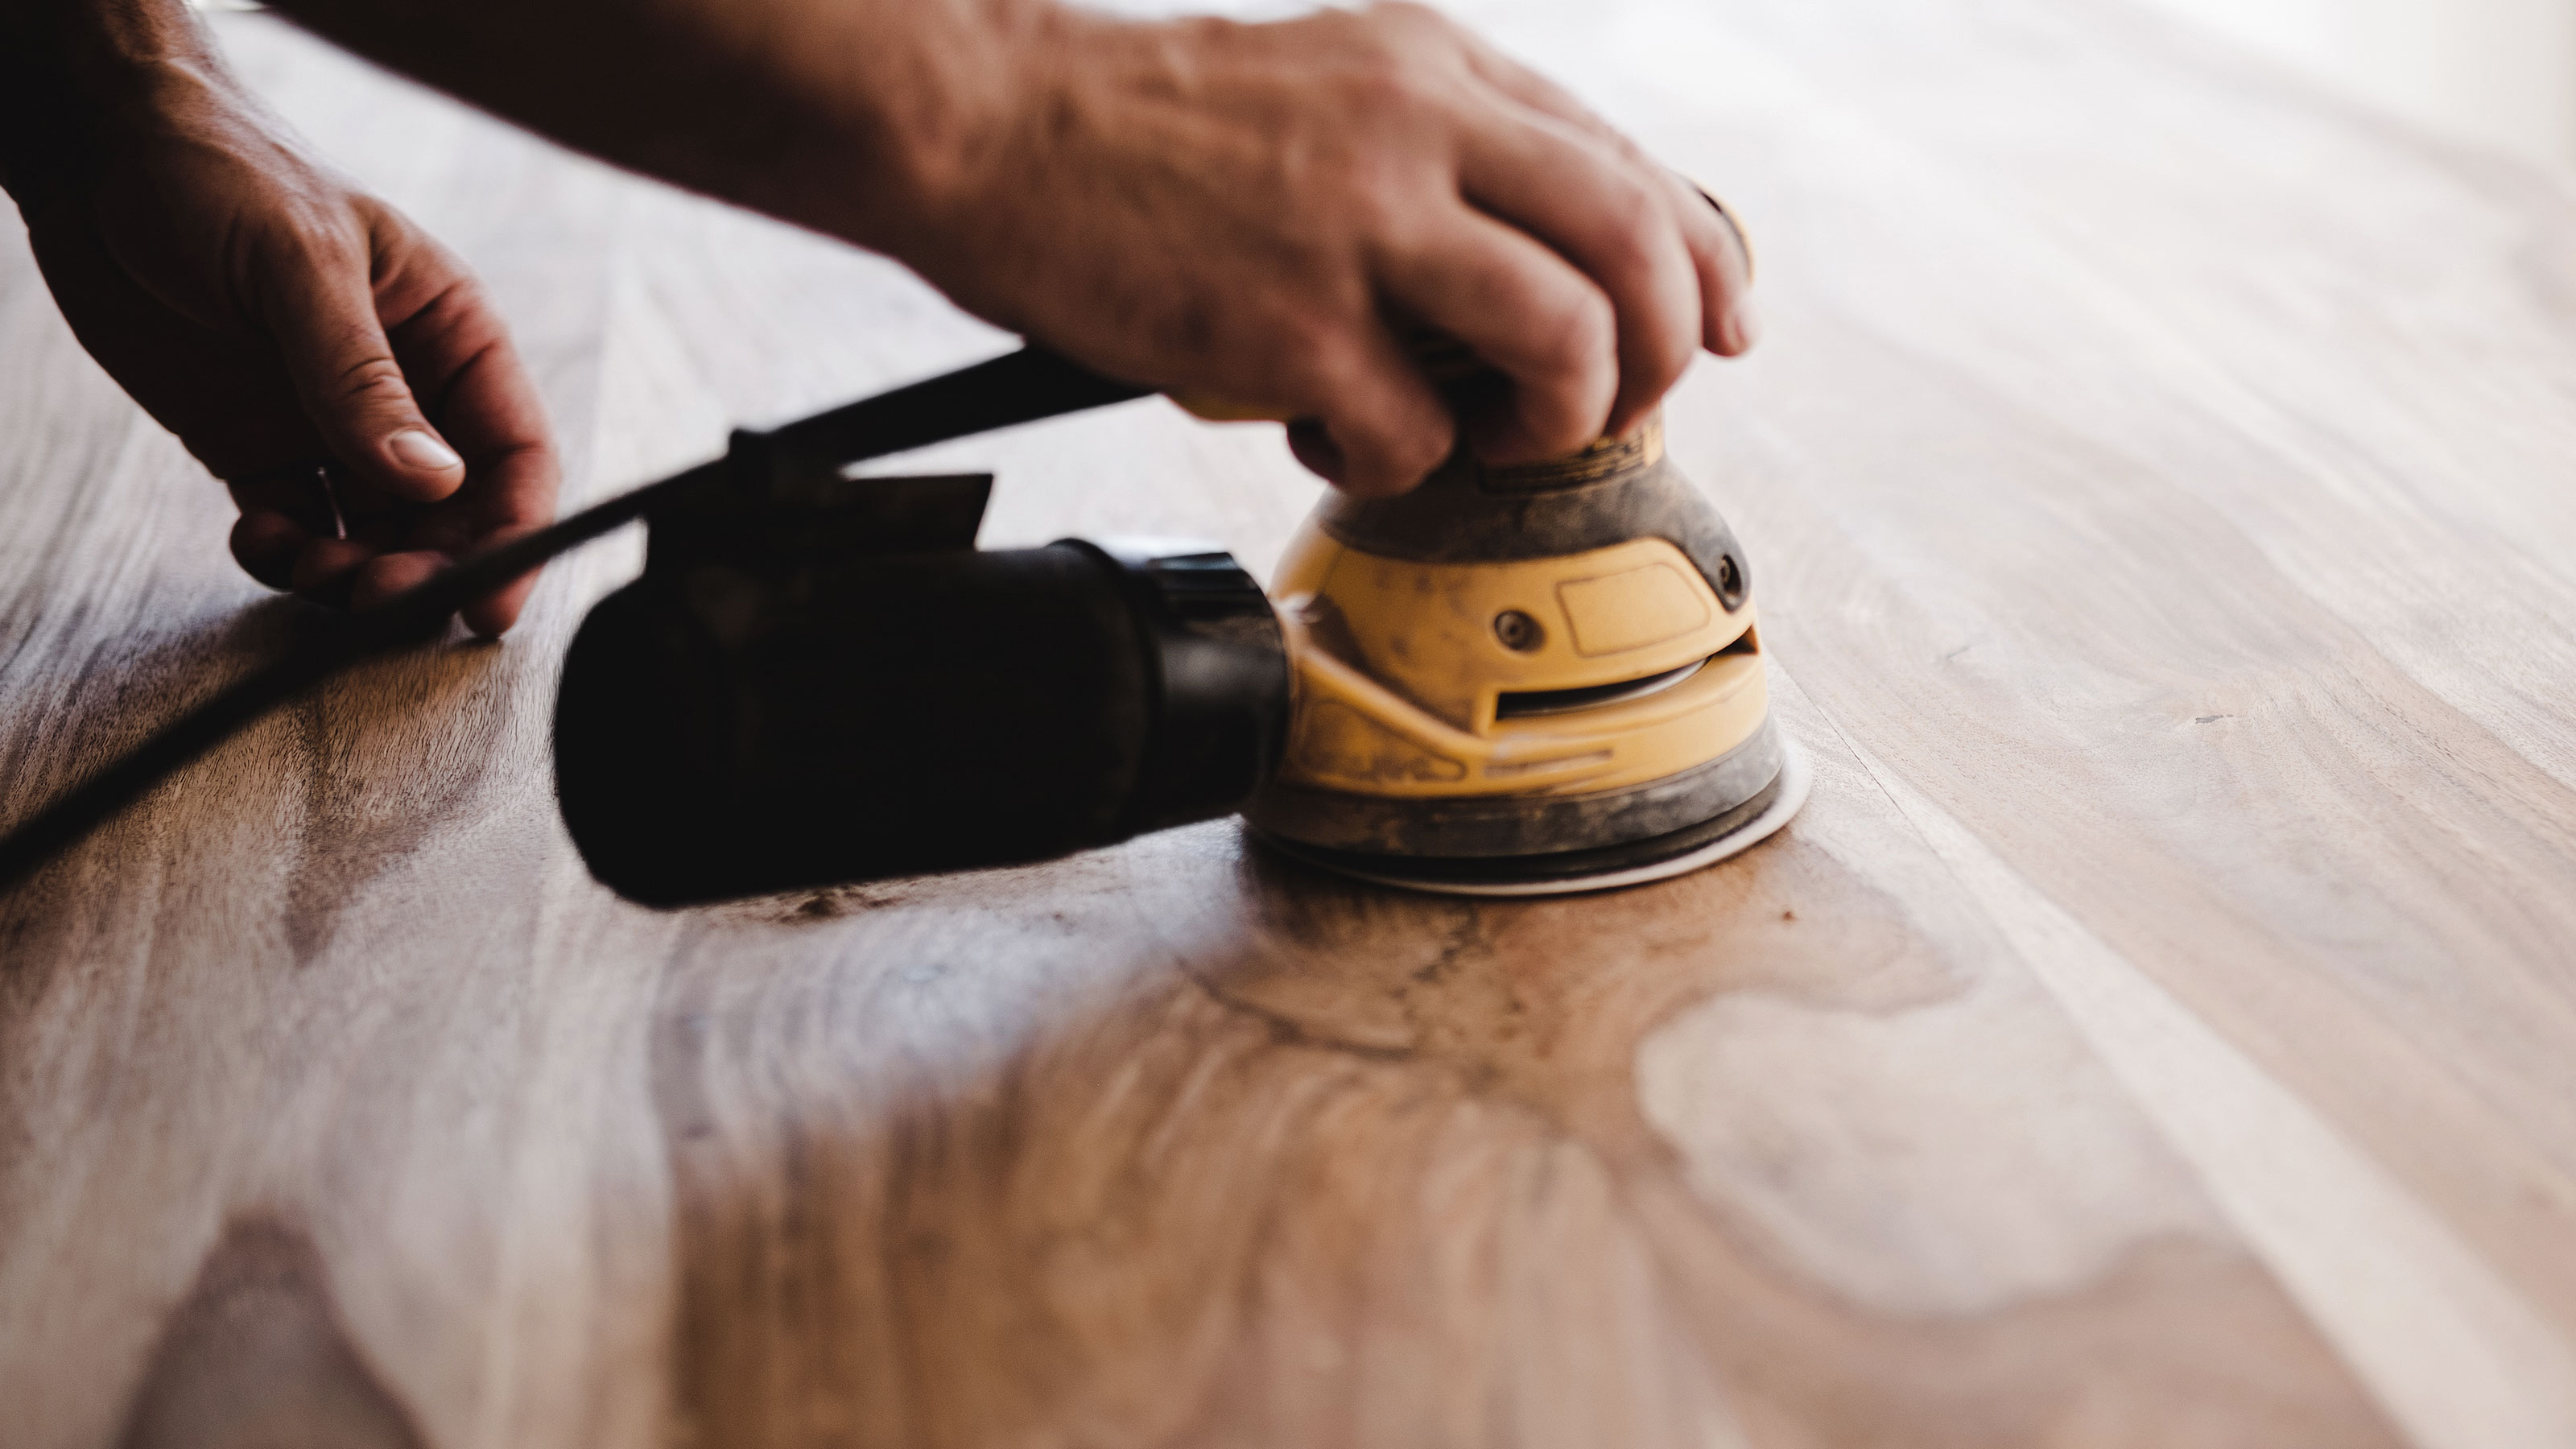
When it comes to power tools, a cordless drill can be used with a polishing compound pad, but experts like Richard McClellan, founder of Elite Customs, advise caution. He warns that a drill can be “too fast and aggressive.” Instead, he recommends “cordless or corded buffers, which have lower speeds and will not burn the paint.” For light scratches, even toothpaste can serve as a naturally abrasive polishing agent, though Chris “Moose” Pyle, an automotive expert, notes that “the grit is so fine it can take a lot of paste and a lot of rubbing.”
Read more about: Unleash the Beast: Exploring Pickup Trucks with Unrivaled Towing and Payload Capabilities

3. **Initial Car Washing and Area Preparation**Starting with a perfectly clean surface is a non-negotiable step in any successful car paint repair. Any lingering dirt, dust, grime, or debris can act as an abrasive during the repair process, potentially introducing new scratches or hindering the adhesion of repair products. Thorough cleaning ensures you’re working on a pristine base, allowing for accurate damage assessment and optimal product performance.
Begin by thoroughly washing the scratched area with a mild car wash soap and water. Use a soft sponge or microfiber cloth to gently remove all visible dirt and grime. This fundamental step “ensures that no dirt or debris interferes with the repair process.” After washing, rinse the area completely and dry it thoroughly with a clean, soft microfiber towel. A damp surface can interfere with product application and effectiveness.
Beyond just cleaning, degreasing the area is also a critical preparatory measure, especially for deeper repairs or when applying primers and paints. Using a dedicated “wax and grease remover, such as Grow Automotive 1705, to eliminate any residue” is recommended. This ensures that repair materials bond correctly to the car’s surface. It’s also vital to remember a professional tip: “Never use household cleaners — they can leave silicone residue that causes fisheyes in paint,” which can severely compromise your repair.
Read more about: Insider Tip-Off: A Deep Dive into 12 Electric Vehicles and Their Alleged Winter Range Drop
4. **Addressing ‘Barely There’ / Clear Coat Scratches**For those incredibly shallow “barely there” scratches that don’t catch your fingernail, the repair process is often surprisingly straightforward and highly effective. These are typically clear coat scratches, meaning they only affect the outermost protective layer of your car’s paint. With the right technique and products, you can make these minor imperfections virtually disappear, restoring your car’s smooth finish.
The first step in tackling these shallow scratches involves light sanding. Start by dampening the scratched area. Next, using fine 3000-grit sandpaper, gently sand the scratch down. You’ll know you’ve sanded enough when the scratch begins to look faded and less noticeable. After sanding, thoroughly wipe the area clean with a fresh microfiber towel, ensuring all sanding residue is removed before proceeding to the next stage.
Once the area is clean, it’s time to apply a rubbing compound. Apply a small amount of your chosen rubbing compound to a polishing pad or the appropriate applicator, then begin spreading it over the sanded scratch. Once the area is coated, you can use a polisher or drill set to around 1,200 rpm, as suggested for removing “barely there” scratches. Work the compound until the area starts to look hazy. Follow this with a polishing compound to truly “bring back the shine” and blend the repair seamlessly with the surrounding paint.
5. **Dealing with Small / Primer or Base Coat Scratches**If your fingernail snags on a scratch, but you don’t see bare metal underneath, you’re likely dealing with a small scratch that has penetrated the clear coat and possibly into the primer or base coat. While these require a bit more effort than “barely there” scratches, they are still very much within the realm of a dedicated DIY enthusiast. The key here is patience and consistent application of the rubbing compound.
After ensuring your car is clean and dry, begin the repair process by applying a quarter-sized dollop of rubbing compound directly onto your scrubbing pad. This specific type of scratch requires a more direct approach with the compound. Start working the compound into the scratch using firm, even pressure. The goal is to gently abrade the surface, allowing the compound to diminish the appearance of the scratch.
Once you have thoroughly covered the scratched area and worked the compound in, take a clean microfiber towel and wipe away any residue. This allows you to inspect your progress clearly. If the scratch is still visible after the first pass, “go ahead and give the scratch a second or third pass.” Each application should make the scratch “harder to see,” so continue repeating the process until you are satisfied with the result and the scratch has faded significantly. However, Chris “Moose” Pyle warns that “repairing it without re-paint will require you to remove a top layer of paint… So over time, this area will have a paint failure from being too thin.”
Read more about: Customizers Be Wary: 14 Types of Paint Jobs You Should Seriously Think Twice About Choosing for Your Ride
6. **Sanding the Scratched Area**For scratches that are deeper, especially those that have gone through the clear coat and possibly into the base coat or primer, sanding becomes a crucial preparatory step. This isn’t about removing the scratch entirely through sanding alone, but rather about leveling the damaged area and feathering the edges of the old paint. This process creates a smooth, receptive surface for subsequent repair materials like fillers and primers, ensuring the final repair blends seamlessly.
After thoroughly washing and drying your car, you’ll need to sand down the area immediately around the scratch. For deeper chips, begin with 320–400 grit sandpaper, or 600 grit for surface scratches. The goal is to carefully sand until you can see the metal if the scratch is that deep. It’s vital to “Remember not to sand in the opposite direction of the scratch,” as this can create new, unwanted marks. Always work with the direction of the existing scratch to avoid further damage.
For particularly stubborn or “bad scratches,” you might need to employ a technique called wet sanding. Richard McClellan recommends keeping “a small bucket or bowl of water close” and dunking your fine sandpaper in it periodically during the process. Wet sanding helps to keep the sandpaper from clogging, reduces friction, and allows for a smoother, more controlled sanding action, preparing the surface perfectly for the next stages of buffing and polishing. If the scratch goes down to bare metal, finishing with 180–220 grit before applying primer is also advised.
Read more about: Unmasking the Mystery: Why Even a Minor Bumper Scratch Can Cost a Fortune to Fix, Explained by a Body Shop Owner
7. **Filling Deep Chips or Gouges**When dealing with more significant damage, such as deep chips or pronounced gouges that create visible grooves in the car’s surface, sanding alone won’t be enough to restore a smooth profile. These types of imperfections require a filling material to build up the surface before any paint can be applied. This step is essential if “you can feel the scratch with your fingernail,” as this indicates a need for filler or primer.
For these deeper imperfections, you’ll need to apply a spot putty or glazing filler. Begin by spreading the chosen filler evenly over the damaged area using a plastic spreader. The aim is to slightly overfill the chip or gouge, allowing for shrinkage during the curing process and providing enough material to sand down to a perfectly level surface. Make sure the application is smooth and consistent across the entire affected spot.
Once applied, allow the filler to cure according to the manufacturer’s instructions, which typically takes “15–30 minutes.” After it has fully hardened, you will need to sand the area smooth. Use 400–600 grit sandpaper for this step, carefully leveling the filled area until it is perfectly flush with the surrounding paint. Products like “USC Icing or Evercoat Z-Grip Glaze are great for small surface repairs” and can help you achieve a seamless repair before the next stages of painting.
Read more about: Unlock Your Inner Handyman: 14 Savvy DIY Home Repair Tricks Pros Might Keep Secret

8. **Applying Automotive Primer**Once you have successfully filled and sanded any deep chips or gouges, and if the scratch has exposed bare metal, applying an automotive primer becomes an indispensable step. Primer serves multiple critical functions: it provides a uniform base for the paint, ensures excellent adhesion, and, most importantly, protects the exposed metal from rust and corrosion. Skipping this step can compromise the longevity and appearance of your entire repair.
Before applying primer, it’s essential to meticulously prepare the area. Use masking tape and paper or drape film to carefully section off the scratched area. This prevents overspray from affecting the surrounding, undamaged paint. Once the area is masked, apply your automotive primer. It is recommended to apply “2–3 light coats of primer,” holding the can or spray gun “about 6–8 inches away.” Allow “proper flash time between coats” as specified by the product instructions, which ensures each layer dries sufficiently before the next is applied.
For the best adhesion and build, a 2K urethane primer is often recommended. After the final coat of primer dries completely, which can take some time depending on environmental conditions, you’ll need to sand the surface again. Use 600–800 grit sandpaper for this final primer sanding step. The goal is to achieve a surface that feels “perfectly smooth” to the touch, ensuring that the subsequent paint layers will lay down flawlessly and blend seamlessly with your car’s original finish.
Read more about: Factory Floor Whispers: The 8 Paint Application Flaws Allegedly Chipping Away Your Car’s Finish Just Months After Delivery
9. **Applying Matched Touch-Up Paint**Once the primed area is perfectly smooth and dry, the next crucial step is to apply color-matched touch-up paint. This stage is all about restoring your car’s original hue and making the repaired area blend seamlessly with the surrounding finish. Selecting the correct paint is paramount, and you can often find your car’s specific color code in the owner’s manual or on a sticker located inside the door frame. Many automotive retailers offer quality paint touch-up pens or kits specifically designed for this purpose.
Before application, ensure the area is clean and free of any dust. Carefully apply the touch-up paint using a small brush or a fine-tipped applicator, depending on the product type. The key is precision; gently fill the scratch without allowing the paint to overflow onto the surrounding, undamaged paint. This attention to detail will prevent noticeable ridges or unevenness that can be challenging to correct later.
Apply thin, even coats, building up the color gradually if necessary. It’s often better to apply several light layers than one thick coat, as this promotes proper drying and a more uniform finish. Allow each coat to dry completely according to the manufacturer’s instructions before applying the next. This ensures proper adhesion and helps to create a durable, professional-looking repair that truly restores your car’s aesthetic appeal.
Read more about: Unmasking the Mystery: Why Even a Minor Bumper Scratch Can Cost a Fortune to Fix, Explained by a Body Shop Owner

10. **Applying Clear Coat**With the color-matched touch-up paint fully dry and the scratch effectively filled, your car needs its protective clear coat layer restored. This transparent outer layer is essential for shielding the underlying paint from environmental damage, UV rays, and minor abrasions, while also providing the characteristic gloss and depth of your car’s finish. Skipping this step would leave your new paint vulnerable and diminish the overall longevity of your repair.
Just as with the primer and color coat, meticulous preparation is key. If the scratch extended through the original clear coat, a fresh application is necessary to restore both protection and shine. Utilize a clear coat pen or spray designed for automotive use. For optimal results, apply 2–3 thin, even coats of clear coat, holding the can or spray gun about 6–8 inches away from the surface.
Allow adequate ‘flash time’ between each clear coat application, as recommended by the product manufacturer. This allows solvents to evaporate and ensures each layer cures properly before the next is applied. After the final clear coat has been applied, let it dry and cure completely. This curing period is crucial for the clear coat to reach its maximum hardness and durability, providing robust protection and a seamless blend with the existing paintwork.
Read more about: Beyond the Knighthood: An In-Depth Exploration of the Honorific ‘Sir’ Across Cultures and Contexts

11. **Polishing and Buffing for a Seamless Finish**After the clear coat has thoroughly dried and cured, the next step involves polishing and buffing the repaired area to achieve a perfectly seamless and glossy finish that matches the rest of your car’s paint. This process is vital for blending the new paint layers with the original finish, eliminating any slight imperfections or differences in texture that might remain from the repair work.
Start by applying a small, quarter-sized amount of polishing compound to a clean polishing pad or a soft microfiber cloth. Work the compound into the repaired area using gentle, even pressure, moving in a circular motion. The goal here is to smooth out any tiny imperfections and enhance the shine. For faster results on larger areas, a cordless buffer or polisher can be used, but always keep the speed low (around 1,200 rpm) and keep the tool moving to avoid burning the paint, as Richard McClellan advises.
After the initial polishing, wipe away any residue with a clean microfiber towel and inspect the area. If you notice any haziness or wish for an even deeper shine, you can follow up with a finer polishing compound. Continue buffing until the repaired spot seamlessly integrates with the surrounding paint, exhibiting the same level of gloss and smoothness. This final attention to detail is what truly elevates a DIY repair to a professional-looking standard.
Read more about: Beyond the Buff: 14 Simple Lifehacks to Keep Your Classic Car’s Chrome Gleaming

12. **Wet Sanding for Advanced Smoothing**For those more challenging repairs, particularly after filling deep chips or when striving for an exceptionally smooth surface, wet sanding offers an advanced technique for achieving perfection. This method effectively levels out the repaired area, removing any minor high spots or texture inconsistencies that might be left from the paint or clear coat application. Wet sanding helps prepare the surface for a mirror-like gloss during the final polishing stages.
To perform wet sanding, you will need very fine-grit sandpaper, typically in the range of 1500-2000 grit, and a small bucket or bowl of clean water. Before you begin, thoroughly dampen the sandpaper. Richard McClellan recommends periodically dunking the sandpaper in water during the process. This keeps the sandpaper from clogging with paint particles, reduces friction, and allows for a much smoother, more controlled sanding action.
Gently sand the repaired area, applying light, even pressure. Work slowly and methodically, ensuring you do not over-sand, which could cut through the newly applied layers. The aim is to create a perfectly flat and smooth surface that feels uniform to the touch. After wet sanding, thoroughly clean the area with a microfiber towel to remove all residue. This careful preparation is crucial for the subsequent polishing steps to truly ‘bring back the shine’ and achieve an invisible repair.
Read more about: DIY Enthusiast’s Guide: 14 Woodworking Mistakes That Lead to Quick Project Failures in 2025
13. **Blending Techniques for Touch-Up Paint**Achieving a repair that is truly invisible often comes down to mastering blending techniques for your touch-up paint. Even with perfectly matched paint, a noticeable edge or slight color difference can betray the repair. The goal is to seamlessly integrate the newly applied paint with the existing finish, making it appear as though the scratch was never there.
One effective blending technique involves feathering the edges of the touch-up paint. After applying your paint to fill the scratch, use a very fine brush or applicator to gently extend the outermost edges of the wet paint slightly beyond the immediate confines of the scratch. This helps to soften the transition zone, preventing a stark line where the old and new paint meet. Patience and precision are paramount for this step, as it requires a delicate touch.
Another strategy involves the application of thin, even coats of both the basecoat and clear coat, spraying outwards to blend with the surrounding paint. Once the paint has dried, thorough polishing and buffing with a compound designed to ‘bring back the shine’ will further aid in blending. Professional polishing tools and compounds, as Richard McClellan suggests, can help restore the gloss and ensure a uniform appearance, effectively making the repaired spot indistinguishable from the rest of your car’s surface.
Read more about: Unmasking the Mystery: Why Even a Minor Bumper Scratch Can Cost a Fortune to Fix, Explained by a Body Shop Owner

14. **Post-Repair Car Maintenance**Congratulations on successfully fixing those pesky scratches! Now that your car’s paint job has been restored, maintaining that flawless appearance is crucial for ensuring the longevity of your repair and protecting your investment. Proper post-repair car care prevents new damage and keeps your vehicle looking its best for years to come.
Regular washing is a fundamental part of maintenance. Clean your car consistently using a mild car wash soap and soft microfiber cloths to prevent the buildup of dirt, grime, and environmental contaminants that can cause new scratches or degrade your paint. Remember, using harsh household cleaners is not recommended, as they can damage your vehicle’s finish. After washing, always dry your car thoroughly with a clean, soft microfiber towel to prevent water spots.
Applying a quality car wax every 2-3 months provides an essential protective barrier. Wax shields your paint from harmful UV rays, bird droppings, tree sap, and other elements, while also enhancing its shine and smoothness. Additionally, be mindful of where you park. Choosing shaded or covered areas helps prevent paint fading, and parking away from trees minimizes the risk of scratches from branches or corrosive bird droppings. Regularly inspecting your car for any new minor imperfections allows you to address them promptly before they worsen.
Read more about: Diesel Durability Unveiled: 10 Engines That Redefine Longevity — And Those That Don’t

15. **Knowing When to Seek Professional Help**While many minor car scratches are entirely fixable with DIY methods, it’s equally important to recognize when a scratch transcends the realm of home repair and requires professional intervention. Attempting to fix severe damage yourself without the proper expertise or tools can often worsen the problem, potentially leading to more costly repairs down the line or compromising the car’s structural integrity due to rust.
A good rule of thumb for assessing severity is the fingernail test. If your nail catches deeply in the scratch, indicating it has penetrated beyond the clear coat, base coat, and possibly even the primer to expose bare metal, it might be a job for the experts. Such deep gouges or extensive paint damage, especially if they are larger than a minor chip, are usually best handled by a professional auto body shop. According to Richard McClellan, these types of extensive damage require specialized tools and techniques that most DIY enthusiasts might not possess.
Moreover, if you lack prior experience with removing deep automotive paint scratches or simply feel uncomfortable tackling a more complex repair, consulting a professional is always your best bet. Experts have the knowledge, precision, and specialized equipment to ensure a high-quality, long-lasting repair that maintains your car’s aesthetic value and protects it from further corrosion. They can effectively address medium to deep scratches, ensuring a seamless outcome that DIY efforts might struggle to achieve, especially when the damage is extensive or covers a significant area.
Read more about: How to Uncover a Used Car’s Past: A Consumer’s Guide to Identifying Former Rentals, Taxis, and Police Vehicles
Restoring your car’s paint from scratches, whether minor or deep, is a rewarding process that not only enhances its appearance but also safeguards its long-term value. By following these comprehensive steps, from initial assessment and meticulous preparation to precise painting, careful clear coat application, and diligent post-repair maintenance, you can transform unsightly marks into a distant memory. Remember, patience and attention to detail are your greatest allies in achieving a truly seamless finish. Keep these tips in mind, and you’ll be able to enjoy a gleaming, well-protected vehicle for many miles to come. Happy driving!


