

Oh, the sheer joy of homemade pasta! If you’ve ever dreamt of transforming a few humble ingredients into tender, silken strands of pure culinary bliss, then you’re in for an absolute treat. There’s truly something extraordinary about making your own pasta from scratch, a process that might seem a little daunting at first glance but is, in reality, far more approachable and rewarding than you might imagine. Forget those store-bought packages for a moment; we’re talking about a flavor, a texture, and a deep, comforting satisfaction that only comes from food made with your own two hands. It’s an experience that can send you straight to food heaven with that very first, cozy bite!
Many years ago, I had the incredible fortune of taking a cooking class in the sun-drenched hills of Tuscany, where the secrets of authentic homemade pasta were gently unveiled. That day wasn’t just about learning a recipe; it was about embracing a tradition, understanding the rhythm of the dough, and feeling the magic happen right at my fingertips. And honestly, after countless cooking adventures in Italy and beyond, that simple, from-scratch pasta recipe remains my absolute go-to. It’s quick, it’s easy, and the results are so magnificently superior that using the dried stuff from the store just doesn’t quite measure up anymore. Once you try this, I’m certain you’ll feel exactly the same way.
So, are you ready to embark on this delicious journey with me? Because making pasta at home isn’t just a task; it’s a delightful kitchen adventure, an act of love, and a testament to the incredible power of simple, quality ingredients. Let’s gather our apron strings and dive into the heart of what makes homemade pasta so utterly irresistible, starting with the very foundation: the dough itself. You’ll find that the true secret lies not in complex techniques, but in understanding your ingredients and letting the process guide you.
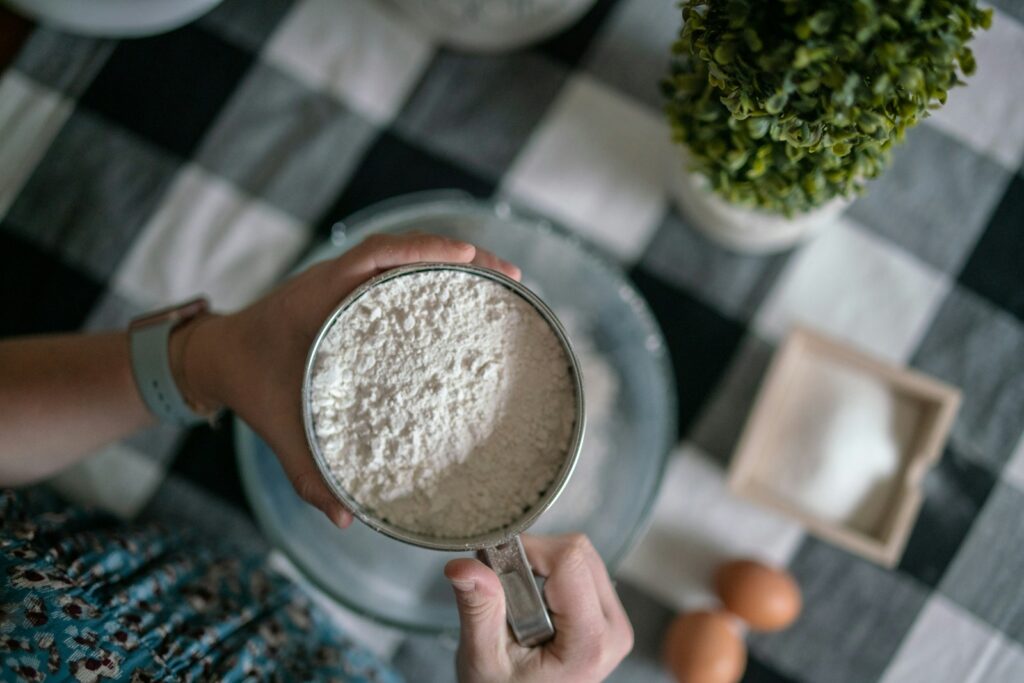
At the heart of every magnificent homemade pasta creation lies a few basic, high-quality ingredients. It’s almost astonishing how something so simple—flour, eggs, a touch of olive oil, and a pinch of salt—can transform into such a marvel. But here’s the kicker: the quality of these ingredients and their careful balance are absolutely essential. Think of them as the building blocks of your culinary masterpiece; you want them to be the very best they can be to ensure your pasta sings with flavor and boasts that dreamy texture.
Let’s talk about flour first, because it’s a star player here. While some might insist you need fancy ’00’ flour for the best results, and it certainly gives a wonderfully soft and fine texture, don’t fret if it’s not readily available. Some fantastic homemade pasta recipes, surprisingly, prove that regular all-purpose flour can yield beautifully chewy, bouncy noodles every single time. In fact, some traditional approaches even combine ’00’ flour with a sturdier, higher protein flour, sometimes called Manitoba flour in Italy, or simply all-purpose or plain flour elsewhere. Other regional variations might even use a mix of semolina and soft wheat flour. So, while ’00’ flour is ideal for that specific, very soft, very fine quality, especially for things like Neapolitan-style pizza dough, know that you have options!
Next up, the eggs – these are the key ingredients, adding richness, flavor, and crucial moisture to your dough. The consensus among pasta masters is clear: use the highest quality free-range eggs you can possibly find. In Italy, they even have special eggs just for pasta, known as ‘Pasta Gialla,’ which means ‘yellow dough’ or ‘yellow pasta.’ These eggs boast yolks so vibrantly orange that they impart a stunning, naturally golden hue to your pasta, a beautiful sign of authenticity. Finding eggs with that perfect, deep yolk color in your area might take a little searching, but it’s a search well worth the effort for that visual appeal and enhanced flavor.

The size of your eggs also truly matters for consistent results. For this recipe, stick to large eggs to ensure the perfect consistency. If you happen to use smaller or medium-sized eggs, you’ll likely need to adjust the amount of flour slightly. Now, for the golden ratio: the general rule of thumb is 1 large egg to every 100g (or about 3.5 oz) of ’00’ flour. But here’s a little secret from Emily, one of our pasta pros: she likes to add one extra egg yolk to the entire mixture, not per 100g, but to the whole batch. For instance, to make ravioli for six people, she uses 3 large eggs, 300g (10.5oz) of ’00’ flour, and that single extra egg yolk. This little addition really boosts the richness and color, making your pasta even more heavenly.
Then there’s olive oil – a drizzle, just a small splash, can make a surprising difference. While some traditionalists, like Rosemary Molloy’s mother-in-law, might skip it, others, like her sister-in-law, swear by it. And I tend to agree; adding olive oil enriches the taste of the fresh pasta, making it more fragrant and notably more elastic and easier to work with. It’s a small detail that yields a big impact on the dough’s pliability and the final taste. Finally, a pinch of salt is essential, not just in the dough itself, but also for seasoning the pasta water later, ensuring your noodles are flavorful from the inside out.
Now that we have our ingredients ready, let’s get our hands into the flour and begin the magical process of crafting the dough. This is where the kitchen truly comes alive! You’ll want a clean, spacious work surface – a large cutting board, a clean countertop, or even a specialized pasta board will do beautifully. This is your canvas for creation. Begin by placing your chosen flour onto this surface, creating a lovely, neat mound. Then, with a confident hand, make a deep well right in the center of that flour pile. This well is where all the liquid gold – your eggs, olive oil, and salt – will nestle.
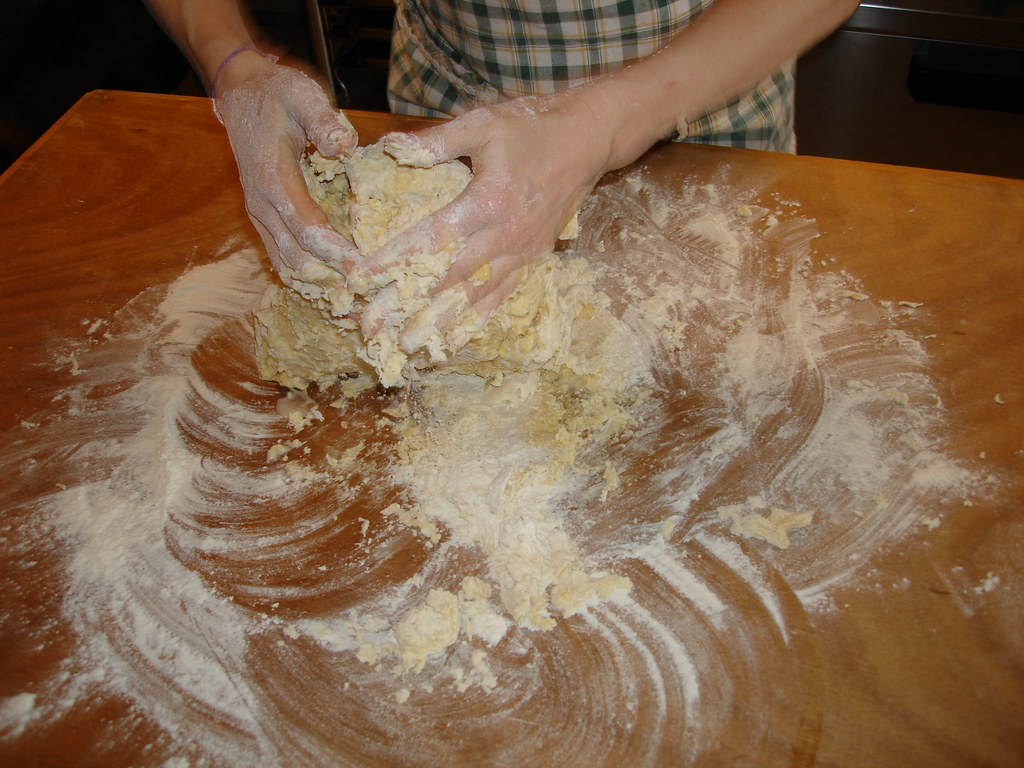
Once your eggs, olive oil (if you’re using it), and salt are gently nestled in the well, grab a fork and start whisking the wet ingredients. As you whisk, gradually begin to incorporate the flour from the inner edges of the well, slowly drawing it into the liquid. It’s like building a little dam, carefully preventing a delicious overflow. At first, it might look like a messy, shaggy dough, a collection of rough clumps, but don’t despair! Keep working that fork, and as more flour gets incorporated, you’ll likely find it easier to switch to your hands. Your fingers are the best tools for sensing the dough’s texture and bringing it together. Gently work the dough, drawing the remaining flour inward until it starts to coalesce into a cohesive, albeit still rough, ball.
Now comes the real meditative part, the heart of pasta making: kneading. This isn’t just about mixing; it’s about developing the gluten, giving your pasta its incredible structure, chewiness, and elasticity. Bring the shaggy dough together with your hands to form a ball, and then begin to knead it. This means pushing the dough away from you with the heels of your hands, folding it over, rotating it, and repeating the motion. You’ll want to knead for no less than 10 minutes. Yes, ten glorious minutes!
At the beginning of this kneading process, the dough will likely feel pretty dry, almost stiff. You might even wonder if it’s ever going to come together into that smooth, pliable ball you envision. Stick with it! Trust the process. After 8 to 10 minutes of consistent kneading, a remarkable transformation occurs. The dough should become cohesive, smooth, and wonderfully elastic. It’s a truly satisfying feeling. If, during this process, the dough seems a little too dry and resistant, just lightly sprinkle your fingers with a tiny bit of water and work that moisture in as you continue kneading. Conversely, if it becomes too sticky and clings to your hands or the surface, a light dusting of more flour onto your work surface will help.
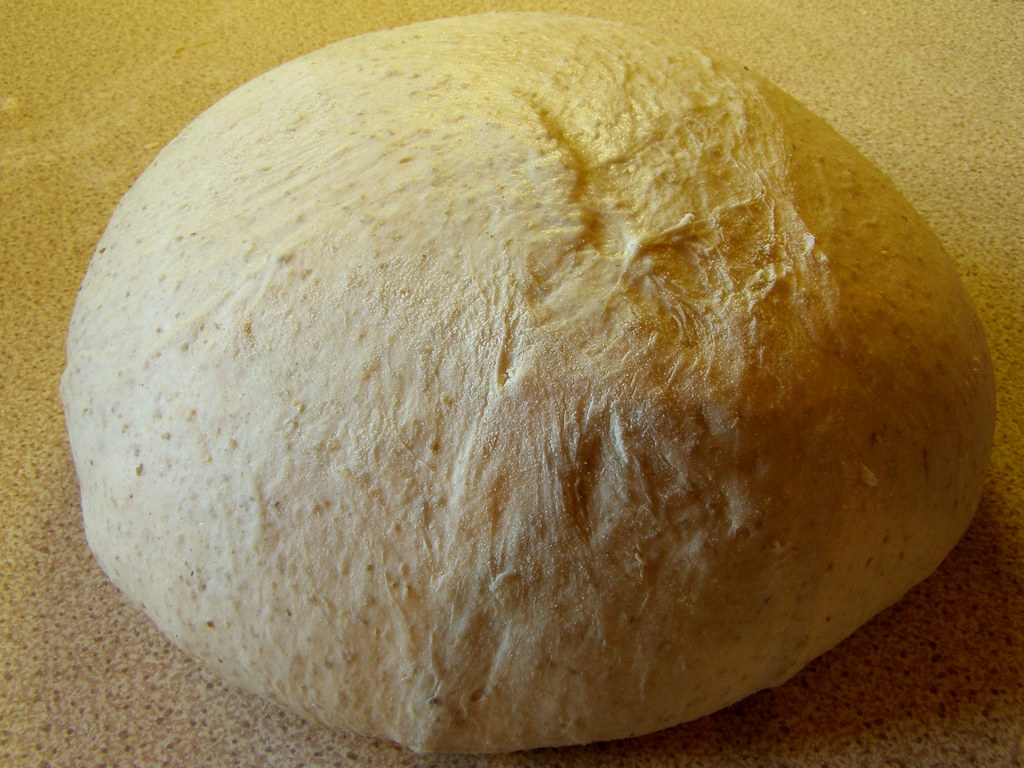
A little tip from the experts: if you’re unsure whether your dough is perfectly kneaded and ready, simply cut the ball in half. If you see tiny air bubbles inside the dough, congratulations! It’s ready. These little bubbles are a sign that the gluten has developed beautifully. Once your dough has reached this smooth, pliable, and elastic state, it’s time for its well-deserved rest. Shape it into a perfect ball, then tightly wrap it in cling film or cover it with a clean cloth. This resting period, typically 30 minutes, is extremely important. It allows the gluten to relax, preventing the dough from snapping back when you try to roll it out, and it also gives the flavors a chance to meld together, ensuring your dough achieves the perfect texture. Leave it out of the fridge, at room temperature, to allow this magic to happen.
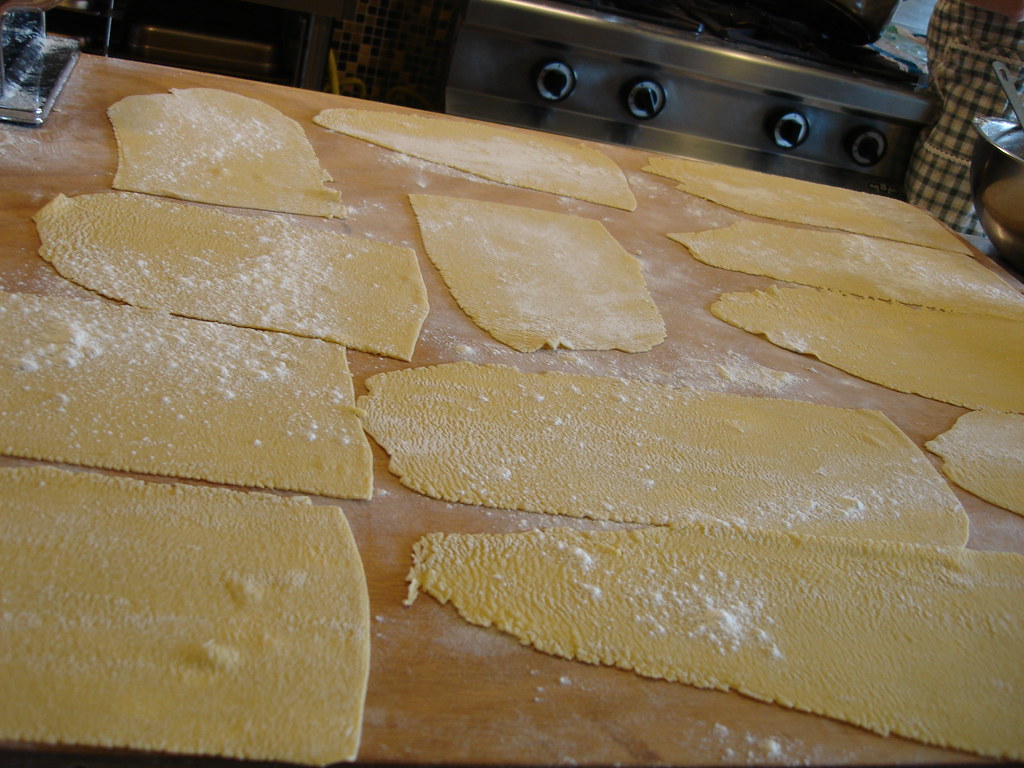
With your beautifully rested dough eagerly awaiting its transformation, it’s time for the next exciting phase: rolling it out! This is where you really start to see your efforts take shape. Begin by slicing your dough. If you made a larger batch, cutting the dough in half or even into four equal pieces will make it much easier to manage. Imagine trying to roll out a huge, floppy sheet – not ideal!
Take one of your dough pieces and gently flatten it with the palm of your hand. You want to create a somewhat oval or rectangular disk that’s thin enough to easily fit through the widest setting of your pasta machine. On most machines, this is typically set to ‘0’ or ‘1’. Don’t force it; a little initial flattening makes the machine’s job so much smoother. Once flattened, run this piece of dough through the widest setting of your pasta maker. It’s like a gentle warm-up for the dough, getting it accustomed to the rollers.
Now, here’s a crucial step that many a pasta maker swears by for developing the perfect sheet: once your dough has passed through the widest setting once, lay it flat on your work surface. Then, fold one side over the other, bringing the short ends to meet in the center, and then folding it in half lengthwise to form a neat rectangle. This folding technique, often repeated several times, is essential. It’s not just about shaping; it’s about creating a stronger, more uniform, and ultimately more rectangular pasta sheet. Some pros recommend repeating this process, folding the sides in and passing it through the widest setting, four times – a step not to be skipped if you want beautifully consistent pasta. Others might do it three times. The key is to repeatedly feed the folded dough through the widest setting, which helps to build the dough’s strength and create those perfect, smooth sheets that are a joy to work with. Remember to lightly sprinkle flour or semola on your work surface and on the rollers of your pasta machine to prevent any sticking, ensuring a smooth, seamless journey for your pasta dough. This is the foundation for creating any pasta shape you desire, and it’s a step that truly sets the stage for pasta perfection.
With your beautifully strong and uniform sheets now ready, having embraced the foundational wisdom of repeated passes through the widest setting, it’s time to embark on the truly exciting part: transforming these smooth sheets into the delightful pasta shapes you dream of! This is where your efforts truly blossom, revealing the versatility and sheer magic of homemade pasta. The journey from a simple sheet to delicate strands or sturdy parcels is just a few adjustments away on your trusty pasta machine, or with a keen eye and a steady hand.
The ideal thickness for your pasta sheets is often a matter of personal preference and the type of pasta you’re creating. While your pasta machine typically has many settings, from the widest (often ‘0’ or ‘1’) down to the very thinnest (sometimes ‘8’ or ‘9’), our pasta pros advise caution when going too thin. Rolling your pasta to the very last setting can make it a little too delicate and much harder to work with, increasing the chances of tearing. So, let’s strike that perfect balance!
For robust and satisfying ravioli, you’ll want a slightly thicker sheet to hold all that delicious filling. The sweet spot here is often the third-last setting on your machine, which is typically number ‘7. This gives you enough structure to encase your filling without being too doughy. However, if you’re aiming for classic lasagne sheets, tagliatelle, or pappardelle, the second-last setting, usually number ‘8’, is generally preferred. This thickness ensures a wonderful al dente bite and holds up beautifully to rich sauces, making every forkful a joy.
Creating your favorite pasta shapes from these perfectly rolled sheets is where the fun really ramps up! Let’s start with lasagne, which is wonderfully straightforward. Once your dough is rolled to your preferred thickness – again, often the second-last setting or even the very last if you dare – all you need to do is cut the sheets to fit the size of your baking dish. You’re then ready to layer them into your favorite comforting lasagne, whether it’s a classic with a rich ragu and silky béchamel or a hearty vegetarian option.
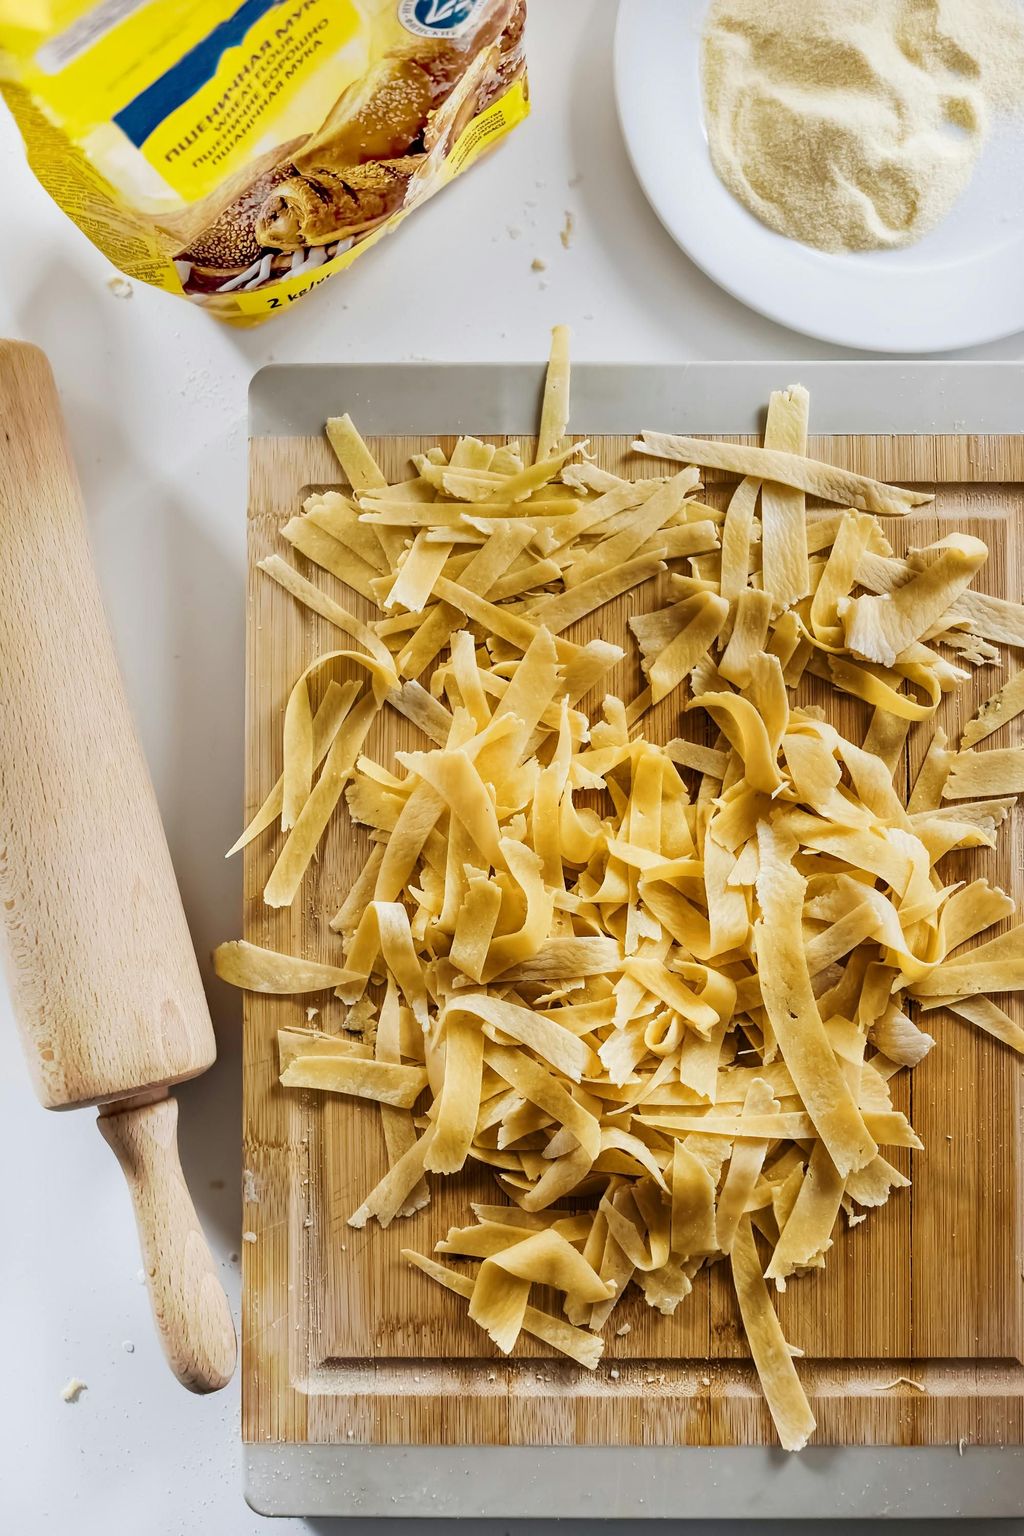
For the beloved long strands like tagliatelle, pappardelle, and fettuccine, the process is largely similar, with one charming exception. Pappardelle, being the widest of the three, is traditionally cut by hand. It’s a beautifully tactile experience! You simply take your rolled lasagne sheet and fold it over and over again, lengthwise, until you achieve a neat roll that’s about a 1-inch width. Then, with a sharp knife, you cut this roll into delightful 1/2-inch wide pieces. As you unravel them, you’ll reveal those rustic, broad pappardelle strands, perfect for embracing chunky sauces.
When it comes to tagliatelle and fettuccine, your pasta machine often comes with a fantastic helping hand: a cutting attachment! Most machines are equipped with these, and they make quick work of transforming your flat sheets into uniform, elegant noodles. You simply place the relevant attachment onto your machine, feed your expertly rolled pasta sheets through, and watch as gorgeous tagliatelle or fettuccine emerges. It’s truly satisfying to see.
If you’re not planning to cook your freshly cut pasta straight away, don’t worry! You can easily shape a few strands at a time into charming little nests and let them dry out slightly. This helps them hold their shape and prevents sticking. It’s a wonderful way to prep ahead and keep the magic of homemade pasta ready for whenever a craving strikes.
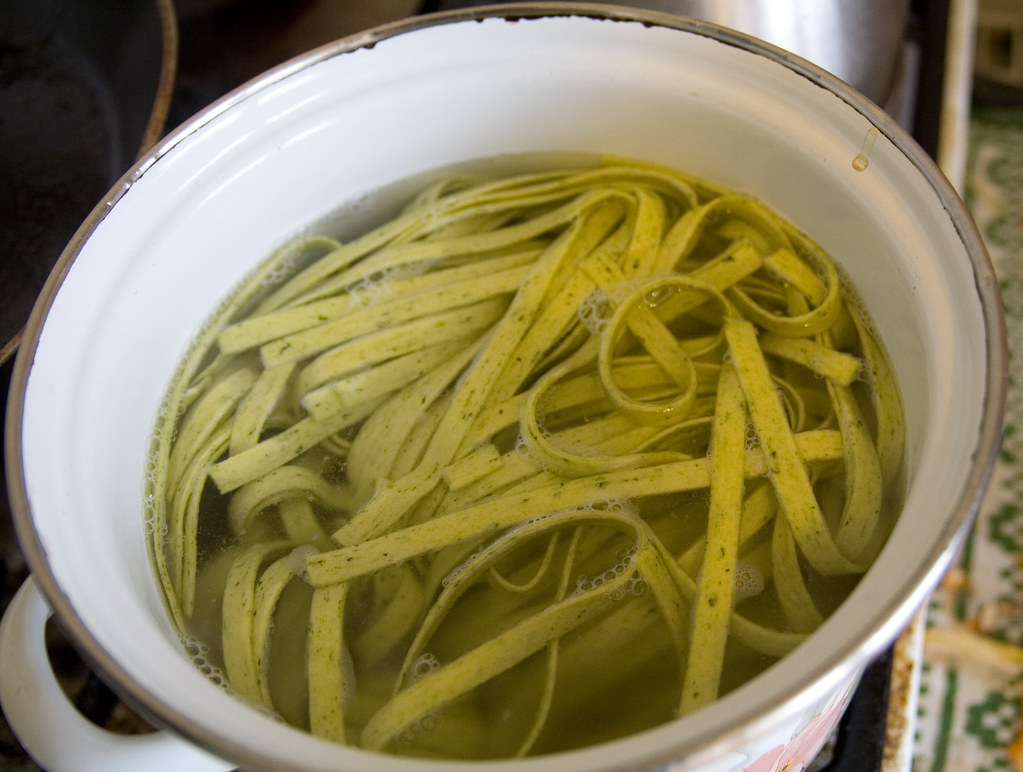
Now, for perhaps the most critical part of enjoying your handmade masterpieces: cooking them to perfection! Fresh pasta cooks incredibly quickly, so it’s essential to be ready. The first rule of engagement is to use plenty of water. A good guideline is 4 cups (1 liter) of water for every 3.5 ounces (100 grams) of pasta. This generous amount ensures the pasta has ample room to move and prevents it from clumping together, allowing for even cooking.
Choose a pot that’s suitably large, keeping in mind that pasta can increase in volume by up to three times when cooked. You certainly don’t want water bubbling over the rim! Always cover the pot when you’re bringing the water to a boil, as this speeds up the process. However, once you add the pasta, be sure to remove the lid to maintain a vigorous boil and prevent foam-overs.
Salt is absolutely non-negotiable for flavorful pasta. Add about 7 grams of salt for every liter of water, but here’s a crucial tip: only add the salt once the water has reached a rolling boil. Adding it earlier can potentially pit your pot. After the pasta goes in, bring the water back to a boil quickly and keep it at a boil throughout the cooking process. Stir frequently to ensure each strand cooks evenly and doesn’t cling to its neighbors or the bottom of the pot.
One golden rule for all pasta, especially fresh homemade pasta, is to never, ever rinse it under running tap water after draining. This strips away the precious starches that help your sauce cling beautifully to the noodles, diminishing the flavor and texture. If you’re making a cold pasta salad and need to cool it down, simply add a drizzle of olive oil to prevent sticking as it cools naturally.
The ultimate goal is al dente! This Italian phrase means “to the tooth,” signifying pasta that is firm to the bite but still tender. The best way to achieve this is by tasting frequently. There’s truly nothing worse than mushy pasta, so taste, taste, taste! For fresh pasta, this usually means a cooking time of only 1 to 2 minutes, or perhaps two to three minutes, depending on the thickness. It cooks lightning fast compared to dried pasta, so stay vigilant!
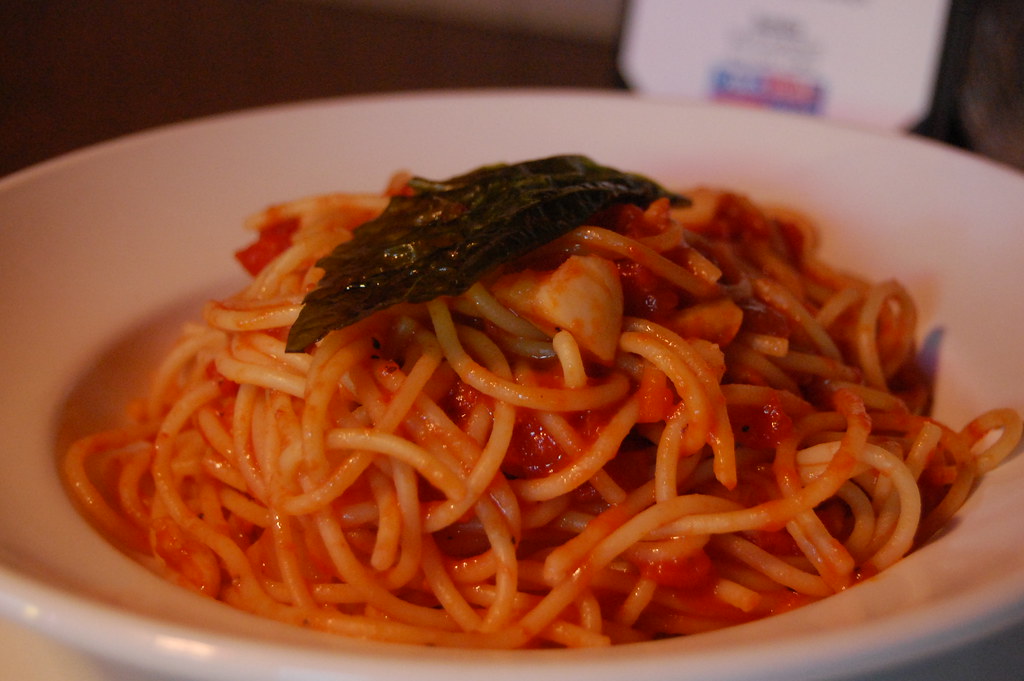
With your perfectly cooked pasta ready, it’s time to unleash its full potential with a marvelous sauce. Homemade pasta is a blank canvas, eager to marry with a spectrum of flavors. From the elegant simplicity of a classic marinara sauce, bursting with ripe tomatoes, to the bright, herbaceous notes of a fresh pesto, or the creamy indulgence of a homemade Alfredo sauce, the possibilities are endless.
Don’t underestimate the sheer delight of serving your freshly made noodles simply with a drizzle of good olive oil and a generous sprinkle of Parmesan cheese (or vegan Parmesan, if that’s your preference). The pure flavor and bouncy texture of the pasta truly shine through with minimal adornment. For something a little more substantial, consider tossing your pasta with delightful combinations like tagliatelle with asparagus and peas, a zesty spaghetti aglio e olio, or a rich roasted vegetable pasta.
These freshly made noodles are also perfect for elevating your favorite larger pasta dishes. Imagine using your homemade sheets in a robust vegetarian lasagna bolognese or a classic meat-based version. They absorb the flavors beautifully, making every layer a testament to your culinary prowess. They also pair wonderfully with a hearty vegan bolognese made with mushrooms, lentils, and walnuts, or a traditional meat-based Bolognese.
For any leftover fresh pasta, the good news is you can store it! Simply wrap it tightly in plastic wrap and keep it in the fridge for up to two days. But what if you want to enjoy your hard work weeks or even months down the line? You can absolutely freeze fresh, raw pasta in various forms. The trick is to lay the shaped pasta well-spaced on a baking sheet and pop it into the freezer until it firms up, usually for a couple of hours. Once firm, transfer the frozen pasta to a freezer bag or an airtight container. When you’re ready to cook, simply boil it directly from frozen in salted boiling water, no thawing required!


