

It seems like with every trip to the grocery store, extra dollars are added to my bill, even with fewer groceries in my cart. We’re seeing that food prices around the world are steadily increasing every single week! This isn’t just a fleeting trend; according to an article by the USDA’s Economic Research Service, the food-at-home Consumer Price Index increased 1.4% from June 2022 to July 2022 and was a staggering 13.1% higher than July 2021. The predictions suggest these prices will continue to climb, forcing many of us to rethink our approach to food spending.
As someone who has always leaned towards frugality in grocery shopping, meal planning, and home cooking, these rising costs have pushed me to stick to the absolute bare minimum. It means focusing on the cheapest groceries available and crafting extremely budget-friendly recipes. Right now, it’s all about how much you can stretch a dollar, and I’ve been consistently planning meals around what’s most affordable, all while striving to ensure my family still eats healthily.
If you find yourself in a similar position, aiming to get more value for your money when it comes to your monthly food bill, then you’ve come to the right place. I’m excited to share the cheapest foods that form the backbone of our meals, my essential budget grocery list, and all my top tips for navigating the aisles economically. Let’s dive into the ultimate list of foods that are not only delicious but also incredibly kind to your wallet, starting with the first eight staples that make regular appearances on my meal plans.

1. **Eggs**When money is tight, eggs are an absolute superstar on my cheap grocery list. Their versatility is unmatched, allowing them to be paired with virtually any side dish you can imagine. For an incredibly budget-friendly meal, I often enjoy mine simply with a dinner roll; pop it into a panini press for an instant upgrade to your breakfast game.
The true beauty of eggs lies in their affordability and nutritional punch. An individual egg often costs less than 20 cents in my area, making them an incredibly cost-effective source of protein and essential nutrients. They can be cooked in countless ways – scrambled, hard-boiled, sunny side up, poached, or transformed into a filling omelette. Whether you pair them with a cheap veggie, some toast, or even eat them alone, eggs offer a substantial meal that’s both healthy and kind to your budget.

Blueberry Coffee Cake Muffins
Ingredients
Equipment
Method
- Preheat the oven to 350 degrees F. Place 16 paper liners in muffin pans.
- In the bowl of an electric mixer fitted with the paddle attachment, cream the butter and sugar until light and fluffy, about 5 minutes. With the mixer on low speed, add the eggs 1 at a time, then add the vanilla, sour cream, and milk. In a separate bowl, sift together the flour, baking powder, baking soda, and salt. With the mixer on low speed add the flour mixture to the batter and beat until just mixed. Fold in the blueberries with a spatula and be sure the batter is completely mixed.
- Scoop the batter into the prepared muffin pans, filling each cup just over the top, and bake for 25 to 30 minutes, until the muffins are lightly browned on top and a cake tester comes out clean.
Notes
Read more about: From Screen to Struggle: The Heartbreaking Journeys of 9 Beloved Child Stars Who Faced Fame’s Dark Side

2. **Grilled Cheese Sandwich**There’s something inherently comforting and incredibly cheap about a classic grilled cheese sandwich. This simple meal is a consistent winner in my home, especially when paired with a warm cup of coffee or tea. To maximize savings, I opt for a small block of cheddar cheese and slice off portions as needed, which offers better value than pre-shredded or sliced varieties.
Crafting a grilled cheese sandwich is not only quick but also highly economical. You’ll be surprised at how heavenly a perfectly golden, melty grilled cheese can be, especially when you know it’s saving you money. This dish proves that satisfying and delicious meals don’t require expensive ingredients, making it a staple for any frugal shopper.

Grilled Cheese Sandwich Recipe
Ingredients
Equipment
Method
- Evenly spread butter on one side of each bread slice.
- Place one slice of bread, butter-side down, in a cold nonstick skillet or on a griddle.
- Layer two slices of cheese on top of the bread in the skillet, then top with the second slice of bread, butter-side up.
- Season the top of the sandwich lightly with kosher salt.
- Place the skillet over medium-low heat and cook until the bottom slice is deeply golden brown and crisp, about 4-6 minutes.
- Carefully flip the sandwich with a spatula.
- Continue to cook on the second side until it’s also golden brown and crisp, and the cheese is fully melted and gooey, about 3-5 minutes more.
- Remove the grilled cheese from the skillet and place it on a cutting board.
- Allow it to rest for 1-2 minutes to let the cheese set slightly.
- Slice the sandwich in half diagonally and serve immediately.
Notes
Read more about: Chick-fil-A Simplifies Large Order Catering with New Online Platform: Feeding Your Crowd Just Got Easier

3. **Fries**Long before frozen, pre-cut options filled supermarket aisles, making fries from scratch was a common and cherished practice. I vividly recall my mom regularly buying sacks of potatoes to turn into homemade fries, which was always a special treat and one of my favorite meals growing up. Skipping those costly frozen varieties like crinkle cut and shoestring is a smart move for your wallet, as the pre-packaged options add unnecessary expense.
Potatoes are consistently one of the cheapest groceries you can buy, and a bag always secures a spot on my weekly list. Making fries is one of the easiest ways to utilize them, offering a satisfying and versatile side or main dish. For a healthier twist that doesn’t compromise on the crispy goodness, utilizing an air fryer is a fantastic option. This approach ensures you enjoy a beloved comfort food without breaking the bank, transforming humble potatoes into a delightful and economical treat.
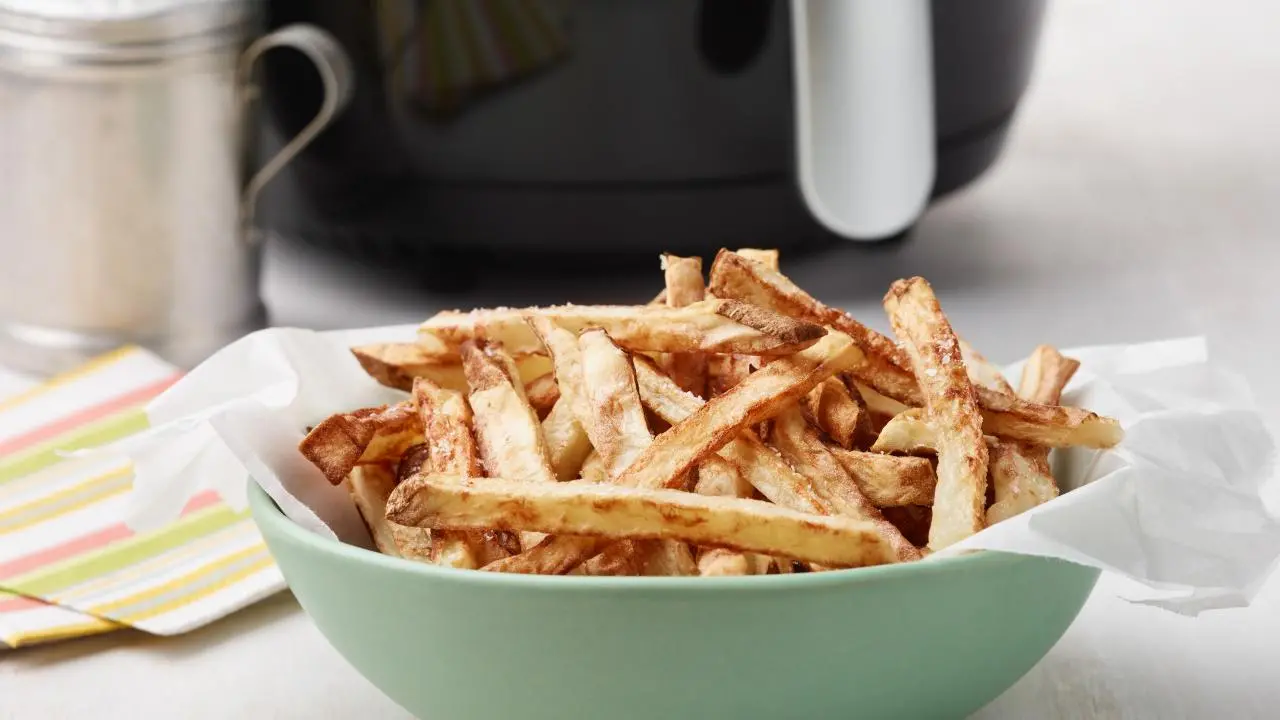
Air Fryer French Fries
Ingredients
Equipment
Method
- Preheat an air fryer to 380 degrees F .
- Cut the potato in half lengthwise, then into 1/4-inch slices. Cut the slices into 1/4-inch sticks. Put the fries in a medium bowl and rinse them well with cold water, then drain and pat dry with paper towels.
- Toss the fries with the oil in a medium bowl, then sprinkle with 1/2 teaspoon salt and several grinds of pepper. Working in batches if necessary, put the fries in an even layer in the air fryer basket with no overlapping and cook, turning them halfway through, until golden brown and crisp, 14 to 16 minutes. Remove and season with salt.
Notes
Read more about: Bob Newhart, Deadpan Comedy Legend Who Shaped Generations’ Humor, Dies at 94
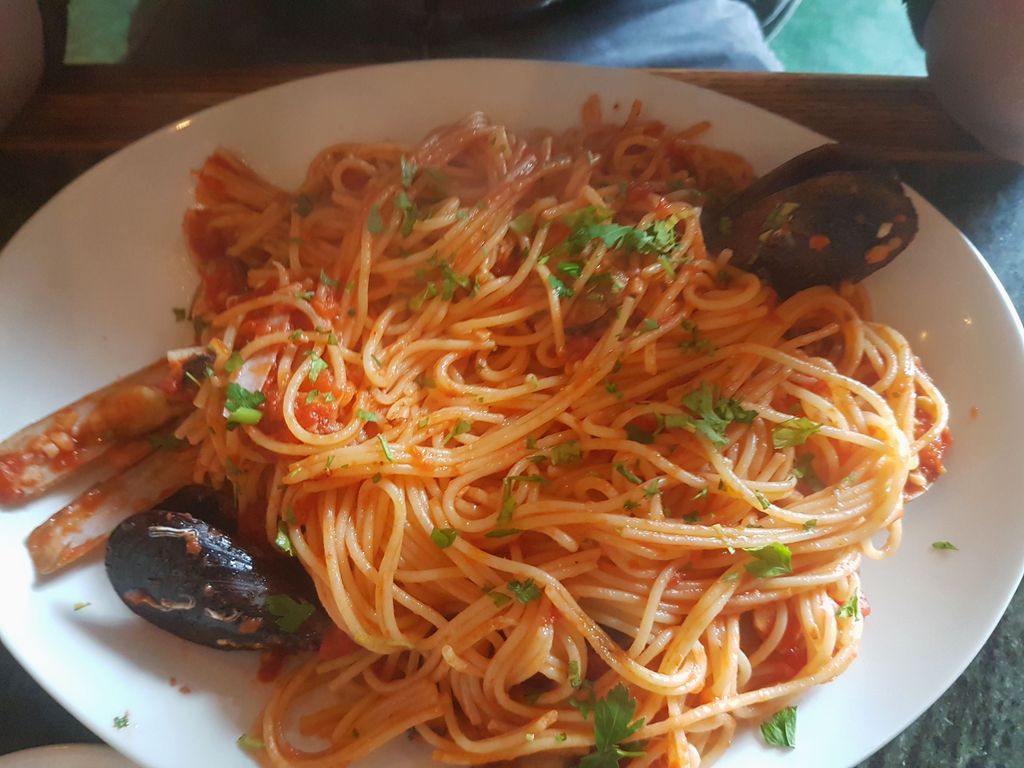
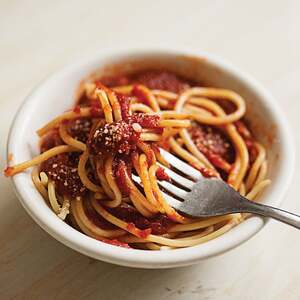
4. **Spaghetti Marinara**Meatless Spaghetti Marinara is a top contender for the cheapest food I prepare, and it’s always a family favorite. The core ingredients – spaghetti packs and canned pasta sauce – are notably inexpensive, making this meal a go-to when keeping costs low is a priority. I frequently choose the most affordable can of pasta sauce available, proving that delicious meals don’t require premium brands.
This dish is a testament to how easy and economical cooking can be. Spaghetti is a pantry staple that offers significant stretch, allowing a single pack to feed several people generously. By focusing on simple, budget-friendly components, you can create a satisfying and flavorful meal that everyone enjoys without overspending.
Steakhouse Spaghetti Marinara
Ingredients
Equipment
Method
- Heat olive oil in a large stockpot or Dutch oven over medium-high heat until shimmering.
- Add beef shank bones and pork neck bone to the pot and sear until deeply browned on all sides, about 8-10 minutes. Remove bones and set aside.
- Reduce heat to medium, add steak trimmings, and cook until browned, then remove and set aside with the bones.
- Add garlic and onion to the pot, cooking until softened and fragrant, about 5-7 minutes.
- Stir in tomato paste, sugar, and celery seeds, cooking for 2-3 minutes, stirring constantly, until the tomato paste darkens slightly.
- Return bones and steak trimmings to the pot. Add basil sprigs, crushed tomatoes, and bay leaves. Stir well to combine.
- Bring the sauce to a simmer, then reduce heat to low, cover, and cook for at least 3-4 hours, or up to 6 hours, stirring occasionally, until the sauce is rich and thick and meat on bones is tender.
- Remove bones, bay leaves, and basil sprigs from the sauce. Shred any edible meat from the bones and stir back into the sauce. Season with kosher salt and freshly ground black pepper to taste.
- Cook spaghetti according to package directions in salted boiling water until al dente.
- Serve the marinara sauce over hot spaghetti, garnished generously with grated Parmesan cheese.
Notes
Read more about: Ditch the Dishes! Uncover 14 Mind-Blowing One-Pot Wonders for Your Busiest Weeknights!
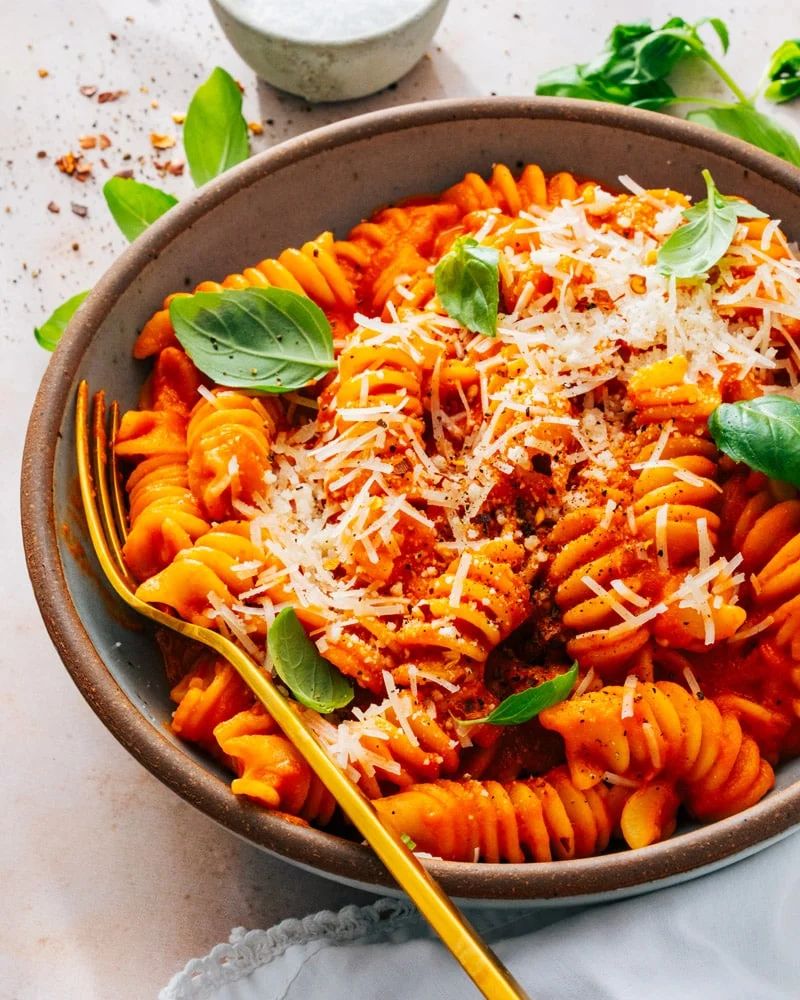
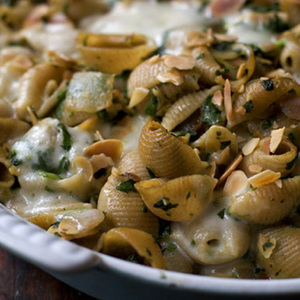
5. **Pasta Casserole**Pasta is an incredibly versatile ingredient that forms the foundation of many cheap and satisfying meals. Unlike some other pantry items, its price has remained relatively stable, making it a reliable choice for budget-conscious cooking. There are so many creative ways to transform pasta into a hearty dish, and a casserole is one of the best.
For a delicious pasta casserole, I typically use a small piece from my trusty cheddar cheese block – remember, buying blocks of cheese offers better value than shredded options. Then, I throw in any other affordable ingredients I have on hand and bake it. Voila! If you’re looking for inspiration, the context mentions a “budget-friendly Chicken Pasta Casserole Recipe,” with a smart tip: “Skip the chicken, and choose cheaper brands to save money!” This adaptability makes pasta casseroles an ideal meal for maximizing your grocery dollar.
Baked Pasta Casserole Recipe
Ingredients
Equipment
Method
- Preheat your oven to 375°F (190°C) and lightly grease a large casserole dish.
- Bring a large pot of generously salted water to a rolling boil, then add the whole wheat pasta shells and cook according to package directions until al dente.
- While the pasta cooks, heat a generous drizzle of extra-virgin olive oil in a large skillet over medium heat.
- Add the chopped yellow onion to the skillet and sauté for 5-7 minutes until softened and translucent, then add the chopped garlic and cook for another minute until fragrant.
- Stir in the fresh spinach and cook until just wilted, about 2-3 minutes; remove from heat.
- Drain the cooked pasta thoroughly and transfer it to a large mixing bowl.
- Add the sautéed onion and garlic mixture, wilted spinach, lightly toasted sliced almonds, and the zest of 2 lemons to the pasta.
- Toss all ingredients gently to combine, ensuring everything is well distributed, then season with sea salt to taste.
- Transfer the pasta mixture into the prepared casserole dish and spread evenly, then top with shredded or torn mozzarella.
- Bake for 20-25 minutes, or until the cheese is melted, bubbly, and lightly golden brown. Let rest for a few minutes before serving.
Notes
Read more about: 8 Thanksgiving Side Dishes Your Grandma Secretly Wished She Made (Seriously, They’re THAT Good)
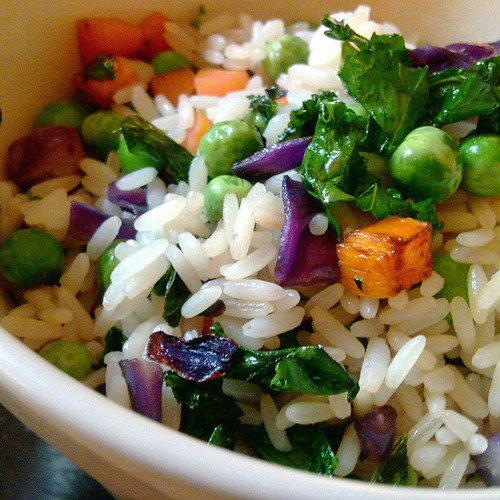
6. **Fried Rice**Fried rice stands out as a wonderfully cheap meal to prepare, especially when you already have the essential staples stocked in your pantry. It’s crucial to remember that while fried rice can be a budget meal, adding expensive ingredients can quickly drive up the cost. The key is to keep it simple and focus on affordable basics.
My approach usually involves making a basic fried rice with readily available ingredients like chopped onion and garlic, which are constant staples in my kitchen, alongside a diced carrot. Of course, a little oil and soy sauce are also necessary. Although the price of rice isn’t as low as it once was, it remains a cost-effective carbohydrate source, allowing you to whip up a delicious and satisfying fried rice meal without overspending.

Fried and Stuffed Rice Balls (Arancini di Riso)
Ingredients
Equipment
Method
- Breading: Put the bread crumbs in a medium bowl. Set aside.
- Filling: In a medium bowl, combine the risotto, bread crumbs, Parmesan, basil, and eggs. With damp hands, using about 2 tablespoons of the risotto mixture, form the mixture into 1 3/4-inch diameter balls. Make a hole in the center of each ball and insert a cube of Gorgonzola. Cover up the hole to completely enclose the cheese. Roll the balls in the breading to coat.
- In a large heavy-bottomed saucepan, pour in enough oil to fill the pan about 1/3 of the way. Heat over medium heat until a deep-frying thermometer inserted in the oil reaches 350 degrees F. (If you dont have a thermometer, a cube of bread will brown in about 2 minutes.) In batches, fry the rice balls, turning occasionally, until golden, about 4 to 5 minutes. Drain on paper towels and serve.
Notes
Read more about: Seriously, These Are The New Trader Joe’s Items Everyone’s Absolutely Obsessed With Right Now
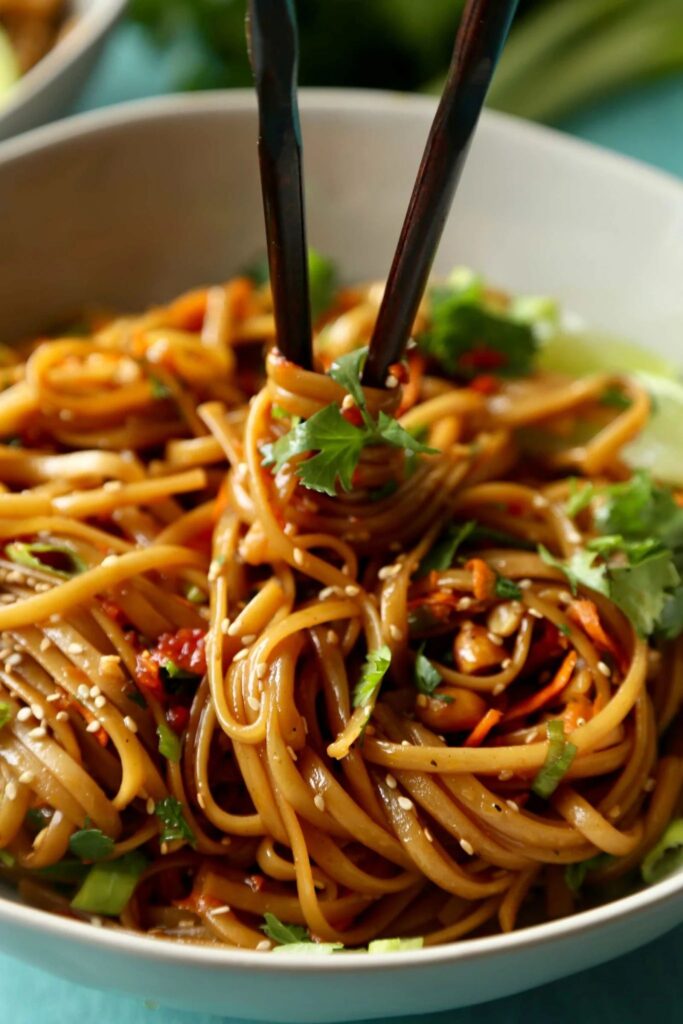
7. **Noodles**Noodles are another personal favorite that consistently makes an appearance on our family’s meal plan, offering a fantastic and inexpensive alternative to rice-based dishes. The preparation method for a cheap noodle dish is quite similar to how I approach my budget-friendly fried rice, emphasizing simplicity and affordable ingredients.
Instead of dicing them, I usually cut carrots into thin strips to complement the noodles. This simple substitution from rice to noodles creates a distinct yet equally economical meal. It’s incredibly straightforward to prepare and easily ranks as one of the cheapest foods you can make, making it perfect for stretching your grocery budget further without sacrificing flavor or satisfaction.
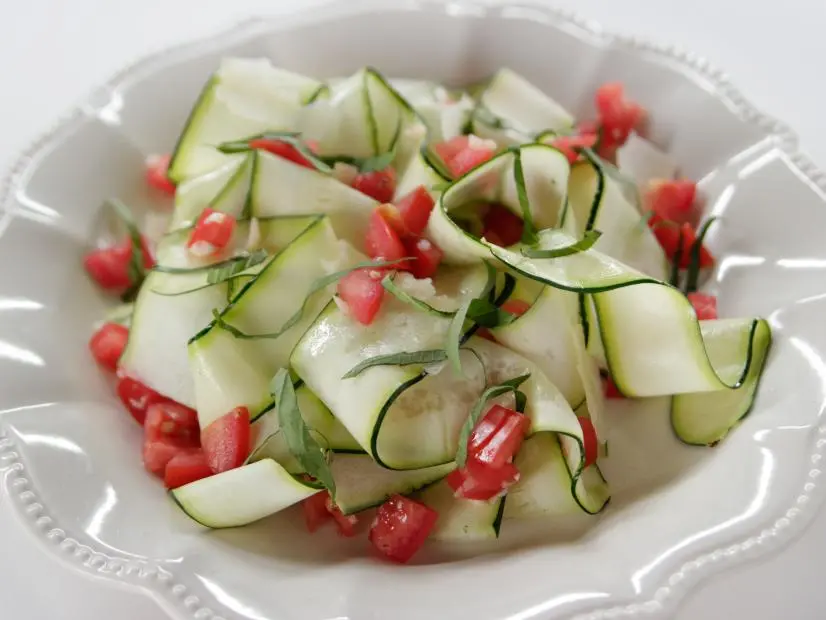
Zucchini Noodles
Ingredients
Equipment
Method
- Using a vegetable peeler, peel the zucchini into long ribbons.
- Set a nonstick skillet over medium-high heat and heat the butter and olive oil. Add the zucchini and toss around in the skillet for 1 to 2 minutes. Sprinkle in some salt and pepper. Add the Parmesan, tomatoes and garlic and toss to heat through. Sprinkle over the basil and serve within a few minutes, before the zucchini gets too soft!
Notes
Read more about: Seriously, These Are The New Trader Joe’s Items Everyone’s Absolutely Obsessed With Right Now
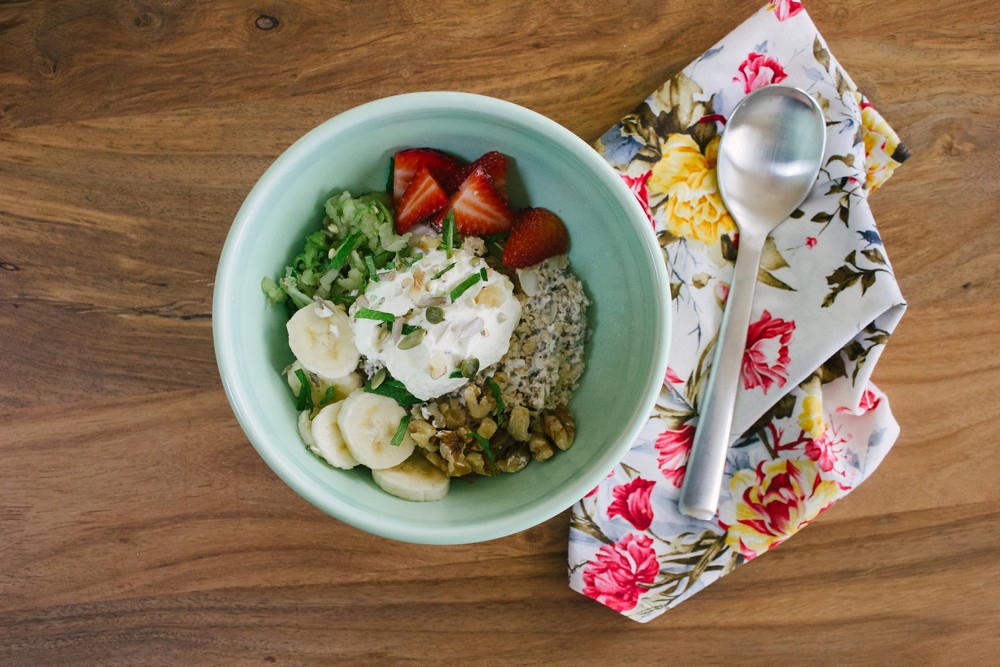
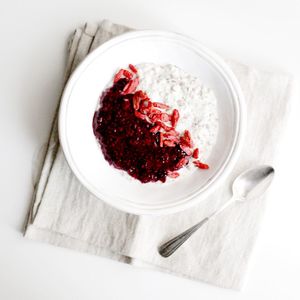
8. **Overnight Oats**When compiling a list of cheap, healthy, and convenient foods, overnight oats are an absolute must-add. This ingenious breakfast option not only goes easy on your wallet but also delivers significant health benefits, and perhaps best of all, makes for an incredibly easy morning routine. All the necessary prep work is completed the night before, saving you precious time when you wake up.
Imagine waking up to an easy, delicious, and nutritious breakfast that didn’t require any effort that morning – and, crucially, didn’t break the bank! Oats are inherently inexpensive, and by preparing them ahead of time, you eliminate the temptation of grabbing costly breakfast items or resorting to takeout. Overnight oats exemplify smart, efficient, and frugal meal planning, proving that eating well on a budget can be effortlessly simple.
With a solid foundation of budget-friendly staples under our belts, it’s time to expand our frugal repertoire even further. The journey to a more economical kitchen doesn’t stop at eight items; there are still plenty of delicious and affordable options waiting to be discovered. This next section will unveil seven more essential food choices that consistently help me keep my grocery bill low, alongside a wealth of strategic shopping hacks that will empower you to save even more on your weekly hauls.
Continuing our deep dive into smart grocery choices, we’re not just listing foods; we’re embracing a mindset of optimization and efficiency. These additional staples, combined with tried-and-true money-saving tips, will transform your approach to food shopping and meal preparation, ensuring you get maximum value and satisfaction without ever feeling deprived. Let’s keep building that ultimate frugal kitchen!
Overnight oats
Ingredients
Equipment
Method
- Gather all your ingredients and measuring tools.
- In a medium mixing bowl, combine the oatmeal, flaxseed, and chia seeds.
- Pour in the almond milk and maple syrup.
- Using a whisk or spoon, thoroughly mix all ingredients until well combined, ensuring no dry clumps remain at the bottom.
- Divide the mixture evenly into two individual air-tight jars or containers.
- Securely cover the jars with lids.
- Refrigerate for at least 6 hours, or preferably overnight, allowing the oats and seeds to soften and absorb the liquid.
- In the morning, stir the oats well before serving.
- Optionally, add your favorite toppings such as fresh fruit, nuts, or a drizzle of extra maple syrup before enjoying.
Notes
Read more about: The 16 Most Drop-Dead Gorgeous Actors and Actresses Who Defined 1970s Hollywood

9. **Wraps and Flatbreads**Even with the fluctuating price of flour, it remains a surprisingly economical ingredient compared to many other grocery items. This makes crafting your own wraps and flatbreads an incredibly smart move for any budget-conscious cook. Instead of reaching for pre-packaged options that carry an added cost for convenience, I find immense satisfaction—and savings—in making my own.
Kneading your own dough for flatbreads or mixing up your own batter for wraps is a skill that pays dividends. It offers a fresh, customizable base for countless meals, from quick lunches to dinner accompaniments, all while drastically cutting down on your overall food expenditure. This hands-on approach truly maximizes your savings and ensures you know exactly what’s going into your food.

Lebanese chicken wraps
Ingredients
Equipment
Method
- Cut the chicken fillets into strips or bite-sized pieces for even cooking.
- In a mixing bowl, combine Greek yogurt, lemon juice, lemon zest, allspice, olive oil, and crushed garlic. Add the chicken to this marinade, ensuring it’s well-coated. Marinate for at least 30 minutes in the refrigerator.
- While the chicken marinates, toast the pine nuts in a dry pan over medium-low heat until golden brown, watching carefully to prevent burning. Set aside.
- Dice the tomatoes and cucumber. Finely chop the fresh parsley. Combine these in a separate bowl to create a fresh salad topping.
- Heat a frying pan over medium-high heat. Remove chicken from the marinade, shaking off excess, and cook in batches until golden brown and cooked through, approximately 5-7 minutes per batch.
- Warm the tortilla wraps or flatbreads according to package instructions (e.g., in a dry pan or microwave) to make them pliable.
- Spread a thin layer of the Greek yogurt marinade (or fresh yogurt) onto each warm wrap.
- Layer the cooked chicken strips evenly over the yogurt.
- Top generously with the diced tomato, cucumber, and chopped parsley salad, then sprinkle with the toasted pine nuts.
- Roll up the wraps tightly and serve immediately, optionally with extra mixed salad on the side.
Notes

10. **Hot Dogs**While hot dogs might not always sit at the pinnacle of healthy eating, they are undeniably one of the cheapest food options available when money is tight. If your primary goal is to eat economically without compromising on portion size or convenience, hot dogs are an absolute must-have on your shopping list. They offer a quick and satisfying meal solution that can be easily adapted.
Consider pairing them with an inexpensive bun for a classic meal, or get creative by slicing them into smaller pieces to extend their use across multiple dishes. The affordability of hot dogs means you can stretch your dollar further, making them a reliable choice for those weeks when every penny counts. They prove that sometimes, simple and straightforward is the most effective approach to frugal eating.

The Best Grilled Hot Dogs Recipe
Ingredients
Equipment
Method
- If using stewed hot-dog onions, prepare them according to your preferred method; otherwise, have sauerkraut ready.
- In a large pot or Dutch oven, combine the lager or light ale and bring to a gentle simmer over medium heat.
- Add the natural casing all-beef hot dogs to the simmering beer, ensuring they are fully submerged.
- Reduce heat to low and simmer the hot dogs for 10-15 minutes, allowing them to plump up and absorb the beer’s flavor without bursting.
- While hot dogs simmer, preheat your grill to medium-high heat, ensuring the grates are clean and oiled.
- Carefully remove the hot dogs from the beer bath using tongs, allowing any excess liquid to drain off.
- Place the hot dogs directly on the preheated grill grates and grill for 2-4 minutes per side, turning frequently, until they are evenly browned and have a desirable crisp snap.
- During the last minute of grilling, lightly toast the hot dog buns on the grill if desired, for added warmth and texture.
- Serve the grilled hot dogs immediately in toasted buns with stewed onions or sauerkraut and mustard.
- Enjoy your perfectly grilled, flavorful hot dogs.
Notes
Read more about: Bumper Stickers on Wheels: 8 Cars That Make a Statement

11. **Beans & Rice**There’s a good reason why “beans and rice diet” is a common phrase when people talk about saving money: it’s incredibly cheap and remarkably nutritious. Both canned and dried beans consistently rank among the most affordable foods you can purchase, offering an excellent source of protein and fiber that’s kind to your wallet. Paired with rice, which remains a cost-effective carbohydrate source, this duo forms a complete and satisfying meal.
This staple combination isn’t just budget-friendly; it’s also incredibly versatile. You can create a myriad of flavorful dishes by simply varying your seasonings or adding in a few inexpensive vegetables. Whether it’s classic red beans and rice, black eye peas, or a hearty addition to soups, this pairing is a testament to how humble ingredients can create substantial and delicious meals.

Flageolet Beans
Ingredients
Equipment
Method
- Rinse the dried flageolet beans thoroughly under cold running water.
- In a large pot or Dutch oven, combine the rinsed flageolet beans and the low-sodium vegetable broth.
- Bring the mixture to a boil over medium-high heat.
- Once boiling, reduce the heat to low, cover the pot, and simmer gently.
- Cook for 1.5 to 2 hours, or until the beans are tender. Check occasionally and add hot water if needed to keep the beans submerged.
- Once the beans reach desired tenderness, stir in the coarse salt.
- Continue to simmer, uncovered, for an additional 10-15 minutes to allow the flavors to meld and the broth to slightly concentrate.
- Taste the beans and adjust salt if necessary before serving.
Notes
Read more about: Beyond the Buzz: Inside the Energy Drink Industry’s Transformative Leap Towards Sustainable Packaging and a Greener Future
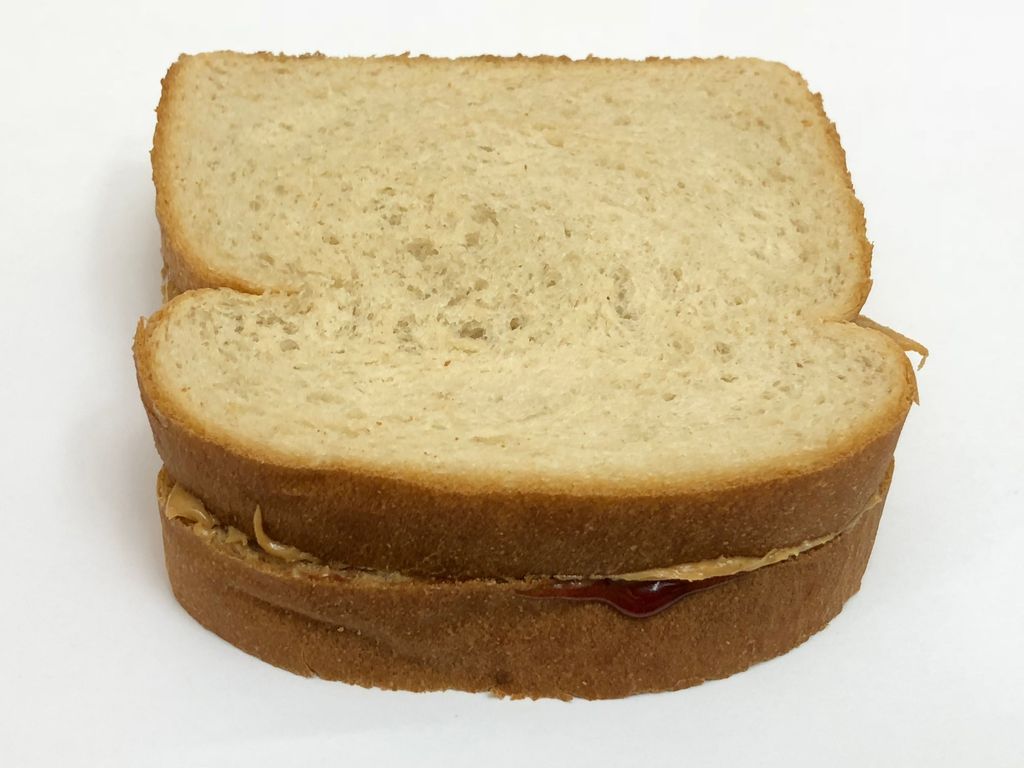
12. **Peanut Butter Sandwich**For any family focused on economical eating, the peanut butter sandwich is an absolute must-have in their meal rotation. It’s the trifecta of convenience, deliciousness, and affordability that makes it a consistent winner for quick lunches, snacks, or even a simple dinner when time and budget are tight. A good loaf of bread, which can cost about one dollar in my area, combined with peanut butter, yields many satisfying sandwiches.
Beyond the classic sandwich, peanut butter is a versatile pantry staple. It can be paired with apple slices for a healthy snack or even incorporated into other budget-friendly recipes. This simple yet effective food choice demonstrates how easily you can prepare filling and enjoyable meals without stretching your financial limits, making it a cornerstone of frugal family eating.

APPLE PEANUT BUTTER SANDWICH
Ingredients
Equipment
Method
- In a small bowl, combine peanut butter, brown sugar, and vanilla until well mixed.
- Core and thinly slice the apple into uniform pieces.
- Melt 1 tablespoon of butter in a non-stick skillet over medium heat. Add the sliced apples, cinnamon, and 1/8 cup of water.
- Cook the apples, stirring occasionally, until softened and slightly caramelized, about 3-5 minutes. Remove from skillet and set aside.
- Wipe the skillet clean. Add the remaining 1 tablespoon of butter and melt over medium heat.
- Place the two slices of whole wheat bread in the skillet and toast until golden brown on both sides.
- Spread the prepared peanut butter mixture evenly on one side of each toasted bread slice.
- Arrange the warm spiced apple slices over one piece of the peanut butter-covered bread.
- Top with the second piece of peanut butter-covered bread, creating a sandwich.
- Serve immediately for the best experience.
Notes
Read more about: Unlocking the Five Guys Universe: How Digital Innovation Transforms Your Custom Burger Experience

13. **Soups**Soups have long been celebrated as an incredibly inexpensive meal option for anyone looking to cut down on food costs. Their inherent flexibility is a major advantage, allowing you to incorporate a variety of affordable ingredients you might already have on hand, from leftover vegetables to inexpensive beans or pasta. What’s even better is that when you customize them with ingredients your family loves, they’re almost guaranteed to taste yummy!
Adding soups to your cheap meal plan is a smart strategy, particularly when you’re craving an easy comfort meal without the hefty price tag. They can be made in large batches, providing delicious leftovers for days, further maximizing your savings and minimizing cooking time during busy weekdays. Soups truly embody the spirit of making the most out of simple, affordable components.

Semolina Dumplings
Ingredients
Equipment
Method
- In a medium saucepan, bring 3 ½ cups of water (for soup) or milk (for main) with 2 tablespoons butter, 1 teaspoon sugar, and ½ teaspoon salt to a boil.
- Reduce heat to low and gradually whisk in 1 cup semolina, stirring constantly and vigorously, until a thick paste forms and pulls away from the sides of the pan.
- Remove the semolina paste from heat and transfer it to a mixing bowl; allow to cool for about 10-15 minutes, stirring occasionally.
- Add the 5 room temperature eggs one at a time, beating thoroughly after each addition until fully incorporated and the mixture is smooth and cohesive.
- Stir in 1 tablespoon chopped parsley or basil (if for soup) or ¼ teaspoon freshly grated nutmeg (if for main dish).
- Using two spoons or a small ice cream scoop, gently shape the mixture into small, uniform dumplings.
- Bring your chosen soup or cooking liquid (water or milk) to a gentle simmer in a large pot. Carefully drop the shaped dumplings into the simmering liquid.
- Poach the dumplings for 8-10 minutes, or until they float to the surface and are cooked through, firm yet tender.
- While the dumplings poach, melt and brown the remaining 3 tablespoons of butter in a small skillet over medium heat until it turns amber and smells nutty.
- Serve the cooked semolina dumplings immediately, either in your prepared soup or as a main dish drizzled generously with the warm browned butter.
Notes
2. Incorporate eggs one at a time into the cooled semolina mixture. This ensures proper emulsification and a smooth, cohesive dough, preventing a scrambled egg texture.
3. When poaching, maintain a gentle simmer, not a rolling boil, to prevent the dumplings from breaking apart or becoming tough. They are done when they float to the surface and are firm yet tender.
4. Browning butter for the main dish adds a profound nutty depth that elevates the simple flavors of the semolina.
Read more about: Nearly a Decade Behind the Scenes at Longhorn Steakhouse: Secrets, Hacks, and What I Learned

14. **Chili**Chili is another fantastic option when you’re searching for cheap foods that deliver on flavor and satisfaction. This hearty dish is perfect for stretching your budget, often relying on inexpensive ground meat (if you choose to add it, or can be made vegetarian with beans) and pantry staples like canned tomatoes and spices. It’s a meal that feels substantial and comforting without demanding expensive ingredients.
One of the great advantages of making chili is its versatility, especially when it comes to leftovers. Sometimes, I even add leftover chili to my hot dogs later on in the week, transforming a simple meal into something more substantial and exciting. This ability to repurpose and combine ingredients makes chili an indispensable tool in a frugal kitchen.

White Chicken Chili
Ingredients
Equipment
Method
- Drain and rinse the canned white beans. In a medium bowl, mash half of the beans with a potato masher until chunky. Reserve the beans until needed.
- Add the canola oil to a large Dutch oven and heat it over medium-high heat. Add the peppers, onions, and garlic and saute until soft and fragrant, about 5 minutes. Season the vegetables with salt, and pepper, to taste. Add the cumin, coriander, and chili powder and continue to saute for 1 more minute to toast the spices. Stir in the chicken stock, and lime juice and bring to a simmer. Add the beans and continue to simmer for 20 more minutes.
- After 20 minutes of simmering, taste for seasoning, and adjust if necessary. Stir in the shredded rotisserie chicken and cilantro and simmer until heated through, about 5 more minutes. Serve the chili in individual bowls topped with a dollop of sour cream, crushed tortilla chips, and lime wedges.
Notes
Read more about: The Curse of the Sequel: Why These Iconic Movie Franchises Crumbled Under the Weight of Ambition and Greed

15. **Ramen**When it comes to sheer affordability, ramen truly is as cheap as it gets. These instant noodle packs are a perennial favorite, particularly among kids, who often enjoy them just as they are. While their nutritional content isn’t the highest on their own, especially when served simply, their low cost makes them an undeniable go-to during times of extreme budget consciousness.
For those of us who prefer a bit more flavor and nutrition, ramen can be easily elevated with a few extra seasonings and ingredients. Adding an egg, some cheap veggies like carrots or frozen peas, or even a small portion of ground meat can transform it into a more satisfying and balanced meal without significantly increasing the cost. However, because it’s not the healthiest option, I personally try to avoid adding it too regularly to our weekly meal lineup.
—
**Strategic Shopping Hacks for the Ultimate Frugal Kitchen**
Beyond choosing the right ingredients, mastering the art of frugal grocery shopping involves a set of smart strategies that can save you hundreds, even thousands, of dollars each year. These aren’t just tips; they’re habits that empower you to take control of your food budget and ensure every dollar stretches further. Let’s dive into some of the most impactful ways to maximize your grocery savings.
**Make a Budget & Stick to It**
The very first step on your journey to saving money on food is to create a realistic food budget and commit to it without fail. If you’re serious about ramping up your money-saving game, it’s essential to integrate this into an overall household budget that accounts for all your income and expenditures. This holistic view provides crucial insight into how much money can realistically be allocated towards your food for the month.
The goal, of course, is to keep this allocation as low as possible without compromising your health or sanity. It might seem daunting, but believe it’s achievable. I’ve managed to feed my family on as little as $18 per week in the past, proving that significant savings are possible with dedication. Once your monthly grocery allowance is set, divide it by four to establish your weekly budget, and then meticulously plan your meals around this figure. This disciplined approach is the bedrock of successful frugal eating.
**Meal Plan & Cook at Home**
With your weekly grocery budget firmly in place, the next crucial step is to meticulously plan your meals for the upcoming week. The objective here is to select inexpensive, family-favorite dishes that are also straightforward and quick to prepare. This approach prevents the feeling of being overwhelmed by complicated recipes, which often leads to the temptation of expensive takeout.
Simplify your cooking process as much as you can by choosing meals that are quick and easy. A fantastic strategy is to double up on recipes, allowing you to utilize delicious leftovers on subsequent days, thus saving both time and money. Additionally, prepping meats and vegetables ahead of time can significantly streamline your daily cooking, making home-cooked meals a stress-free and economical reality.
**Shop Your Pantry & Make Your Cheap Grocery List**
Before you even begin to craft your grocery list, make it a golden rule to “shop your pantry” first. This vital step prevents you from accidentally buying ingredients you already have stashed away, which, over time, can lead to substantial savings. Trust me, it’s an easy mistake to make, but an even easier one to avoid with a quick inventory check.
Meal planning and shopping your pantry are two practices that truly go hand-in-hand. You can strategically plan your upcoming meals based on the ingredients you’ve already got on hand, ensuring nothing goes to waste. Always keep a close eye on expiry dates, committing to the principle that no ingredient should be left behind. This proactive approach helps you use everything you buy, maximizing value and minimizing waste.
**Use Delivery/Pick-up**
Once your carefully curated grocery list is complete, it’s time for the actual shopping, and here’s one of my biggest tips for saving money: utilize grocery delivery or pick-up services. Seriously, this method can save you big time! The primary benefit is that it acts as a powerful deterrent against impulse purchases, those little extras that quickly inflate your bill.
Online shopping simplifies the entire grocery experience dramatically. With just a few clicks, your order is placed, eliminating the endless wandering through aisles and the temptation of strategically placed items designed to catch your eye. It transforms grocery shopping into an efficient, controlled process that directly contributes to keeping your budget in check.
**Practice Money Smarts When Shopping In-Store**
Sometimes, online shopping isn’t an option, and you find yourself needing to brave the grocery store aisles in person. When this is the case, it’s absolutely critical to practice extreme money smarts. The reality is, once you step foot inside a store, you’re statistically far more prone to overspending than if you were shopping online. But with this awareness and a commitment to self-control, you can absolutely conquer the in-store challenge!
Here are some essential reminders: Always eat before you go grocery shopping; a hungry shopper is a dangerous shopper, more likely to overload their cart with unnecessary items. And for those who contribute to the “overloaded cart” phenomenon—kids and even some spouses—consider leaving them at home if possible. While in the store, remember to look beyond eye-level shelves; the most expensive products are often placed conveniently at eye-level, so look higher and lower for better deals. Always skip name-brand products for store brands, and choose canned fruits and vegetables when they offer better value. Most importantly, stick rigorously to your grocery list—not a single item more!
**Take Advantage of Sales & Coupons**
The savviest, most thrifty shoppers understand the power of strategic timing: they know how to plan their meals and select ingredients based on current sales and available coupons. This isn’t just about minor savings; taking advantage of these opportunities can significantly reduce your grocery bill over time. Be sure to actively seek out and utilize all avenues for discounts.
Many stores offer weekly flyers detailing upcoming sales, and a quick search online can reveal printable or digital coupons for items on your list. Even small discounts on individual items add up remarkably, contributing to substantial savings over the course of a month or year. A few minutes dedicated to checking for deals before you shop can make a huge difference to your bottom line.
**Buy in Bulk**
Do you have certain meal ingredients that consistently appear on your meal plan week after week? Perhaps these are family favorites or simply incredibly affordable staples. If so, you can unlock even greater savings by purchasing these specific ingredients in bulk. Buying in larger quantities typically translates to a cheaper price per unit, offering a better deal in the long run.
For example, spaghetti is a true staple in my weekly meal plan; it’s one of the cheapest foods I rely on, making an appearance every week. While buying 2-3 packs weekly costs a bit under $3, I often prefer to buy spaghetti in bulk—perhaps a larger box or a multi-pack of six—to achieve a cheaper per-unit price. Always remember to do the calculations to ensure you’re truly getting the best deal when buying in bulk, and only purchase what you’re sure to use before it expires.
**Buy in Season**
A highly effective, yet often overlooked, strategy for saving money on produce is to plan your weekly meals around ingredients that are currently in season. When fruits and vegetables are in season, they are typically in high supply, which naturally drives down their prices. This means you get fresher, better-quality produce for less money compared to out-of-season items that incur extra costs for shipping and storage.
Making the most of seasonal availability is a smart way to ensure your produce budget stretches further. Not only does it help keep your grocery costs down, but it also means you’re enjoying fruits and vegetables at their peak flavor and nutritional value. Embrace the seasonal bounty to add variety and savings to your frugal kitchen.
—

Homemade Tonkotsu Ramen
Ingredients
Equipment
Method
- Bring a large stockpot of generously salted water to a rolling boil for the ramen noodles.
- While the water heats, cut the pork fat into small, uniform pieces to ensure even rendering.
- Place the cut pork fat into a medium saucepan over low to medium heat. Slowly render the fat, stirring occasionally, until cracklings are golden brown and crisp, and the lard is fully extracted.
- Carefully strain the rendered pork fat (lard) through a fine-mesh sieve into a heatproof container, separating it from the crispy cracklings. Set both aside.
- Once the water is boiling vigorously, add the ramen noodles and cook according to package directions, aiming for an al dente texture.
- Immediately drain the cooked noodles using a fine-mesh strainer or colander.
- Optionally, briefly rinse the noodles under cold water if preparing ahead to prevent sticking, or proceed directly to serving if ready.
- Portion the cooked noodles into serving bowls.
- Garnish the noodles with some of the prepared crispy pork cracklings and a drizzle of the rendered pork lard for enhanced flavor and texture.
- Serve these components as foundational elements for a homemade Tonkotsu Ramen.
Notes
Read more about: Discovering the No Color Hair Color Trend: A New Era in Hair Fashion
Eating well on a budget truly doesn’t have to be a source of stress or compromise. By thoughtfully selecting affordable staple foods and integrating these strategic shopping hacks into your routine, you can create a kitchen that’s both economical and abundant. From mastering meal planning to making smart choices in the aisles, every deliberate step contributes to significant savings. Embrace these practical strategies, stay disciplined, and discover the immense satisfaction of feeding yourself and your family delicious, nutritious meals without ever overspending. The ultimate frugal kitchen is not just about cutting costs; it’s about smart choices that empower a richer life.
: Comfort Food Classic with History & Easy Recipe")

