

Remember those dishes that defined American dinner tables for generations? The comfort foods grandma whipped up on Sunday afternoons, or the quirky concoctions that were always a hit at potlucks? Well, times are changing, and so are our eating habits! It’s wild how some foods can go from being absolute staples to something you’d struggle to find on a menu or even in a grocery store aisle today.
Just like fashion trends that come and go, think film cameras or pedal pushers, food trends also ebb and flow with our ever-changing tastes, interests, and even technological advancements. What was once the pinnacle of culinary cool can, surprisingly quickly, fall completely out of favor. America’s dinner tables have always reflected the nation’s shifting tastes, evolving health trends, and changing cultural influences.
Over the decades, numerous once-beloved foods have faded from the spotlight, some quietly vanishing from shelves, others replaced by trendier or healthier alternatives. We’re talking about dishes that were once everywhere, from family kitchens to fancy dinner parties, and now they’re more of a nostalgic novelty. Let’s take a wild, tasty trip down memory lane and seriously ask: Why the shift? Why are these 14 beloved American foods no one reaches for anymore?

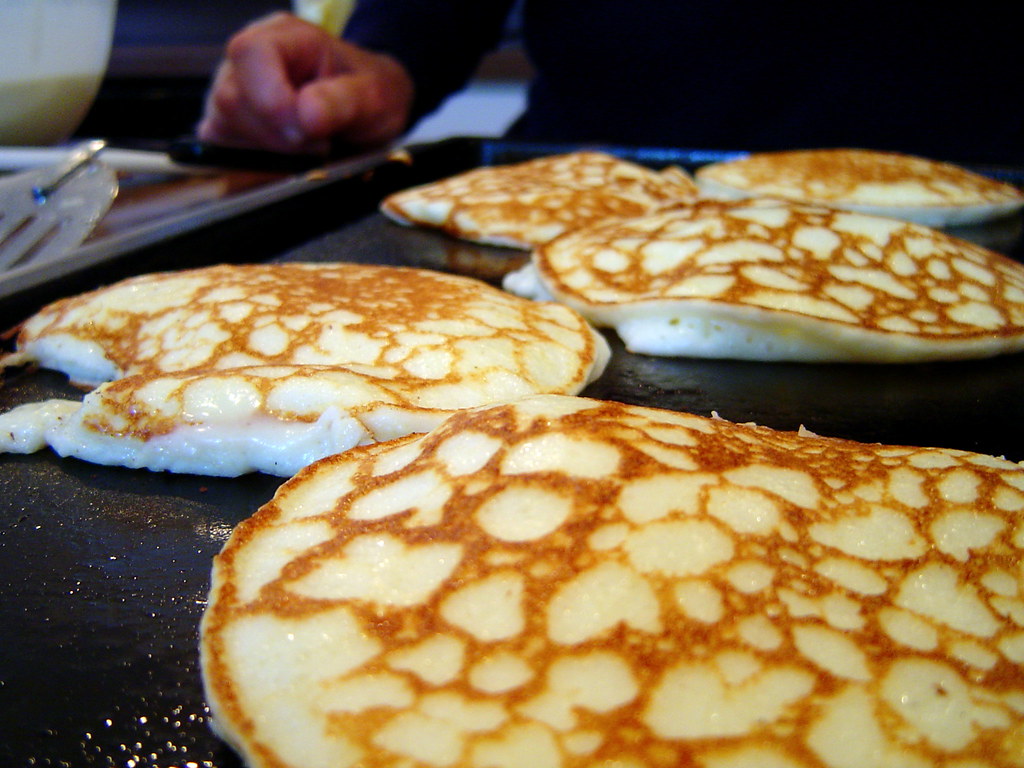
1. **Jell-O Salad**Ah, Jell-O salad. This vibrant, shimmering concoction was an unmistakable fixture of dinner parties, especially in the 1950s! Imagine elaborate molded salads incorporating everything from whipped cream and pineapple to mini marshmallows. These gelatin-based creations symbolized mid-century innovation, offering a playful way to serve both sweet and savory dishes, and they were especially popular for their convenience and visual appeal, often molded into elaborate shapes for maximum table impact.
The concept of a Jell-O salad, or gelatin salad, became a traditional side on American tables, often mixing savory and sweet ingredients. We’re talking fruit, grated carrots and other vegetables, cottage and cream cheese, marshmallows, and even crunchy fillings like pretzels and nuts! After Jell-O was invented in the late 1800s, making it easy to create gelatin-based foods, the first jello mold popped up in Pennsylvania in 1904 by Mrs. John E. Cook. Talk about making a splash!
However, by the mid-1970s, their popularity had crashed so dramatically that several flavors were discontinued entirely. Their decline can be directly attributed to the rise in women joining the workforce in larger numbers, who demanded quicker and simpler meal solutions than labor-intensive molded gelatin masterpieces. These days, Jell-O salads are more likely to be found in retro cookbooks than on dinner tables. Most younger Americans today have never experienced the polarizing textures of lime Jell-O, cottage cheese, and canned pears, and the move toward fresh ingredients and simpler preparations has left these quirky concoctions behind. While some families still make them for the sake of nostalgia, most younger generations view them as a culinary curiosity rather than a must-have dish.

Raspberry Jell-O Salad
Ingredients
Equipment
Method
- Crush graham cracker sheets into fine crumbs, then combine with melted butter and 1 tablespoon of sugar and a pinch of salt until well mixed.
- Press the graham cracker mixture evenly into the bottom of a 9×13-inch baking dish; chill for at least 30 minutes to set.
- In a saucepan, bring 2 cups of water to a boil, then remove from heat and whisk in the raspberry gelatin powder until fully dissolved.
- Add the frozen raspberries, remaining lemon juice, and the majority of the remaining salt to the dissolved gelatin, stirring gently to combine.
- Pour the raspberry gelatin mixture over the chilled graham cracker crust and refrigerate for at least 2-3 hours, or until firmly set.
- In a large mixing bowl, beat the room temperature cream cheese with the remaining 2 tablespoons of sugar and a pinch of salt until smooth and creamy.
- In a separate chilled bowl, whip the cold heavy cream until soft peaks form.
- Gently fold the whipped cream into the cream cheese mixture until just combined, being careful not to overmix.
- Once the Jell-O layer is completely set, spread the cream cheese topping evenly over it.
- Refrigerate the salad for at least another 1-2 hours to allow the topping to set and the flavors to meld, then serve chilled.
Notes
Read more about: Step Back in Time! 14 Jaw-Dropping Pictures That Prove the 1950s Were Totally Wild and Way Cooler Than You Think
2. **Cottage Cheese**Once upon a time, cottage cheese was a bona fide superstar in America, particularly as a popular snack food in the 1970s. Can you believe the average American ate nearly 5 pounds of cottage cheese back then, according to the U.S. Department of Agriculture? It was even marketed heavily as a slimming food throughout the 1970s and well into the 1990s, with its consumption increasing rapidly throughout the country, reaching approximately 4.6–5.3 pounds per capita in the early 1990s.
But then, something shifted. Consumption declined sharply in the 1980s, largely due to the meteoric rise in popularity of yogurt. The yogurt industry, with its superior taste, smoother texture, and more charming marketing, was directly responsible for cottage cheese’s fall from grace. It seemed like everyone swapped their curds for creamy, fruity yogurt cups, leading to a significant drop in cottage cheese sales.
Statista reports that by the early 2020s, the figure declined to about 2 pounds of cottage cheese per person per year, marking a decline of as much as 58%. It’s fascinating how tastes evolve! Interestingly, this high-protein food has slowly started to make a resurgence, thanks to TikTok and Instagram social media influencers. Americans are realizing it’s incredibly versatile—did you know you can use cottage cheese to make ice cream? Now, viral cottage cheese recipe hacks are shared widely across platforms, proving that even a once-forgotten food can find new life!
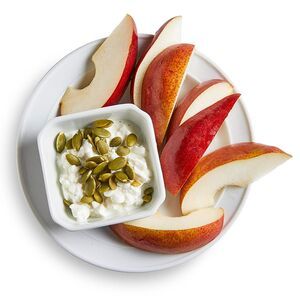
Pear & Cottage Cheese
Ingredients
Equipment
Method
- Wash the pear thoroughly.
- Using a paring knife, carefully slice the pear into desired pieces, removing the core.
- Measure ¼ cup of low-fat cottage cheese and place it into a serving bowl.
- Add 1 tablespoon of pepitas to the bowl, alongside the cottage cheese.
- Arrange the sliced pear around or on top of the cottage cheese and pepitas.
- Serve immediately.
Notes
Read more about: Cracking the Code: Can Diabetics Safely Enjoy Watermelon? Your In-Depth Guide to Fruit and Blood Sugar Management
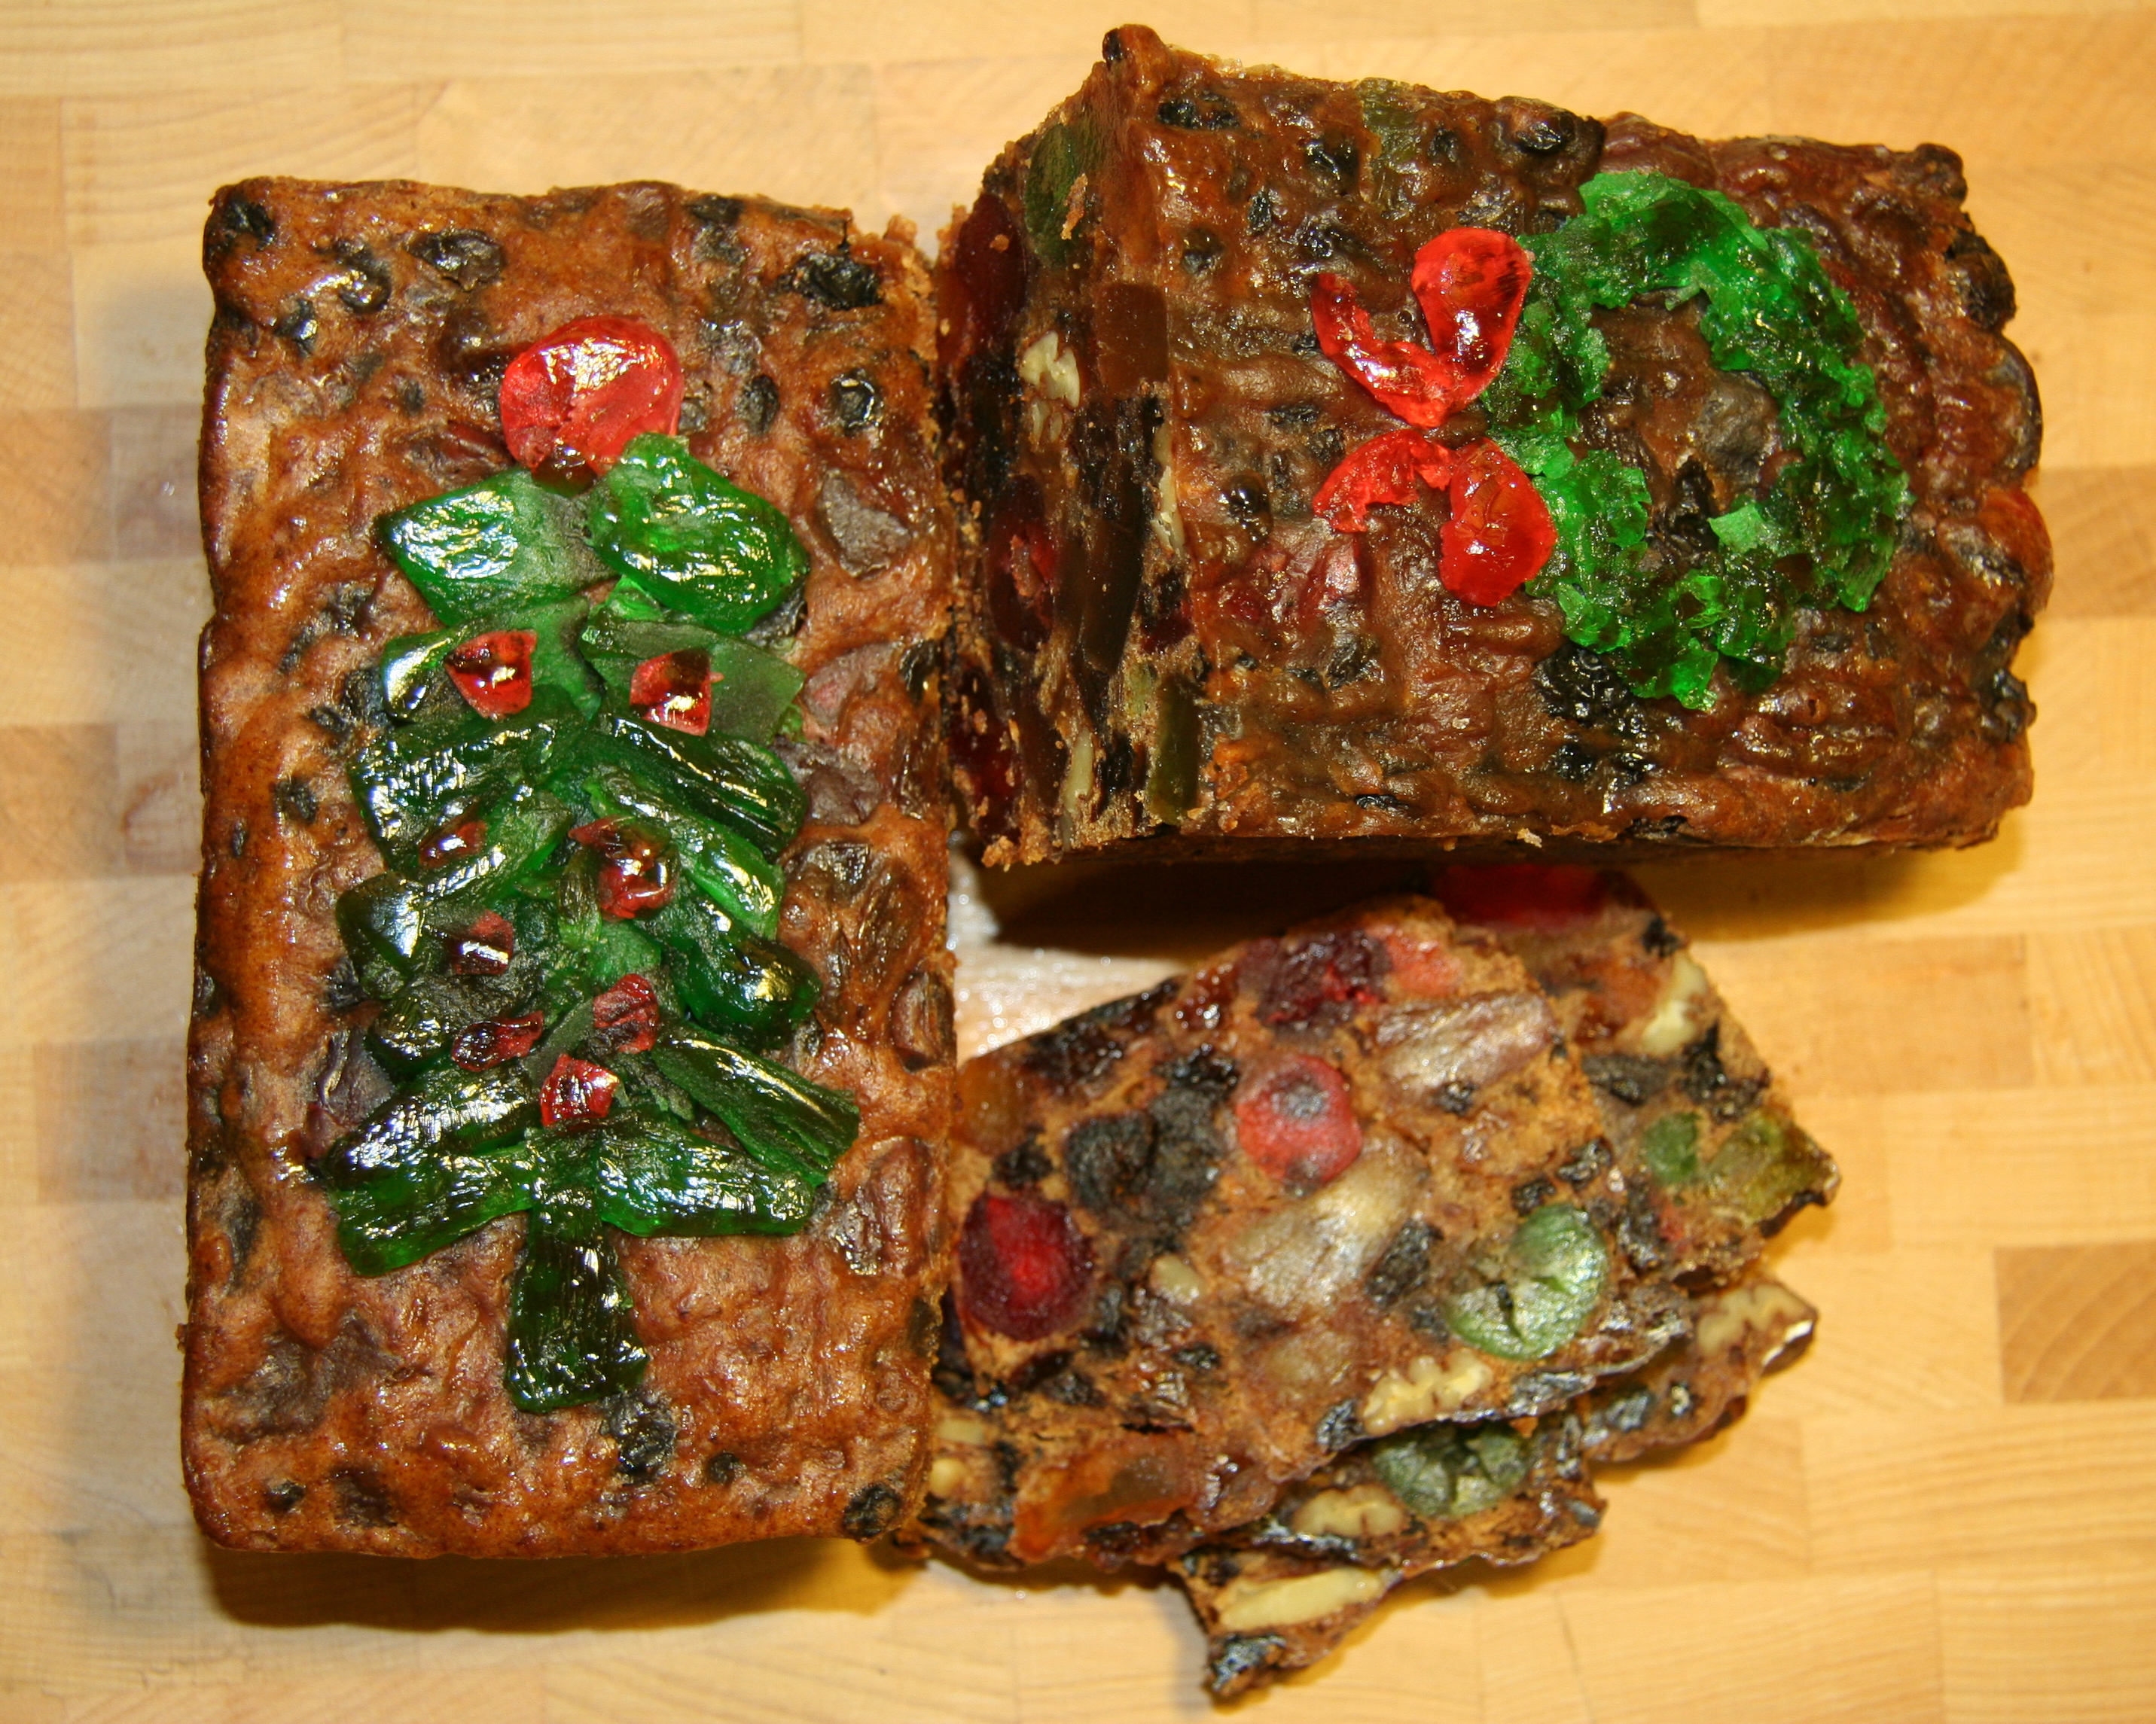
3. **Fruitcake**Fruitcake, oh fruitcake! This dense, boozy, and often maligned dessert, studded with candied fruits and nuts, was once a festive cornerstone of American celebrations. Its history dates back as early as ancient Roman times, where it was more of a sweet energy bar made with barley, honey, pomegranate seeds, wine, and dried fruit. Versions of this delicacy spanned different countries and cultures, becoming most ubiquitous as a sweet treat to celebrate the holidays. It’s even the chosen cake served at royal weddings – talk about a glow-up!
Families once devoted entire afternoons to assembling and baking fruitcakes or placed orders with specialty bakeries months in advance. It was a true labor of love, a centerpiece that symbolized holiday tradition and abundance. The expectation was that this rich, flavorful cake would be a cherished part of the festive season, something eagerly anticipated by all.
However, tastes changed, and the home-baked allure and popularity of fruitcakes fell with dry mass-produced cakes. The decline in popularity can also be attributed to the unfortunate reputation fruitcakes have earned as the quintessential unwanted gift, often regifted for years, and the subject of countless jokes. A recent Mashed survey even found that 43% of participants chose fruitcake as the holiday dessert they’d least like to see at a Christmas party, making it the most disliked dessert in the ranking. Ouch! From royal weddings to the most disliked dessert, fruitcake has certainly had a journey.
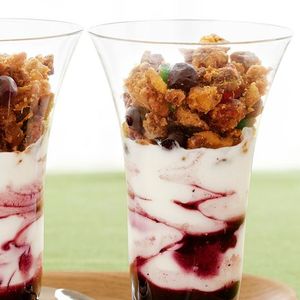
Fruitcake Parfaits
Ingredients
Equipment
Method
- Crumble the fruitcake into small, bite-sized pieces using your hands, a knife, and a cutting board, ensuring an even texture.
- Place the thawed blueberries in a small mixing bowl; gently mash a portion of them to release more juice and enhance the flavor.
- Prepare four individual parfait glasses or dessert bowls for assembly.
- Distribute an even layer of the crumbled fruitcake at the bottom of each glass.
- Spoon a layer of the prepared blueberries, including any released juices, over the fruitcake in each glass.
- Add a generous layer of plain yogurt over the blueberries in each glass, smoothing the top.
- Repeat the layering process, starting with fruitcake, then blueberries, and finally yogurt, until the glasses are filled to the top, ending with a yogurt layer.
- Optionally, garnish each parfait with a few extra whole blueberries or a small sprig of fresh mint for enhanced presentation.
- Cover the assembled parfaits and refrigerate for a minimum of 30 minutes to allow the flavors to meld and the fruitcake to soften.
- Serve the chilled fruitcake parfaits as a refreshing dessert or a unique breakfast item.
Notes
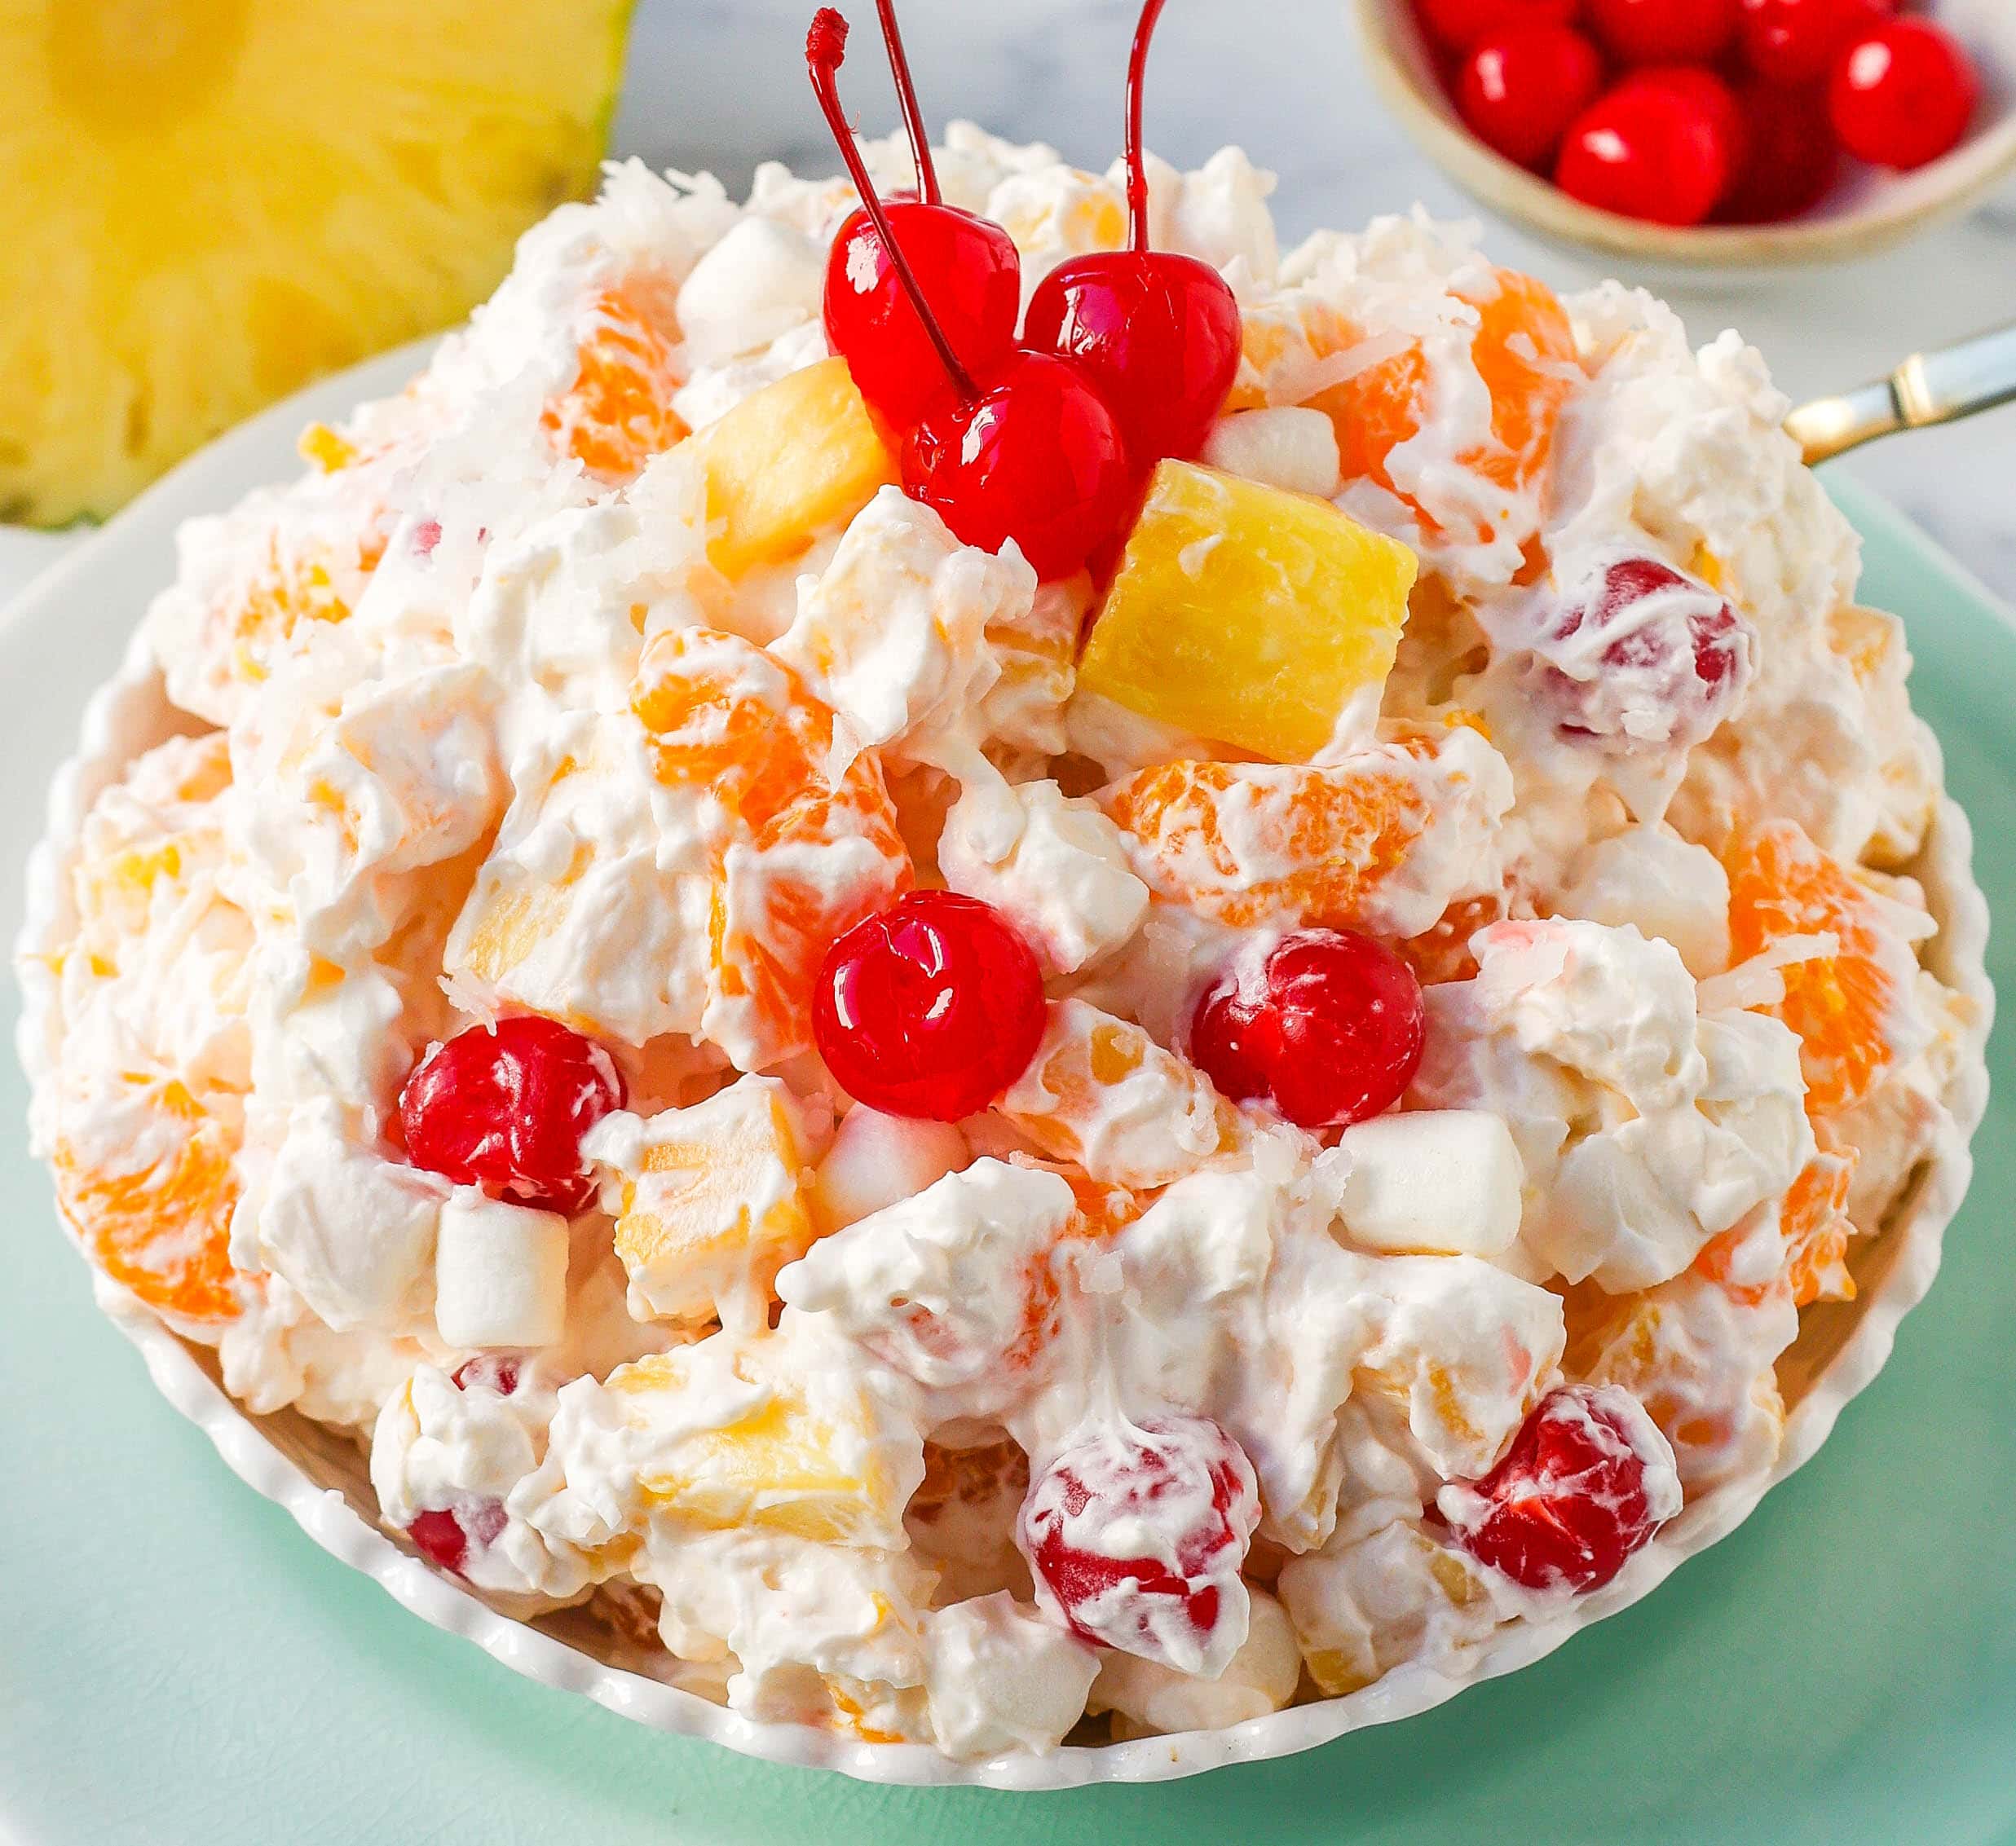
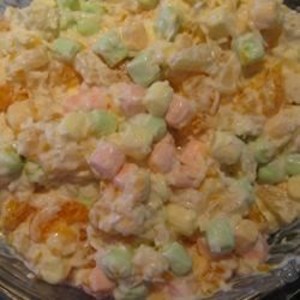
4. **Ambrosia Salad**Ambrosia salad! The very name, of Greek origin, translates as ‘food of the gods,’ which tells you just how revered this dish once was. This colorful Southern potluck mainstay, a trifecta of citrus, coconut, and marshmallows, was considered an impressive treat to set before dinner guests. It started appearing in cookbooks in the 1800s, especially when citrus fruit became easier to get ahold of, and soon became an American staple across dinner tables nationwide. This sweet creamy salad typically included canned pineapple, canned mandarin oranges as well as fresh oranges, miniature marshmallows, and coconut.
For a long time, this fruit salad remained incredibly popular because coconut and citrus were luxuries for most Americans. It became a staple across Southern states in the 20th century, with its creamy, fruity flavor and pastel colors making it a favorite for children and adults alike. For many, ambrosia salad was a symbol of celebration and family togetherness, a fixture at holiday gatherings, especially in the South.
However, its reign as a dinner table MVP has dwindled. Ambrosia salad is currently only visible at Thanksgiving and Christmas feasts, and not even as widely as it once was. Fewer people include it in their regular holiday menus, as preferences have shifted toward lighter and less sugary desserts. Nowadays, nostalgic occasions or family reunions are among the few places where ambrosia salad still makes an appearance. The salad’s decline marks the end of an era in American dessert traditions, a bittersweet departure for the ‘food of the gods.’
Ambrosia Salad
Ingredients
Equipment
Method
- Open the cans of mandarin oranges and pineapple chunks using a can opener.
- Thoroughly drain the mandarin oranges and pineapple chunks in a colander, pressing gently to remove all excess liquid.
- In a large mixing bowl, combine the well-drained mandarin oranges, drained pineapple chunks, miniature marshmallows, and flaked coconut.
- Add the sour cream to the bowl with the other ingredients.
- Gently fold all ingredients together using a spatula or large spoon until everything is evenly coated and well combined.
- Cover the mixing bowl tightly with plastic wrap or a lid.
- Refrigerate the Ambrosia salad for at least 1 hour, or preferably longer, to allow the flavors to meld and the salad to chill thoroughly.
- Before serving, give the salad a final gentle stir.
- Transfer the chilled Ambrosia salad to a decorative serving bowl.
- Serve cold as a refreshing dessert or a sweet side dish.
Notes
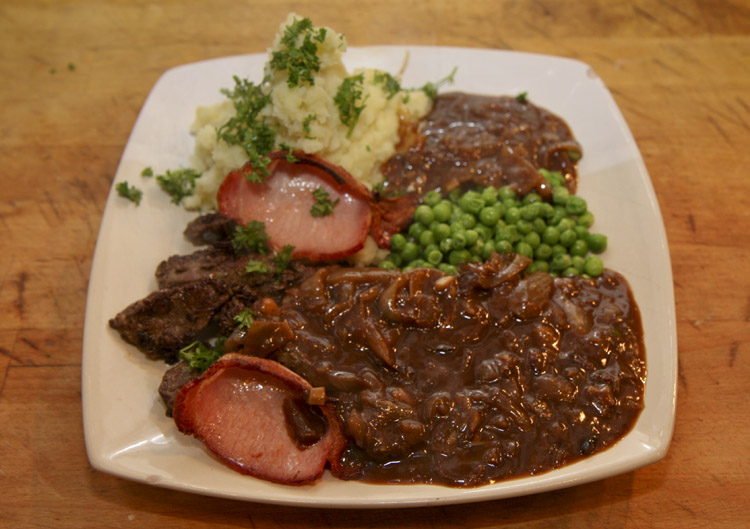
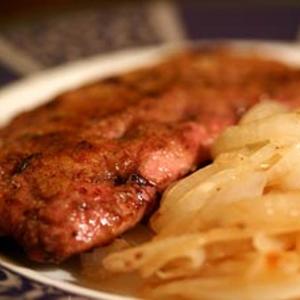
5. **Liver and Onions**Liver and onions, a dish prized for its nutritional value and affordability, was once a regular feature on many American dinner tables and restaurant menus. Its strong, distinctive flavor and aroma certainly made it a love-it-or-hate-it meal, but for many, it was a comforting reminder of home-cooked dinners. Despite liver being one of the most nutritionally dense foods available, packed with vitamins and minerals, it has seen a significant decline in popularity.
The shift is directly tied to a general aversion among younger people toward liver and offal. Younger generations are simply far less inclined to order or eat them, leading to liver and onions largely disappearing from restaurant menus. It’s a culinary mystery how something so rich in nutrients could fall out of favor so dramatically!
While it rarely features in modern meal choices, be it breakfast, lunch, or dinner, the demand for beef liver tells a different story on a global scale. According to Research Nester, the global beef liver market was valued at approximately USD 5.4 billion in 2024 and is projected to grow to USD 15.03 billion by 2037, with a robust compound annual growth rate (CAGR) of 7.7%. This suggests that while individual American plates might be shying away, there’s still a significant, perhaps industrial or international, demand for the ingredient. But for your average diner in the U.S., it’s a dish from a bygone era, reflecting broader changes in American eating habits and preferences towards milder flavors and more familiar cuts of meat.
Liver And Onions
Ingredients
Equipment
Method
- Thinly slice the yellow onions and the calves liver; ensure liver is patted dry.
- In a shallow dish, whisk together the flour with salt, pepper, paprika, and dry mustard to taste.
- Heat the bacon fat in a large frying pan or skillet over medium heat.
- Add the sliced onions to the hot fat and cook slowly, stirring occasionally, until deeply caramelized and tender, about 15-20 minutes. Remove onions from the pan and set aside.
- Lightly dredge each slice of liver in the seasoned flour, shaking off any excess.
- Increase the heat to medium-high and add more bacon fat if needed. Sear the floured liver slices for 2-3 minutes per side, or until a nice crust forms and the interior is slightly pink (do not overcook).
- Return the caramelized onions to the pan with the cooked liver and gently toss to combine and warm through.
- Serve immediately, garnished if desired.
Notes
Read more about: Forget What You Thought: Why Motor City Pizza’s Reign Isn’t Ending, It’s Just Getting Started!

6. **Aspic and Savory Gelatin Salads**Get ready for a blast from the past, because aspic and savory gelatin salads were once the absolute height of culinary sophistication and a huge status symbol at dinner parties in the first half of the 20th century! Imagine shimmering towers of gelatin, not with fruit and marshmallows, but with vegetables, meats, or even seafood. These elaborate, shimmering molds graced the tables of formal dinners and special occasions, admired for their artistry as much as their taste.
The ability to serve such a visually stunning dish demonstrated one’s sophistication and access to modern conveniences. This was especially true at a time when only a small percentage of the population had electricity in their homes, let alone refrigerators and freezers! Aspic was a way for home cooks to demonstrate their skills and impress guests, showcasing true culinary creativity.
However, times change, and so do palates. Gelatinous savory dishes like aspic have little appeal to modern tastes. The dish has virtually disappeared from American kitchens, remembered mostly as a symbol of retro culinary excess. Its decline reflects changing preferences and a move away from labor-intensive, visually driven foods that might not always deliver on taste for contemporary diners. It’s a fascinating look at how what we consider ‘fancy’ has completely transformed!

7. **Meatloaf**Grandma’s go-to dinner staple, the mighty meatloaf, is vanishing faster than leftovers at a potluck! This ground beef and breadcrumb concoction was once the weekly centerpiece that allowed families to make a small amount of pricey meat last for several days. In the United States, red meat consumption, particularly beef, has decreased significantly in recent decades. According to USDA data, in 1976, Americans consumed about 89 pounds of red meat per capita, and that number has steadily declined.
Meatloaf was a weeknight hero, a comforting, hearty meal that filled bellies and stretched budgets. It represented a time when families gathered around the table for a simple, yet satisfying, home-cooked dinner. Its affordability and versatility made it an indispensable part of countless American households for generations, a true symbol of economical and nourishing fare.
However, the culinary landscape has evolved, and the classic meatloaf has been replaced by a far wider variety of options than in previous generations. Modern diets lean towards less processed and diverse meal solutions. Although restaurants in the United States continue to offer meatloaf as part of their menus, it is becoming a relic of a bygone era. It’s now often seen as a nostalgic dish, rather than a regular fixture, signaling a broader shift in how and what Americans choose to eat at home.
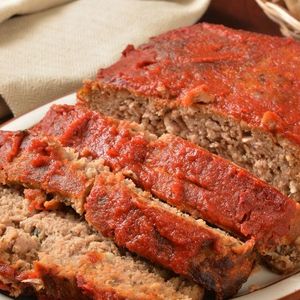
Meatloaf
Ingredients
Equipment
Method
- Preheat your oven to 350°F (175°C).
- Finely chop the onion, garlic, and fresh parsley as specified in the ingredients list.
- In a large mixing bowl, combine the meatloaf mix, cooked oatmeal, chopped onion, parsley, soy sauce, eggs, garlic, thyme, and black pepper.
- Mix gently with your hands until all ingredients are just incorporated, taking care not to overmix the meat mixture.
- Form the mixture into an oblong loaf shape and place it into a standard loaf pan or onto a foil-lined baking sheet.
- Evenly spread the chili sauce over the top surface of the meatloaf.
- Bake for 60-70 minutes, or until the internal temperature of the meatloaf reaches 160°F (71°C) when checked with a meat thermometer.
- Remove the meatloaf from the oven and let it rest for 10-15 minutes before slicing to allow the juices to redistribute.
- Slice the meatloaf into desired portions and serve warm.
Notes
Read more about: Beyond the Stars and Stripes: Unmasking the Surprising International Roots of 15 ‘All-American’ Foods

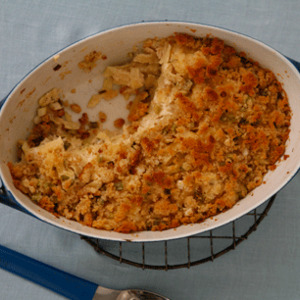
8. **Tuna Noodle Casserole**Talk about a weeknight hero! Tuna noodle casserole was a go-to recipe for busy families in the post-war era. This budget-friendly dish combined canned tuna, noodles, a creamy sauce usually made with canned cream of mushroom soup, and often a crunchy topping. It was affordable, incredibly filling, and super easy to whip up in large batches, making it a staple that truly nourished generations.
This simple concoction became synonymous with comfort food, a warm hug in a bowl, and was a regular fixture at countless potlucks and church suppers across America. Quaint Cooking even points out its status as a weeknight hero. It represented a time when families valued economical, hearty meals that could stretch to feed everyone without too much fuss, creating a sense of togetherness around the dinner table.
However, interest in tuna noodle casserole has waned significantly in recent years. A major reason for its disappearance from dinner tables is the growing distrust of canned tuna and processed ingredients in general. U.S. tuna sales have plummeted by almost 40% since the mid-1980s, dragging this classic casserole down with it.
The decline in tuna’s popularity can also be attributed to increasing concerns over mercury levels, a growing preference for fresh, minimally processed ingredients, and a broader shift away from sodium-heavy options. The classic tuna noodle casserole, relying almost entirely on ingredients straight from a can—like that canned cream of mushroom soup and canned peas—just doesn’t fit into modern dietary preferences for healthier, fresher fare. While some still enjoy it for its sheer nostalgia, it’s definitely no longer the household staple it once was.
Tuna–Noodle Casserole
Ingredients
Equipment
Method
- Preheat your oven to 375°F (190°C). Lightly grease a 9×13-inch baking dish.
- Bring a large pot of generously salted water to a rolling boil. Add the flat egg noodles and cook according to package directions until al dente. Drain thoroughly.
- In a large saucepan or Dutch oven, melt 6 tbsp. of butter over medium heat. Add the chopped scallions and sauté until softened, about 3-4 minutes.
- Whisk in the flour and dry mustard. Cook, stirring constantly, for 1-2 minutes to create a smooth roux and cook out the raw flour taste.
- Gradually whisk in the milk, adding it slowly to prevent lumps. Bring the mixture to a simmer, whisking frequently, and cook until the sauce thickens to a creamy consistency, approximately 5-7 minutes.
- Season the sauce generously with salt and freshly ground black pepper to taste.
- Add the drained tuna, broken into small chunks, and the cooked, drained noodles to the sauce in the pot. Stir gently to combine all ingredients thoroughly.
- Transfer the entire tuna-noodle mixture into the prepared baking dish, spreading it evenly.
- In a small pan, melt the remaining 4 tbsp. butter. Add the fresh white bread crumbs and toss until they are evenly coated. Sprinkle the buttered bread crumbs over the top of the casserole.
- Bake for 25-30 minutes, or until the casserole is bubbling around the edges and the bread crumb topping is golden brown and crisp. Let stand for a few minutes before serving.
Notes
Read more about: Unlock the Secrets: Your Ultimate Guide to Pairing Wine with Beloved Comfort Foods
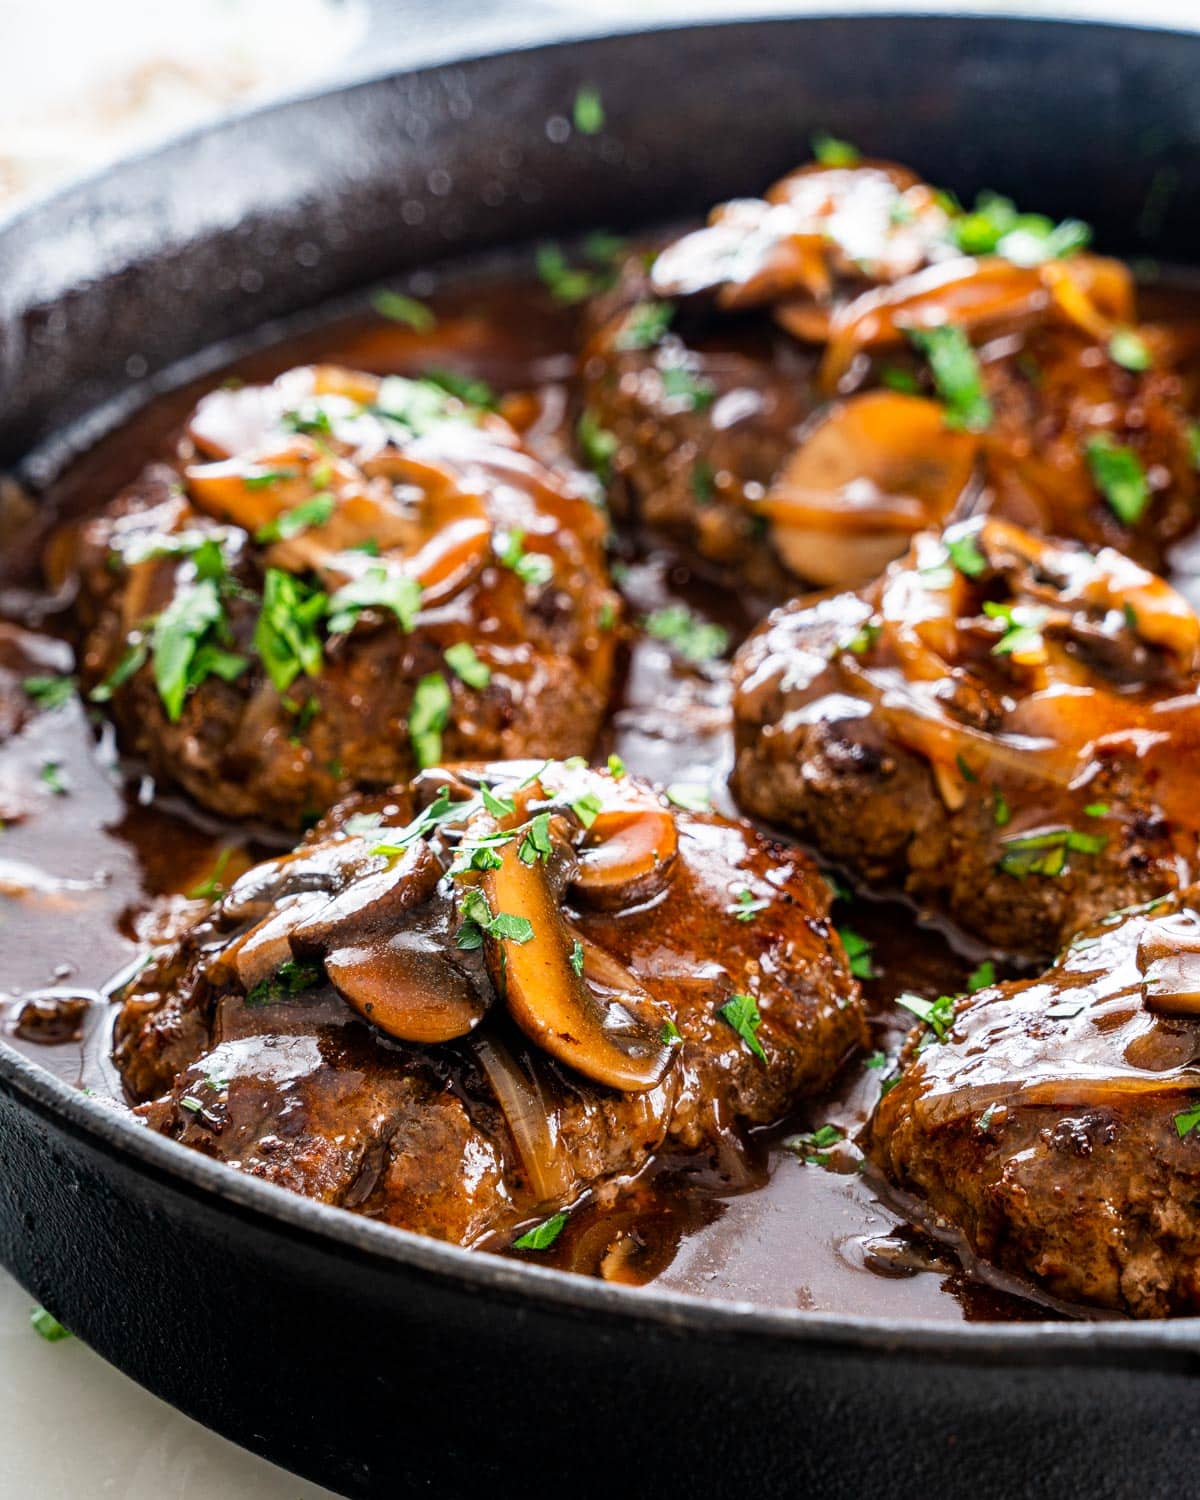
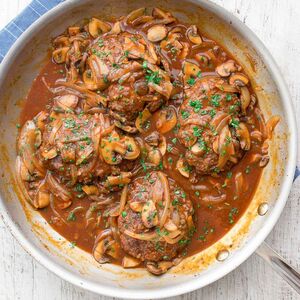
9. **Salisbury Steak**Ah, Salisbury steak – the quintessential diner and TV dinner mainstay! This dish, consisting of a ground beef patty served smothered in savory brown gravy, often alongside mashed potatoes, offered a hearty and comforting meal that was both affordable and satisfying. In the mid-20th century, Salisbury steak was a popular choice for families looking for a filling dinner that mimicked a steakhouse experience right at home, but without the hefty price tag.
Interestingly, the dish is named after Dr. James Salisbury, an early pioneer of germ theory, who actually popularized ground beef patties as a cure for digestive illness for troops during the Civil War. He claimed that a diet high in beefsteak and coffee could help cure digestive diseases, believing beef was easier to digest than root vegetables. It then became a common dish served to troops in World War I and remained a staple on American tables for decades.
However, much like other frozen meal favorites, Salisbury steak has experienced a significant decline in sales over the past decade. Between 2010 and 2020, the entire frozen meal category saw a downturn as consumers increasingly gravitated toward fresh, organic, and more health-conscious alternatives. The convenience factor simply wasn’t enough to outweigh changing tastes and preferences.
Nowadays, Salisbury steak is seldom seen outside of specialized frozen meal sections or old-fashioned diners that cling to retro menus. The prevailing trend toward fresher, less processed meats and a greater interest in diverse, internationally-inspired cuisines has unfortunately left Salisbury steak behind. While it still holds a nostalgic spot for some, it’s certainly no longer the dinner table fixture it once was.
Salisbury Steak with Mushroom Gravy
Ingredients
Equipment
Method
- In a large mixing bowl, gently combine the ground beef, breadcrumbs, egg, salt, and ground black pepper until just mixed.
- Divide the mixture into four equal portions and shape them into oval or round patties, about 3/4-inch thick.
- Heat the neutral-flavored cooking oil in a large skillet over medium-high heat until shimmering.
- Carefully place the patties in the hot skillet and sear for 4-6 minutes per side, until deeply browned and cooked through. Remove patties and set aside.
- Reduce the heat to medium. Add sliced mushrooms to the skillet and cook, stirring occasionally, until softened and lightly browned (approximately 5-7 minutes).
- Sprinkle 1-2 tablespoons of all-purpose flour over the mushrooms, stirring to coat, and cook for 1 minute to remove the raw flour taste.
- Gradually whisk in 2 cups of beef broth (or stock) and a teaspoon of Worcestershire sauce, scraping up any browned bits from the bottom of the pan.
- Bring the gravy to a simmer, stirring continuously, and cook until it thickens to your desired consistency.
- Return the cooked patties to the skillet, nestling them into the gravy.
- Simmer for 5-7 minutes, allowing the flavors to meld and the patties to warm through. Taste and adjust seasoning before serving.
Notes
Read more about: You’re Not Alone: Some Everyday Things That Become Surprisingly Annoying As You Get Older

10. **TV Dinners**Get ready for a serious blast from the past, because the invention of the TV dinner absolutely revolutionized mealtime in the 1950s! As television sets became a staple in U.S. households, these compartmentalized trays, typically filled with main dishes like Salisbury steak, mashed potatoes, and often a brownie for dessert, offered families a quick and easy way to enjoy a meal while watching their favorite shows. They became an instant symbol of convenience and modern living.
For decades, these humble TV dinners were a true staple in American freezers, promising a hot, fully cooked, ready-to-eat meal in mere minutes. Slightly different from the frozen dinner selections we see today, these classic trays often contained a main course in a gravy sauce, side dishes like peas, carrots, or corn, and sometimes even a little chocolate cake! They were a lifesaver for busy parents and a treat for kids.
However, as Americans have become increasingly health-conscious and interested in fresh, minimally processed foods, frozen TV dinners have lost much of their former appeal. Modern consumers are on the hunt for meals with fewer preservatives and more natural ingredients, which unfortunately makes the classic TV dinner a relic of the past. The broader frozen meal category saw a significant downturn between 2010 and 2020, reflecting this major shift in consumer habits.
Today, TV dinners are more of a nostalgic novelty, a quirky throwback to a simpler time, rather than a regular dinner staple. Their decline is a clear indicator of how our priorities around food have changed, moving from ultimate convenience to a greater focus on health, freshness, and culinary variety. It’s truly fascinating how something so groundbreaking can become a historical footnote!

Janette’s Healthy TV Dinners
Ingredients
Equipment
Method
- Prepare the Portobello Ragout first: Sauté chopped onions in olive oil until translucent, then add garlic and chopped portobello mushrooms, cooking until softened and browned. Season with salt, Parmesan, dry nonfat milk, and parsley, simmering briefly.
- Cook lasagna noodles according to package directions until al dente; drain, rinse with cold water to prevent sticking, and lay flat.
- Make the ricotta filling for the roll-ups: In a mixing bowl, combine lowfat ricotta, well-drained defrosted spinach, kosher salt, black pepper, cayenne pepper, nutmeg, and 1 tablespoon of grated Parmesan.
- Prepare the meatless meatballs: In another bowl, combine whole wheat breadcrumbs, 1 tablespoon Parmesan, 1 1/2 cups of the prepared Portobello Ragout, ground toasted almonds, egg white, and garlic salt. Form into small balls and brown them in a skillet sprayed with olive oil.
- Assemble the lasagna roll-ups: Spread the ricotta mixture evenly over each lasagna noodle, then top with a thin layer of the remaining Portobello Ragout. Carefully roll each noodle and place seam-side down into individual oven-safe dishes or TV dinner trays.
- Cook the frozen peas according to package directions, then season lightly with butter-flavor cooking spray.
- Prepare the peach dessert: Fill each drained peach half with lowfat granola, then sprinkle with ground cloves and cinnamon.
- Assemble the TV dinners: In each individual dish, arrange two lasagna roll-ups, a portion of the meatless meatballs, a serving of the seasoned peas, and two granola-filled peach halves.
- Bake the assembled TV dinners in a preheated oven at 375°F (190°C) for 20-25 minutes, or until the lasagna is heated through and the cheese is bubbling.
- Serve immediately or allow to cool completely before covering and refrigerating or freezing for later.
Notes
Read more about: From Cabo Sunsets to Vegas Lights: A Deep Dive into Selena Gomez’s ‘Fun But Chill’ Bachelorette & Benny Blanco’s Bachelor Parties!

11. **Baked Alaska**Baked Alaska, with its stunning layers of cake and ice cream encased in a perfectly toasted meringue, was once the ultimate showstopper dessert! Served dramatically flambéed at the table in upscale restaurants or painstakingly crafted at home for special occasions, it truly dazzled guests with both its exquisite taste and its theatrical presentation. This dessert was the magnum opus for any home cook looking to truly wow their guests at a dinner party.
Crafting a Baked Alaska is no small feat; it requires immense skill, demanding the precise cooking and freezing of multiple components before the grand finale of torching the meringue topping tableside. It was a labor-intensive affair, a testament to culinary dedication, and a symbol of elegant entertaining. Its impressive nature made it a go-to for hosts who wanted to leave a lasting impression.
However, the intricate dance of creating this dessert has contributed to its decline. The technical difficulties and significant labor required to create a Baked Alaska mean that fewer home cooks attempt it today, and it’s seldom seen on restaurant menus. The culinary world has also seen a movement away from such fussy, over-the-top desserts in favor of simpler, less production-heavy sweet treats.
According to Tastewise, a staggering statistic reveals that only 0.04% of restaurants currently offer Baked Alaska on their menus. This dramatic decline in popularity is a testament to both the skill required to make it and the evolving tastes and time constraints of modern life. It’s a bittersweet departure for a dessert that once commanded such attention and applause.

Baked Alaska
Ingredients
Equipment
Method
- Cut the pound cake into desired serving-sized pieces, typically squares or rounds.
- Place each piece of pound cake onto a baking sheet lined with parchment paper.
- Scoop approximately 2 ounces of firm chocolate ice cream onto the center of each pound cake piece, shaping it neatly.
- Immediately transfer the baking sheet to the freezer and freeze for at least 2 hours, or until the ice cream is rock solid.
- In a very clean mixing bowl, combine egg whites and cream of tartar.
- Using an electric mixer, whip the egg whites on medium-high speed until soft peaks form.
- Gradually add the sugar, one tablespoon at a time, continuing to whip until stiff, glossy peaks form. Beat in the vanilla extract.
- Remove the frozen cake and ice cream from the freezer. Working quickly, cover each with a generous layer of meringue, ensuring the cake and ice cream are completely sealed to prevent melting.
- If desired, return the meringue-covered desserts to the freezer for a few minutes to firm up the meringue slightly.
- Using a kitchen blowtorch, carefully brown the meringue until golden all over, or place under a preheated broiler (highest setting) for 1-2 minutes, watching constantly. Serve immediately.
Notes
Read more about: The Digital Witness: An In-Depth Examination of Livestreamed Crimes and Their Unsettling Societal Impact

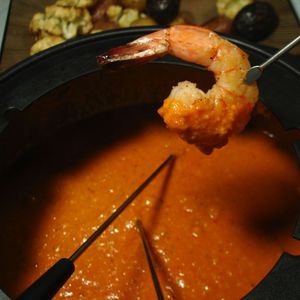
12. **Fondue**Fondue, that once-beloved shared culinary experience centered around bubbling pots, has become surprisingly scarce in most American homes! Back in its heyday, gathering around a communal pot of melted cheese or chocolate with long-stemmed forks was the epitome of a sophisticated and fun dinner party. It fostered interaction and made for a truly memorable evening.
However, the home fondue-making trend has seen a steady decline, especially throughout the 2000s. The reason? Fewer people are now hosting the kind of elaborate, hours-long dinner parties that fondue so perfectly complemented. Modern entertaining has shifted towards more casual, less time-intensive formats, leaving the fondue pot to gather dust in the back of the cupboard.
Nowadays, fondue has largely transformed into a nostalgia piece in many households. The fondue pot itself is often seen as a retro novelty, a quirky antique from a bygone era, rather than the must-have wedding gift it once was. It’s a fascinating example of how social trends directly impact our culinary traditions and the tools we use to prepare food.
While the home-based fondue ritual has faded, you can still find fondue sets and even pre-made fondue mixes in most supermarkets and from third-party retailers like Amazon and Walmart. So, if you’re ever feeling a sudden craving for a dippable dinner or a communal dessert, the ingredients are still out there – you just might have to host a very retro-themed dinner party to truly enjoy the experience!
Fondue Español
Ingredients
Equipment
Method
- Rehydrate the dried ancho chile by soaking it in warm water until pliable, then remove stem and seeds.
- Roast bell peppers and tomatoes until tender and slightly charred, then peel and core the peppers.
- Cut day-old French bread into bite-sized cubes and toast in an oven until golden and crisp.
- Toast slivered almonds in a dry pan or oven until fragrant and lightly browned.
- Combine the rehydrated ancho chile, roasted bell peppers, tomatoes, minced garlic, toasted almonds, red wine vinegar, 1 cup of water, salt, and pepper in a blender or food processor.
- Blend until very smooth, slowly drizzling in the extra virgin olive oil to emulsify the sauce.
- Grate the Manchego cheese.
- Transfer the blended sauce to a heavy-bottomed saucepan. Over low to medium-low heat, gradually add the grated Manchego cheese and 1/4 cup dry white wine, stirring constantly until the cheese is fully melted and incorporated into a smooth fondue.
- Adjust the fondue’s consistency with additional warm water or white wine, a tablespoon at a time, until desired dippable texture is achieved. Taste and adjust seasoning with salt, pepper, and an optional pinch of cayenne.
- Transfer the hot fondue to a warmed fondue pot and serve immediately with the toasted French bread cubes for dipping.
Notes
Read more about: Nearly a Decade Behind the Scenes at Longhorn Steakhouse: Secrets, Hacks, and What I Learned
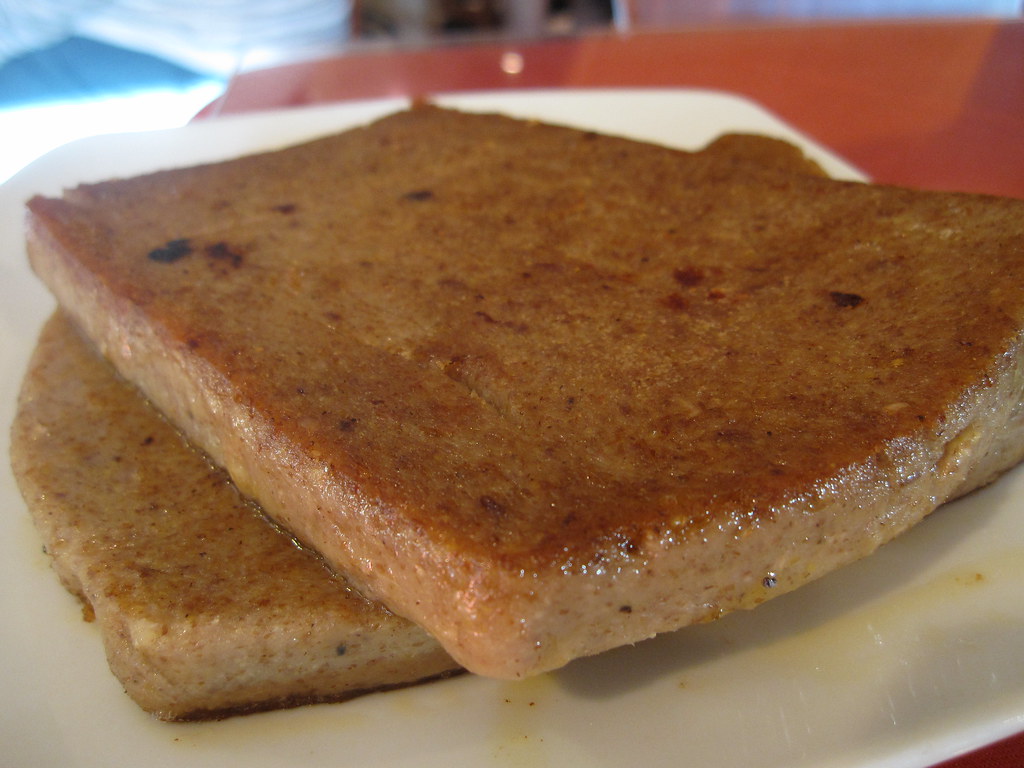
13. **Scrapple**Let’s talk about scrapple, a true Pennsylvania Dutch delicacy that was once a thrifty way to ensure no part of the pig went to waste. This hearty mash of pork trimmings, cornmeal, and flour was originally intended to create a filling breakfast sausage. It embodies a rich history of resourcefulness and culinary ingenuity, transforming less desirable cuts into a comforting and substantial meal, particularly popular in specific regions of America.
Despite its historical significance and regional charm, grocery store sales of scrapple have steadily decreased since the year 2000. It seems modern Americans have increasingly abandoned this unique part of their culinary heritage. The appeal of traditional, nose-to-tail eating has diminished for many, leading to a quiet decline in demand for such resourceful preparations.
A significant factor in scrapple’s waning popularity is arguably the ingredients themselves. The pig parts that traditionally go into its creation aren’t particularly appetizing to the modern eye, which has unfortunately given scrapple a bit of a bad reputation. As palates have shifted towards more conventional, identifiable cuts of meat, dishes like scrapple can struggle to find a place in contemporary diets.
Its decline reflects a broader societal change, moving away from the necessity of using every part of an animal for sustenance and towards a preference for milder flavors and more processed, less “challenging” food experiences. While it holds a special place in the hearts of those who grew up with it, scrapple is now largely a nostalgic item, a taste of a bygone era for many Americans.

Scrapple
Ingredients
Equipment
Method
- In a large Dutch oven or heavy-bottomed pot, cook the ground pork sausage over medium-high heat, breaking it apart with a spoon, until thoroughly browned and cooked through.
- Drain off any excess fat from the cooked sausage, leaving just enough to coat the bottom of the pot.
- Return the pot to medium heat and stir in the sweetened condensed milk, bringing the mixture to a gentle simmer.
- Gradually whisk in the yellow cornmeal and coarsely ground black pepper, ensuring the cornmeal is incorporated smoothly to prevent lumps.
- Continue to cook the mixture over medium-low heat, stirring frequently with a spatula or wooden spoon, for 15-20 minutes, or until it becomes very thick and pulls away from the sides of the pot.
- Lightly grease a loaf pan (8×4 or 9×5 inches). Pour the hot scrapple mixture into the prepared pan, pressing down firmly to remove any air pockets and create an even surface.
- Allow the scrapple to cool completely at room temperature, then cover the pan with plastic wrap.
- Refrigerate the scrapple for at least 6-8 hours, or preferably overnight, until it is thoroughly chilled and firm enough to slice.
- Once firm, invert the loaf pan onto a cutting board and carefully remove the scrapple loaf. Slice the scrapple into 1/2-inch thick pieces.
- In a large skillet over medium heat, add a thin layer of oil or butter. Fry the scrapple slices for 3-5 minutes per side, or until golden brown and crispy, then serve immediately.
Notes

14. **Rocky Mountain Oysters**Brace yourselves for this one: Rocky Mountain oysters, also known by the slightly more direct name of testicle fries, have significantly declined in popularity as American diets shifted to favor more conventional cuts of meat. Believe it or not, organ meats once played a central role in the American diet, especially during resource-scarce periods like the Great Depression and World War II. They were a vital source of nutrition when other options were limited.
However, the post-war era brought about rapid industrialization and large-scale meat production, which fundamentally changed consumer habits. With an abundance of more conventional and easily recognizable cuts of meat available, the necessity and appeal of consuming organ meats began to wane. This shift marked a departure from the resourceful eating practices of previous generations.
Younger generations, largely disconnected from the traditions of eating offal and the small, family-run farms that often depended on using every part of the animal, have further contributed to the declining prevalence of Rocky Mountain oysters. Without the cultural context or necessity, the idea of eating such a dish simply doesn’t resonate with modern palates or culinary preferences.
As a result, these once-popular dishes have become increasingly rare, largely relegated to novelty menus in specific regions or specialty establishments. Their disappearance from mainstream American diets reflects a profound transformation in our eating habits, moving towards milder, more familiar flavors and a general avoidance of the more adventurous and traditional aspects of meat consumption.
Whew, what a culinary roller coaster! It’s wild to see how much our dinner tables have transformed over the years, isn’t it? From the shimmering Jell-O molds of yesteryear to the once-mighty TV dinners, these foods tell a fascinating story of America’s changing tastes, health priorities, and even our social lives. Some might make a comeback, thanks to a viral TikTok or a wave of nostalgia, but for many, their time in the spotlight has definitely dimmed. What’s next to vanish, or perhaps, make a triumphant return? Only time (and our ever-evolving palates!) will tell. So, next time you’re scrolling through old cookbooks or a vintage menu, take a moment to appreciate these forgotten foods – they were, after all, once the talk of the town!


