
")
Let’s be real, balancing a healthy lifestyle with a budget that feels a bit tight can sometimes feel like a culinary tightrope walk. We all crave nutritious, delicious meals, especially at lunchtime, but the thought of expensive ingredients or hours in the kitchen can be a total buzzkill. As the context reminds us, “Maintaining good health doesn’t happen by accident. It requires work, smart lifestyle choices,” and sometimes, a little creative meal planning! But who said healthy eating has to be a luxury, or even worse, bland?
Good news, savvy foodies! You can absolutely conquer your midday hunger with meals that are both incredibly kind to your wallet and your amazing body. Forget those sad desk salads that cost a fortune or reaching for high-sodium, highly processed takeout. We’re about to dive deep into a “treasure trove of 5-dollar dinner ideas” that are so versatile, they’ll easily become your new favorite lunch staples, proving once and for all that “you don’t need to break the bank or sacrifice flavor.” Get ready for some serious meal-prep inspiration that will leave your taste buds dancing and your wallet happy!
This article is your ultimate, no-nonsense guide to revolutionizing your lunch game, ensuring you “enjoy delicious, healthy meals without breaking the bank.” We’re talking about smart, simple, and seriously tasty ways to fuel your day using affordable ingredients and embracing the core principles of good nutrition. From boosting fiber to cutting down on added sugars, these ideas are designed to make healthy eating an absolute breeze. So, grab your apron (or just your lunchbox!), because we’re jumping into the first five amazing ideas that will make you a lunch-packing superstar!

1. **Homemade Soup Using Pantry Staples**Let’s kick things off with a true comfort food hero that’s as kind to your budget as it is to your soul: homemade soup using pantry staples. This isn’t just any soup; this is your new go-to, a warm hug in a bowl that exemplifies healthy eating made easy and affordable. The beauty of soup lies in its incredible versatility, allowing you to whip up a nutritious and flavorful meal primarily from ingredients you likely already have on hand, which is exactly why it’s considered a “pot of homemade soup using pantry staples.”
One of the biggest wins with homemade soup is how effortlessly it helps you “bump up fiber.” The context reminds us that “Fresh fruits and vegetables, whole grains, legumes, nuts, and seeds are good sources of fiber.” Soup provides the perfect canvas for loading up on diced vegetables like carrots, celery, and onions, or even incorporating hearty legumes like lentils and beans. These fiber-rich additions not only make your soup incredibly satisfying, helping you feel fuller longer, but also contribute to digestive health and blood sugar control – talk about a triple threat!
Moreover, crafting your own soup gives you complete control over the ingredients, particularly when it comes to sodium. Many store-bought soups can be packed with hidden salts, but with your homemade version, you can “cut back on sodium” significantly. Opt for low-sodium broths or even make your own vegetable broth, and instead of relying on salt for flavor, reach for “alternatives to salt to add flavor to your meals. A squeeze of lemon juice. A dash of no-salt spice blends. Fresh herbs.” Imagine a vibrant tomato soup made with “canned tomatoes with no salt added,” elevated with fresh basil and a pinch of oregano – pure deliciousness without the sodium overload.
This approach also allows for delightful customization, meaning your soup “can be tailored to your taste buds.” Whether you prefer a chunky minestrone brimming with vegetables or a creamy (but healthy!) lentil soup, the possibilities are endless. Plus, making a big batch on Sunday means you’ve got several days of easy, healthy, and incredibly budget-friendly lunches sorted. It’s a “hearty soup” and truly a game-changer for anyone looking to eat well without the fuss or expense. So go ahead, get creative and whip up a bowl of goodness!
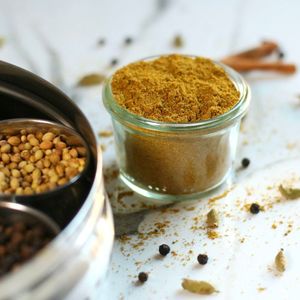
Xawaash Spice Blend
Ingredients
Equipment
Method
- Gather all whole spices and measure them accurately according to the recipe.
- Heat a dry frying pan or skillet over medium-low heat on the stovetop.
- Add coriander seeds, cumin seeds, black peppercorns, whole cloves, cardamom pods, and crushed cinnamon stick to the heated pan.
- Toast the spices, stirring continuously, for 2-3 minutes until they become fragrant and lightly warm. Be vigilant to prevent burning, which can lead to bitterness.
- Remove the toasted spices from the pan immediately and spread them thinly on a plate or tray to cool completely to room temperature.
- Once thoroughly cooled, transfer the toasted spices to a clean spice grinder (or use a mortar and pestle).
- Add the ground turmeric to the grinder along with the cooled, whole toasted spices.
- Grind the mixture into a fine, uniform powder. If necessary, work in small batches to achieve a consistent texture.
- Transfer the freshly ground Xawaash spice blend into an airtight spice jar or container.
- Store the blend in a cool, dark place, away from direct sunlight and heat, to maintain its potency and aroma for an extended period.
Notes
Read more about: Dinner Dilemmas SOLVED! 15 Easy 15-Minute Meals for Your Craziest 2025 Nights (Seriously, We’re Obsessed!)

2. **Tacos with Ground Beef or Turkey (or Go Meatless!)**Who says tacos are just for Tuesday nights? Prepare to have your lunch game redefined with these utterly “flavorful tacos” that are perfect for any midday meal and won’t make your wallet weep. This idea is a total standout because it offers incredible flexibility and can be adapted to fit almost any dietary preference or budget. Whether you’re a meat-lover or leaning into plant-based goodness, tacos can be your ultimate healthy, cheap lunch solution.
Budget-wise, using “ground beef or turkey” as your protein base is incredibly cost-effective, especially when you can snag them on sale. And if you’re really looking to pinch pennies or prefer a plant-forward approach, you can “go meatless!” with hearty beans or lentils. The context highlights that “Protein recommendations include seafood, lean meats and poultry, eggs, legumes (beans, peas, and lentils), soy products, nuts, and seeds.” So, whether you choose lean ground turkey or a robust black bean filling, you’re packing your tacos with essential protein to keep you feeling full and energized through your afternoon. This makes it an ideal option for maintaining stable blood sugar and avoiding that dreaded afternoon slump.
Beyond the protein, tacos are a fantastic way to “aim for a variety of colors” on your plate, which, as the context suggests, means you’re loading up on essential vitamins, fiber, and minerals. Think about topping your tacos with a vibrant array of fresh, crunchy vegetables. “Diced vegetables to stews and omelets to boost color and nutrients. Peppers, broccoli, and onions are great options,” and these perfectly apply to taco toppings! A rainbow of finely diced bell peppers, crisp lettuce, fresh salsa, and even a sprinkle of fresh herbs not only adds stunning visual appeal but also a powerful nutritional punch.
To keep these tacos as healthy as possible, you can also strategically “replace saturated fats” by choosing leaner cuts of meat or by opting for plant-based fillings. Instead of full-fat cheese, consider a lighter sprinkle, or even better, load up on a creamy avocado for healthy unsaturated fats. The context encourages us to “Sprinkle nuts or seeds on salads instead of cheese,” and while it’s not directly for tacos, it inspires us to think about healthier toppings! Season your fillings with “no-salt spice blends” and “fresh herbs” to get maximum flavor without relying on excess sodium, which can be a common culprit in processed taco seasonings. With a little creativity, “you’ll get creative with your meal prep” and craft a taco lunch that’s truly a celebration of flavor and health.
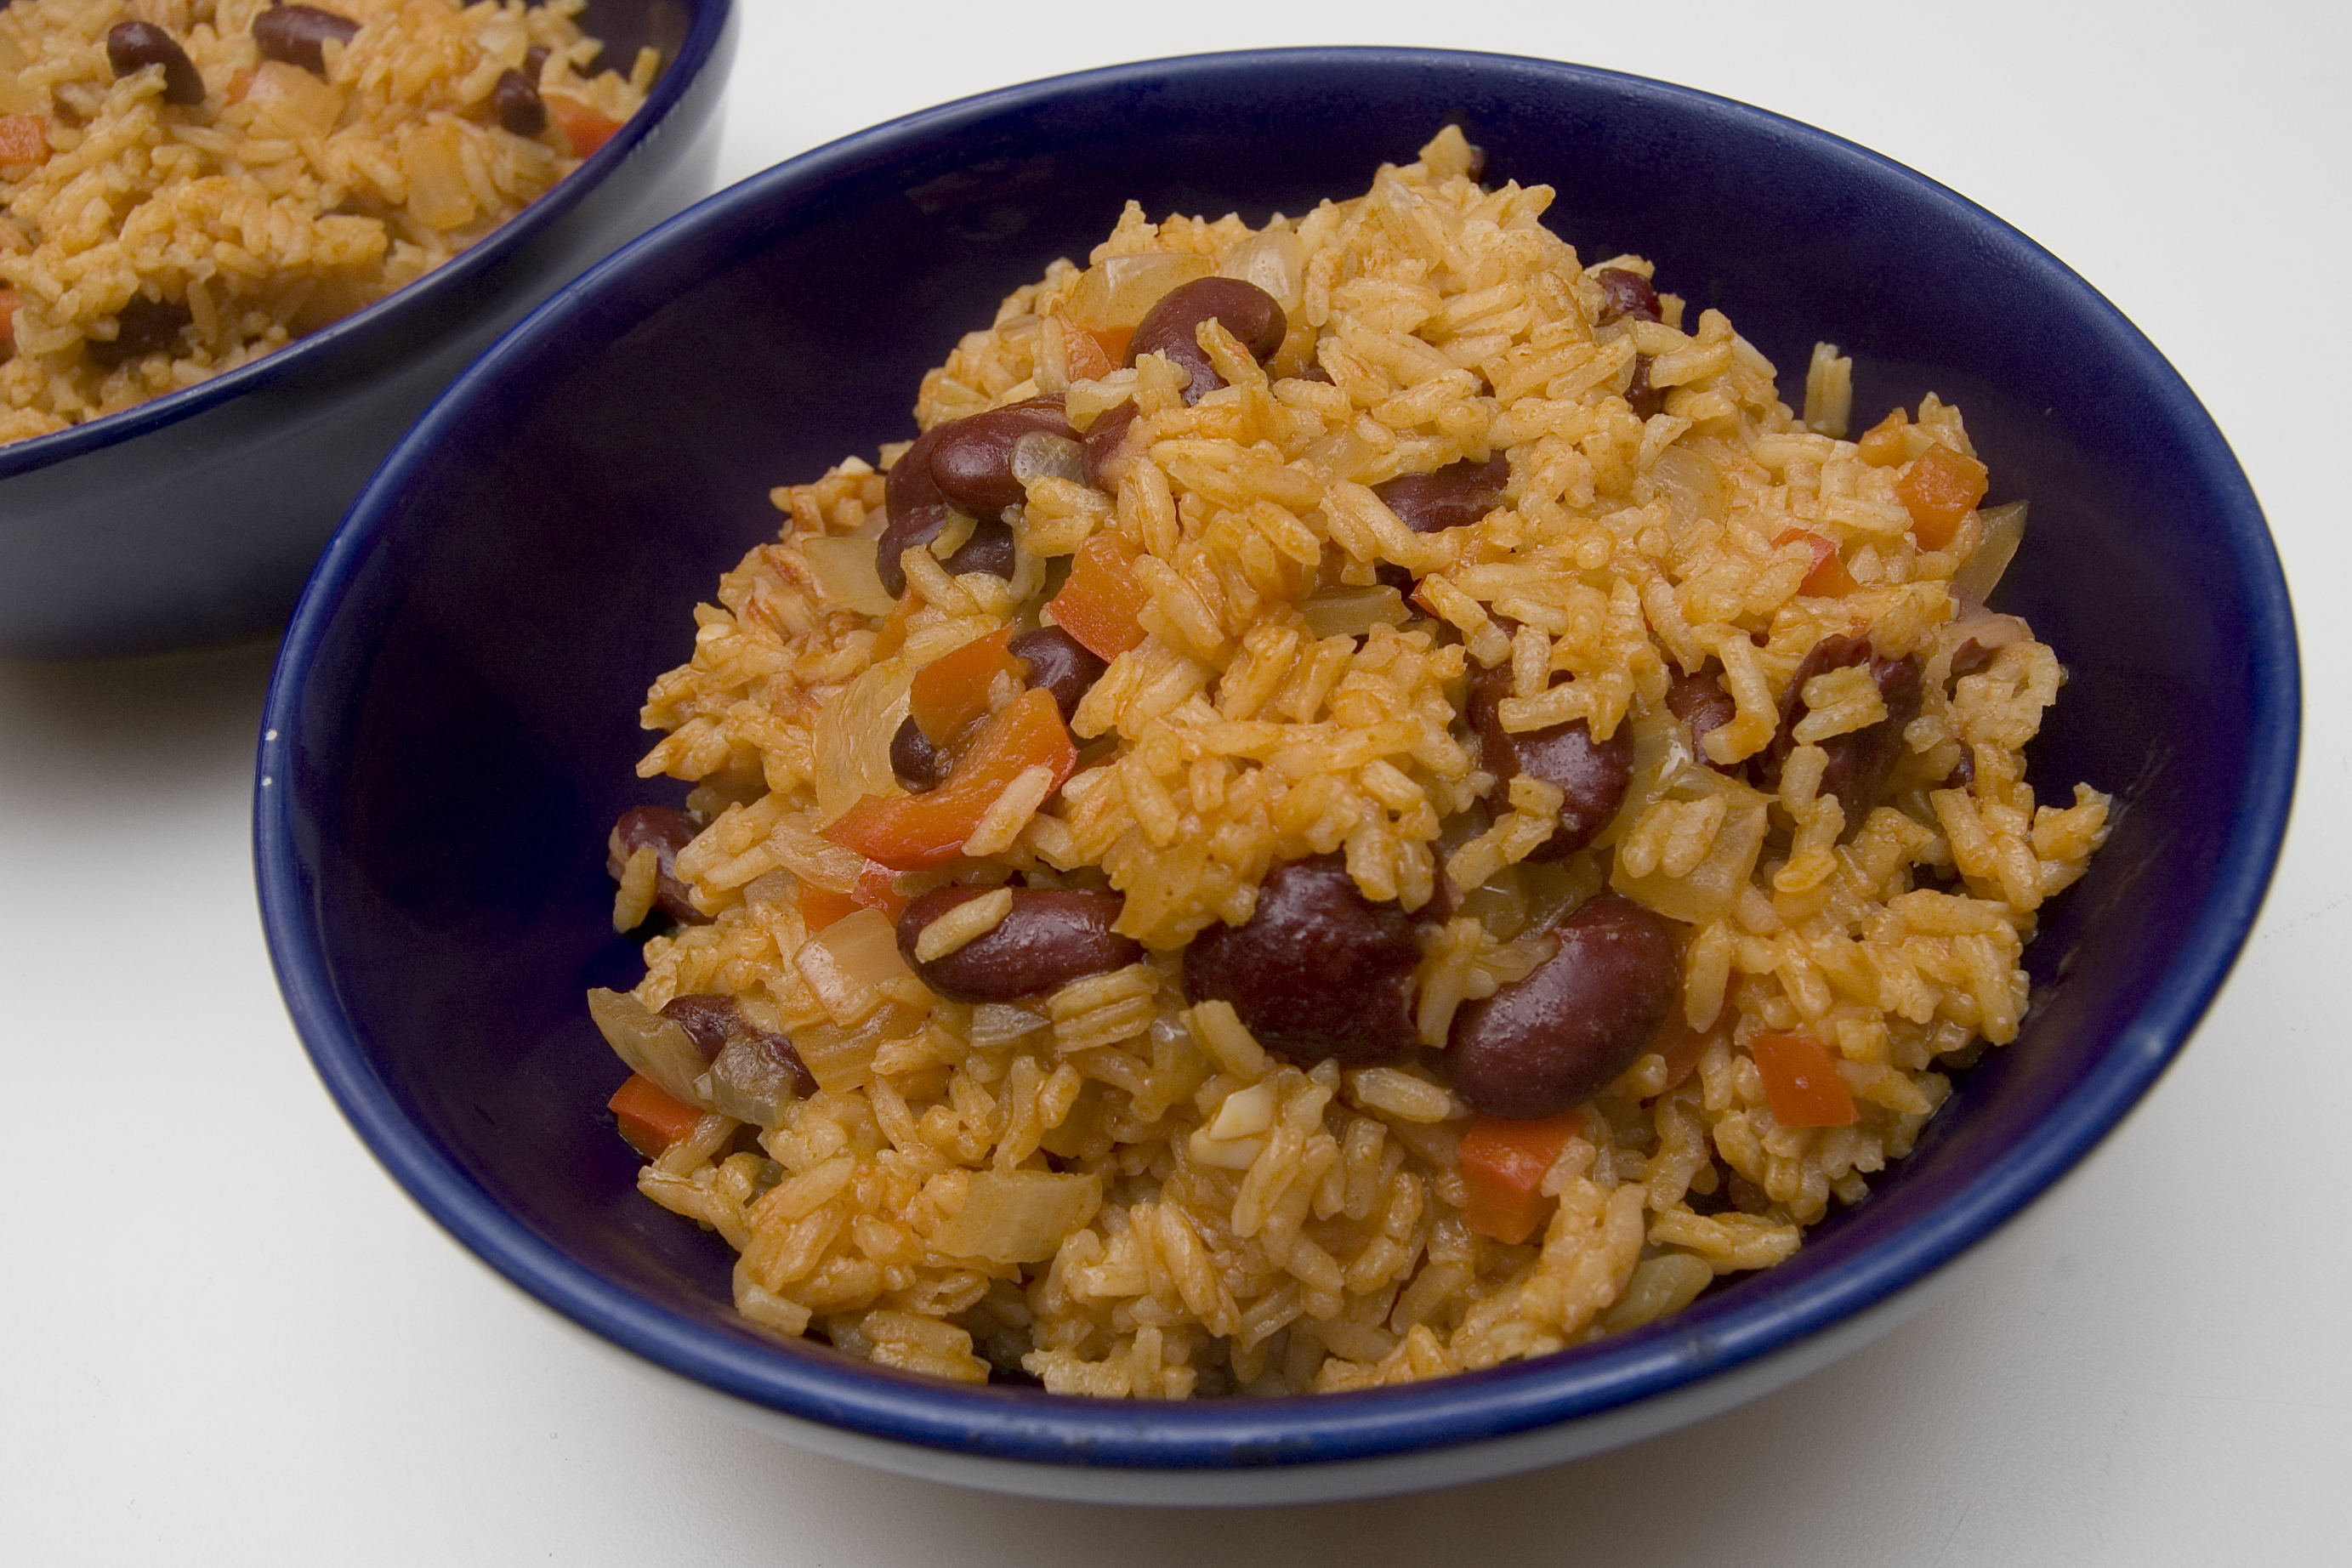
3. **Simple Rice and Beans Dish**When it comes to budget-friendly, powerhouse lunches, the simple rice and beans dish is an undeniable superstar. This isn’t just a meal; it’s a culinary foundation that has sustained cultures for centuries, and for good reason! It’s incredibly economical, wonderfully versatile, and packed with nutrients, making it one of those “easy ways to get started” that truly delivers on taste and value. You can literally “cook up a simple rice and beans dish” with minimal effort and maximum reward.
One of the standout health benefits of this dynamic duo is its incredible fiber content. The context emphasizes that “Fiber helps maintain digestive health and helps us feel fuller longer. Fiber also helps control blood sugar and lowers cholesterol levels.” And guess what? Beans are absolutely bursting with it! Pairing them with whole-grain rice (like brown rice, though the context also mentions “bulgur or quinoa are also high in fiber” if you want to switch it up) creates a fiber-rich powerhouse that will keep you satisfied for hours, preventing those pesky mid-afternoon hunger pangs and unhealthy snack cravings.
Furthermore, this humble dish is a fantastic source of plant-based protein. The context specifically includes “legumes (beans, peas, and lentils)” in its protein recommendations, and beans are, of course, the star here. Combining rice and beans creates a complete protein, meaning you’re getting all the essential amino acids your body needs, typically without the saturated fats found in some animal proteins. This makes it an excellent choice for anyone looking to incorporate more plant-based meals into their diet or reduce their intake of “processed or high-fat meats.”
The versatility of rice and beans is another reason why it’s such a beloved option. You can customize it endlessly to ensure it “can be tailored to your taste buds.” Amp up the flavor with a variety of spices, a squeeze of fresh lime, or a handful of “fresh herbs.” You can add “diced vegetables” like peppers and onions for extra nutrients and color, or even a dash of hot sauce if you like a little kick. This allows you to “get a variety of healthy foods” in one simple, satisfying bowl. It’s a truly nourishing and comforting meal that proves healthy eating doesn’t have to be complicated or expensive – just delicious!

Simple Black Beans & Rice
Ingredients
Equipment
Method
- Soak the black beans overnight in ample water, or use a quick-soak method by boiling them for one minute, then letting them rest for one hour before draining.
- Drain the soaked black beans thoroughly and set aside.
- In a large Dutch oven or pot, cook the bacon pieces over medium heat until crisp; remove the bacon, reserving about 1 tablespoon of rendered fat in the pot (or melt 1 tablespoon of unsalted butter if omitting bacon).
- Add the finely minced shallot and jalapeño to the pot and sauté until softened, about 3-5 minutes. Stir in the minced garlic and cook for another minute until fragrant, being careful not to burn it.
- Stir in the drained black beans, chicken or vegetable stock, kosher salt, ground cumin, ancho chile powder, red pepper flakes, and ground black pepper.
- Bring the mixture to a boil, then reduce the heat to low, cover, and simmer for 1.5 to 2 hours, or until the beans are tender, stirring occasionally.
- Taste the beans and adjust seasonings as necessary, adding more salt or spices if desired.
- Once the beans are tender, stir in the cooked rice and the reserved crispy bacon pieces (if using).
- Ladle the simple black beans and rice into serving bowls.
- Garnish generously with fresh cilantro and serve warm.
Notes
Read more about: The 11 Best Coffee Makers Under $50: Expert-Tested Picks for Reliable Performance and Lasting Value

4. **Oven-Baked Chicken Breast**Prepare yourself for a lunch idea that’s so simple, so versatile, and so utterly delicious, it might just become your weekly meal prep obsession: oven-baked chicken breast. This isn’t just a dish; it’s a fundamental building block for countless healthy and budget-friendly meals. As the context lovingly states, it’s “one of my personal favorites is oven-baked chicken breast – it’s a cinch to make, uses affordable ingredients, and is a healthy option the whole family will love.” And honestly, what’s not to love?
First off, let’s talk about the health benefits. Chicken breast is a lean protein powerhouse, perfectly aligning with the context’s “Protein recommendations include seafood, lean meats and poultry.” Opting for lean meats and poultry helps you to “replace saturated fats” from your diet with healthier options, which is crucial for heart health. The context even refers to “Poultry consumption and human cardiometabolic health-related outcomes,” highlighting the positive impact lean poultry can have on your well-being. This ensures you’re getting the essential protein needed for muscle maintenance and satiety without loading up on unhealthy fats.
One of the best things about oven-baked chicken breast is its incredible affordability, especially when you buy in bulk or look for sales. This aligns perfectly with our goal of creating healthy lunches “without breaking the bank.” The ease of preparation is another huge win. It’s “a cinch to make” – simply season, bake, and you’re good to go. This makes it an ideal component for meal prepping on a Sunday, providing you with a versatile protein source for several lunches throughout the week, fitting seamlessly into your busy schedule as it’s “perfect for busy days.”
Flavor is key, and with oven-baked chicken breast, you can get creative without resorting to high-sodium marinades. The context advises using “alternatives to salt to add flavor to your meals. A squeeze of lemon juice. A dash of no-salt spice blends. Fresh herbs.” Imagine rubbing your chicken with a blend of paprika, garlic powder, onion powder, and dried oregano, then finishing it with a squeeze of fresh lemon juice after baking. This infuses incredible taste while keeping your sodium intake in check. You can then slice it for salads, shred it for sandwiches, or pair it with a side of roasted vegetables (which also helps you “aim for a variety of colors”) for a complete, satisfying, and super healthy lunch. It’s truly a champion of efficiency and flavor!

Oven baked chicken breast
Ingredients
Equipment
Method
- Preheat your oven to 400°F (200°C).
- Pat chicken breasts thoroughly dry with paper towels and season generously with salt and black pepper.
- Slice half of the lemon into thin rounds; set aside the other half for juicing.
- In a small mixing bowl, combine the olive oil, the fresh juice from the remaining half lemon, and the fresh thyme sprigs.
- Arrange the seasoned chicken breasts in a single layer in an oven-safe baking dish.
- Drape the thin lemon slices over and around the chicken breasts, then pour the olive oil and thyme mixture evenly over them.
- Bake for 20-25 minutes, or until the chicken reaches an internal temperature of 165°F (74°C) when checked with a meat thermometer. Cooking time may vary based on chicken thickness.
- Remove the baking dish from the oven and loosely tent it with aluminum foil.
- Let the chicken rest for 5-10 minutes before slicing or serving to ensure maximum juiciness.
- Serve hot, optionally garnished with additional fresh thyme or a final squeeze of fresh lemon.
Notes
Read more about: Unpacking Food Safety: A Comprehensive Consumer’s Guide to Preventing Illness and Protecting Your Family
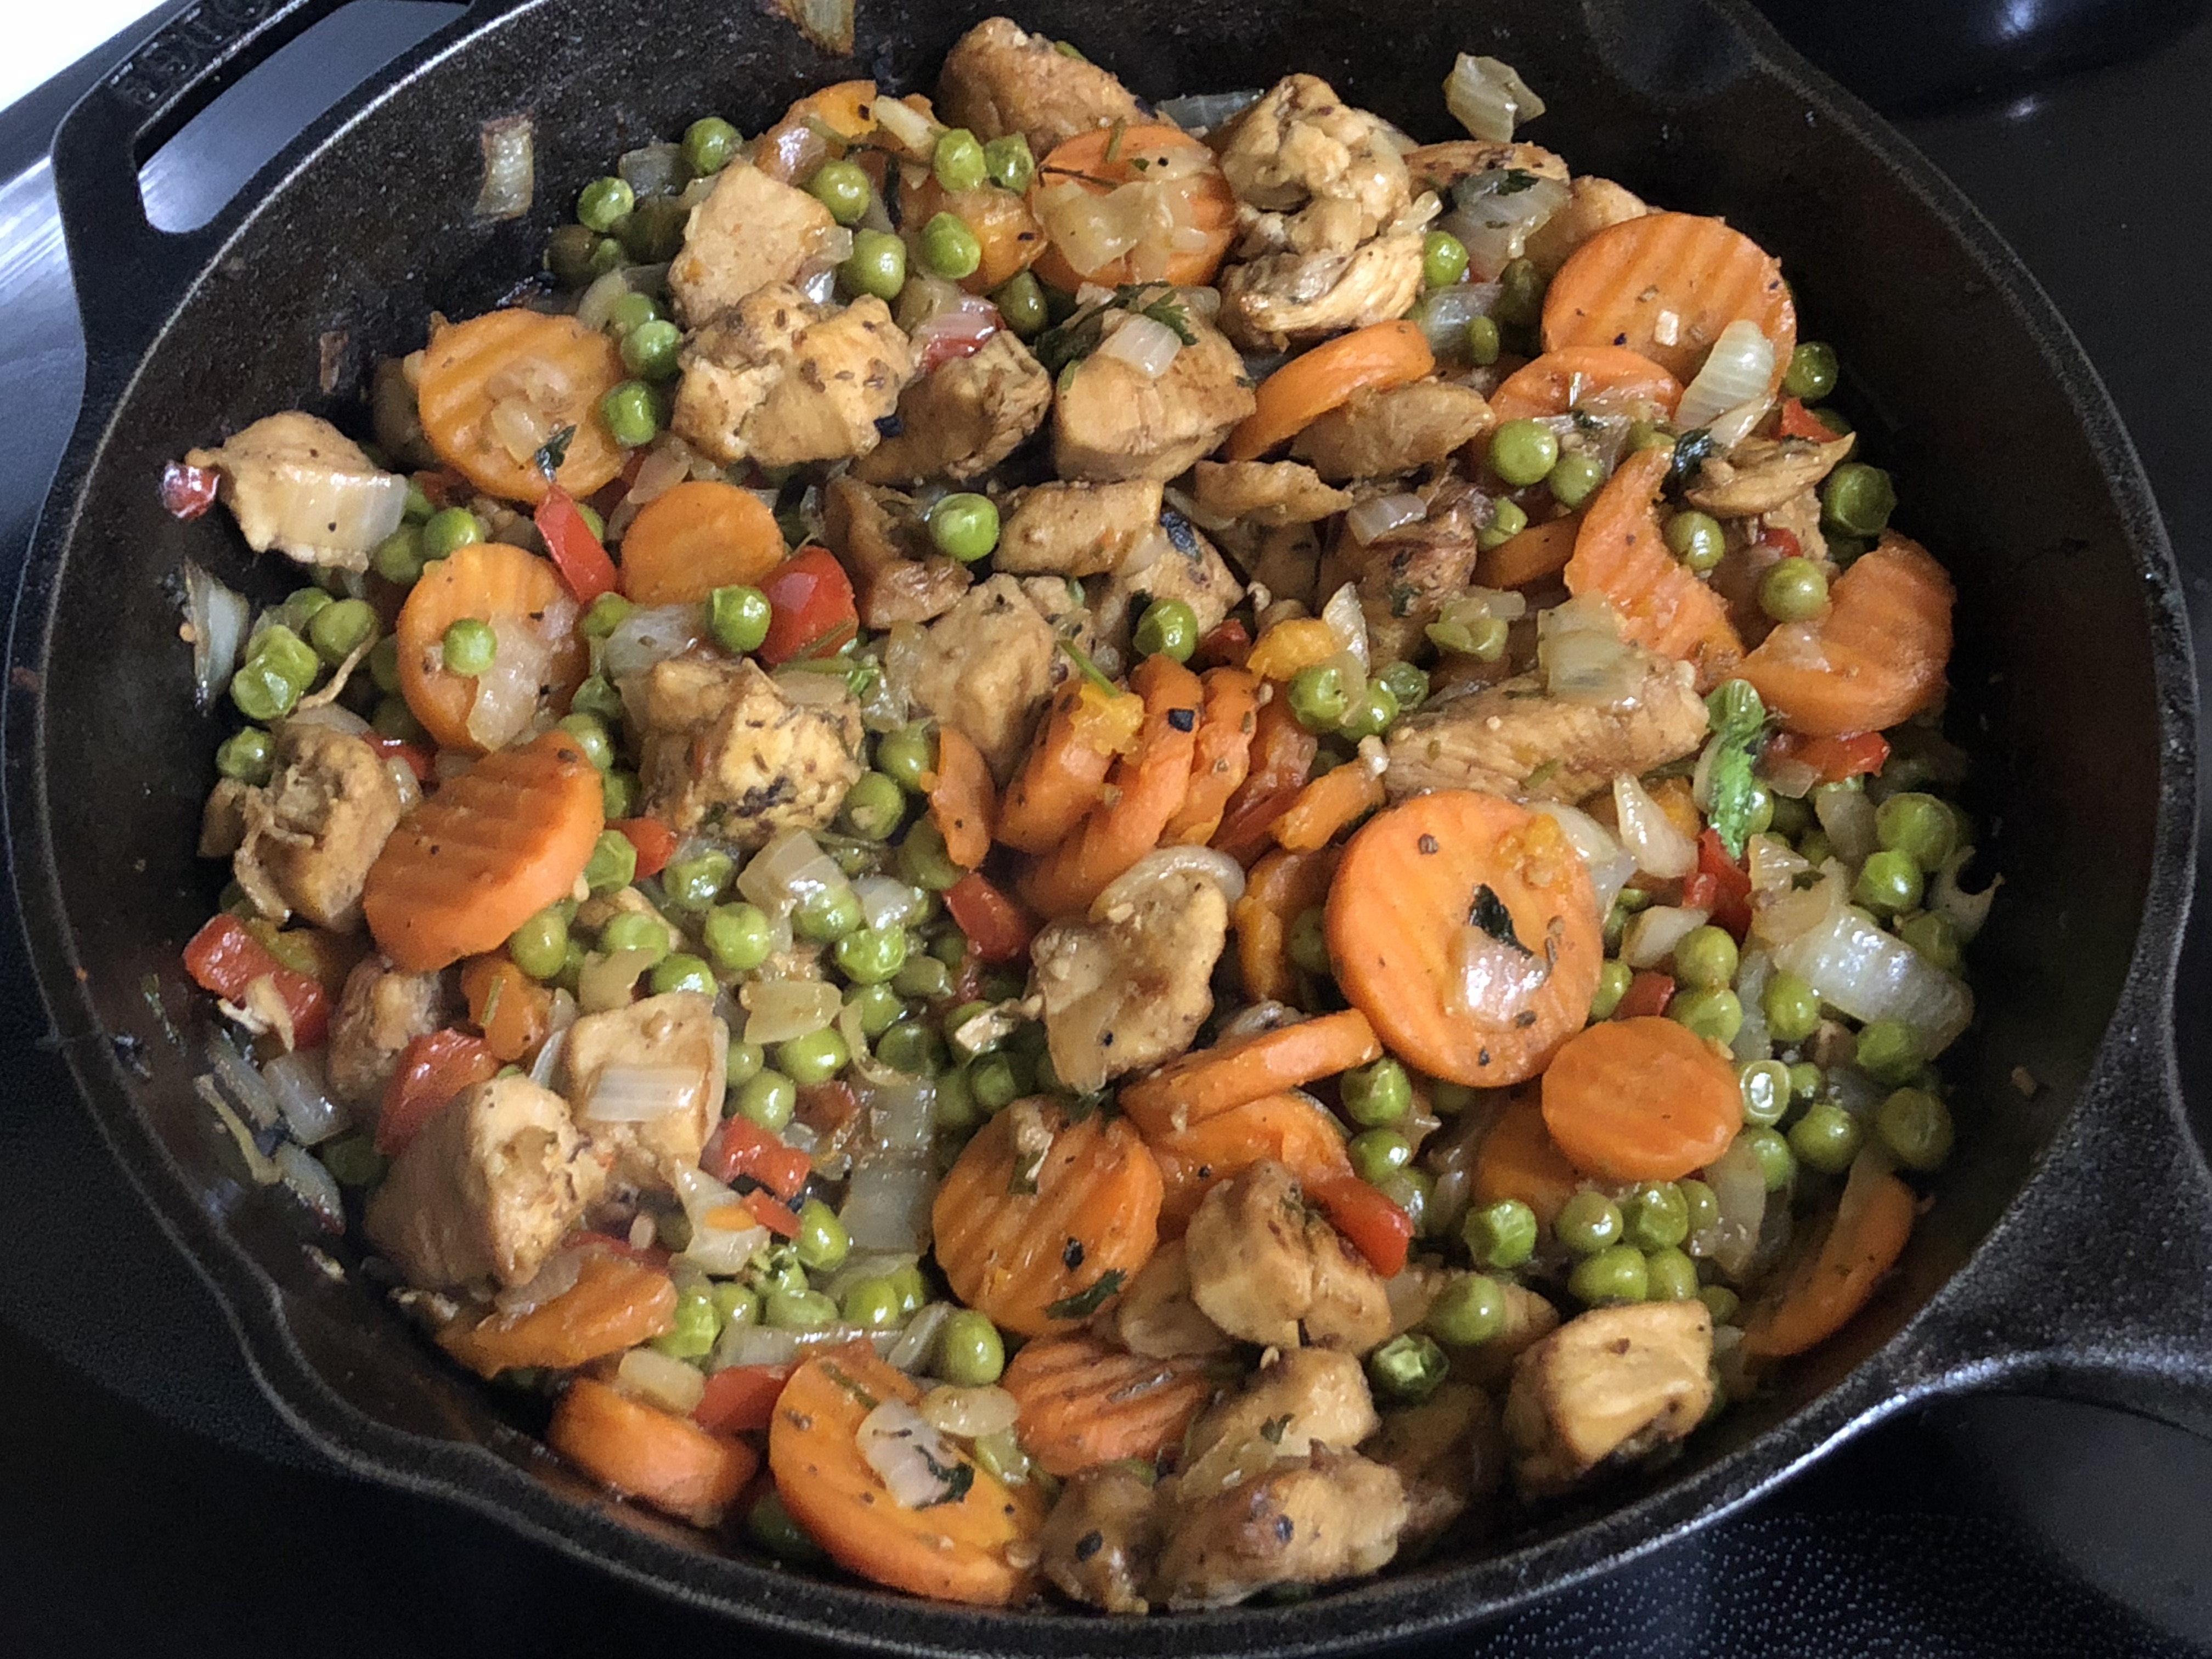
5. **Skillet Chicken with Peppers and Onions**Get ready for a vibrant, flavorful, and incredibly easy lunch idea that will have you feeling like a gourmet chef without the fuss: skillet chicken with peppers and onions. This dish is truly a gem, lauded in the context as “Another go-to recipe is skillet chicken with peppers and onions – quick, easy, and budget-friendly.” It’s the perfect marriage of lean protein and colorful, nutrient-dense vegetables, all cooked up in a single pan for maximum convenience and minimal cleanup.
The health benefits are plentiful here. By combining lean chicken, which is part of the “lean meats and poultry” protein recommendations, with a generous amount of bell peppers and onions, you’re building a meal that’s rich in both protein and vitamins. This aligns beautifully with the context’s emphasis that “Healthy eating emphasizes fruits, vegetables, whole grains, dairy, and protein.” The chicken provides sustained energy and helps keep you full, while the vegetables are packed with essential nutrients and fiber, contributing to your overall well-being.
This dish is also a fantastic way to heed the advice to “aim for a variety of colors” on your plate. Bell peppers come in a glorious spectrum of reds, yellows, and greens, each bursting with different vitamins and antioxidants. As the context notes, “Diced vegetables to stews and omelets to boost color and nutrients. Peppers, broccoli, and onions are great options.” Sautéing them alongside the chicken not only creates a visually appealing meal but also ensures you’re getting a diverse array of plant-based goodness in every bite, maximizing your nutrient intake for a healthy, vibrant lunch.
What truly makes this dish a winner for busy lunch preparers is its “quick, easy” nature. It’s a “budget-friendly” meal that comes together in a single skillet, streamlining both the cooking process and the dreaded cleanup. To ensure maximum flavor without excess sodium, remember to season with “no-salt spice blends” and “fresh herbs.” You can even add a splash of vinegar, as the context references studies on “Vinegar (acetic acid) intake on glucose metabolism,” suggesting a thoughtful addition. This simple yet incredibly satisfying meal proves that eating healthy, flavorful, and affordable lunches is not just possible, but genuinely enjoyable!
This incredible combination of lean protein and vibrant vegetables ensures a satisfying and wholesome meal that aligns perfectly with our healthy eating goals. Whether you enjoy it on its own, with a small serving of whole-grain rice, or tucked into a whole-wheat wrap, skillet chicken with peppers and onions is a lunch staple you’ll find yourself making again and again. It’s a testament to how creative and budget-conscious cooking can be truly delicious, setting you up for a productive and energized afternoon without costing a fortune.
Alright, lunch-packing superstars, are you ready for more? We’ve already unveiled five incredible, budget-friendly lunch hacks, and now it’s time to keep the good times (and great food!) rolling. Get ready to explore four more innovative and incredibly tasty lunch solutions, all keeping that awesome under-$5 price tag in mind. We’re talking about creative ways to use everyday ingredients, pack in those veggies and lean proteins, and craft satisfying, vibrant meals that totally support a healthy lifestyle. Making healthy eating fun and accessible? You bet we are! Let’s dive into these next must-try ideas that will have you feeling energized and totally satisfied.

Skillet Chicken and Rice with Peppers and Onions Recipe
Ingredients
Equipment
Method
- Pat chicken thighs dry. Season generously with kosher salt and black pepper on all sides.
- Heat olive oil in a large oven-safe skillet over medium-high heat. Sear chicken thighs skin-side down until deeply golden brown and crisp (8-10 minutes). Flip and sear for 2-3 minutes. Remove chicken and set aside, reserving rendered fat.
- Add sliced green bell peppers, red onion, and chopped jalapeño to the skillet. Cook, stirring occasionally, until softened and lightly caramelized (5-7 minutes).
- Stir in the dried oregano and basmati rice. Cook for 1-2 minutes, stirring, to lightly toast the rice.
- Incorporate the drained and rinsed black beans and corn kernels into the skillet, stirring to combine.
- Pour in 3 cups of water or chicken stock. Bring the mixture to a rolling boil, scraping any browned bits from the bottom of the skillet.
- Nestle the seared chicken thighs back into the rice mixture, skin-side up. Reduce heat to low, cover the skillet tightly, and simmer for 20-25 minutes, or until the rice is tender and the chicken is cooked through.
- Remove from heat and let rest, still covered, for 5 minutes. Gently stir in the grated cheddar or Monterey Jack cheese until melted and combined with the rice.
- Sprinkle generously with picked cilantro leaves.
- Serve hot directly from the skillet, with lime wedges on the side for squeezing.
Notes
Read more about: Dinner Dilemmas SOLVED! 15 Easy 15-Minute Meals for Your Craziest 2025 Nights (Seriously, We’re Obsessed!)

6. **Crockpot Chicken Enchilada Soup**If you’re anything like me, the word “crockpot” immediately conjures images of effortless cooking and amazing flavors, and this Crockpot Chicken Enchilada Soup is no exception! Our treasure trove of $5 dinner ideas explicitly calls this out as an option if you’re looking for “something a bit more adventurous,” but let me tell you, it’s still incredibly easy and perfect for busy days. Just toss in your ingredients in the morning, and by lunchtime (or dinner!), you’ve got a warm, comforting, and seriously delicious meal waiting for you. It’s the ultimate set-it-and-forget-it hack for meal prep!
The beauty of this soup lies in its incredible blend of lean protein and potential for a rainbow of vegetables. “Protein recommendations include seafood, lean meats and poultry,” and chicken is a fantastic, affordable base for this dish. You can easily load it up with corn, beans, and diced tomatoes, ensuring you “aim for a variety of colors” on your plate, which means you’re boosting your intake of vitamins, fiber, and minerals. Plus, those legumes (beans, peas, and lentils) are great sources of fiber, helping you feel fuller longer and supporting digestive health.
One of the best parts about making soup at home, especially this enchilada version, is having total control over the sodium content. Instead of relying on high-sodium canned sauces, you can season your soup with “no-salt spice blends” and “fresh herbs” like cilantro and a squeeze of lime juice. These “alternatives to salt” will give you that authentic, zesty flavor without the unhealthy sodium overload. It’s all about creating a meal that “can be tailored to your taste buds” while keeping it super healthy.
This rich, flavorful soup is not just a budget-friendly superstar; it’s a game-changer for anyone wanting healthy lunches that practically cook themselves. Imagine having a hearty, homemade lunch ready to go with minimal effort, providing sustained energy throughout your afternoon. It’s truly a testament to how simple yet satisfying healthy meal prep can be, transforming those “busy days” into delicious triumphs!

Crockpot Chicken Enchilada Soup
Ingredients
Equipment
Method
- Dice the white onion; rinse and drain the black beans and corn (if canned).
- Place the boneless, skinless chicken breasts at the bottom of the crockpot.
- Add the diced onion, rinsed black beans, fire-roasted diced tomatoes (with juice), drained corn, and green chiles to the crockpot.
- Pour in the chicken stock and red enchilada sauce.
- Season with ground cumin and salt.
- Stir all ingredients gently to combine.
- Cover the crockpot and cook on low for 6-8 hours or on high for 3-4 hours, or until chicken is easily shredded.
- Remove the cooked chicken breasts from the crockpot.
- Shred the chicken using two forks and return it to the soup, stirring well to combine.
- Ladle into bowls and garnish with fresh cilantro and avocado before serving.
Notes

7. **Dump-and-Bake Chicken Broccoli Rice Casserole**Prepare yourself for a lunch idea that lives up to its name: the Dump-and-Bake Chicken Broccoli Rice Casserole! Our guide proudly declares this “one-dish casserole is a game-changer,” and honestly, it’s not wrong. It’s a true staple in any savvy kitchen, offering an “easy to prepare but also packed with flavor and texture” experience. With just five ingredients and a mere 5 minutes of prep time, this is the ultimate hack for getting a wholesome lunch on the table without the fuss, which is exactly what we need on “busy days.”
This casserole is a nutritional powerhouse, combining lean protein and fiber-rich vegetables in one delightful dish. Chicken, falling under the “lean meats and poultry” category, provides essential protein to keep you feeling satisfied and energized. And let’s talk about broccoli! It’s an excellent source of fiber, and as we know, “Fiber helps maintain digestive health and helps us feel fuller longer.” Adding “diced vegetables to stews and omelets to boost color and nutrients. Peppers, broccoli, and onions are great options,” and broccoli definitely shines here, helping you “aim for a variety of colors.”
The beauty of a homemade casserole is that you’re in charge of the ingredients, making it easy to keep it healthy. You can choose whole-grain rice for extra fiber and opt for low-sodium broths or “no salt added” canned ingredients. This allows you to “cut back on sodium” significantly compared to many store-bought alternatives. By focusing on “unprocessed food to prepare at home without salt,” you ensure your lunch is bursting with natural flavor and goodness, rather than hidden preservatives.
Seriously, this casserole is a champion of efficiency and taste. You simply combine all the ingredients, pop it in the oven, and let the magic happen, as the context says. It’s perfect for Sunday meal prep, providing you with a delicious and “satisfying, filling meal” for several lunches throughout the week. It’s the kind of inventive meal solution that truly helps you “get creative with your meal prep” and makes eating well utterly effortless.
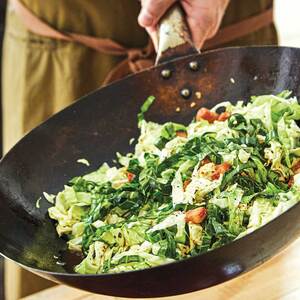
8. **Fried Cabbage with Bacon**Who’s ready for a surprisingly delicious and incredibly versatile lunch option? Enter Fried Cabbage with Bacon! Our budget-friendly guide describes this as a “scrumptious” dish that serves as a “lightning-fast and effortless side dish or main course option.” It even boasts a “low-carb profile,” making it a fantastic addition to your healthy eating repertoire. This isn’t just a meal; it’s a beloved “family favorite” that you’ll want to add to your regular rotation for its ease and fantastic flavor.
Let’s get real about the stars of this show. Cabbage is a fantastic vegetable, packed with vitamins and fiber, perfectly aligning with the advice to “aim for a variety of colors on your plate.” And while bacon gets a bad rap, using it judiciously, perhaps as “bacon bits,” allows for that burst of flavor without overdoing it on saturated fats. Remember, “replacing saturated fat with healthier unsaturated fats can help protect your heart.” So, you can choose leaner bacon options or even turkey bacon to enjoy this dish while keeping your heart health in mind.
To make this dish as healthy as possible without sacrificing any of its scrumptious appeal, think smart seasoning. Instead of relying on excess salt from bacon, use “alternatives to salt to add flavor to your meals. A squeeze of lemon juice. A dash of no-salt spice blends. Fresh herbs.” A little bit of black pepper, garlic powder, or even a splash of apple cider vinegar (which can have positive effects on “glucose metabolism”) can elevate the flavors beautifully, allowing the natural sweetness of the sautéed cabbage to shine.
This fried cabbage dish is an absolute win for quick, healthy, and satisfying lunches. It’s incredibly filling on its own or can be paired with a simple baked chicken breast or some beans for an extra protein boost. It proves that healthy eating doesn’t have to be complicated or expensive; sometimes, the simplest ingredients, prepared smartly, create the most delightful and budget-friendly meals. Get ready to fall in love with cabbage all over again!
Stir-Fried Cabbage with Bacon
Ingredients
Equipment
Method
- Cut the thick bacon slices into ½-inch wide pieces. Core and cut the green cabbage crosswise into ¼-inch wide shreds. Finely chop the garlic.
- In a large wok or skillet, cook the bacon over medium heat until it’s crispy and most of its fat has rendered, approximately 5-7 minutes.
- Using a slotted spoon, remove the crispy bacon from the pan and set it aside, leaving the rendered fat in the skillet.
- If the remaining bacon fat is less than 1-2 tablespoons, add canola oil to reach the desired amount.
- Add the finely chopped garlic to the hot fat and stir-fry for about 30 seconds until fragrant, taking care not to burn it.
- Add the shredded cabbage to the pan. Increase the heat to medium-high and stir-fry for 3-5 minutes, until the cabbage begins to wilt and become tender-crisp.
- Pour in the chicken stock and soy sauce. Bring the mixture to a simmer, scraping any browned bits from the bottom of the pan to deglaze.
- Continue cooking for another 1-2 minutes, allowing the cabbage to absorb the liquid and soften further while still retaining some bite.
- Return the reserved crispy bacon to the pan and toss everything together to combine evenly.
- Taste the dish and season with kosher salt and freshly ground black pepper as needed before serving immediately.
Notes
Read more about: Taste of History: 14 Iconic Recipes from U.S. Presidents and First Ladies to Try at Home

9. **Vegetarian Spinach Quiche with Sun-Dried Tomatoes**For our final budget-friendly lunch sensation, get ready to embrace the elegance and nutritional punch of a Vegetarian Spinach Quiche with Sun-Dried Tomatoes! Our context highlights this as an “innovative way to utilize your veggies,” specifically mentioning “Spinach Quiche with Sun-Dried Tomatoes, feta, and mozzarella.” This dish is not just delicious; it’s “protein-packed” and a fantastic way to enjoy a wholesome, satisfying meal that feels incredibly gourmet, all while keeping that under-$5 budget.
This quiche is a vibrant celebration of vegetables and lean protein. Spinach is a dark, leafy green that, along with sun-dried tomatoes, contributes to the crucial goal of aiming for a “variety of colors on your plate.” These ingredients are “loaded with vitamins, fiber, and minerals,” giving your body a serious nutrient boost. Eggs form the protein-packed base of the quiche, fitting perfectly into the “Protein recommendations include seafood, lean meats and poultry, eggs, legumes… nuts, and seeds.” Eggs are a complete protein source, ensuring you stay full and energized.
To ensure this quiche remains a healthy hero, we can make smart choices with the dairy. While feta and mozzarella add wonderful flavor, opting for lower-fat versions of these cheeses can help you “replace saturated fats” with healthier options. And remember, “dairy recommendations include low-fat or fat-free milk.” Using skim milk or a plant-based alternative in your quiche filling can also reduce saturated fat content without compromising creaminess. Seasoning with “fresh herbs” like basil or oregano, rather than excessive salt, will enhance the flavors naturally.
Imagine slicing into a warm, savory quiche for your midday meal – pure bliss! This dish is not only easy to prepare in advance, making it perfect for meal prepping a week’s worth of lunches, but it also tastes fantastic cold or reheated. It’s a delightful way to “get a variety of healthy foods” into your diet, proving that healthy, budget-friendly lunches can be both elegant and incredibly delicious. This quiche is a total winner for any day of the week!

Mini Mediterranean Gluten Free Quiche (Paleo, Vegetarian, Dairy-free) recipes
Ingredients
Equipment
Method
- Preheat oven to 350°F (175°C) and lightly grease a 6-cup muffin tin.
- In a large bowl, whisk together almond flour, salt, and baking soda. Add melted coconut oil and water; mix until a cohesive dough forms.
- Divide the dough into 6 equal portions. Press each portion firmly and evenly into the bottom and up the sides of the muffin tin cups to form crusts.
- In a skillet over medium heat, sauté finely diced red onion until softened, then add minced garlic and chopped baby spinach. Cook until spinach wilts and excess moisture evaporates.
- In another bowl, whisk eggs, nutritional yeast, nut/seed mylk (or vegetable broth), and a pinch of pepper until well combined.
- Stir the sautéed onion, garlic, and spinach into the egg mixture, along with the sliced sun-dried tomatoes and pitted/sliced red olives.
- Carefully pour the egg and vegetable filling into each prepared almond flour crust, filling almost to the top.
- Bake for 20-25 minutes, or until the quiches are set and lightly golden brown on top.
- Remove from oven and let cool in the muffin tin for 5-10 minutes before carefully removing them.
- Serve warm or at room temperature.
Notes
There you have it, savvy eaters! We’ve journeyed through ten incredible, budget-friendly lunch ideas that are not just easy on your wallet but also bursting with flavor and nutritional goodness. From comforting soups to vibrant quiches, these recipes prove that eating healthy doesn’t have to be a luxury or a culinary chore. By embracing simple ingredients, smart preparation, and a little creativity, you can enjoy delicious, healthy meals every single day without ever breaking the bank. So go forth, get cooking, and transform your lunch routine into a feast of flavor and wellness! Your taste buds and your wallet will thank you. Happy prepping!

")
