

The culinary world is a vibrant tapestry of flavors, where spices often play the role of master artists, painting our dishes with depth, warmth, and irresistible aromas. We all dream of crafting that perfect meal, a harmonious blend where every ingredient sings in unison. Yet, even the most seasoned home cooks can stumble upon a culinary conundrum: those moments when spices, instead of elevating a dish, decide to wage a full-blown flavor war.
It’s a tale as old as time in the kitchen – two seemingly innocent spices meet, and instead of a beautiful duet, you get a cacophony that leaves your palate perplexed. Understanding what spices should not be used together isn’t just about avoiding a culinary misstep; it’s about unlocking a deeper appreciation for flavor profiles and ensuring that every dish you create is nothing short of a masterpiece. This journey into the spicy realm of culinary do’s and don’ts is about elevating your dishes and ensuring your flavor profile remains harmonious.
So, let’s embark on an exciting exploration of the notorious offenders in the spice cabinet—those combinations that can lead to disastrous results if not approached with caution. By shining a light on these tricky individual spices and their potential clashes, we’re not just learning what to avoid; we’re gaining the knowledge and confidence to truly master flavor harmony in our kitchens. Get ready to transform your cooking with newfound wisdom and a dash of adventurous spirit!

1. **Cinnamon**Cinnamon, with its distinctive aromatic, sweet, and warm profile, is a cherished spice, often evoking comforting memories of baked goods and rich stews. Its woody and pungent notes can be absolutely delightful, adding a deep dimension to a wide array of dishes. However, this beloved spice, characterized by its sweet and pungent profile, can become quite the troublemaker when paired incorrectly, leading to an off-putting flavor profile that can overwhelm the dish.
Specifically, the strong sweetness and warmth of cinnamon clash dramatically with the sharpness and bitterness that garlic brings to the table. While both are powerful players, their distinct flavor compounds create discord rather than harmony when combined directly. The result is often a confusing jumble on the palate, rather than the intended enhancement of flavors.
Beyond garlic, cinnamon also finds itself at odds with bay leaves. The sweetness of cinnamon clashes directly with the earthy bitterness of bay leaves, creating confusion on the palate that simply doesn’t make for an enjoyable experience. It’s best to keep these two distinct flavor profiles away from each other if you’re aiming for clarity and balance in your cooking.
Furthermore, the bold character of cinnamon, with its woody and earthy undertones, doesn’t always play well with herbs like rosemary and thyme. While these Mediterranean herbs have their own robust profiles, the dominating sweetness and pungency of cinnamon can easily overpower their more nuanced herbaceous notes, making for a less balanced and less enjoyable flavor composition. Thoughtful consideration of its strong profile is key when combining cinnamon with other assertive spices.

Apple Pie Shake
Ingredients
Equipment
Method
- Gather all necessary ingredients: frozen vanilla yogurt or ice cream, apple pie slices, milk, ground cinnamon, and optional whipped cream.
- Add the frozen vanilla yogurt (or ice cream) and the apple pie slices into a high-speed blender.
- Pour in approximately half of the recommended milk amount to start, adjusting later for desired thickness.
- Blend the ingredients on medium-high speed until the mixture is mostly smooth.
- Pause the blender and use a spatula to scrape down any ingredients clinging to the sides, ensuring even blending.
- Gradually add more milk, a tablespoon at a time, blending briefly after each addition until your desired shake consistency is achieved.
- Add a generous pinch of ground cinnamon to the mixture and blend for a final few seconds to thoroughly combine the flavors.
- Pour the prepared apple pie shake into chilled serving glasses.
- Optionally, top each shake with a dollop of fresh whipped cream and a further sprinkle of ground cinnamon for an appealing garnish.
- Serve immediately to enjoy this decadent and refreshing dessert beverage.
Notes
Read more about: Seriously, Where Did They Go? 14 Classic Desserts That Totally Vanished From Our Tables

2. **Cumin**Cumin is a cornerstone of many global cuisines, celebrated for its earthy, strong, and savory qualities. It brings a musky warmth that feels incredibly comforting and often serves as the foundational flavor for countless dishes. Known for its earthy qualities, this spice adds an irreplaceable depth to savory recipes, making it a favorite in everything from tacos to curries.
However, this earthy hero has a notorious rival: cardamom. Cumin is earthy and strong, while cardamom has a sweet, almost floral flavor. When used together, cardamom can overpower the cumin, leading to an unbalanced dish where cumin’s depth is utterly lost. Especially in savory recipes, it is advisable to keep these two spices separate to ensure each can truly shine.
The problem lies in the balance of their distinct flavor profiles. Cardamom, with its potent floral and sweet notes, simply doesn’t allow cumin’s more subtle earthy nuances to emerge. It’s like trying to hear a soft melody over a booming orchestra; the delicate notes are drowned out. This clash can lead to a dish that feels lopsided, missing the intended complexity.
Additionally, while cumin is a champion in savory applications, its strong, earthy character generally does not lend itself well to desserts. Attempting to integrate it into sweet dishes often results in an unexpected and jarring flavor that detracts from the intended sugary delight. Sticking to its strengths in pungent spices and warm dishes is often the best approach to harnessing cumin’s full potential.

Wendy’s Chili
Ingredients
Equipment
Method
- Brown the ground beef in a large pot or Dutch oven over medium-high heat, breaking it into small crumbles as it cooks. Drain any excess fat.
- Add the diced onions, green chili, and celery to the pot with the browned beef. Sauté until the vegetables are softened, approximately 5-7 minutes.
- Stir in the diced fresh tomatoes, cumin, chili powder, black pepper, and salt. Cook for 2-3 minutes, allowing the spices to bloom and become fragrant.
- Pour in the canned tomato sauce, kidney beans (with their liquid), pinto beans (with their liquid), and water.
- Bring the entire mixture to a gentle boil, then reduce the heat to low.
- Cover the pot and simmer for at least 1.5 to 2 hours, or longer for deeper flavor, stirring occasionally to prevent sticking and ensure even cooking.
- Taste the chili and adjust the seasoning as needed, adding more salt, chili powder, or a pinch of cayenne if a spicier kick is desired.
- Serve the hot chili, optionally garnished with desired toppings such as shredded cheese, sour cream, or fresh cilantro.
Notes
Read more about: Mastering Midlife: 12 Key Foods for Men’s Strength and Unwavering Vitality After 40
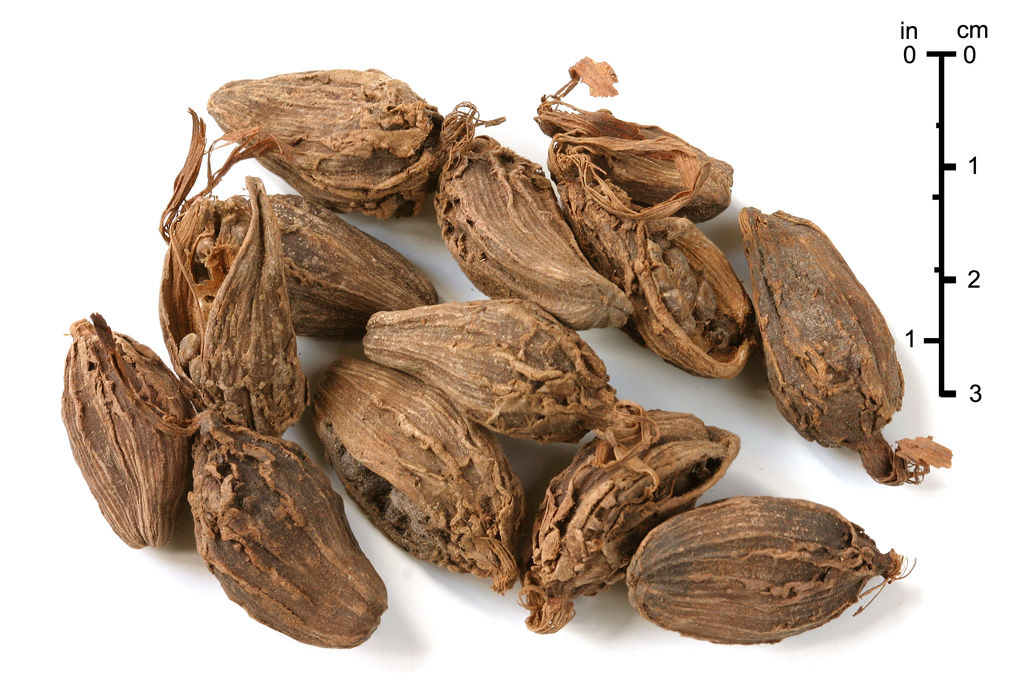
3. **Cardamom**Cardamom, a spice often described as having a sweet, almost floral flavor, is truly captivating. Its citrusy, herbaceous, and warm notes add an exotic elegance to both sweet and savory preparations, making it a prized ingredient in everything from aromatic curries to delicate pastries. Its unique profile can truly elevate a dish, imparting a sophisticated layer of taste.
Yet, despite its allure, cardamom must be approached with a discerning palate, especially when it comes to pairings. As we’ve noted, its potent floral quality can easily overpower the earthy notes of cumin, leading to an unbalanced dish where the latter’s contribution is completely obscured. The balance of power shifts too heavily, and cumin’s nuanced character vanishes under cardamom’s vibrant assault.
Furthermore, cardamom’s delicate yet assertive floral notes find themselves in a challenging dance with chives and lavender. Chives, with their allium-based, slightly pungent flavor, can create an odd contrast with cardamom’s sweetness, potentially leading to a confusing mix rather than a complementary one. The vibrant allium notes of chives can clash rather than harmonize with cardamom’s floral essence.
Lavender, another floral powerhouse, poses a different kind of challenge. While both are aromatic, the specific floral compounds can compete, or cardamom might be overwhelmed by the pungent, hot, or bitter spices that lavender often accompanies. It’s a delicate balance; you want to ensure cardamom’s unique character is allowed to sparkle, not get lost or create an unpleasant discord with overly strong or contrasting flavors.

Air Fryer Berry Hand Pies
Ingredients
Equipment
Method
- Prepare the pastry: Whisk together flour, 2 tablespoons granulated sugar, salt, and baking powder. Cut in cold butter and shortening until coarse crumbs form. Gradually add ice water, mixing until dough comes together. Form into a disk, wrap, and chill for at least 30 minutes.
- Prepare the berry filling: In a medium bowl, combine blueberries, raspberries, chopped strawberries, 1/4 cup granulated sugar, ground cardamom, and a pinch of salt.
- In a small separate bowl, whisk 1 tablespoon water with cornstarch and lime juice until smooth; stir this slurry into the berry mixture.
- On a lightly floured surface, roll out the chilled dough to about 1/8-inch thickness. Use a 3-inch round cutter to cut out approximately 16 circles.
- Place about 1 tablespoon of the berry filling onto one half of each dough circle, leaving a small border around the edge.
- Lightly moisten the edges of the dough with a little water, then fold the other half of the circle over the filling. Press to seal, then crimp the edges firmly with a fork.
- Brush the tops of the hand pies with the lightly beaten egg wash for a golden finish.
- Preheat your air fryer to 350°F (175°C). Arrange pies in a single layer in the air fryer basket, ensuring not to overcrowd. Air fry for 8-10 minutes, or until golden brown and puffed.
- While pies cool, prepare the glaze: In a small bowl, whisk confectioners’ sugar with 2 to 3 teaspoons of water until a smooth, pourable consistency is achieved.
- Drizzle the confectioners’ sugar glaze over the cooled berry hand pies before serving.
Notes
Read more about: Beyond the Fries: 15 Mind-Blowing Dishes You Won’t Believe Your Air Fryer Can Make!

4. **Chili Powder**Chili powder is undeniably a powerhouse in the spice rack, delivering a robust punch of heat and a wonderful depth to countless savory dishes. It’s the go-to for adding that fiery zest and rich, complex warmth that many cultures cherish in their cuisine, making dishes vibrant and incredibly satisfying. The spice contributes a quintessential pungency that defines many beloved comfort foods.
However, a common pitfall arises when chili powder encounters a bright, acidic ingredient like lemon. Chili powder adds heat and depth, whereas lemon brings brightness and acidity. When combined, the acidity can enhance the chili’s pungency to an unbearable level, making it difficult to enjoy the dish. This amplification of heat can quickly overwhelm the palate, overshadowing all other intended flavors.
The scientific rationale behind this unfortunate pairing is fascinating: acidity acts as a catalyst, intensifying the capsaicin, the compound responsible for chili’s heat. Instead of a balanced blend, you get an explosion of heat that can render a dish inedible for many. This isn’t about two flavors subtly clashing; it’s about one ingredient aggressively amplifying another beyond an enjoyable threshold.
To prevent this fiery imbalance, careful consideration is key. If you plan to introduce lemon or any other strong acidic component to a dish featuring chili powder, moderation is paramount. Experiment with small amounts and taste as you go, ensuring that the brightness of the lemon complements rather than overpowers the depth and warmth of the chili. Balance is everything in creating a truly delightful culinary experience.
Read more about: The Future is Flavorful: 14 Cutting-Edge Food Trends Set to Dominate Your Plate in 2025

5. **Oregano**Oregano, a quintessential Mediterranean herb, boasts a distinctively pungent and slightly bitter flavor, intertwined with herbaceous, piney, sweet, and earthy notes. It’s a robust player, capable of lending incredible depth and character to a dish, especially in Italian and Greek cuisines. Its strong aroma often precedes its taste, signaling a powerful presence in any recipe.
However, oregano’s assertive personality can sometimes be its downfall, particularly when paired with more delicate herbs. A prime example is its relationship with sage. Oregano often dominates with its pungent, slightly bitter flavor, while sage has a soft, peppery yet aromatic quality. When used together, sage can be lost entirely in the mix, while oregano steals the show.
This is a classic case of flavor dominance where oregano’s forceful profile simply overwhelms sage’s more subtle, musky notes. The dish ends up tasting primarily of oregano, with the unique contributions of sage completely obscured. It’s a missed opportunity for complexity and balance that could have been achieved with more mindful pairing.
Furthermore, combining oregano with other equally pungent herbs and spices can create a sensory overload. Instead of a rich tapestry of flavors, you might find yourself with a muddled, overpowering dish where too many strong voices are competing for attention. While oregano works well with other Mediterranean herbs and alliums, it’s best to be judicious when introducing it alongside other strong, pungent contenders to ensure a harmonious outcome.

Chicken Marbella
Ingredients
Equipment
Method
- Prepare the chicken: Cut whole chickens into serving pieces or use pre-cut parts, trimming any excess fat.
- Mince the garlic and roughly chop the fresh Italian parsley (set aside half for garnish).
- In a large mixing bowl, combine the brown sugar, white wine, red wine vinegar, olive oil, minced garlic, dried oregano, pitted prunes, olives, capers, and bay leaves.
- Add the chicken pieces to the marinade, ensuring all pieces are thoroughly coated. Cover the bowl and refrigerate for at least 6 hours, or preferably overnight, to allow flavors to meld.
- Preheat your oven to 350°F (175°C).
- Arrange the marinated chicken pieces in a large roasting pan in a single layer, pouring all the marinade over them.
- Bake for approximately 50-60 minutes, or until the chicken is cooked through, tender, and the skin is golden. Baste occasionally with the pan juices to keep the chicken moist and flavorful.
- Once cooked, remove the roasting pan from the oven.
- Garnish generously with the remaining fresh Italian parsley before serving.
- Serve hot, with the rich pan juices, alongside a starch like couscous or rice to soak up the delicious sauce.
Notes
Read more about: The Future is Flavorful: 14 Cutting-Edge Food Trends Set to Dominate Your Plate in 2025

6. **Sage**Sage, with its distinct soft, peppery yet aromatic quality, offers a complex blend of pungent, earthy, musky, and woody notes. It’s a herb that brings a comforting depth, often associated with rich, savory dishes like stuffings and roasted meats. Its flavor profile is both unique and powerful, making it a cherished ingredient for adding warmth and a hint of rustic elegance to meals.
Yet, for all its charm, sage is a herb that demands careful consideration when it comes to pairings. Its delicate peppery aroma can easily be overshadowed, particularly by bolder, more dominant herbs like oregano. As mentioned, when used together, sage can be lost entirely in the mix, with oregano’s more assertive presence stealing the show. This renders sage’s distinctive flavor virtually undetectable, leading to a flatter, less nuanced dish.
The challenge also extends to lighter flavor profiles. Sage’s earthy, musky character can clash surprisingly with bright floral or zesty citrus notes. While an unexpected pairing might sound intriguing, the reality can often be a jarring contrast where neither flavor truly enhances the other. Instead, the combination can leave the palate confused, creating an unpleasant discord.
To truly appreciate sage, it’s often best paired with other Mediterranean herbs, or bitter and musky spices where its unique qualities can stand out without being drowned out. Avoiding combinations that include overly floral or citrusy elements, or those with highly pungent herbs that will inevitably dominate, ensures that sage’s singular aromatic presence contributes meaningfully to the overall flavor harmony of your dish. Let sage shine in its own distinct way.

Air Fryer Scotch Eggs
Ingredients
Equipment
Method
- Prepare the dipping sauce: Combine Greek yogurt, mango chutney, mayonnaise, salt, pepper, curry powder, and cayenne pepper in a bowl. Mix well and set aside.
- Divide the pork sausage into 6 equal portions. Flatten each portion into a thin patty.
- Carefully place one hard-boiled egg in the center of each sausage patty. Gently mold the sausage around the egg, ensuring it’s completely sealed and evenly covered.
- Set up a breading station: Place flour in one shallow dish, the 2 lightly beaten eggs in another, and panko bread crumbs in a third.
- Roll each sausage-wrapped egg first in flour, then dip in beaten egg, and finally coat thoroughly with panko bread crumbs, pressing gently to adhere.
- Preheat your air fryer to 350°F (175°C). Lightly spray the coated eggs with cooking spray.
- Place 3 Scotch eggs in the air fryer basket, ensuring they are not touching. Air fry for 10 minutes, then flip them over.
- Continue to air fry for another 5-7 minutes, or until the sausage is cooked through and the coating is golden brown and crispy.
- Remove the cooked Scotch eggs from the air fryer and repeat with the remaining 3 eggs.
- Serve the warm Air Fryer Scotch Eggs immediately with the prepared mango chutney dipping sauce.
Notes
Read more about: Remembering the Stars: A Fond Farewell to the Beloved ‘Happy Days’ Actors We’ve Lost

7. **Bay Leaves**Bay leaves are often considered the quiet workhorses of the culinary world, utilized to impart a subtle, almost elusive flavor to soups, stews, and sauces. Their primary contribution is an earthy bitterness that builds a background depth, enhancing other ingredients rather than dominating the forefront. This understated quality makes them invaluable for creating complex, layered flavors over long cooking times.
However, despite their subtle nature, bay leaves are not without their potential clashes, particularly when paired with overtly sweet spices. A classic example of such a misstep is combining them with cinnamon. Bay leaves are often utilized to impart a subtle flavor to soups and sauces, while cinnamon delivers a rich warmth. The sweetness of cinnamon clashes with the earthy bitterness of bay leaves, creating confusion on the palate.
This flavor conflict arises because the gentle, grounding bitterness of bay leaves is directly at odds with the vibrant, sweet warmth that cinnamon brings. Instead of a complementary blend, you end up with a confusing sensation where neither spice can truly express its intended character. The palate struggles to reconcile these opposing profiles, leading to a disjointed taste experience.
To ensure your dishes achieve optimal flavor harmony, it’s best to keep these two distinct profiles away from each other. Bay leaves thrive in environments where their subtle depth can shine through, supporting savory elements without competition from pronounced sweetness. By respecting this boundary, you allow bay leaves to fulfill their role as a background flavor builder, contributing to a cohesive and satisfying meal without any unnecessary clashes.
Welcome back to our flavor exploration, where we continue our quest for culinary harmony! After navigating the initial ‘blacklist’ of spices that notoriously clash, it’s time to delve deeper into the pantry. Sometimes, the problem isn’t just about direct clashes, but about certain forms of spices that simply don’t pull their weight, or even worse, actively detract from your dish’s intended deliciousness. These ‘tricky’ spices, often found in convenience-driven forms, can leave your recipes falling flat or introduce unexpected, unwelcome notes.
Understanding these nuances is key to transforming your cooking from good to truly exceptional. We’ll explore why some widely used spice forms might be sabotaging your culinary efforts and, crucially, how to replace them with alternatives that deliver vibrant, authentic flavors. Get ready to elevate your spice game and ensure every meal sings with the clarity and depth it deserves!

Easy Sugared Bay Leaves
Ingredients
Equipment
Method
- Line a baking sheet with parchment paper; set aside.
- In a small bowl, whisk together the egg white and water until lightly frothy and combined.
- Pour the superfine sugar onto a shallow plate or dish.
- Take one fresh bay leaf at a time and, using a small pastry brush or your fingers, thinly coat both sides of the leaf with the egg white mixture. Ensure an even, light layer.
- Immediately dredge the coated bay leaf in the superfine sugar, turning to cover both sides completely. Gently shake off any excess sugar.
- Carefully transfer the sugared bay leaf to the prepared parchment-lined baking sheet, arranging them in a single layer without touching.
- Repeat the coating process for all remaining bay leaves.
- Allow the sugared bay leaves to air-dry at room temperature for at least 4-6 hours, or preferably overnight, until they are completely crisp and dry to the touch. Ensure good air circulation.
- If air is very humid, you may place them in an oven preheated to its lowest setting (around 150°F/65°C) with the door slightly ajar for 30-60 minutes, monitoring closely to prevent browning.
- Store the completely dry sugared bay leaves in an airtight container at room temperature for up to several weeks.
Notes
Read more about: The 21 Most Costly Accidents and Screwups in History

8. **Garlic Powder**Garlic powder often appears as a convenient shortcut in the kitchen, but it rarely captures the soulful depth of fresh garlic. Instead, it can leave your dishes tasting rather flat, or even usher in an unwelcome bitterness, largely depending on its processing and age. This lack of complexity can throw off the delicate balance of everything from comforting soups to vibrant marinades and rich sauces, especially when you’re aiming for that deeply roasted, mellow garlic essence.
Adding to its challenges, many commercially available garlic powders contain anti-caking agents. While practical for preventing clumps, these additives can introduce an undesirable chalky texture, further diminishing the quality of your culinary creations. It’s a classic case where convenience can come at the cost of genuine flavor and a pleasant mouthfeel, leaving your dish noticeably lacking in complexity and authenticity.
For those craving a warm, balanced garlic note without overwhelming other ingredients, a far superior alternative exists. Consider reaching for roasted garlic paste instead. This incredible ingredient is crafted by slow-roasting whole garlic bulbs until they become beautifully soft and caramelized, then mashing the cloves into a smooth, aromatic paste. It’s a game-changer that delivers a richer, smoother flavor, blending seamlessly into dressings, dips, and a wide array of cooked meals.
Roasted garlic paste brings a natural sweetness and mellow quality that stands in stark contrast to the potential bitterness of powdered garlic. It also contributes a wonderfully creamy texture to your sauces and spreads, enhancing the overall sensory experience. By toning down garlic’s inherent sharpness, roasting unlocks a subtle depth, making it an ideal choice for dishes that require a nuanced garlic presence rather than an aggressive punch. Even a modest amount can significantly elevate the entire flavor profile of your meal, proving that a little effort can go a long, delicious way.

White Chicken Chili
Ingredients
Equipment
Method
- Drain and rinse the canned white beans. In a medium bowl, mash half of the beans with a potato masher until chunky. Reserve the beans until needed.
- Add the canola oil to a large Dutch oven and heat it over medium-high heat. Add the peppers, onions, and garlic and saute until soft and fragrant, about 5 minutes. Season the vegetables with salt, and pepper, to taste. Add the cumin, coriander, and chili powder and continue to saute for 1 more minute to toast the spices. Stir in the chicken stock, and lime juice and bring to a simmer. Add the beans and continue to simmer for 20 more minutes.
- After 20 minutes of simmering, taste for seasoning, and adjust if necessary. Stir in the shredded rotisserie chicken and cilantro and simmer until heated through, about 5 more minutes. Serve the chili in individual bowls topped with a dollop of sour cream, crushed tortilla chips, and lime wedges.
Notes
Read more about: Mastering Midlife: 12 Key Foods for Men’s Strength and Unwavering Vitality After 40

9. **Dried Basil**Dried basil is a pantry staple for many, yet it often falls short in delivering the vibrant, fresh notes we associate with this beloved herb. All too frequently, it imparts a dusty and lifeless taste, a particularly disappointing outcome in tomato-based dishes where basil is meant to be a shining star. The culprit is often the drying process itself, which strips away most of the essential oils where basil’s full aroma and flavor reside.
When dried basil is added to sauces or other cooked preparations, its diminished structure means it often doesn’t break down effectively. This can leave behind a scratchy, unpleasant texture that further detracts from the enjoyment of your meal. Rather than enhancing the dish, it can become a textural hindrance, a ghost of its former vibrant self that offers little in terms of true flavor contribution.
If you’re seeking to infuse your cooking with basil’s true essence, fresh basil or basil-infused oil are vastly superior choices. Fresh basil bursts with a clean, peppery brightness that simply cannot be replicated by dried flakes. Its aromatic qualities are paramount, bringing a lively zest that lifts and harmonizes other flavors in a way dried basil cannot.
Basil oil, on the other hand, offers a fantastic way to capture the herb’s flavor without the texture of the leaves, blending beautifully into soups, dressings, and marinades. To keep fresh basil at its best, loosely wrap it in a damp paper towel and store it in a plastic bag in the fridge, where it will last up to five days. For longer-term storage, consider blending it with olive oil and freezing it in small portions. Either method ensures you have a potent source of basil flavor ready and waiting to brighten your dishes.
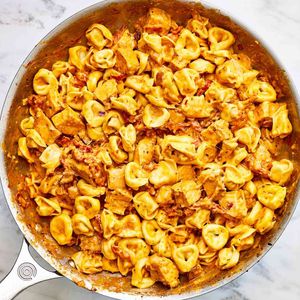
Marry Me Chicken Tortellini
Ingredients
Equipment
Method
- Chop bacon and cook in a large skillet until crispy; remove bacon and set aside, reserving rendered fat in the pan.
- Season pounded chicken breasts with salt and pepper, then sear in the reserved bacon fat until golden brown and cooked through; remove chicken, slice or dice, and set aside.
- Add shallot, garlic, drained sun-dried tomatoes, Italian seasoning, and crushed red pepper to the skillet; sauté until fragrant.
- Stir in tomato paste and cook for 1 minute, allowing it to deepen in color.
- Deglaze the pan with chicken broth, scraping up any browned bits, then stir in heavy whipping cream and bring to a gentle simmer, reducing slightly.
- Meanwhile, cook refrigerated cheese tortellini according to package directions in a separate pot of salted water until al dente; drain, reserving some pasta water.
- Return cooked chicken and crispy bacon to the skillet with the sauce.
- Add the drained tortellini and Parmesan cheese to the sauce; toss to combine everything thoroughly.
- If the sauce is too thick, add a splash of reserved tortellini cooking water to reach desired consistency; season with additional salt and pepper to taste.
- Serve immediately, garnished generously with torn fresh basil leaves and extra grated Parmesan cheese.
Notes
Read more about: The Unfussed Feast: Steve Martin & Martin Short’s Guide to Delightful 2-Ingredient Comfort Food

10. **Ground Nutmeg**Ground nutmeg, while convenient, is a spice that rapidly loses its aromatic vibrancy, often turning stale long before its printed expiration date. When old, it can impart a dusty or even sharp, off-putting taste, which is particularly problematic in delicate recipes like creamy custards or intricately spiced cakes. Using too much of this diminished spice can easily overpower a dish, creating an imbalance that obscures other intended flavors.
The fundamental issue lies in its form: grinding nutmeg exposes a larger surface area to air, light, and moisture, accelerating the evaporation of its precious essential oils. These oils are the heart of nutmeg’s warm, subtly sweet, and complex profile. Once lost, the spice offers little more than an echo of its former self, making any attempt to salvage its flavor a futile exercise.
For a truly transformative culinary experience, freshly grated nutmeg is an absolute must, whether you’re baking a sweet treat or seasoning a savory dish. Whole nutmeg, with its oils securely locked within its shell, retains its potency significantly longer, yielding a far more vibrant and intense flavor when grated on demand. You’ll discover that only a small amount is needed to impart a profound warmth and depth to your cooking.
Using a fine grater or microplane for this task is ideal, as it allows you precise control over the intensity of the flavor, a crucial aspect when crafting recipes that demand balance. The difference is palpable across a spectrum of dishes, from creamy béchamel sauces to intricate spice blends. Once you make the switch to whole nutmeg, the superior aroma and taste are so compelling that returning to pre-ground versions will feel like a compromise you’re unwilling to make. Store whole nutmeg in a cool, dry place and grate it just before use to ensure every dish benefits from its peak flavor.

Vanilla & Nutmeg Coffe Syrup
Ingredients
Equipment
Method
- In a small saucepan, combine the water and sugar.
- Place the saucepan over medium heat and bring the mixture to a gentle simmer, stirring occasionally with a whisk until the sugar is completely dissolved. Do not boil vigorously.
- Once the sugar is dissolved and the syrup is clear, remove the saucepan from the heat.
- Stir in the vanilla extract, ground nutmeg, and a pinch of salt until well combined.
- Allow the syrup to cool completely to room temperature.
- Once cooled, pour the syrup into a clean, airtight bottle or jar.
- Store the syrup in the refrigerator for up to 2-3 weeks.
Notes
Read more about: Beyond the Bite: 12 Healthy Foods That Turn Harmful When You Eat Too Much

11. **Onion Powder**Onion powder, much like its garlic counterpart, can prove to be a deceptive convenience in the kitchen. If it has lingered in the pantry for too long, it frequently develops an unpleasant metallic or stale taste that can quickly compromise the integrity of your dish. Beyond its flavor pitfalls, onion powder also suffers from a textural drawback: it often struggles to dissolve properly in certain recipes, leaving behind gritty, unwelcome bits that disrupt the smoothness of sauces and soups.
This reliance on a less effective form can prevent your cooking from reaching its full potential. The subtle, nuanced sweetness and pungent depth that fresh onions bring are simply not reproducible by their powdered equivalent, leaving a void in the dish’s flavor profile. It’s a shortcut that, more often than not, leads to a less satisfying outcome, lacking the vibrant character that whole ingredients provide.
Instead of resorting to onion powder, consider embracing the superior flavor and texture of finely chopped or grated fresh onion. This natural alternative integrates beautifully into sauces and soups, contributing an authentic sweetness and aromatic complexity that powder utterly lacks. Taking the extra step to sauté your fresh onions first can further unlock their flavors, deepening their caramelization and enriching the overall taste of your dish in a way that dry powder never could.
If a dry alternative is absolutely necessary, dried minced onion offers a more effective solution. It rehydrates far better than powder, maintaining a superior texture and delivering a flavor that more closely mirrors that of real onion. For utmost convenience, you can even chop fresh onions and store them in the freezer, ready for quick use in most cooked dishes. This approach ensures you capture the full, delightful flavor of onion without relying on a powdered form that often disappoints, allowing its softer aroma to complement rather than overpower other ingredients.
Read more about: Seriously, Where Did They Go? 14 Classic Desserts That Totally Vanished From Our Tables
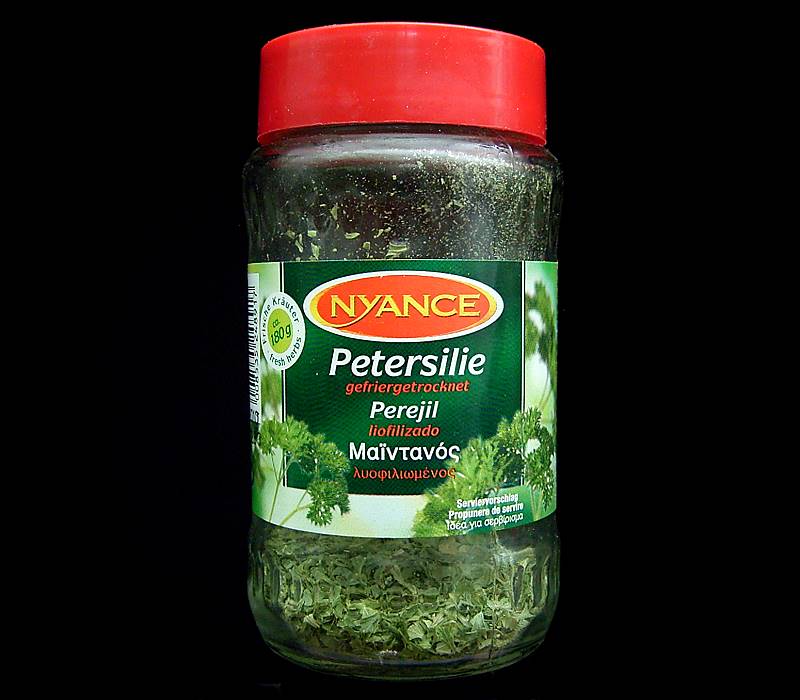
12. **Dried Parsley**Dried parsley, unfortunately, stands as one of the most underwhelming spices in the pantry, offering very little in the way of meaningful flavor. It frequently takes on a dull, paper-like taste that contributes almost nothing to a dish’s complexity or vibrancy. Its vibrant green color, which is a key visual appeal of fresh parsley, rapidly fades, and its delicate texture fails to hold up well when subjected to cooking, often disappearing into the background as an unnoticeable additive.
Most of the time, dried parsley merely occupies space without offering any useful culinary contribution. It’s a prime example of how a shortcut can strip an ingredient of its very essence, leaving behind a husk of what once was. For home cooks aiming to elevate their dishes, relying on dried parsley is a missed opportunity to infuse meals with genuine brightness and a fresh herbaceous note.
To truly brighten up savory dishes, the clear choice is fresh parsley. It delivers a clean, slightly peppery taste that awakens the palate and adds a burst of verdant freshness. Unlike its dried counterpart, fresh parsley not only contributes significantly to the flavor profile but also enhances the visual appeal of a dish with its vibrant green hues.
Whether chopped and sprinkled as a garnish or incorporated into a sauce during the final stages of cooking, fresh parsley provides an aromatic lift that dried versions simply cannot. Its distinct qualities are essential for dishes where a touch of lightness and herbaceous zest are desired, ensuring your culinary creations taste as vibrant as they look.
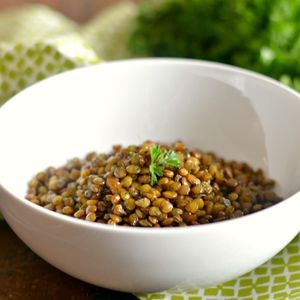
Skillet Popped Lentils With Parsley
Ingredients
Equipment
Method
- Thoroughly rinse the dry lentils under cold water using a fine-mesh sieve, then spread them in a single layer on a clean kitchen towel to air dry completely for at least 30 minutes, ensuring no moisture remains.
- Heat a large, heavy-bottomed skillet over medium-high heat until it is hot but not smoking.
- Add the completely dry lentils to the hot skillet, spreading them into an even single layer.
- Dry-roast the lentils, stirring frequently with a wooden spoon or spatula, for 5-10 minutes.
- Continue roasting until the lentils begin to audibly ‘pop,’ turn a golden-brown color, and achieve a consistently crispy texture. Be diligent to prevent them from burning.
- Once popped and crispy, immediately remove the lentils from the skillet and transfer them to a medium mixing bowl to cool slightly.
- Drizzle the warm popped lentils with the extra virgin olive oil and toss gently to ensure an even coating.
- Add the dried parsley, cayenne pepper, salt, and freshly ground black pepper to the bowl.
- Toss all the ingredients together thoroughly until the popped lentils are evenly seasoned.
- Taste and adjust any seasonings as necessary, then serve immediately as a crunchy snack, a unique garnish, or a topping for salads and soups.
Notes
Read more about: Beyond the Fries: 15 Mind-Blowing Dishes You Won’t Believe Your Air Fryer Can Make!
13. **Celery Salt**Celery salt, while seemingly innocuous, can be a particularly tricky ingredient to wield in the kitchen, often overpowering a dish with surprising speed. Its potent flavor, coupled with its inherent saltiness, makes it incredibly challenging to balance, especially in recipes that already feature brined or salted ingredients. The risk of over-salting becomes alarmingly high, jeopardizing the delicate equilibrium of your culinary creation.
Moreover, if you’re aiming to introduce a genuine depth of flavor, celery salt rarely delivers beyond a sharp, singularly salty punch. It lacks the nuanced complexity and the pleasant textural contribution that fresh celery brings to a dish. Relying on celery salt for anything more than a very specific, minimal application can lead to a dish that feels flat and one-dimensional, dominated by an aggressive saltiness rather than a rich, layered flavor profile.
A far more effective and controlled approach is to use finely diced fresh celery alongside a modest pinch of regular salt. This combination allows you to accurately manage both the salt content and the intensity of the celery flavor, providing a cleaner, more natural taste. Fresh celery also introduces a desirable texture, contributing to the overall mouthfeel of the dish in a way that salt simply cannot.
For situations requiring a more concentrated celery flavor without the bulk of fresh stalks, celery seed is an excellent alternative. While stronger in flavor than fresh celery, it is significantly easier to control than celery salt. You can choose to grind the seeds for a smoother integration into sauces or leave them whole for a subtle crunch and burst of flavor. This thoughtful substitution empowers you to achieve the desired celery essence while maintaining perfect balance in your seasoning.

California Waldorf Salad Gelatin Mold
Ingredients
Equipment
Method
- Lightly grease a 7-cup gelatin mold with a neutral oil or non-stick spray, then set aside.
- For the first layer, in a small bowl, sprinkle 1 envelope of unflavored gelatin over 3 tablespoons of fresh lemon juice; let bloom for 5 minutes.
- In a small saucepan, gently heat 1/2 cup of water. Stir in the bloomed gelatin, 1/4 cup sugar, and 1/2 teaspoon kosher salt until fully dissolved; remove from heat and cool slightly.
- Whisk the prepared 1/2 cup onion dip into the cooled gelatin mixture until smooth and well combined.
- Pour the onion dip mixture into the prepared gelatin mold. Chill in the refrigerator for 30-45 minutes, or until just firm but not completely solid.
- For the second layer, in a separate small bowl, sprinkle 2 envelopes of unflavored gelatin over 6 tablespoons of fresh lemon juice; let bloom for 5 minutes.
- In another small saucepan, gently heat 1 cup of water. Stir in the bloomed gelatin, 1/2 cup sugar, and 1 teaspoon kosher salt until fully dissolved; remove from heat and cool completely to room temperature.
- Once cooled, gently fold in the 1 cup chopped apples, 1/2 cup chopped walnuts, and 1/2 cup chopped celery into the second gelatin mixture.
- Carefully pour the apple-walnut-celery mixture over the set first layer in the mold.
- Chill the entire mold in the refrigerator for at least 4 hours, or preferably overnight, until completely firm. To serve, briefly dip the mold in warm water, then invert onto a serving platter.
Notes
Read more about: The Future is Flavorful: 14 Cutting-Edge Food Trends Set to Dominate Your Plate in 2025
Remember, every spice tells a story, and you are the storyteller in your kitchen. By respecting the unique personalities of these aromatic gems and making conscious decisions about their pairings and preparations, you unlock a deeper level of flavor harmony. So go forth, experiment with newfound confidence, and let your dishes sing with the vibrant, balanced flavors they were always meant to possess. Happy cooking, and may your culinary adventures be endlessly delicious and always perfectly spiced!


")