

There’s just something about the food we grew up with, isn’t there? That first bite of a dish from your childhood can instantly transport you back to simpler times, to family dinners, and to the warm, fuzzy feeling of being utterly cared for. It’s more than just a meal; it’s a powerful connection to our past, a delicious hug from memory lane, reminding us of the ultimate state of “physical or psychological ease, often characterized by the absence of hardship.”
Comfort itself is a profound experience, a “state of physical or psychological ease, often characterized by the absence of hardship.” When we talk about comfort foods, we’re tapping into a unique blend of these feelings. These are the dishes that create “feelings of psychological well-being or emotional relief,” often because they’re linked to our “eating history and early experiences, including family-cooked meals.” It’s a sensory journey back to perceived safety and familiarity, where every spoonful or bite feels like coming home.
So, grab your favorite cozy blanket, settle in, and get ready for a trip down memory lane! We’re about to explore some of the most beloved comfort foods from our childhoods – the kind that, no matter how much time passes, still manage to evoke that perfect sense of warmth, security, and pure deliciousness. These aren’t just recipes; they’re edible heirlooms, passed down through generations, bringing joy and a deep sense of belonging with every forkful. Let’s revisit these timeless favorites and let them remind us of the warmth of home-cooked memories!
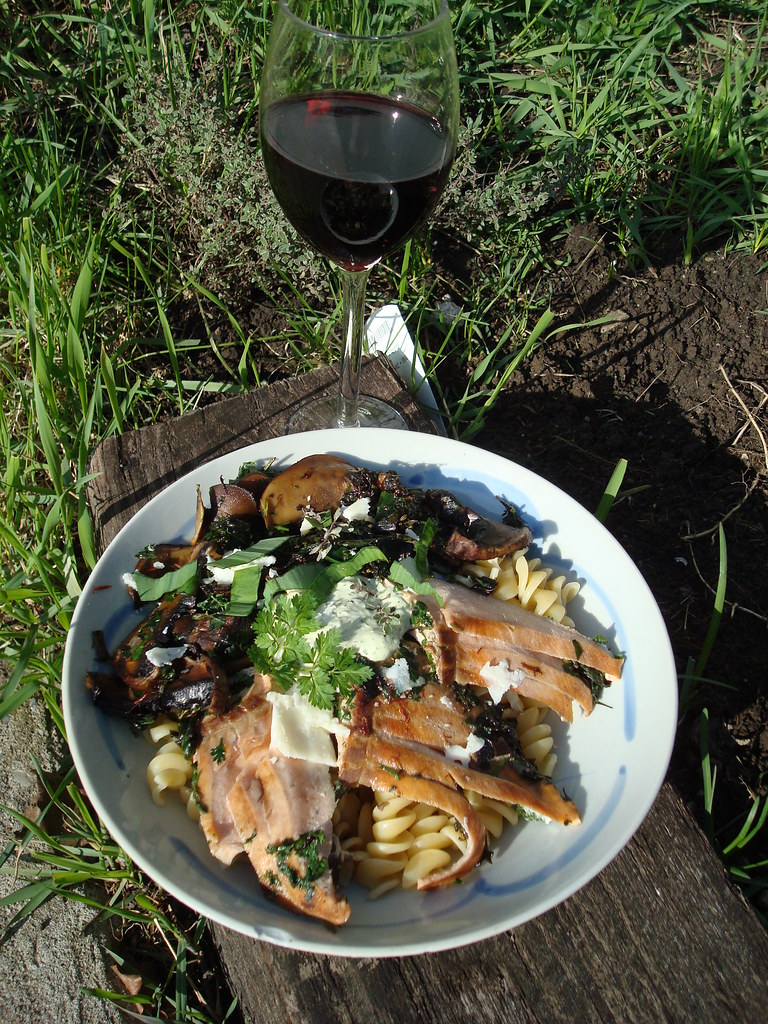
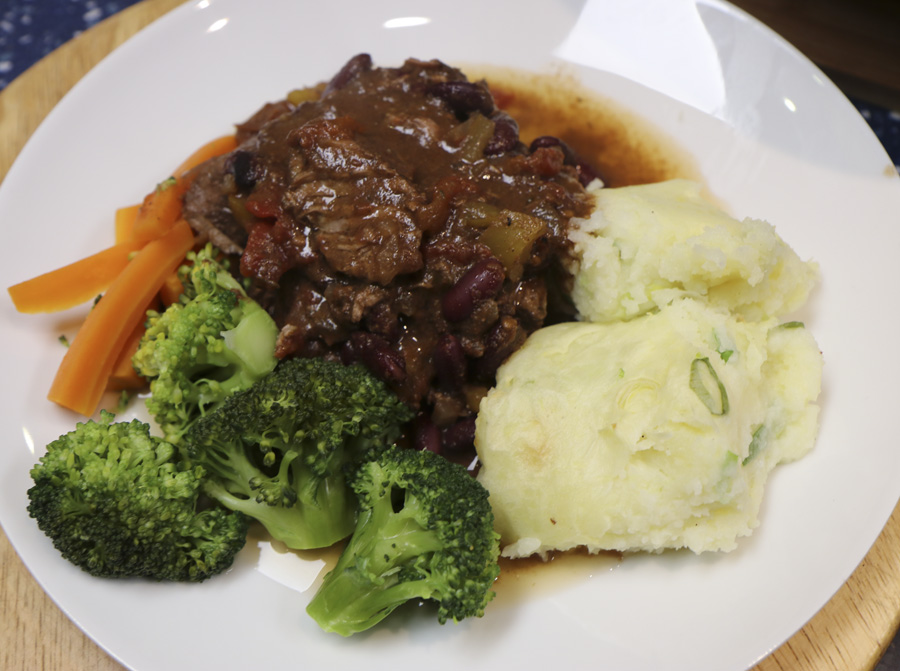
1. **Mushroom Leek Pasta Bake**Ah, the mushroom leek pasta bake! This dish embodies everything wonderful about a hearty, comforting family dinner. It brings together creamy pasta with the delicate sweetness of tender leeks and the rich, earthy notes of mushrooms. It’s the kind of meal that fills the kitchen with an aroma that instantly says, “dinner is ready, and it’s going to be amazing.”
What makes this dish so special, and such a classic comfort food, is its ability to evoke those nostalgic family dinners. Many of us remember similar baked pasta dishes appearing on the table, signaling a meal made with love and designed to satisfy. The baked format not only enhances the flavors, creating a wonderfully golden and bubbling top, but it also simplifies preparation, making it a dream for weeknights or when feeding a gathering.
This isn’t just about the taste; it’s about the experience. Imagine gathering around the table, the casserole dish steaming in the center, everyone eager for a scoop. This mushroom leek pasta bake captures that essence, reminding us of the satisfying, wholesome meals that anchored our family life and created lasting memories. It’s a true testament to how simple ingredients can come together to form something truly extraordinary and deeply comforting.
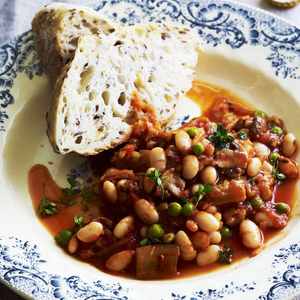
Leek, bean and mushroom bake
Ingredients
Equipment
Method
- Soak dried white beans overnight, then drain and cook until tender; set aside.
- Preheat your oven to 180°C (350°F) and lightly grease an ovenproof baking dish.
- Heat olive oil in a large pot, then sauté sliced leeks, crushed garlic, halved swiss brown mushrooms, and coarsely chopped celery until softened.
- Deglaze the pot with dry red wine, scraping any browned bits from the bottom, and cook until almost evaporated.
- Stir in vegetable stock, bottled tomato pasta sauce (passata), and fresh thyme sprigs; bring to a simmer and cook for 10 minutes to allow flavors to meld.
- Remove thyme sprigs, then stir in the cooked white beans and frozen peas.
- Pour the bean and vegetable mixture into the prepared baking dish.
- Bake for 20-25 minutes, or until the bake is hot and bubbling.
- While the bake is in the oven, toast the multigrain bread and halve each slice.
- Serve the leek, bean, and mushroom bake hot, garnished with the toasted multigrain bread.
Notes
Read more about: Nourish Your Future: 14 Simple Anti-Inflammatory Foods Doctors Recommend for a Healthier You After 40
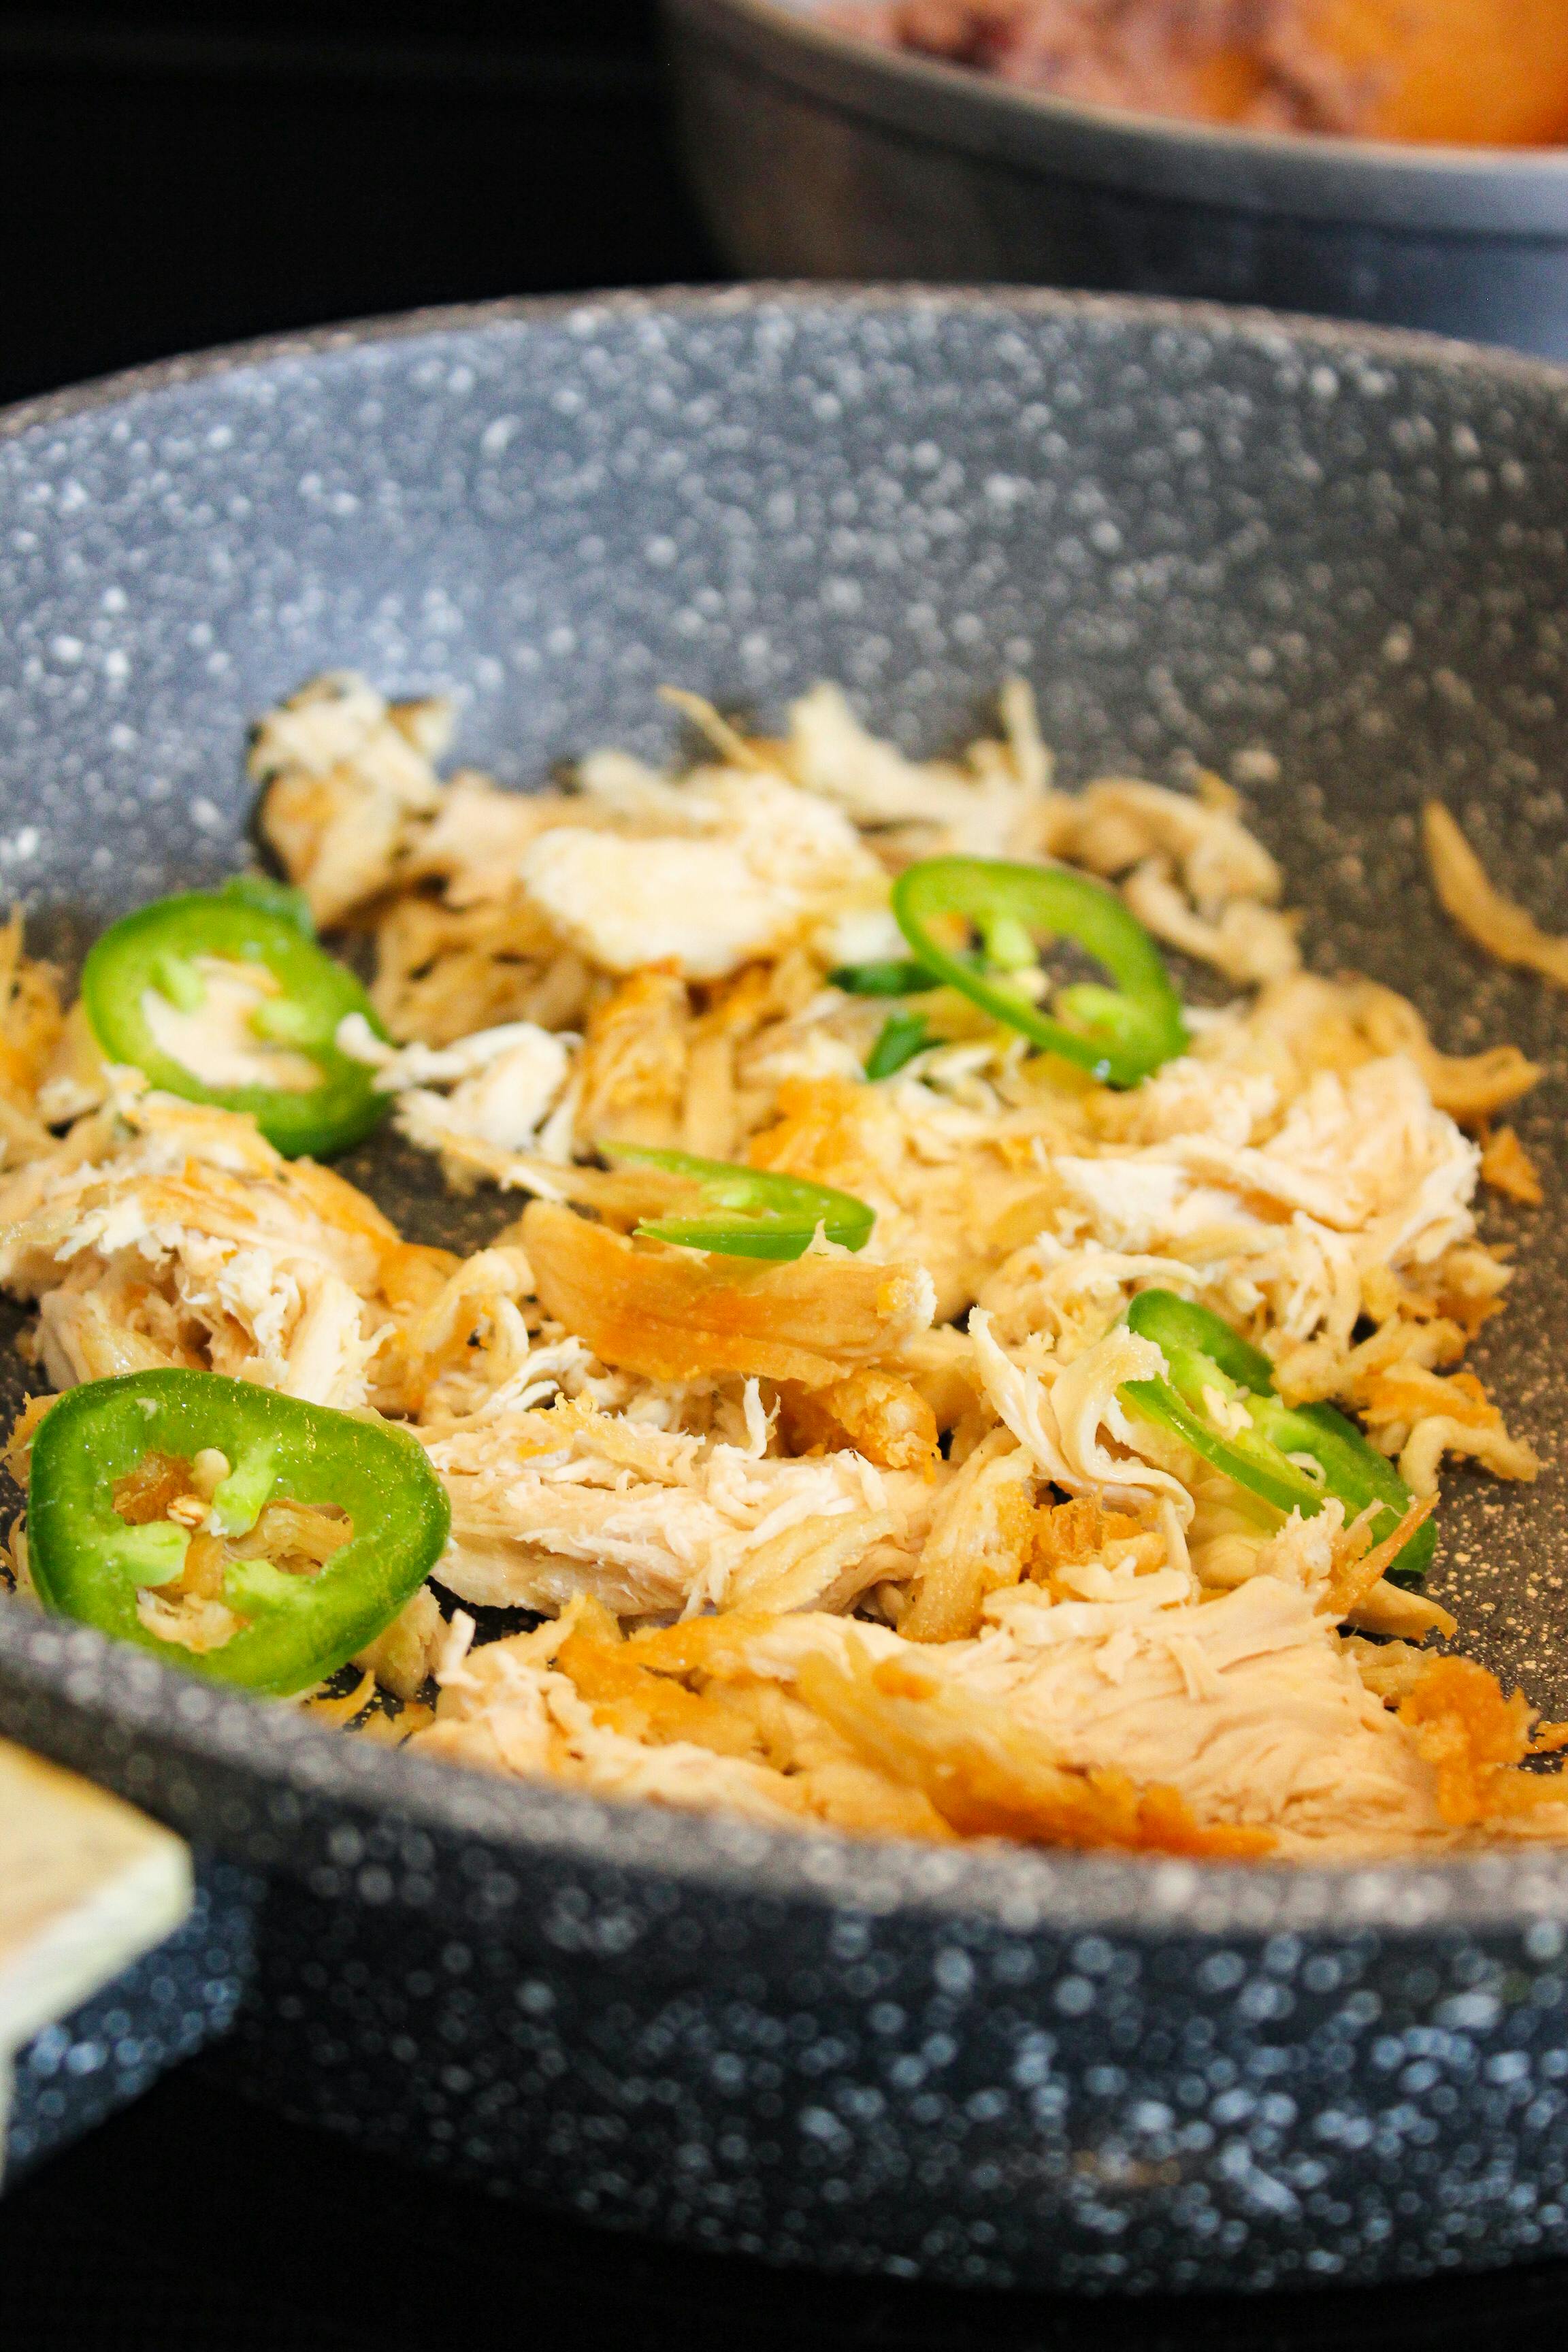
2. **Instant Pot Chicken and Peppers**Next up, we have the Instant Pot Chicken and Peppers, a meal that delivers tender chicken and vibrant vegetables in a rich, flavorful broth. This dish is a fantastic modern take on those classic home-cooked meals we adored as kids, showing us that comfort can evolve while keeping its core essence intact. It’s the kind of meal that felt both special and utterly achievable, even on a busy Tuesday night.
One of the biggest reasons this dish hits different is its incredible ease and speed of preparation, perfectly mirroring the practical yet comforting dishes from our childhood. The Instant Pot works its magic, ensuring that tender chicken and perfectly cooked peppers come together without a fuss. It’s a testament to the idea that delicious, hearty food doesn’t always require hours of simmering on the stove.
This one-pot wonder strikes a beautiful balance between simplicity and heartiness. It’s a dish that felt like a complete meal, offering both protein and vegetables in a satisfying way. For many, it evokes memories of those cherished family meals that brought everyone together, offering warmth and nourishment after a long day. It’s an uncomplicated dish that provides maximum comfort, just like the best childhood memories.
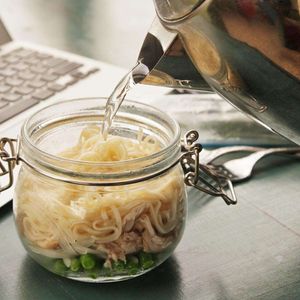
DIY Chicken and Dill Instant Noodles Recipe
Ingredients
Equipment
Method
- Divide the high-quality chicken base evenly among four individual serving bowls.
- Add the thinly sliced onion, frozen peas, and shredded rotisserie chicken meat to each bowl.
- Place one small nest of rice noodles, precooked ramen, or Italian pasta into each bowl.
- Bring a sufficient amount of water to a rolling boil using a kettle or a pot.
- Carefully pour the boiling water over the ingredients in each bowl, ensuring the noodles are fully submerged.
- Cover the bowls immediately and let the ingredients steep for 3 to 5 minutes, or until the noodles are tender and all components are heated through. Adjust steeping time based on your noodle choice.
- Uncover the bowls and stir in the minced fresh dill leaves.
- Season each bowl generously with kosher salt and freshly ground black pepper to taste.
- Gently stir all ingredients together to ensure even distribution of flavors and heat.
- Serve the homemade instant noodles immediately and enjoy hot.
Notes
Read more about: Beyond the Flames: 13 Barbecue Myths Pitmasters Want You to Stop Believing for Safer, Tastier Grilling

3. **Cheesy Cabbage Casserole with Cracker Topping**If you’re looking for a dish that truly screams comfort and nostalgia, look no further than the Cheesy Cabbage Casserole with Cracker Topping. This isn’t just a casserole; it’s a hug in a dish, combining creamy, tender cabbage with a wonderfully crunchy cracker topping that adds an irresistible textural contrast. It’s the kind of unassuming hero dish that always made an appearance at family potlucks and holiday spreads.
Its simple preparation is another hallmark of childhood comfort foods, perfect for weeknight dinners or effortlessly feeding a crowd. There’s something so appealing about a dish that’s easy to assemble but delivers so much flavor and satisfaction. It reflects the practicality and resourcefulness often found in the meals prepared by parents and grandparents, who knew how to make simple ingredients sing.
The combination of flavors and textures in this casserole feels like a heartfelt tribute to classic family favorites. The cheesy goodness melting into the soft cabbage, topped with that golden, buttery crunch, creates a symphony of comfort. Bringing this dish to the table is like recapturing the essence of timeless dinners, filled with laughter, good company, and incredibly satisfying food that sticks to your ribs in the best possible way.
Read more about: Beyond the Fridge: 14 Ingenious Ways to Transform Leftover Vegetables into Culinary Masterpieces

4. **Creamy Vegan Broccoli Casserole**Even if you weren’t vegan as a kid, this Creamy Vegan Broccoli Casserole is designed to transform simple ingredients into a dish that’s wonderfully reminiscent of the vegetable-based casseroles from your childhood. It’s proof that comfort food can be wholesome and adaptable, offering that same cozy feeling with a modern twist. The tenderness of the broccoli, bathed in a rich, creamy sauce, is pure bliss.
Baked to perfection, this casserole offers both convenience and deep comfort. The easy preparation makes it a fantastic addition to any meal, whether as a main dish or a hearty side. It effortlessly captures the essence of nostalgic cooking, reminding us that even humble vegetables can be transformed into something truly special and comforting. It’s a delicious way to ensure everyone at the table feels nourished and content.
This dish is a gentle reminder of meals filled with care and simplicity, the kind where you knew every ingredient was chosen to bring joy. The creamy texture and savory notes make it incredibly satisfying, evoking those quiet, happy moments around the dinner table. Let this casserole revive those warm memories, proving that plant-based options can deliver just as much heartfelt comfort as their traditional counterparts.
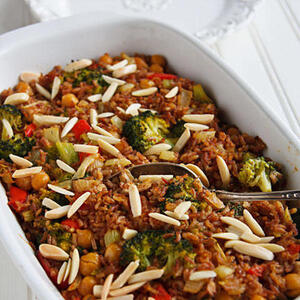
Creamy Vegan Broccoli and Rice Casserole
Ingredients
Equipment
Method
- Preheat your oven to 375°F (190°C) and lightly grease a 9×13 inch casserole dish.
- Chop the head of broccoli into small florets (approximately 5 cups). Finely chop the onion, red or yellow bell pepper, and celery.
- In a large pot or Dutch oven, sauté the chopped onion, bell pepper, and celery over medium heat until they are softened and fragrant, about 5-7 minutes.
- Add the prepared broccoli florets and dried thyme to the pot. Stir well to combine and cook for an additional 3-5 minutes, allowing the broccoli to become bright green and slightly tender-crisp.
- Stir in the cooked chickpeas and the warm brown rice. If using a creamy vegan sauce (e.g., cashew cream, plant-based béchamel), add it at this stage and mix thoroughly to coat all ingredients.
- Season the entire mixture generously with salt and freshly ground black pepper to taste, adjusting as needed.
- Transfer the combined ingredients from the pot into the prepared casserole dish, spreading the mixture evenly to ensure consistent cooking.
- If using, sprinkle the sliced or slivered almonds over the top of the casserole for an optional crunchy texture and nutty flavor.
- Bake the casserole for 25-30 minutes, or until it is heated through, bubbly around the edges, and the top is lightly golden.
- Remove the casserole from the oven and let it rest for 5-10 minutes before serving, allowing the flavors to meld and the dish to set slightly.
Notes
Read more about: Beyond the Fridge: 14 Ingenious Ways to Transform Leftover Vegetables into Culinary Masterpieces

5. **My Grandmother’s Recipe for Carrot Casserole**There’s nothing quite like a recipe that starts with “My Grandmother’s Recipe for…” It instantly imbues a dish with a sense of warmth, history, and tradition, and this Carrot Casserole is no exception. With its tender, lightly spiced carrots, this dish brings the heart of grandma’s kitchen straight to your table. It’s a subtle sweetness, a comforting earthiness, all wrapped up in a familiar embrace.
The sweet and savory profile of this casserole makes it incredibly versatile, whether you serve it as a beloved side dish or even as a standalone, lighter meal. This versatility is a hallmark of many treasured childhood recipes, which often had to stretch to serve various purposes or complement whatever else was on the menu. It gracefully evokes the simplicity and wisdom of meals from the past, where every ingredient played its part perfectly.
One of the most charming aspects of this particular comfort food is its minimal ingredients and straightforward preparation. This simplicity reflects the true heart of home-cooked meals, where the focus was on flavor and nourishment rather than complexity. Let this recipe transport you back to the flavors and traditions of your childhood, to the kitchen where love was the secret ingredient, and every dish told a story.

Grandmother’s Carrot Casserole
Ingredients
Equipment
Method
- Preheat your oven to 350°F (175°C). Lightly grease a 9×13 inch baking dish.
- In a large pot of lightly salted boiling water, cook baby carrots for 10-15 minutes, or until tender. Drain well.
- While carrots are cooking, finely chop the onion and grate the Cheddar cheese.
- In a large mixing bowl, combine the cooked and drained carrots, chopped onion, mayonnaise, grated Cheddar cheese, and sugar. Mix thoroughly to combine all ingredients.
- Transfer the carrot mixture evenly into the prepared baking dish.
- Crush the buttery round crackers finely or coarsely, according to your desired texture.
- Sprinkle the crushed crackers evenly over the top of the carrot mixture in the baking dish, ensuring good coverage.
- Bake for 20-25 minutes, or until the casserole is heated through and the cracker topping is golden brown and crisp.
- Remove the casserole from the oven and let it stand for a few minutes to set before serving.
- Serve warm as a hearty and flavorful side dish.
Notes
Read more about: The Great BBQ Blunder: How to Turn an Empty Grill into a Feast (and Save Face)

6. **Chicken Hash Brown Casserole**Okay, let’s be real: who doesn’t love a good hash brown casserole? Now, imagine that comforting classic elevated with tender chicken and melted cheese – that’s the magic of Chicken Hash Brown Casserole! This dish is a powerhouse of comfort and nostalgia, combining crispy hash browns, savory chicken, and glorious, gooey cheese into one irresistible package. It’s the kind of dish that makes you feel instantly happy.
The beauty of this casserole, much like many of the easy-to-love meals we devoured as kids, is its one-dish preparation. This keeps things wonderfully simple and manageable, which is exactly what busy parents or hungry families need. It’s practical, yes, but more importantly, it delivers maximum flavor with minimal fuss, a trait we all appreciated in our childhood favorites.
With its hearty flavors and satisfying textures, this casserole is absolutely perfect for busy nights when you need a quick win, or for those relaxed family dinners where everyone wants seconds. It brings back the simplicity and heartiness of classic comfort food, the kind that filled you up and left you feeling content. This dish isn’t just food; it’s a warm, cheesy, potato-filled hug that reminds you of home.
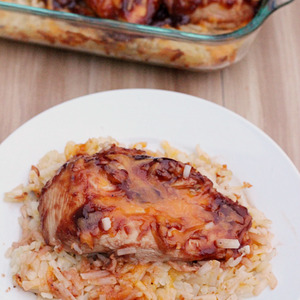
Barbecue Chicken Hash Brown Casserole
Ingredients
Equipment
Method
- Preheat oven to 375°F (190°C). Lightly grease a large baking dish (approx. 9×13 inch).
- Cook the boneless, skinless chicken breasts. This can be done by boiling, grilling, or pan-frying. Once cooked, shred or dice the chicken into bite-sized pieces.
- In a large mixing bowl, toss the shredded or diced chicken with the 1 cup of barbecue sauce until thoroughly coated. Set aside.
- If frozen, ensure the 30-ounce bag of shredded hash browns is thawed. Pat them dry with a paper towel to remove excess moisture.
- In another large mixing bowl, combine the thawed hash browns with 1/4 cup extra virgin olive oil, 1 teaspoon salt, and 1/2 teaspoon pepper. Mix well to ensure the hash browns are evenly coated.
- Spread half of the seasoned hash brown mixture evenly into the bottom of the prepared baking dish.
- Layer the barbecue chicken mixture over the hash browns in the baking dish.
- Sprinkle half of the 2 cups of cheddar cheese over the chicken layer.
- Top with the remaining hash brown mixture, spreading it out evenly, and then sprinkle the remaining cheddar cheese over the top.
- Bake for 30-40 minutes, or until the casserole is golden brown and bubbly, and the hash browns are cooked through and slightly crispy on top. Let stand for a few minutes before serving.
Notes
Read more about: Seriously, Where Did They Go? 14 Classic Desserts That Totally Vanished From Our Tables

7. **One-Pot Buttermilk Chicken and Potatoes Casserole**Closing out our first half of comfort food heaven, we have the One-Pot Buttermilk Chicken and Potatoes Casserole. This dish is a masterclass in hearty family meals, pairing marinated buttermilk chicken thighs with perfectly crispy potatoes. The buttermilk tenderizes the chicken beautifully, infusing it with a subtle tang that makes every bite truly exceptional. It’s a robust, flavorful meal that feels deeply traditional.
The genius of this recipe lies in its straightforward preparation and incredibly easy cleanup. In the hustle and bustle of modern life, just like in the past, convenience doesn’t have to mean sacrificing flavor or comfort. This dish reflects the practicality of meals made with love, where the goal was to nourish and delight without creating an overwhelming amount of work. It’s a win-win for everyone involved.
With its rich flavors and deeply satisfying textures, this casserole captures the very essence of comforting dishes from the past. The crispy edges of the potatoes, the succulent chicken, and the harmonious blend of seasonings create a culinary experience that is both familiar and exciting. Let this recipe simplify your dinner plans while bringing back those cherished flavors and the warm, embracing feeling of a truly magnificent home-cooked meal.
Alright, if those first seven dishes had you reaching for your apron and calling up old recipes, get ready, because we’re just getting started! Our journey down memory lane continues with more iconic comfort foods that shaped our youth, reminding us why these incredible meals still ‘hit different’ in the best possible way. These are the dishes that made every day feel a little brighter and every meal a little more like home. Let’s dive back in!

Chicken, bacon & potato stew
Ingredients
Equipment
Method
- Heat olive oil in a large, heavy-based pot or Dutch oven over medium-high heat. Brown the chicken thighs on all sides until deeply golden, then remove and set aside.
- Add the chopped bacon to the pot and cook until crisp. Remove the bacon with a slotted spoon and set aside, leaving the rendered fat in the pot.
- Reduce heat to medium. Add the chopped shallots to the pot and cook gently for 5-7 minutes until softened and translucent, scraping up any browned bits from the bottom of the pan.
- Pour in the white wine, scraping the bottom of the pot thoroughly with a wooden spoon to deglaze and incorporate all the flavorful fond. Bring to a simmer and cook for 2-3 minutes until slightly reduced.
- Return the browned chicken thighs and crispy bacon to the pot. Add the baby new potatoes and thyme sprigs.
- Pour in the hot chicken stock. Bring the stew to a gentle boil, then reduce the heat to low, cover, and simmer for at least 1.5-2 hours, or until the chicken is falling-off-the-bone tender and the potatoes are soft.
- Once the chicken is tender, remove and discard the thyme sprigs. If using, gradually stir in the buttermilk off the heat to prevent curdling, ensuring it is well incorporated.
- Squeeze in the lemon juice and stir in the chopped fresh tarragon.
- Taste and adjust seasoning with salt and freshly ground black pepper as needed.
- Serve the comforting stew hot, ideally with crusty bread or a light side salad.
Notes
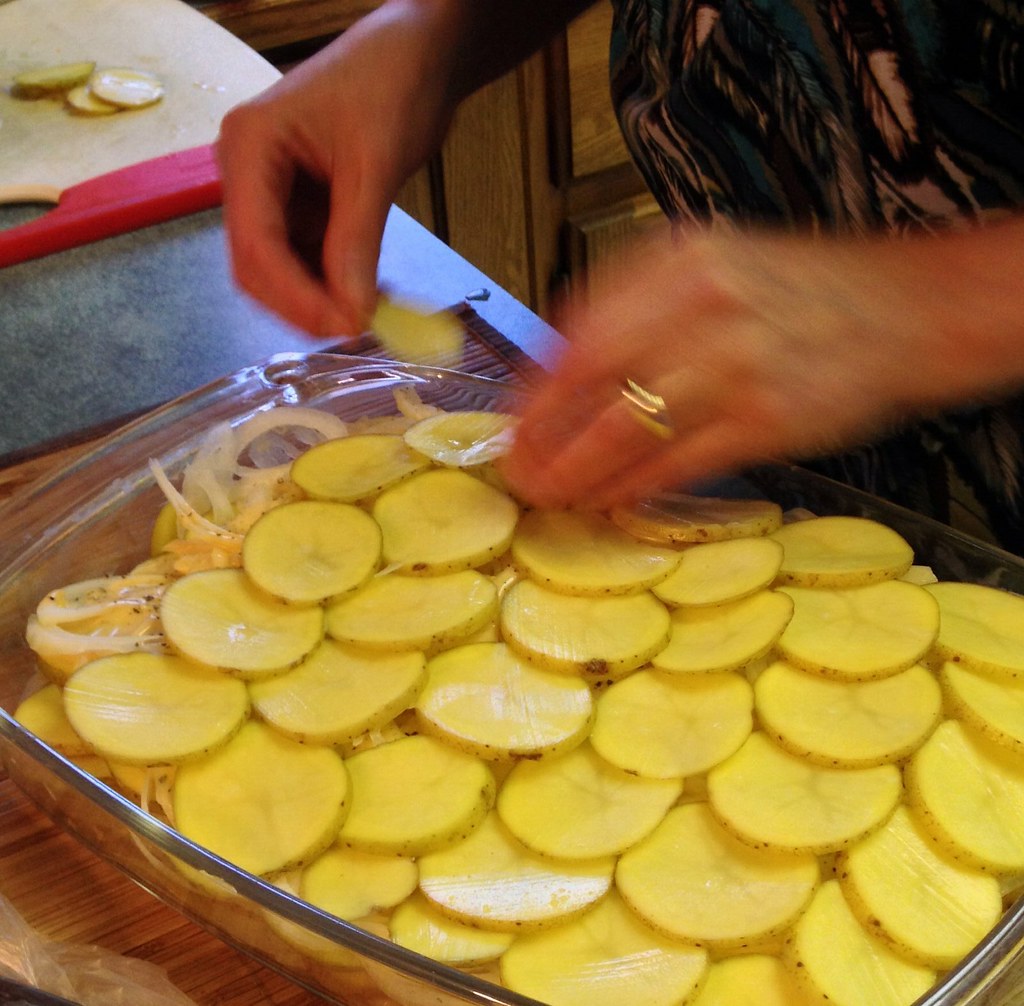
8. **Easy Scalloped Potatoes**Is there anything more universally loved than a pan of beautifully baked scalloped potatoes? This dish, with its tender slices of potato bathed in a rich, creamy sauce, is an absolute superstar of side dishes. It’s the kind of comforting classic that instantly transports you back to bustling family gatherings, holiday meals, or even just a particularly special Sunday dinner at grandma’s house.
What makes these scalloped potatoes so incredibly comforting is their straightforward charm and timeless appeal. It’s not about complex flavors or exotic ingredients; it’s about pure, unadulterated deliciousness born from simple components. The creamy, savory layers melt in your mouth, bringing that perfect balance of softness and richness that feels like a warm, delicious embrace.
This versatile dish pairs seamlessly with almost any main course, whether it’s a perfectly roasted chicken, a juicy ham, or a hearty beef roast. It always elevates the meal, adding a touch of nostalgic elegance and making everything feel a bit more special. You know it’s going to be a good meal when a generous scoop of these babies lands on your plate.
Easy Scalloped Potatoes are more than just a side; they’re a cornerstone of comfort food tradition, a delicious echo of the dishes that truly defined home cooking for so many of us. So go ahead, whip up a batch, and let this classic remind you exactly why some things are just better from scratch.

Easy Scalloped Potatoes
Ingredients
Equipment
Method
- Preheat your oven to 375°F (190°C). Lightly coat a 9×13 inch baking dish with cooking spray.
- Peel the potatoes and slice them thinly and uniformly, about 1/8 inch thick, using a sharp knife or mandoline for best results.
- Arrange a single layer of sliced potatoes evenly in the bottom of the prepared baking dish.
- Sprinkle approximately one-third of the all-purpose flour over the potato layer, then season generously with salt and pepper to taste.
- Place a layer of Cheddar cheese slices over the seasoned potatoes, using about one-third of the cheese.
- Repeat the layering process: add another layer of potatoes, sprinkle with flour, season with salt and pepper, and top with cheese slices.
- Add the final layer of potatoes, sprinkle with the remaining flour, season, and top with the remaining Cheddar cheese slices.
- Carefully pour the skim milk evenly over the layered potatoes and cheese, ensuring it distributes throughout the dish.
- Cover the baking dish tightly with aluminum foil and bake for 60 minutes. Then, remove the foil and bake for an additional 15-20 minutes, or until the potatoes are fork-tender and the cheese is bubbly and golden brown.
- Remove from the oven and let the scalloped potatoes rest for 10-15 minutes before serving to allow the sauce to set and prevent it from being too runny.
Notes
Read more about: Diner Truths: 14 Iconic Dishes That Quietly Vanished From Menus (And Why We Secretly Miss Them!)

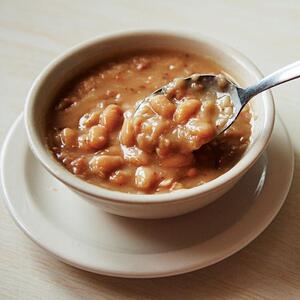
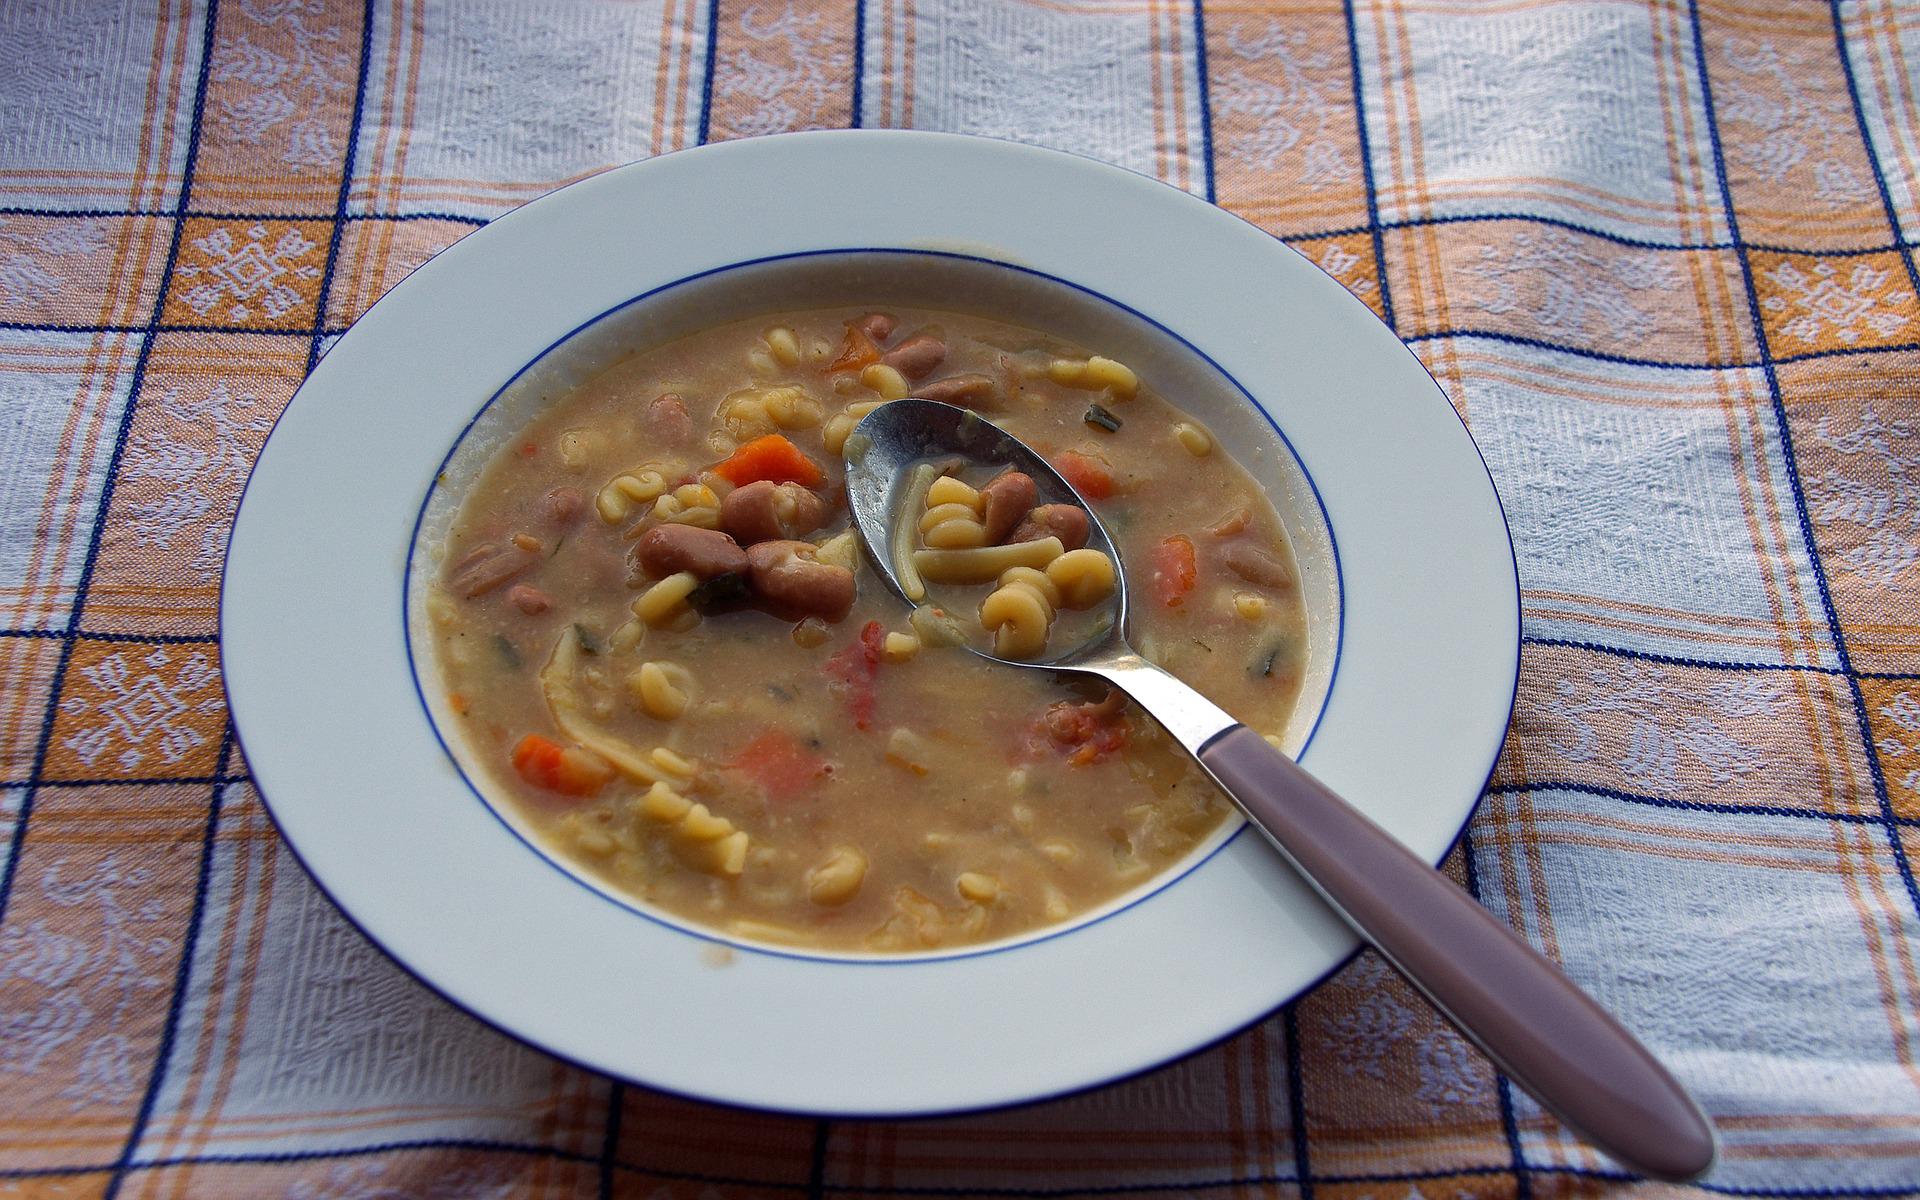
9. **White Bean Soup**Sometimes, the most comforting meals come from the humblest of beginnings, and White Bean Soup is the perfect example. It takes simple pantry staples and transforms them into a creamy, incredibly hearty dish. This soup feels like the kind of meal our parents and grandparents made to nourish and comfort us, using what they had to create something truly magical.
But don’t let its simplicity fool you; this soup is packed with flavor. The addition of fresh, vibrant vegetables isn’t just for looks; it adds a wonderful balance and depth that makes every spoonful utterly satisfying. It’s a wholesome choice for any night, especially when you’re craving something light yet deeply fulfilling, a real hug in a bowl.
One of the best things about White Bean Soup is its one-pot preparation. That means less fuss in the kitchen and more time enjoying the warmth and flavor. This practical approach aligns perfectly with the meals many of us grew up with – delicious food that didn’t require hours of slaving over a stove, leaving more time for family laughter and conversation.
This isn’t just soup; it’s a testament to how simple ingredients, combined with a little love, can transform into a profoundly comforting bowl of memories. Let White Bean Soup whisk you away to those cozy evenings, proving that sometimes, the easiest dishes leave the biggest impact.
White Bean Soup
Ingredients
Equipment
Method
- Place Great Northern beans in a large bowl, cover with at least 3 inches of cold water, and soak overnight (8-12 hours).
- The next day, drain the soaked beans thoroughly and rinse them under cold running water.
- Roughly chop the smoked ham into desired, bite-sized pieces.
- Transfer the drained beans and chopped ham to a large pot or Dutch oven.
- Cover the beans and ham with enough fresh cold water (approximately 8-10 cups, or 2-3 inches above the ingredients).
- Bring the pot to a boil over medium-high heat, then immediately reduce the heat to low.
- Simmer gently, partially covered, for 1.5 to 2 hours, or until the Great Northern beans are very tender. Skim any foam that rises to the surface during the first 30 minutes.
- Taste the soup. Season carefully with Kosher salt and freshly ground black pepper, adjusting to your preference, keeping in mind the ham’s inherent saltiness.
- Remove the pot from the heat and let the soup rest for about 10-15 minutes, allowing flavors to meld further.
- Ladle the hot white bean soup into bowls and serve immediately.
Notes
Read more about: Unleashing Your Inner Foodie: Yelp’s Top 14 All-You-Can-Eat Restaurants, State by State
10. **Easy Beef Stew**When the weather gets chilly or you just need a serious dose of comfort, nothing quite hits the spot like a hearty Easy Beef Stew. We’re talking tender, fall-apart beef, chunky, satisfying vegetables, and a rich, savory broth that clings to every ingredient. This is a classic comfort dish that has been loved for generations, and for good reason!
The magic of this stew is not just in its incredible flavor, but also in its one-pot preparation. You get all that hearty goodness without a mountain of dishes, which is definitely a win in our book! It simplifies cooking without losing an ounce of the robust, well-loved feel of a slow-simmered recipe. It’s home cooking at its absolute best, without the stress.
Easy Beef Stew is perfect for those big family dinners where everyone gathers around, or for when you’re looking forward to delicious leftovers that taste even better the next day. It brings a beautiful blend of practicality and deep nostalgia to the table, creating moments and memories that last long after the last spoonful has been savored.
Let this stew envelop you in its warmth and remind you of all those wonderful home-cooked meals shared with loved ones. It’s a dish that warms you from the inside out, making everything feel right with the world, even if just for a little while.
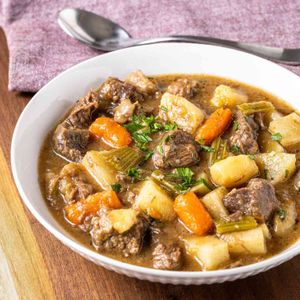
Easy Beef Stew
Ingredients
Equipment
Method
- Pat the beef chuck dry and season generously with kosher salt.
- Heat olive oil in a large Dutch oven over medium-high heat. Sear the beef in batches until well browned on all sides, then remove and set aside.
- Add celery, onion, carrots, and parsnips to the pot, sautéing until softened and lightly caramelized.
- Stir in black pepper and fresh thyme, then sprinkle with flour, cooking for 1-2 minutes to toast the flour.
- Deglaze the pot with a splash of beef broth, scraping up any browned bits from the bottom.
- Return the seared beef to the pot, add remaining beef broth, water, balsamic vinegar, and Worcestershire sauce. Bring to a simmer.
- Reduce heat to low, cover, and cook for 1.5 to 2 hours, or until the beef is very tender.
- Add the peeled and cubed russet potatoes to the stew. Continue to simmer, uncovered, until the potatoes are tender, about 20-30 minutes.
- Taste and adjust seasoning with additional salt and pepper as needed.
- Garnish with fresh chopped parsley before serving hot.
Notes
Read more about: Seriously, What Happened? 12 Once-Beloved Foods Americans Just Don’t Eat Anymore (And Why We Kinda Miss ‘Em)
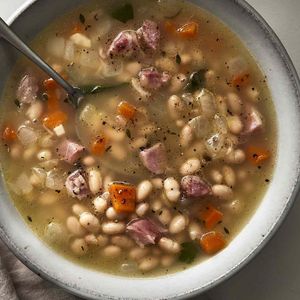
11. **Navy Bean and Ham Soup**There’s something so wonderfully grounding about a bowl of Navy Bean and Ham Soup. It’s a dish that takes creamy, wholesome beans and combines them with savory ham to create a hearty meal. This soup feels like it emerged directly from the pages of a beloved family cookbook, carrying the whispers of traditional meals and comforting flavors.
What makes this recipe truly special is its clever use of affordable staples. It’s a fantastic example of the simplicity and resourcefulness often found in the meals we grew up with, where ingenuity turned everyday ingredients into something spectacular. It’s food that makes sense, both for your palate and your wallet.
This soup is absolutely perfect for busy evenings when you need something quick and satisfying, or for those cold nights when all you crave is warmth and nourishment. With every spoonful, it offers a deep sense of contentment, reminding you of the simple pleasures that define true comfort food.
Let Navy Bean and Ham Soup transport you back to the heart of those family dinners, where simple, wholesome ingredients were transformed into meals filled with love and warmth. It’s a timeless classic that continues to deliver that perfect cozy feeling, bite after delicious bite.
Navy Bean and Ham Soup
Ingredients
Equipment
Method
- Pick over the dry navy beans, rinse them thoroughly, and drain.
- Place the prepared navy beans, fresh parsley sprigs, chopped fresh thyme, bay leaf, smoked ham hocks, coarsely chopped carrot, onion, and garlic into a large stockpot or Dutch oven.
- Add 8 cups of cold water to the pot, ensuring all ingredients are submerged.
- Bring the mixture to a rolling boil over high heat.
- Once boiling, reduce the heat to low, cover the pot, and let it simmer gently for 2 to 2 1/2 hours, or until the beans are tender.
- Carefully remove the ham hocks, parsley sprigs, thyme sprigs, and bay leaf from the pot using tongs or a slotted spoon. Discard the herbs and bay leaf.
- Allow the ham hocks to cool slightly until they are easy to handle. Remove the meat from the bones and shred or dice the ham.
- Return the shredded or diced ham meat to the soup in the pot.
- Season the soup generously with kosher salt and freshly ground black pepper to taste, adjusting as needed.
- Ladle the hot Navy Bean and Ham Soup into serving bowls and serve immediately.
Notes

12. **Cracker Barrel Meatloaf**Who doesn’t love a good meatloaf, especially one that brings back the cozy vibes of a classic diner or a Sunday supper? This copycat Cracker Barrel Meatloaf delivers all the mouth-watering flavors of homestyle cooking, with perfectly seasoned beef baked until it’s tender and juicy. It’s a testament to the power of a well-made meatloaf to bring pure, unadulterated joy.
This dish truly evokes those cherished memories of hearty meals shared around the dinner table, capturing the very essence of comforting recipes from the past. It’s the kind of centerpiece meal that made everyone gather ’round, eagerly awaiting their slice. There’s a magic to it that goes beyond just the ingredients.
One of the best parts? It’s surprisingly easy to prepare, making it a fantastic way to bring back a beloved classic you might have forgotten about, or perhaps only enjoyed outside the home. It’s simple enough for a weeknight, but special enough for a weekend treat, hitting all the right nostalgic notes.
Let this Meatloaf remind you of all those incredible dishes that made home feel extra special, the kind that filled the house with inviting aromas and filled your tummy with happiness. It’s not just a meal; it’s a delicious, memory-packed experience waiting to happen.

Cracker Barrel Meatloaf
Ingredients
Equipment
Method
- Preheat oven to 350°F (175°C) and lightly grease a loaf pan.
- Finely crush 45 butter crackers. In a large mixing bowl, combine the crushed crackers, 2 pounds ground beef (80 percent lean), 1 cup grated sharp cheddar, 1/2 to 3/4 cup finely diced green bell pepper, 1/2 cup finely diced yellow onion, 1/2 cup whole milk, 2 lightly beaten large eggs, 1 teaspoon salt, and 1/4 teaspoon black pepper.
- Gently mix all meatloaf ingredients until just combined; avoid overmixing to keep the meatloaf tender.
- Shape the mixture into an even loaf and place it into the prepared loaf pan.
- In a small bowl, whisk together 1/2 cup ketchup, 2 tablespoons brown sugar, and 1 teaspoon yellow mustard for the glaze.
- Bake the meatloaf for 45 minutes.
- Remove the meatloaf from the oven, then spread the glaze evenly over the top.
- Return to the oven and continue baking for an additional 15-20 minutes, or until an internal temperature of 160°F (71°C) is reached and the glaze is caramelized.
- Remove from the oven and let the meatloaf rest in the pan for 10-15 minutes before slicing to allow juices to redistribute.
- Slice and serve warm.
Notes

13. **Chicken Pastina Soup**Okay, let’s talk about a real blast from the past: Chicken Pastina Soup! This isn’t just any soup; it’s a bowl of pure, unadulterated nostalgia. With its tender chicken and those adorable, tiny star-shaped pastina, it literally feels like a warm, comforting hug from your childhood. You can almost feel your mom or grandma spooning it into your bowl.
This comforting soup is a superstar for a reason: it’s quick and incredibly easy to prepare. That makes it absolutely perfect for those busy family meals when you need something wholesome and delicious on the table without a ton of fuss. It’s the kind of dish that brings instant relief and a contented sigh.
Packed with simple ingredients and possessing a timeless appeal, Chicken Pastina Soup is a recipe that practically guarantees a trip down memory lane, bringing back those cherished memories of home-cooked care and gentle warmth. It’s the ultimate pick-me-up when you’re feeling under the weather or just needing a dose of cozy.
So, if you’re looking to revive those cozy, familiar flavors you grew up loving, look no further. This soup is a testament to the power of simple ingredients to create profound comfort, proving that some things never go out of style and always hit that sweet spot of nostalgia.

Chicken and Egg Soup with Pastina
Ingredients
Equipment
Method
- Remove all meat from the rotisserie chicken and shred; set aside. Place the chicken carcass and bones into a large stockpot.
- Finely chop the small onion. In the same stockpot with the chicken bones, heat the extra virgin olive oil over medium heat. Add the chopped onion and sauté until softened and translucent, about 5 minutes.
- Add the 2 cups of low sodium chicken broth and 4 cups of water to the pot with the chicken bones and sautéed onion. Bring to a gentle simmer, then reduce heat and cook for 15-20 minutes to extract maximum flavor from the bones.
- Carefully remove and discard the chicken carcass and bones from the pot. Skim any excess fat from the surface of the broth. Return the flavorful broth to a gentle simmer.
- Add the 1/2 cup of pastina to the simmering broth and cook according to package directions until al dente, stirring occasionally to prevent sticking.
- While the pastina cooks, whisk together the 2 large eggs and 2 egg yolks in a small bowl until well combined. Gradually ladle about 1 cup of the hot broth from the pot into the egg mixture, whisking continuously to temper the eggs.
- Slowly pour the tempered egg mixture back into the simmering soup, whisking constantly to prevent the eggs from scrambling and to create a silky, smooth texture. Do not boil the soup after adding the eggs.
- Stir in the reserved shredded rotisserie chicken and the 2 cups of baby spinach (or other baby greens) until the spinach has wilted, about 1-2 minutes.
- Squeeze in the juice of both lemons. Stir in the 1/4 cup of chopped fresh dill. Season the soup generously with kosher salt and freshly ground pepper to taste.
- Ladle the hot soup into bowls. Garnish with crumbled feta cheese, if desired, and serve immediately.
Notes

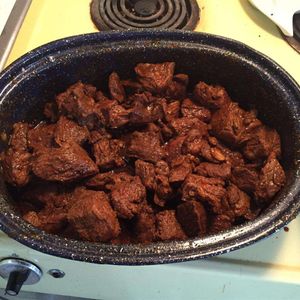
14. **Authentic Hungarian Goulash**Get ready for a flavor journey with Authentic Hungarian Goulash, a dish that truly embodies the heart of traditional comfort food. We’re talking about incredibly tender beef, rich, warming spices like paprika, and slow-cooked flavors that meld together into a symphony of deliciousness. This is a meal that whispers stories of old-world kitchens and generations of culinary wisdom.
This isn’t just a recipe; it feels like a cherished heirloom, a dish that has been lovingly handed down through generations, each one adding to its depth and soul. It offers the kind of nourishing, soul-satisfying experience that truly defined family meals, bringing everyone to the table for a taste of tradition and warmth.
The depth of flavor achieved through slow cooking, combined with its comforting simplicity, makes this Goulash a dish absolutely worth revisiting. It’s hearty, it’s wholesome, and it brings a unique, savory experience that stands out from the crowd. Plus, it smells absolutely incredible while it’s cooking, filling your home with inviting aromas.
Let this Authentic Hungarian Goulash remind you exactly why the classics never go out of style, and why some traditions are simply too delicious to ever let fade. It’s a celebration of rich flavors and comforting heritage, a true culinary embrace that will leave you feeling utterly content.
Authentic Hungarian Goulash
Ingredients
Equipment
Method
- Melt butter in a large Dutch oven or heavy-bottomed pot over medium heat.
- Add diced onions and sauté until softened and translucent, about 8-10 minutes, ensuring they do not brown too quickly.
- Cut flank steak into 1-inch cubes. Add the beef to the pot, increasing heat slightly, and sear until nicely browned on all sides, about 5-7 minutes. Remove any excess fat if desired.
- Stir in caraway seed, dried marjoram, minced garlic, and paprika, cooking for 1-2 minutes until fragrant, being careful not to burn the paprika.
- Pour in 2 cups of water, scraping the bottom of the pot with a wooden spoon to deglaze and incorporate all the browned bits.
- Bring the mixture to a gentle simmer, then reduce heat to low, cover, and cook for 2-2.5 hours, or until the meat is very tender.
- While the goulash simmers, peel and cube the potatoes.
- After the meat has cooked, add the cubed potatoes to the pot. Stir well to combine.
- Continue to simmer, covered, for another 30-40 minutes, or until the potatoes are fork-tender.
- Season generously with salt and pepper to taste before serving hot.
Notes
Read more about: Discover Europe Stateside: 14 American Gems Offering Old-World Charm Without the International Airfare
Well, there you have it, a delicious odyssey through 14 of the most incredible comfort foods from our childhoods! From creamy casseroles to hearty stews and soothing soups, these dishes aren’t just about filling our bellies; they’re about nourishing our souls, reminding us of simpler times, loving hands, and the pure, unadulterated joy of being home. So, which one are you digging into first? Grab a fork, a spoon, or whatever utensil your heart desires, and let the good times (and great food) roll! After all, these flavors are more than just food; they’re edible memories, and they absolutely still hit different.


