

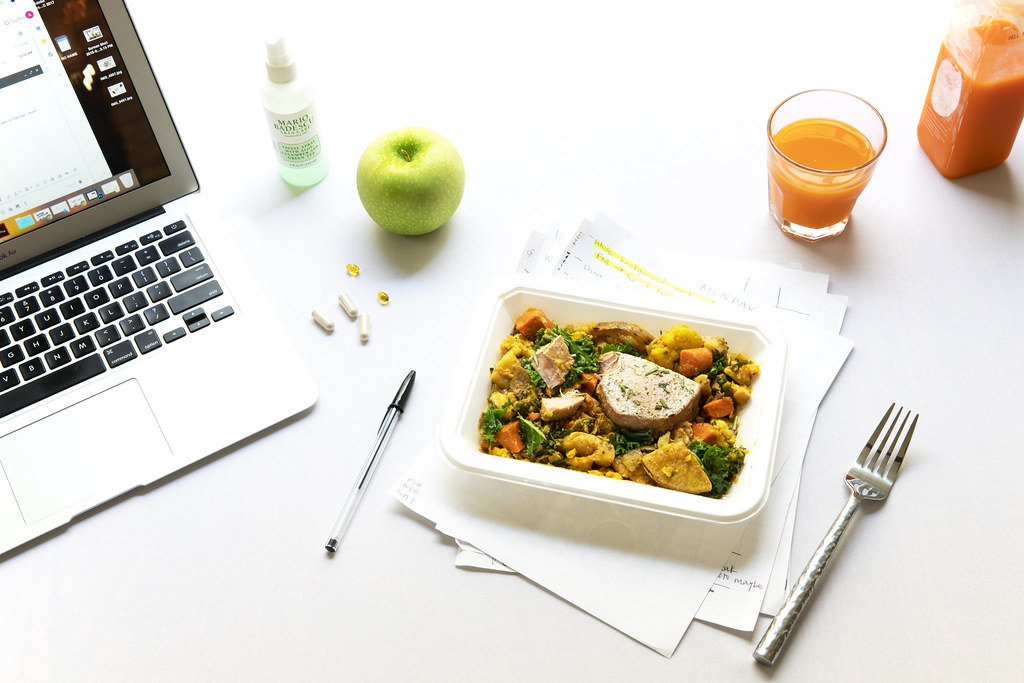
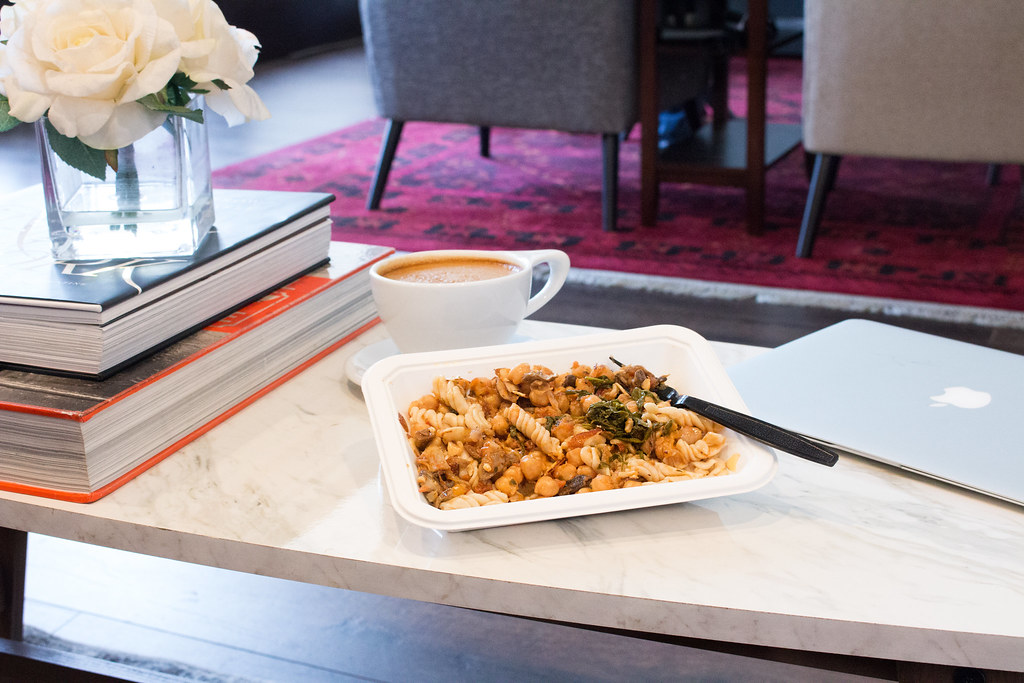
Alright, listen up, busy bees! We all know the drill: It’s the end of a loooong work day, you’re utterly exhausted, and the thought of cooking anything from scratch? Absolutely not. That’s usually when the pizza delivery app calls your name, or maybe you find yourself staring blankly into the fridge, only to settle for microwaved popcorn (don’t worry, we’ve all been there!). But what if there was a way to bypass that decision fatigue and ensure you always have something delicious and nutritious waiting for you? Enter meal prepping!
Meal prepping is seriously a game-changer. By dedicating just a little time once or twice a week, you can plan, shop, prepare, and portion out your meals, banishing those frantic, end-of-day hunger pangs for good. Beyond the sheer convenience, meal prepping offers a treasure trove of benefits. Think about it: it’s a fantastic way to stick to a healthy, calorie-controlled diet, helping you avoid those sneaky food cravings and even supporting weight loss, according to the Harvard T.H. Chan School of Public Health. Plus, who doesn’t love saving a bit of cash by buying ingredients in bulk or snagging those sweet sale deals?
However, let’s be real – becoming a meal prep guru isn’t always smooth sailing. Like any new adventure, it takes practice, and yes, there are definitely some challenges and pitfalls waiting to trip you up. But don’t you worry, because we’re here to spill the tea on the most common meal prep fails that can turn your fridge into a sad science experiment or leave you utterly bored by Wednesday. Let’s dive into these often-made mistakes so you can sidestep them like a pro and make your meal prep journey a roaring success!

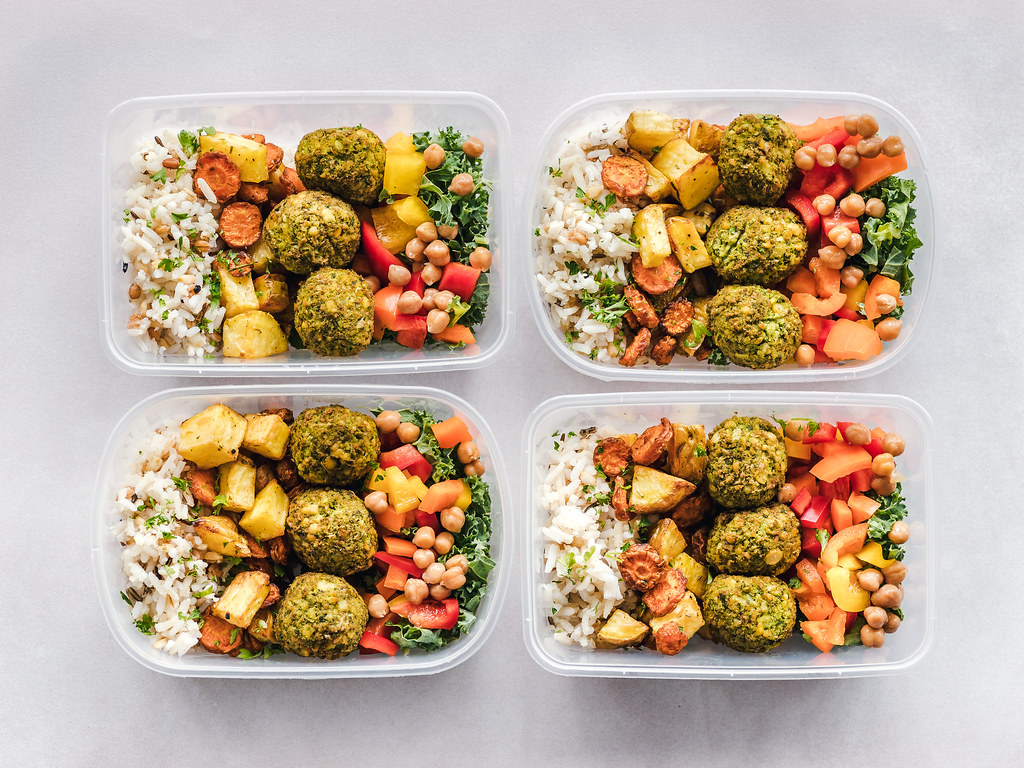
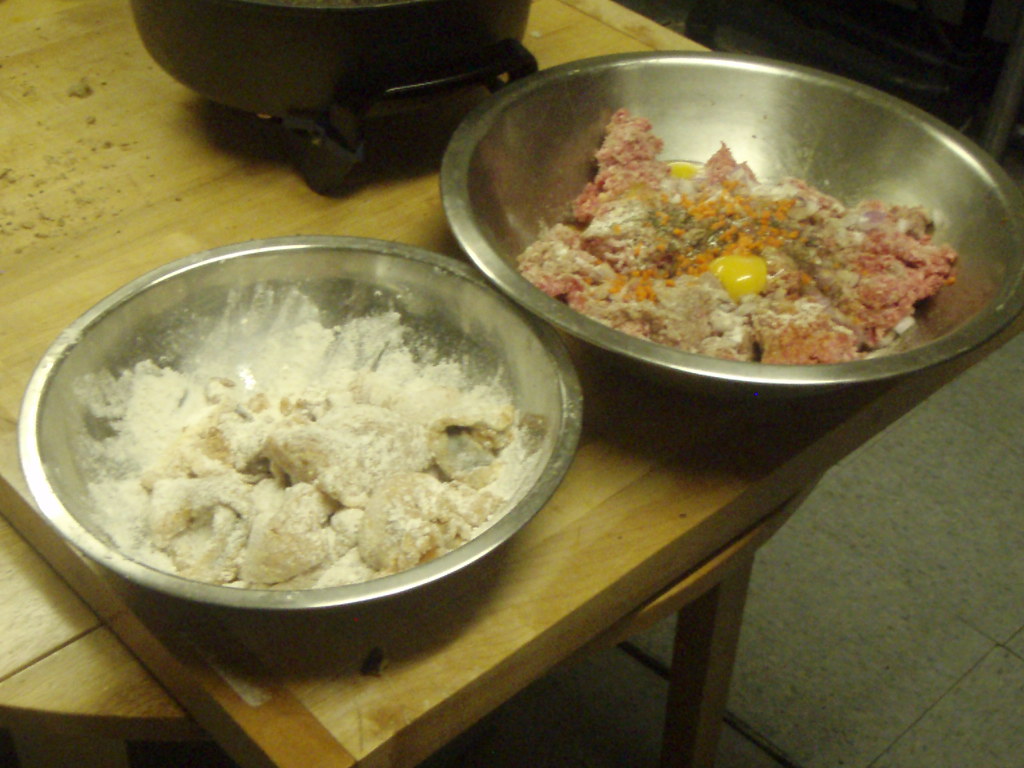
1. **Batch Cooking the Same Single Dish**When you first jump into meal prepping, the idea of batch cooking seems like a stroke of genius, right? Prepare one colossal amount of a single meal and boom, you’re set for days! While it sounds incredibly efficient in theory, the reality often hits different. Most people, even those who adore a particular recipe, quickly grow tired of indulging in the exact same thing for several consecutive days.
This culinary monotony, affectionately known as ‘food burnout,’ is a super common mistake for meal prep newbies. But fear not, because it’s thankfully an easy fix! The best strategy to keep your taste buds tingling and avoid this dreadful boredom is to prepare several different recipes at the same time. Once cooked, portion them out: stash half of each in the freezer for future use and keep the other half in the refrigerator to enjoy throughout the week.
Sure, this approach requires a bit more upfront labor – imagine whipping up three distinct recipes in one afternoon! But trust us, your future self will thank you. By doing this weekly, you’ll always have a delightful variety of meals at your fingertips and a convenient backup in the freezer for the following week or month. Another savvy trick to combat food boredom is to prep versatile ingredients that can star in multiple meals. Roasted vegetables, for example, are total MVPs; they make a fantastic side dish, can elevate a bed of greens into a hearty salad, or even transform into a quick burrito filling when wrapped in a tortilla!

Soft Pumpkin & Butterscotch Cookies~Robynne
Ingredients
Equipment
Method
- Preheat your oven to 350°F (175°C) and line two baking sheets with parchment paper or silicone mats.
- In a large bowl, whisk together the flour, baking powder, baking soda, salt, ground cinnamon, and ground nutmeg until well combined.
- In a separate medium bowl, whisk the eggs and sugar until light and fluffy.
- Stir in the canola oil, canned pumpkin, and vanilla extract into the wet mixture until thoroughly combined.
- Gradually add the dry ingredients to the wet ingredients, mixing gently with a rubber spatula or on low speed with an electric mixer until just combined. Do not overmix.
- Gently fold in 1 cup of the butterscotch chips into the cookie dough.
- Drop rounded tablespoons of dough, or use a cookie scoop, onto the prepared baking sheets, leaving about 2 inches between each cookie.
- Lightly press the remaining 1/3 cup of butterscotch chips onto the tops of the cookie dough mounds for added visual appeal and flavor.
- Bake for 10-12 minutes, or until the edges are lightly golden and the centers are set but still soft. Avoid overbaking to maintain a soft texture.
- Remove the cookies from the oven and let them cool on the baking sheets for a few minutes before transferring them to a wire rack to cool completely.
Notes
Read more about: From Zero to Hero: 15 Everyday Home Products That Became Absolute Viral Sensations
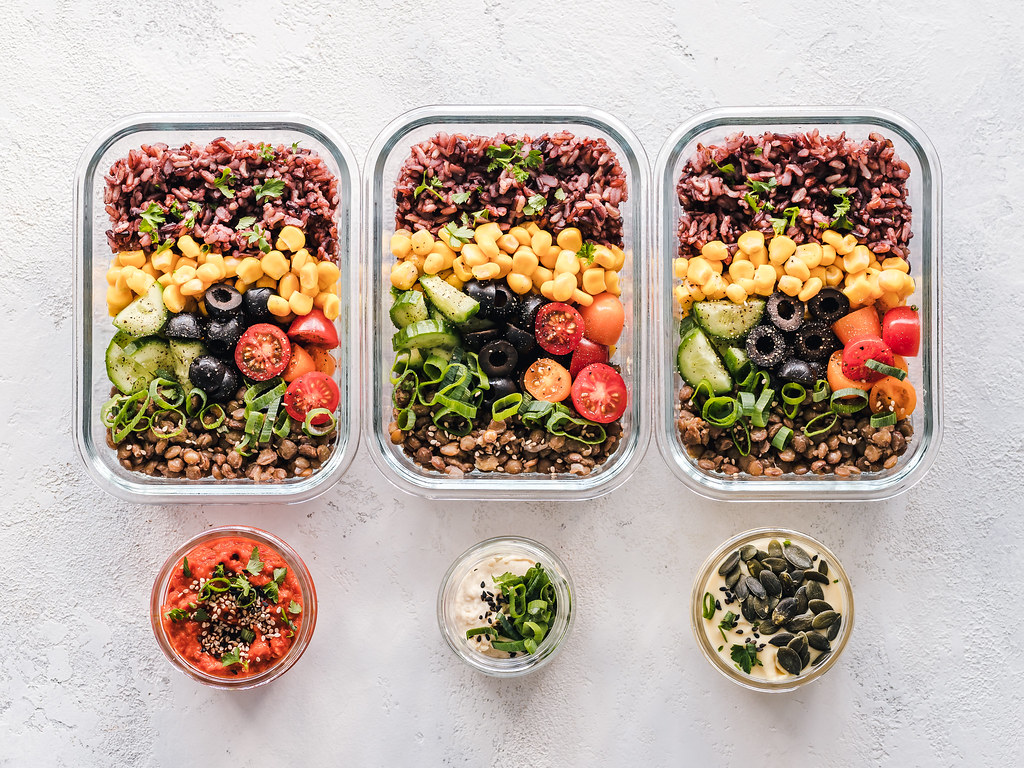
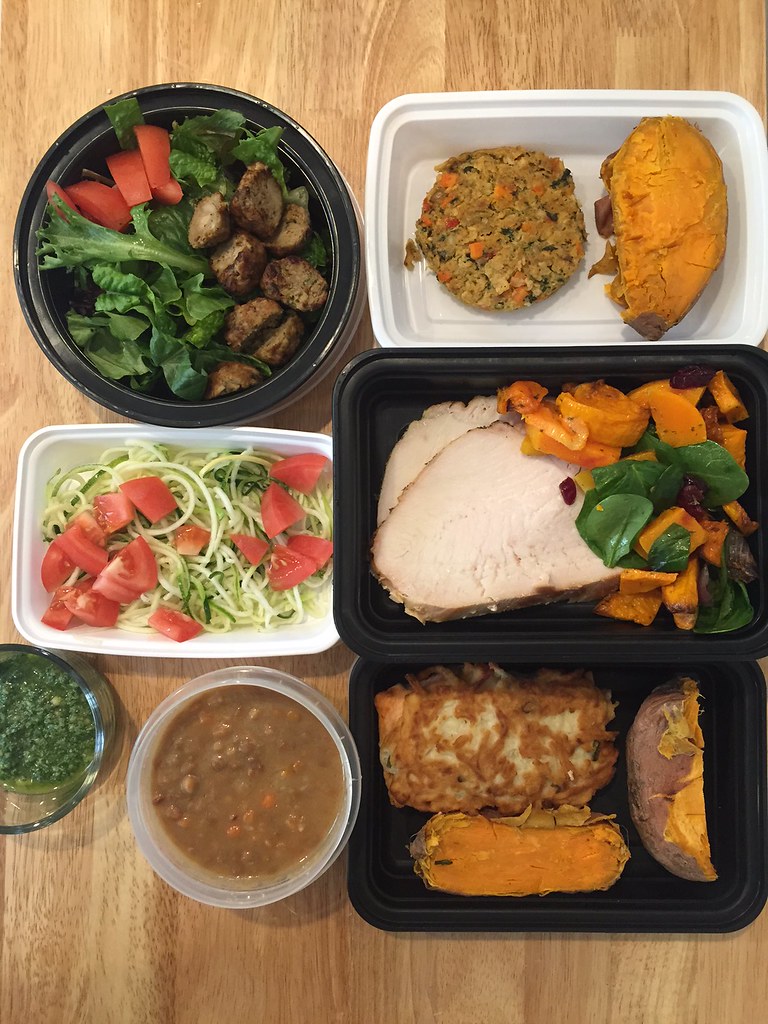
2. **Prepping Too Much Food**Ah, the classic trap of overambition! When you’re just starting your meal planning journey, it’s incredibly easy to get carried away and prepare way too much food. And what happens when you’ve got an Everest of leftovers you can’t possibly conquer? Food waste, my friends, and that’s a big no-no for our wallets and the planet!
According to FoodPrint, a significant chunk of food waste actually happens right in our home kitchens, with over-preparing and poor planning being the main culprits. When spoiled ingredients end up rotting in landfills, they contribute to greenhouse gases. Unless, of course, you’re one of the savvy 27% of U.S. households that have access to composting (shout-out to Green Biz for that stat!). But even if composting isn’t an option, home chefs can be a huge part of the solution simply by putting a little extra thought into their meal prep to avoid making excess.
The key is to plan each week with a bit of wiggle room. For instance, consciously leave some space in your weekly menu for those delicious leftovers. It’s super easy to overestimate just how much food you and your family will realistically eat during the week, especially when you don’t account for spontaneous company lunches or those last-minute dinner invitations with friends or family. Life happens, and despite our best-laid meal plans, things pop up unexpectedly. This often means your meticulously packed dishes might end up hanging out in your refrigerator for longer than intended, possibly leading to spoilage. So, plan smart, not just big!

Slow Cooker Irish Beef Stew
Ingredients
Equipment
Method
- Dice the russet potatoes, chop the large onion, and mince the garlic cloves; set aside.
- Heat olive oil in a large skillet or Dutch oven over medium-high heat. Season the cubed beef chuck roast generously with salt and ground black pepper.
- Sear the beef in batches, browning all sides thoroughly, then transfer the seared beef to the slow cooker.
- Add the chopped onion and minced garlic to the skillet, sautéing until fragrant, about 2-3 minutes.
- Pour about half of the stout beer into the skillet, scraping up any browned bits from the bottom of the pan to deglaze, then transfer this mixture to the slow cooker.
- Add the diced potatoes, baby carrots, remaining stout beer, tomato paste, beef broth, garlic powder, onion powder, and smoked paprika to the slow cooker.
- Stir all ingredients gently to combine, ensuring the beef and vegetables are well coated with the liquid and spices.
- Cover the slow cooker and cook on low for 6-8 hours, or on high for 3-4 hours, until the beef is fork-tender and the vegetables are soft.
- Taste the stew and adjust seasoning with additional salt and ground black pepper as needed.
- Serve the hearty Irish beef stew warm, garnished with fresh herbs if desired, for a comforting meal.
Notes
Read more about: From Zero to Hero: 15 Everyday Home Products That Became Absolute Viral Sensations

3. **Sticking to Just One Protein**Let’s be honest, we’ve all been there: chicken, glorious chicken! It’s the undisputed king of meal prep proteins. It’s versatile, can be grilled, boiled, baked, steamed, and practically thrown into any dish imaginable. And that’s precisely why it’s so easy to fall into a chicken-centric rut. But trust us, sticking to the same meat day in and day out is a surefire way to zap all the excitement from your homemade meals.
Fighting off the boredom with your own cooking is easier than you think – just try a new protein! Instead of always reaching for poultry, revisit the old classics like beef and pork and discover new recipes to make them sing. Or, why not venture out to your local butcher or farmer’s market? You might be surprised by what’s fresh and available, with many places offering less common but equally delicious options like venison and bison.
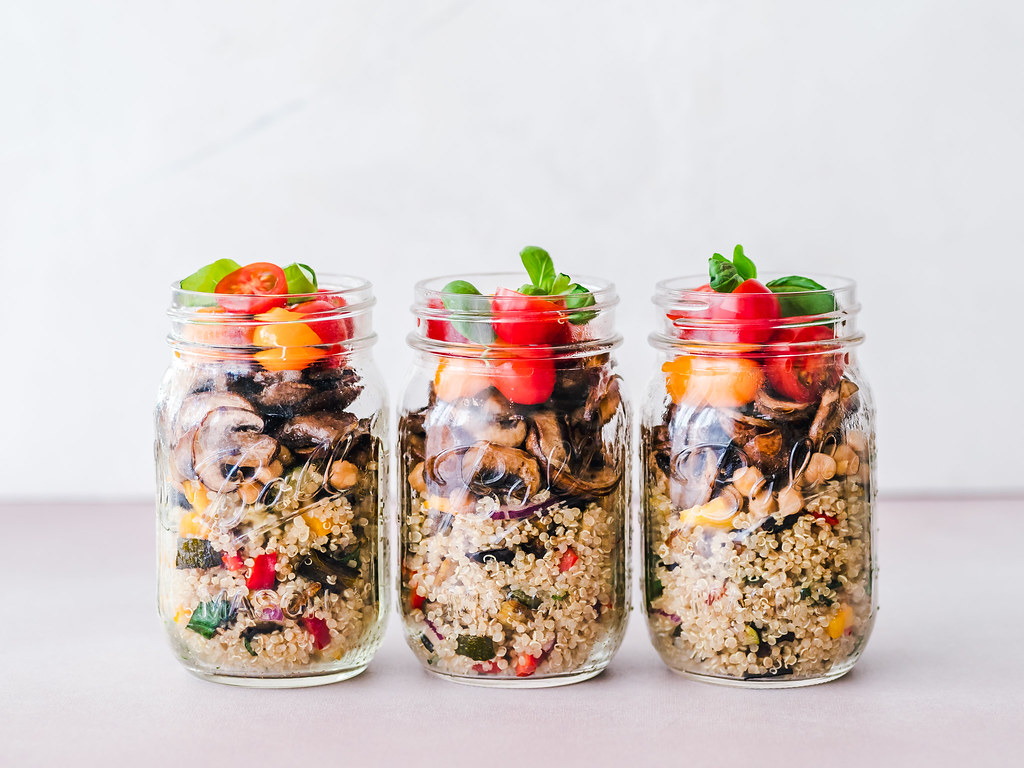
If you’re feeling particularly adventurous, don’t shy away from experimenting with unique meats like liver, tripe, or even tongue. While these aren’t typically American diet staples, they are perfectly safe, packed with nutrients, and regularly enjoyed in many other parts of the world, offering a fantastic way to broaden your culinary horizons. And for those looking for a plant-based twist, you can whip up incredibly satisfying vegetarian meals using proteins like lentils, beans, and quinoa – they’re easy to prep and make for a truly hearty dish!

Fresh Tomato & Greens Pasta
Ingredients
Equipment
Method
- Bring a large pot of generously salted water to a rolling boil for the pasta.
- While the water heats, prepare all ingredients: finely chop the garlic and basil, dice the tomatoes (reserving their juice), and chop the Swiss chard stems separately from the leaves.
- In a large skillet, heat 1-2 tablespoons of extra virgin olive oil over medium heat. Add the chopped garlic and crushed red pepper; sauté for 1-2 minutes until fragrant, being careful not to brown the garlic.
- Add the chopped Swiss chard stems to the skillet and cook for 2-3 minutes until they begin to soften.
- Stir in the chopped Heirloom tomatoes with their juice and the Swiss chard leaves. Cook for 5-7 minutes, stirring occasionally, until the tomatoes soften and the greens wilt. Season with salt and freshly ground black pepper to taste.
- Cook the pasta in the boiling water according to package directions until al dente. Before draining, reserve about 1 cup of the starchy pasta cooking water.
- Add the drained pasta directly to the skillet with the tomato and greens sauce.
- Stir in the fresh chopped basil. Toss everything together vigorously, adding a splash or two of the reserved pasta water as needed to create a light, emulsified sauce that coats the pasta beautifully.
- Taste and adjust the seasoning with additional salt and pepper if necessary. A final squeeze of lemon juice can brighten the flavors.
- Serve the Fresh Tomato & Greens Pasta immediately, optionally garnished with a drizzle of high-quality extra virgin olive oil.
Notes
Read more about: Seriously, What Happened? 12 Once-Beloved Foods Americans Just Don’t Eat Anymore (And Why We Kinda Miss ‘Em)
4. **Ignoring Personal Preferences**Here’s a crucial step many home chefs overlook when diving into weekly meal planning: customizing your dishes to fit *your* diet and *your family’s* tastes. All too often, folks new to food prep make the mistake of blindly following a pre-designed menu from their favorite website or glossy magazine without considering what they (and their loved ones) actually enjoy eating.
Customizing your meals doesn’t have to be rocket science; it can be as simple as making a list of what everyone in your household will genuinely eat. If you or any family members have specific dietary requirements – maybe gluten-free options or vegetarian-friendly meals – it’s vital that your weekly menu reflects those needs to satisfy everyone. After all, a meal prep plan is only good if people actually eat the food!
Consider this scenario: you might absolutely love the idea of making a huge, healthy salad each week. But if you’re the only one who’ll touch it, while the rest of your family gives it the cold shoulder (even though it’s packed with goodness!), then it’s not a successful meal prep. No matter how much you wish they’d get more greens, you need to be realistic in your planning. Ensure that everyone’s needs and tastes are being met to keep mealtime happy and hassle-free, rather than a battle of wills.

French Buttercream Recipe
Ingredients
Equipment
Method
- Combine granulated sugar and water in a small saucepan; bring to a boil over medium-high heat, stirring until sugar dissolves.
- While the syrup boils, place the egg yolks in the bowl of a stand mixer fitted with the whisk attachment.
- Continue boiling the sugar syrup, without stirring, until it reaches precisely 240°F (115°C) on a candy thermometer.
- With the mixer on medium-low speed, slowly and carefully stream the hot sugar syrup into the egg yolks, avoiding contact with the whisk.
- Increase mixer speed to high and whisk continuously until the mixture (pâte à bombe) is very thick, pale yellow, and has cooled to room temperature, about 5-8 minutes.
- Reduce mixer speed to medium-low and begin adding the softened butter, one cube at a time, allowing each addition to fully incorporate before adding the next.
- Once all the butter is added, increase speed to medium-high and whisk for several minutes until the buttercream is light, fluffy, and smooth.
- If the buttercream appears curdled or broken, continue whisking on high speed; it will often come together after a few more minutes.
- Add the vanilla extract and pinch of salt, whisking until just combined and evenly distributed.
- Use the French buttercream immediately for frosting or piping, or store it in an airtight container for later use, re-whipping to desired consistency before serving.
Notes
Read more about: The Unholy Seven: Crushing the Costly Transmission Fluid Myths Mechanics Wish You’d Ditch Already
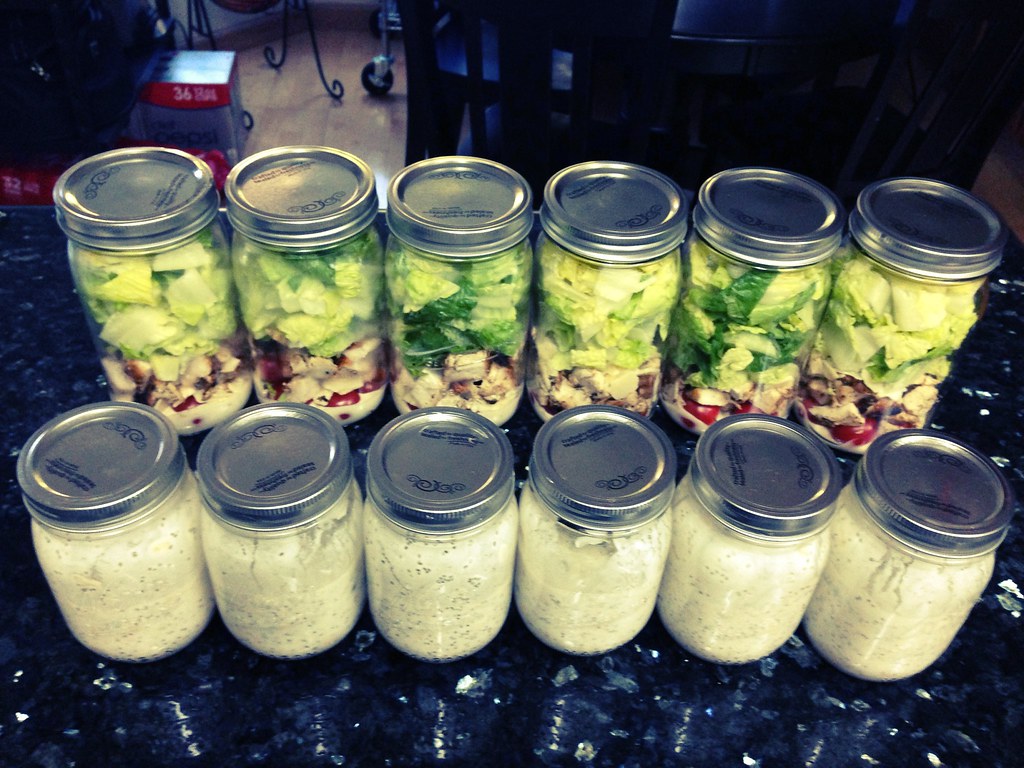
5. **Prepping All Meals at Once for the Entire Week**For many aspiring meal preppers, Sunday becomes “the day” – the sacred time dedicated to whipping up a week’s worth of food. And while one big prep session might sound like the ultimate time-saver, relying solely on a single day for all your food prep for the entire week often isn’t sufficient. Here’s the cold, hard truth: most foods stored in the refrigerator begin to lose their freshness and can start growing bacteria in about three to four days, according to the Mayo Clinic.
Nobody wants to open their carefully prepared meal on Thursday only to find it’s looking a bit sad, or worse, questionable! The best way to dodge this fridge-funk dilemma is to spread your prep sessions out a bit. Instead of one mega-session, try prepping a couple of days a week. For instance, you could cook a batch of meals on Sunday to cover the first half of the week, and then do another quick session on Thursday to ensure your dishes for the latter half are just as fresh and appealing.
This two-part approach guarantees that your meals don’t languish too long in the refrigerator. Plus, it offers greater flexibility. If you’re still keen on prepping a lot in advance, remember that you can always freeze portions of your cooked meals. The FDA notes that prepared foods enjoy a much longer life in the freezer; many soups and stews, for example, can happily last for two to three months. This strategy helps ensure you always have fresh-tasting food available and allows you to mix and match dishes, especially since some foods, like pasta and rice, don’t always freeze well. Dishes like burritos, meatballs, tuna patties, soups, and casseroles are freezer superstars, and portioning them before freezing makes grabbing an individual meal incredibly easy!

One-Pot Pasta Recipe: Linguine with Roasted Red Peppers, Tomatoes & Brie
Ingredients
Equipment
Method
- Prepare all ingredients: break linguine in half, coarsely chop basil, roasted red peppers, and sun-dried tomatoes; press garlic; remove rind from brie and tear into small pieces.
- Combine the broken linguine, chopped basil, roasted red peppers, sliced sun-dried tomatoes, pressed garlic, 4 1/2 cups water, 2 tablespoons sun-dried tomato oil, and 1 tablespoon kosher salt in a large pot or Dutch oven.
- Bring the mixture to a rolling boil over high heat, ensuring all ingredients are well combined and the pasta is mostly submerged.
- Reduce the heat to medium-high and continue to cook, stirring very frequently with tongs to prevent the pasta from sticking to the bottom and ensure even cooking.
- Cook for approximately 9-11 minutes, or until the linguine is al dente and most of the liquid has been absorbed, forming a light, thickened sauce.
- Remove the pot from the heat and immediately stir in the torn brie pieces.
- Continue stirring gently until the brie has completely melted and is fully incorporated, creating a smooth and creamy sauce.
- Season generously with freshly ground black pepper and add more salt to taste, if desired, adjusting to your preference.
- Serve the one-pot pasta immediately while warm, garnished with extra fresh basil if desired.
Notes
Read more about: 13 Simple Rules That 12 Celebrity Chefs Enforce in Their Home Kitchens
6. **Forgetting Nutritional Balance**We’ve all seen the food pyramid evolve over the years, but one thing remains constant: the undeniable importance of a balanced diet. A complete diet isn’t just about avoiding hunger; it’s about supplying your body with all the vitamins and minerals it desperately needs from fresh fruit, vegetables, lean protein, and healthy carbohydrates. If your regular eating habits consistently skimp in any of these crucial areas, you’re essentially rolling out the welcome mat for a weakened immune system and a higher risk of getting sick, as healthline wisely points out.
While we might intellectually understand the vital role of a balanced diet, putting it into practice isn’t always a walk in the park. That’s why, when you’re meticulously planning your meals, it’s absolutely worth taking a moment to double-check your food prep to ensure you’re crafting a truly balanced menu. Ask yourself: Does your meal plan boast enough leafy greens? Are you incorporating a vibrant spectrum of colorful vegetables, like crisp peppers and sweet carrots? If you approach your prep with nutrition at the forefront of your mind, you’ll naturally weave in a delightful mix of foods that keep you not only healthy but also deeply satisfied and fueled throughout the day.
One brilliant way to maintain a varied and nutritionally balanced diet, according to Nourish, is to embrace fruits and vegetables that are in season. Think about it: munch on juicy mandarins and creamy sweet potatoes during the winter months. As spring blossoms, enjoy crisp asparagus and peppery radishes. Come summer, cool down with refreshing cucumbers and succulent peaches. And in the golden embrace of autumn, savor flavorful bell peppers and tender green beans. Eating seasonally doesn’t just taste better; it effortlessly introduces a diverse array of nutrients to your plate, making balanced eating a delicious adventure.
Read more about: Mastering the Marathon Menu: 14 Common Diet Mistakes Elite Runners Absolutely Avoid
7. **Experimenting with Untested Recipes for Batch Prep**Okay, fellow home chefs, hands up if you get a thrill from trying out brand-new recipes! There’s nothing quite like the excitement of discovering a shiny new dish, right? It’s a fantastic way to unleash your creativity in the kitchen and explore new flavors. However, when it comes to the serious business of meal prepping for the week, that dazzling new recipe might need a few practice runs before it earns a coveted spot in your regular rotation.
Here’s why: you absolutely do not want to invest your precious time and hard-earned money preparing a massive batch of a meal you *think* you’ll like, but have never actually made before. Recipes and individual tastes can vary wildly, and almost every time you try a new one, you’ll likely want to tweak it to perfectly match your palate – perhaps a little extra garlic, a touch less salt, or a daring dash more spice.
So, until you’ve truly mastered a dish and pinpointed your favorite variation of it, it’s best to hold off on adding it to your weekly prep lineup. Meal planning shines brightest when you stick to things you already know you and your family will devour. Save those exciting new recipes for a leisurely evening when you’re just cooking for dinner, not for a large-scale batch operation. For your main meal prep sessions, stick to reliable family favorites and prepare staples like a hearty chicken and vegetable stir-fry or satisfying beef enchiladas. This way, you guarantee deliciousness and avoid any meal prep disappointments!
Alright, buckle up, because we’re diving deeper into those sneaky meal prep mistakes that can totally derail your healthy eating goals! We’ve already covered the first seven blunders, but trust us, there are a few more critical missteps to avoid if you want your meal prep journey to be a roaring, sustainable success. From adding the perfect dash of flavor to getting your whole crew involved, we’re about to unpack everything you need to know to keep your fridge stocked with delicious, wholesome food and your sanity intact. Let’s get to it!

8. **Forgetting the Seasoning**Ever bitten into a meal prep dish only to find it… well, a little *meh*? That’s probably because you forgot the magic touch: seasoning! The right spices can seriously elevate a bland meal to a whole new level of deliciousness. Many home chefs tend to eyeball their seasonings, just a pinch of this or a dash of that, which works fine for a quick dinner for two. But when you’re batch cooking, gauging those ratios becomes a whole different ballgame. It’s super important to pay close attention to the exact measurements in your recipe to avoid either overwhelming your food or leaving it completely flat.
One brilliant way to infuse flavor and keep your proteins juicy for meal prep is through marinating. Since salt, especially, has a knack for drying out meats like chicken and steak, a good marinade works wonders to keep them tender and packed with flavor. Think beyond just salt and pepper; explore different herbs, spices, and acids to create vibrant marinades that will make your future self seriously happy.
If marinades aren’t your jam, dry rubs are another fantastic option to flavor your proteins. They come in so many different blends of herbs and spices, offering a quick and easy way to add a flavor punch. And here’s a pro tip for those meals that have been chilling in the fridge for a couple of days: a simple squeeze of lemon! The acid from the lemon adds a bright, fresh burst of flavor that can instantly liven up a pre-made dish, making it taste like it was just whipped up.

Creole Stewed Turkey Wings
Ingredients
Equipment
Method
- Clean and thoroughly pat dry the turkey wings. If very large, you may separate them at the joint into drumettes and flats for easier handling.
- Generously season the turkey wings on all sides with garlic powder, Adobo seasoning, and Tony Chachere’s New Orleans seasoning, ensuring an even coating.
- In a large Dutch oven or heavy-bottomed pot, heat a small amount of high-smoke-point oil over medium-high heat. Sear the seasoned turkey wings until deeply golden brown on all sides, working in batches to avoid overcrowding, then set aside.
- Reduce the heat to medium. Add the sliced sweet onion, chopped celery, and chopped green bell pepper to the pot. Sauté, scraping up any browned bits from the bottom, until the vegetables are softened and translucent, approximately 5-7 minutes.
- Return the browned turkey wings to the pot, nestling them among the sautéed vegetables.
- Pour in enough water or chicken/turkey broth to partially submerge the turkey wings (about halfway). Bring the liquid to a gentle simmer.
- Cover the pot, reduce the heat to low, and let the stew gently simmer for 1.5 to 2 hours, or until the turkey is fork-tender and easily pulls from the bone. Stir occasionally to prevent sticking.
- Periodically check the liquid level during simmering and add more hot liquid if needed to maintain a consistent stewing environment.
- During the last 30 minutes of cooking, taste the stew and adjust seasonings as necessary, adding more salt or spice to your preference.
- Once the turkey is tender, remove from heat. Serve the Creole stewed turkey wings hot, preferably over steamed white rice or creamy grits, ensuring plenty of the rich gravy accompanies each serving.
Notes
Read more about: Seriously Where Did They Go? 14 Essential Camping Items That Vanished From Our Trips (And How to Never Forget Them Again!)
9. **Using Too Much Oil**Okay, let’s talk oil. While most proteins definitely need some kind of fat to cook up perfectly, one common meal planning mistake is going overboard with the oil. Here’s the deal: when you mix too much oil with the natural fats in your food, and then let it sit in the refrigerator for a few days, it can turn into a cold, gelatinous goo. And let’s be real, nobody wants to open their carefully prepped meal on day three only to find an unappetizing, congealed mess!
The best way to dodge this oily disaster is pretty straightforward: use less oil! You can totally explore different cooking methods that require less fat, like air frying or baking, which still yield delicious results. Another savvy trick is to steam or sauté your ingredients in white wine or broth. This way, you infuse tons of flavor without drowning your dishes in excessive fat. Plus, WebMD even suggests that you can partially replace oil in marinades with white wine, giving you another avenue for flavor control.
And don’t forget about your salads and veggies! When it comes to meal prepping salads, always keep the dressing separate until you’re ready to eat to maintain that fresh, crisp texture. For sautéed or roasted vegetables, a quick pat down with a paper towel can absorb any excess oil before you pop them into your containers. These small steps make a huge difference in ensuring your prepped meals remain appetizing and enjoyable all week long.

Slow Cooker Potato, Leek, and Kale Gratin With Too Much Cheese
Ingredients
Equipment
Method
- Prepare leeks and kale: Wash and thinly slice leeks (white and light green parts), and chop kale leaves after removing stems.
- Slice potatoes uniformly: Wash potatoes and slice them about 3mm (1/4 inch) thick, ideally using a mandoline for consistency.
- Sauté leeks: In a large skillet, heat olive oil over medium heat. Add sliced leeks and cook until softened and translucent, about 5-7 minutes.
- Combine liquids and cheeses: In a large bowl, whisk together heavy cream and chicken or vegetable stock. Stir in the grated Gruyère and Parmesan cheeses.
- Layer the gratin: Lightly grease the slow cooker insert. Begin layering with a third of the sliced potatoes, followed by half of the sautéed leeks, half of the chopped kale, and half of the creamy blue cheese.
- Continue layering: Pour a third of the cream mixture over the layers. Repeat the potato, leek, kale, and blue cheese layers once more.
- Final layers: Top with the remaining potatoes, ensuring they are evenly distributed. Pour the remaining cream mixture over everything, making sure the potatoes are largely submerged.
- Slow cook: Cover the slow cooker and cook on low for 4-6 hours, or until the potatoes are completely tender when pierced with a fork.
- Optional finish: For a golden-brown crust, transfer the gratin to an oven-safe dish and broil for 5-10 minutes, watching carefully to prevent burning.
- Rest and serve: Let the gratin rest for 10-15 minutes before serving to allow it to set and thicken slightly.
Notes
Read more about: From Zero to Hero: 15 Everyday Home Products That Became Absolute Viral Sensations
10. **Not Considering Snacks**Raise your hand if you’ve ever hit that afternoon slump, a rumbling belly leading you straight to the nearest vending machine or snack cupboard for something… less than ideal. We’ve all been there! Snack time is seriously the best time of day, a mini-meal that keeps you going until your next main dish. But surprisingly, many newcomers to meal prep totally forget to plan for these crucial morsels when organizing their weekly dishes.
Here’s why ignoring snacks is a no-go: a hungry belly is basically an open invitation for poor choices. Healthline wisely points out that well-planned snacks can actually help control hunger throughout the day, effectively eliminating those impulsive urges to eat excessive calories. So, don’t skip this step! Prep those mid-meal munchies accordingly and make sure you have plenty of healthy, ready-to-go options available.
Preparing snacks can be super simple. Think about putting together small, individual bags of things like granola, dried fruit, cheese and crackers, or nuts. These are total superstars for easy grab-and-go moments. With work, school, and all those other activities buzzing around, having a portable, nourishing treat is the ultimate way to keep your energy levels soaring throughout the day. And if you’re craving something a bit more substantial, hard-boiled eggs are an excellent source of protein, according to myfitnesspal. You can whip up a batch for the week and just toss one in a sandwich bag on your way out the door – seriously, no other packaging required for this protein-packed gem!

Nuts and Bolts Snack Mix
Ingredients
Equipment
Method
- Preheat your oven to a low temperature, typically 250°F (120°C), to ensure a slow, even bake.
- In a very large mixing bowl, combine the toasted corn cereal, bite-size pretzels, and salted dry-roasted peanuts.
- Melt the unsalted butter in a small saucepan over low heat or in the microwave.
- To the melted butter, add the finely pressed or minced garlic, Worcestershire sauce, paprika, cayenne pepper, coarse salt, and the chopped fresh rosemary. Whisk thoroughly to combine all the ingredients into a uniform sauce.
- Pour the prepared butter mixture over the cereal and pretzel blend in the large bowl. Using a sturdy rubber spatula or your hands, gently but thoroughly toss until all components are evenly coated.
- Divide the coated snack mix equally among two or three large rimmed baking sheets, spreading it into a single, thin layer to promote even baking.
- Bake for 1.5 to 2 hours, stirring the mixture gently every 20-30 minutes to ensure even browning and crispness and to prevent any parts from burning.
- The snack mix is ready when it is golden brown and feels completely dry and crisp. Remove the baking sheets from the oven.
- Allow the Nuts and Bolts mix to cool completely on the baking sheets. It will become even crisper as it cools.
- Once fully cooled, transfer the snack mix to airtight containers for optimal freshness and store at room temperature. Serve as desired.
Notes
Read more about: Seriously, What Happened? 12 Once-Beloved Foods Americans Just Don’t Eat Anymore (And Why We Kinda Miss ‘Em)
11. **Using the Wrong Containers**Believe it or not, your packaging plays a HUGE role in your meal prep success. Since your delicious homemade dishes will be spending a good chunk of time in containers, choosing the right vessels is a big deal. First things first, consider the material: plastic containers are usually durable and lightweight, making them super convenient for on-the-go meals. Then there’s glass, which is also incredibly durable and fantastic for reheating, but it tends to be more expensive, heavier, and, of course, a bit more fragile.
Beyond just the material, think about the functionality of your containers. The ideal vessel should absolutely be microwave-safe, especially if you plan on reheating your meals. A tight-fitting, leak-proof lid is non-negotiable – nobody wants a saucy surprise in their lunch bag! And bonus points if they stack easily in your fridge or cupboards and are dishwasher-safe for effortless cleanup. If you’re going all-in on freezing your prepped meals, make sure you invest in freezer-friendly options like reusable silicone bags; they’re incredibly versatile and durable.
For those of you meal planning for the whole family, buying containers in bulk can be a real game-changer, saving you money and ensuring everyone has their perfect portion. And hey, repurposing yogurt packaging or glass jars can totally work in a pinch, plus they’re often recyclable – score! Just make sure to steer clear of reusing those flimsy foam containers. They’re not only a big no-no for the environment but also aren’t microwave-safe, which defeats the purpose of convenient meal prep. Choose wisely, and your meals will thank you!

Easy Red Sangria
Ingredients
Equipment
Method
- Wash and prepare all fruit; core the apple, then loosely chop the orange, apple, and lemon.
- In a large pitcher or carafe, combine the chopped fruit, sugar, and brandy.
- Stir vigorously for 1-2 minutes to ensure the sugar begins to dissolve into the brandy and fruit juices.
- Pour the entire bottle of merlot into the pitcher with the fruit and brandy mixture.
- Stir gently to thoroughly combine all ingredients, ensuring no sugar remains undissolved at the bottom.
- Cover the pitcher tightly and refrigerate for a minimum of 4-6 hours, or preferably overnight, to allow the flavors to fully meld.
- Before serving, give the sangria another gentle stir to redistribute the fruit and settled flavors.
- Serve chilled over ice, ensuring each glass receives a generous portion of the infused fruit.
- For an enhanced presentation, garnish each serving with fresh slices of orange or a few berries.
Notes
Read more about: Unearthing Silver Screen Secrets: 15 Highly Valuable Hollywood Memorabilia You Might Find in Your Attic
12. **Not Getting the Family Involved**Okay, let’s be real for a second: meal prepping is a labor of love, but it’s still *labor*! From planning recipes and shopping for ingredients to cooking all those delicious dishes and storing them perfectly, it’s a lot to handle solo. So, if you’re whipping up meals for the entire family, why not make it a true family affair? Getting everyone involved doesn’t just lighten your load; it’s a fantastic opportunity to spend quality time together with a common goal, teaching valuable teamwork skills along the way.
Make it a fun, weekly ritual! Sit down together to brainstorm the week’s menu, letting everyone have a say in what goes on the table. This is your chance to get creative and explore new foods! You can even connect meal planning to school topics – imagine incorporating a fun Mexican dish if your child is learning about ancient pyramids in Mexico! Children are so much more likely to appreciate and eat the foods they’ve had a hand in choosing.
Even the littlest hands can help out! While some knife skills might be a work in progress, kids can absolutely help with duties like sharing the shopping list, portioning food into containers, shredding cooked proteins, or tackling the washing up as you go. According to The New York Times, when children are involved in the cooking process, they become more willing to try new foods, develop a wonderful sense of accomplishment, and gain a deeper understanding of healthy eating habits. It’s a win-win for everyone!
Cook the Book: Mashed Potatoes, Finally Revealed
Ingredients
Equipment
Method
- Peel and cut russet potatoes into approximately 2-inch chunks.
- Halve garlic cloves and remove any green shoots from the center.
- Place the potato chunks and halved garlic cloves in a large stockpot. Cover with cold water by about an inch and add 1 teaspoon of kosher salt.
- Bring the water to a boil over high heat, then reduce heat to a simmer and cook until the potatoes are very tender when pierced with a fork (about 15-20 minutes).
- While potatoes cook, combine heavy cream and unsalted butter in a small saucepan. Heat gently until the butter is fully melted and the mixture is hot, but not boiling. Keep warm.
- Drain the cooked potatoes and garlic thoroughly using a colander. Return the drained potatoes and garlic to the empty hot stockpot or a large, warm mixing bowl.
- Pass the hot potatoes and garlic through a potato ricer directly into the pot/bowl.
- Pour the warm cream and butter mixture over the riced potatoes.
- Gently fold and stir with a sturdy spoon or spatula until just combined and smooth. Be careful not to overmix, as this can make the potatoes gummy.
- Taste and adjust seasoning with additional kosher salt as needed. Serve immediately for best results.
Notes
Read more about: Unpacking M. Night Shyamalan’s ‘Old’: 13 Ways This Thriller Redefined Cinematic Storytelling and Time’s Unrelenting Grip
13. **Not Using Your Time Wisely**Meal planning is all about efficiency, but miscalculating the time it actually takes to make those dishes is a super common mistake. When you’re in the kitchen, it’s essential to give yourself plenty of time for all the boiling, steaming, and sautéing. Trying to multitask and whip up a few dishes at once might sound intimidating, but if you’re an organized home chef, you can totally get a lot done by following a couple of simple kitchen rules.
First up, embrace the magic of *mise en place* – that’s French for “putting in place.” In meal prep terms, it means having all your ingredients prepped and all the kitchen tools you’ll need laid out on the counter *before* you even start cooking. Trust us, this simple step will save you so much time and make the entire cooking process incredibly smoother, preventing those frantic searches for that one spice mid-stir.
Another golden kitchen rule, especially for meal prep, is to clean as you go. There’s always some built-in downtime while you’re cooking – like when pasta is boiling, or you’re waiting for something to cool down. Don’t just stand there! Always take advantage of those little breaks to wash a pan or wipe down a counter. Keeping the dirty dishes from piling up is key, and it makes the post-prep cleanup so much less daunting. An organized kitchen is the absolute secret weapon to having a successful meal prep session and truly making the most of your valuable time.

Coffee Mousse Cake
Ingredients
Equipment
Method
- Prepare the butter cake: Cream butter and sugar, then beat in egg yolks. Sift dry ingredients, then add to creamed mixture alternately with milk and vanilla.
- Whip egg whites with cream of tartar until stiff peaks form, then gently fold into the cake batter. Pour into a greased springform pan and bake until a toothpick comes out clean. Cool, then slice horizontally into two layers.
- Prepare the coffee mousse: Bloom gelatin in water. Blend cottage cheese, sugar, instant coffee, vanilla, and brandy until smooth. Gently warm a small portion of the cheese mixture, dissolve bloomed gelatin in it, then combine with the rest of the cheese mixture.
- Whip 4 egg whites with cream of tartar until stiff peaks. Fold the whipped egg whites into the coffee-cheese mixture until just combined, creating the mousse.
- Prepare the syrup: Combine water, brown sugar, and brandy in a saucepan. Bring to a simmer until sugar dissolves; cool slightly.
- Assemble the cake: Place one cake layer in the springform pan. Brush generously with cooled syrup. Spread half of the coffee mousse evenly over the cake layer.
- Top with the second cake layer, brush with remaining syrup, and spread the remaining coffee mousse over it. Chill the cake for at least 2-3 hours, or until the mousse is firm.
- Prepare the chocolate ganache: Melt dark chocolate with raspberry sauce and milk over a double boiler or in the microwave until smooth and glossy.
- Pour the warm ganache over the chilled cake, spreading evenly to cover the top. Return the cake to the refrigerator to chill for another 1-2 hours, or until the ganache is set.
- Carefully remove the springform pan sides. Slice and serve cold.
Notes
Read more about: Navigating Financial Complexity: Essential Knowledge for Independent Truck Drivers to Guard Against Scams
And there you have it, folks! Thirteen common meal prep fails that can turn your culinary dreams into a kitchen nightmare, along with all the hacks you need to sidestep them like a pro. From seasoning your food just right and ditching the oil slick, to making snack time a priority and getting the whole family in on the action, these tips are your golden ticket to a week of delicious, stress-free eating. So go ahead, tackle your next meal prep session with confidence, knowing you’re armed with the wisdom to make it a smashing success. Your future, well-fed self will definitely thank you for it!


