

Have you ever found yourself wandering the aisles of a grocery store, a pang of nostalgia hitting you as you realize a beloved snack or dinner staple from your childhood is simply… gone? Or perhaps you’ve stumbled upon an old cookbook, flipping through pages filled with recipes for dishes you vaguely remember your grandparents making, but which rarely, if ever, grace modern tables today. It’s a phenomenon that’s more common than you might think, and honestly, it’s a bit of a culinary mystery we’re here to solve.
Just like fashion trends and cultural entertainment, from film cameras to pedal pushers, food trends have their own ebb and flow. Americans’ tastes are constantly changing, influenced by everything from new interests and technological advancements to a growing health consciousness and shifts in our daily lives. These factors can cause once-ubiquitous foods to fall out of favor, sometimes only to make a resurgence years later, thanks to a new generation or a viral social media trend (hello, cottage cheese ice cream!). But for many, the fade is permanent.
So, let’s get real. What happened to those iconic dishes and quirky concoctions that once held a cherished spot in American hearts and on our plates? We’re taking a delightful trip down memory lane to explore some of these lost gems, uncovering the stories behind their rise to popularity and their eventual, often quiet, disappearance. Prepare for a fascinating journey through culinary history, filled with forgotten flavors and a good dose of nostalgia. Grab your sense of adventure, and let’s rediscover these bygone delights, starting with some truly unique entries from yesteryear.

1. **Aspic**If the word ‘aspic’ doesn’t immediately conjure an image in your mind, you’re not alone among modern diners, but rewind to the 1960s, and this shimmering, gelatinous creation was a true dinner party darling! Imagine meats and vegetables, artfully suspended in a savory gelatin, creating a dish that was as much a visual spectacle as it was a culinary one. It was a staple, often seen at retro dinner parties, a testament to a different era of food presentation.
Aspic’s unique texture and presentation were, at the time, genuinely admired. It showcased a certain level of effort and creativity that captivated guests. However, as culinary preferences began to evolve, shifting decidedly towards fresh and less processed foods, the allure of aspic began to wane. The intricate preparation and the very nature of suspending ingredients in gelatin became less appealing to a public seeking simplicity and natural flavors.
Today, aspic is truly a rare find. It’s not something you’d typically encounter on a restaurant menu or at a casual family gathering. Yet, for adventurous cooks and enthusiasts of historical cuisine, it hasn’t completely vanished. It still makes an appearance for themed events, offering a quirky, edible time capsule that sparks conversation and curiosity. So, would you dare to try this unique piece of culinary history?

Salmon and Asparagus in Aspic
Ingredients
Equipment
Method
- Trim asparagus ends. Blanch white and green asparagus in salted, sugared, and lemon-juiced boiling water until tender-crisp. Immediately transfer to an ice bath, then drain and pat dry.
- In a saucepan, combine fish stock and white wine; bring to a gentle simmer. Whisk in aspic powder until fully dissolved. Season with salt and lemon juice, then remove from heat and let cool slightly, skimming any foam.
- Arrange sliced smoked salmon, blanched asparagus, fresh basil leaves, and corn decoratively in individual aspic molds.
- Carefully pour the slightly cooled aspic mixture over the arranged ingredients in each mold, ensuring full submersion.
- Gently tap the molds on the counter to release any trapped air bubbles.
- Transfer the filled molds to the refrigerator and chill for at least 4 hours, or until the aspic is completely set and firm.
- To unmold, briefly dip the bottom of each mold in warm water for a few seconds.
- Carefully invert each mold onto a chilled serving plate.
- Garnish with extra fresh basil or lemon wedges for presentation.
- Serve cold as an elegant main course or sophisticated appetizer.
Notes
Read more about: The Secret’s Out: Why Costco’s New Bakery Items Are Selling Out Faster Than You Can Say ‘More, Please’

2. **Jellied Eels**Now, this one might sound like something straight out of a dare, but for London’s working class, jellied eels were once an absolute staple. Despite what the name might suggest to an uninitiated modern palate, these slippery delights were genuinely beloved for their distinct savory taste and were a common, affordable meal. Their popularity was deeply rooted in local culture and tradition.
So, how did something so ingrained become so obscure on American tables, and even in many parts of the UK? The primary culprit seems to be the texture. For many modern diners, the unique, gelatinous texture of jellied eels presents a significant challenge. Our evolving palates have grown accustomed to different culinary experiences, and this particular mouthfeel just doesn’t resonate as it once did.
While they might be a hard sell for contemporary tastes, for those daring enough to embrace a truly unique culinary adventure, jellied eels still exist. A few traditional eateries, particularly in London, continue to serve them, preserving a piece of their heritage. If you ever find yourself there and are feeling brave, taking a flavorful leap with jellied eels might just be the ticket to an authentic British experience!
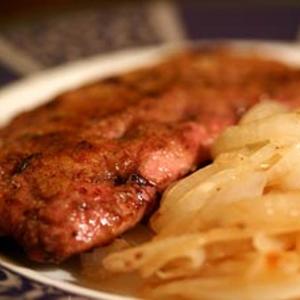
3. **Liver and Onions**For generations, liver and onions was a common, nutrient-packed household meal across America. It was the kind of dish that many grew up with, often praised for its health benefits and affordability. Yet, today, mentioning it often elicits a mixed reaction, and it’s certainly not the weeknight go-to it once was. The question is, why did this once-ubiquitous dish fall out of favor?
The decline can largely be attributed to a shift in evolving palates. The strong, distinct flavors and unique texture of liver simply didn’t suit the changing tastes of Americans. As people moved towards lighter, more delicate, or perhaps more universally appealing flavors, the robust and often polarizing taste of liver became less desirable. It’s a classic example of how culinary preferences can change over time, pushing even highly nutritious foods aside.
Despite its diminished popularity, liver and onions hasn’t completely disappeared. It holds a special place for those seeking a taste of nostalgia, and many still recreate it in their kitchens. For those who can embrace its robust taste, it offers a delightful blast from the past and a connection to traditional home cooking. Perhaps, just perhaps, it’s time to consider giving this classic a whirl and see if it’s due for a comeback!
Liver And Onions
Ingredients
Equipment
Method
- Thinly slice the yellow onions and the calves liver; ensure liver is patted dry.
- In a shallow dish, whisk together the flour with salt, pepper, paprika, and dry mustard to taste.
- Heat the bacon fat in a large frying pan or skillet over medium heat.
- Add the sliced onions to the hot fat and cook slowly, stirring occasionally, until deeply caramelized and tender, about 15-20 minutes. Remove onions from the pan and set aside.
- Lightly dredge each slice of liver in the seasoned flour, shaking off any excess.
- Increase the heat to medium-high and add more bacon fat if needed. Sear the floured liver slices for 2-3 minutes per side, or until a nice crust forms and the interior is slightly pink (do not overcook).
- Return the caramelized onions to the pan with the cooked liver and gently toss to combine and warm through.
- Serve immediately, garnished if desired.
Notes
Read more about: Forget What You Thought: Why Motor City Pizza’s Reign Isn’t Ending, It’s Just Getting Started!
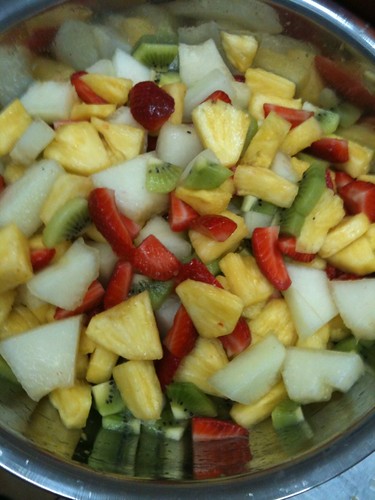
4. **Pineapple Cheese Salad**Where did the pineapple cheese salad go, you ask? This kitschy dish was once a staple at potlucks and family gatherings, a quirky combination that somehow found its way onto countless tables. It typically brought together canned pineapple, cubes of cheddar cheese, and a generous dollop of mayonnaise, creating a sweet and savory, surprisingly textural experience that defined a certain era of American culinary exploration.
Its fall from grace parallels the broader shift in American dietary preferences. As tastes leaned increasingly towards fresh, wholesome, and health-conscious options, the charm of this particular combination began to wane. The idea of combining canned fruit with cheese and mayo, while once seen as innovative or simply convenient, didn’t quite fit into the emerging narrative of modern, lighter cuisine.
Nevertheless, for those with an adventurous spirit and a love for retro food, pineapple cheese salad still offers a unique, quirky delight that is guaranteed to spark conversation. It’s a perfect candidate for a retro-themed gathering, allowing you to surprise and charm your guests with its unexpected blend of flavors. Who knows, you might just find yourself charmed by its historical quirkiness!
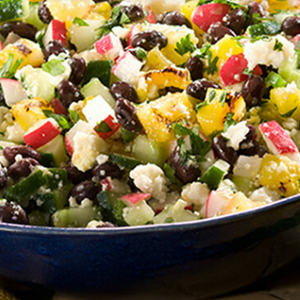
Black Bean, Grilled Pineapple and Cucumber Salad
Ingredients
Equipment
Method
- Preheat a grill or grill pan to medium-high heat.
- Grill pineapple rings for 2-3 minutes per side until distinct char marks appear and the pineapple is slightly softened; then dice once cool enough to handle.
- Prepare all vegetables: chop radishes, seed and chop cucumber, finely chop jalapeño (adjusting seeds for desired heat), and chop cilantro.
- Drain and thoroughly rinse the canned black beans.
- In a large mixing bowl, combine the diced grilled pineapple, black beans, chopped radishes, cucumber, jalapeño, and cilantro.
- In a separate small bowl, whisk together the fresh lime juice, extra virgin olive oil, HERDEZ® Salsa Verde, kosher salt, and fresh ground black pepper until well combined and emulsified.
- Pour the prepared dressing over the salad ingredients in the large bowl and toss gently to ensure even coating.
- Fold in the crumbled queso fresco or feta cheese.
- Taste the salad and adjust seasoning as necessary, adding more salt, pepper, or lime juice to your preference.
- Chill the salad in the refrigerator for at least 15-20 minutes before serving to allow the flavors to meld.
Notes
Read more about: Stop Overpaying: Uncovering the Hidden Markups on 10 Common Grocery Items You Buy Every Time You Shop

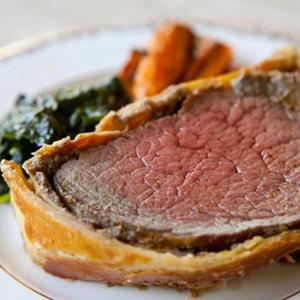
5. **Beef Wellington**Beef Wellington, a dish synonymous with culinary sophistication and grandeur, was once the unquestioned star of dinner parties and fine dining establishments. Encased in flaky puff pastry, often with a layer of pâté or duxelles, this impressive roast beef dish was a symbol of gastronomic excellence and an unforgettable showstopper. Its presence on a menu or at a table immediately conveyed elegance.
So, how did such a magnificent dish fade from the everyday menus and household repertoire? The primary reason lies in its labor-intensive preparation. In our increasingly fast-paced modern kitchens, where convenience often trumps complexity, the significant time and effort required to perfect a Beef Wellington made it less appealing. It’s not a dish you whip up on a Tuesday night; it demands dedication and culinary skill.
Yet, the rich, deeply satisfying flavors of a well-made Beef Wellington remain unforgettable. For those willing to invest the time and effort, this dish rewards with its luxurious taste and breathtaking presentation. It’s a culinary challenge that promises a truly spectacular result. Perhaps it’s time to revive this classic, surprising your guests not only with your impressive culinary skills but also with a delicious slice of history!
Beef Wellington
Ingredients
Equipment
Method
- Season the beef tenderloin generously with salt and pepper, then sear vigorously in a hot, oiled skillet until deeply browned on all sides. Allow to cool, then brush evenly with yellow mustard.
- Finely chop the mushrooms in a food processor. Cook the chopped mushrooms in the same skillet until all moisture evaporates and the mixture is very dry, forming a duxelles. Season well and cool completely.
- Lay out overlapping sheets of plastic wrap on a clean surface, then arrange the Parma ham slices into a neat rectangle on top of the plastic wrap.
- Evenly spread the cooled mushroom duxelles over the ham layer.
- Place the seared and mustard-coated beef tenderloin at one end of the duxelles-covered ham.
- Using the plastic wrap, carefully roll the ham and duxelles tightly around the beef, forming a compact log. Twist the ends of the plastic wrap to secure and chill for at least 30 minutes.
- On a lightly floured surface, roll out the puff pastry into a rectangle large enough to fully encase the beef log.
- Unwrap the chilled beef log and carefully place it onto the rolled-out puff pastry. Wrap the pastry tightly around the beef, trimming any excess and securely sealing all seams.
- Transfer the pastry-wrapped beef to a baking sheet lined with parchment paper. Brush generously with beaten egg yolk and score the top of the pastry decoratively. Chill again for 15-20 minutes.
- Bake in a preheated oven (around 400°F/200°C) for approximately 30-40 minutes, or until the pastry is golden brown and flaky, and the internal temperature of the beef reaches 125-130°F (52-54°C) for medium-rare. Rest for 10-15 minutes before slicing and serving.
Notes
Read more about: Delicious Skillet Shepherd’s Pie: 3 Recipes to Try at Home

6. **Spam Fritters**Remember Spam fritters? For many, particularly during wartime and post-war periods, these humble yet satisfying delights were incredibly beloved. They offered convenience, affordability, and a satisfyingly crispy exterior, making them a popular choice when other fresh options were scarce. They were a testament to resourcefulness and comfort food during challenging times.
As the availability of fresh food options expanded dramatically in the post-war era, the necessity and appeal of Spam fritters naturally diminished. With a wider array of meats and meal choices readily available, the once-staple Spam fritter slowly transitioned into a rarity. It became less a practical necessity and more a nostalgic curiosity.
However, their nostalgic appeal remains incredibly strong. For those eager for a taste of history and a connection to simpler times, recreating Spam fritters at home can be a genuinely charming experience. Their simplicity and the stories they evoke make them more than just a meal—they’re a fun way to connect with the past. Who says you can’t relive the good old days with a delicious, crispy bite?

7. **Baked Alaska**Who could resist the sheer spectacle of a Baked Alaska? This iconic dessert, with its thrilling hot-cold contrast—a warm, toasted meringue exterior protecting a core of frozen ice cream, all often flambéed right at the table—was once the undisputed star of fancy dinners and celebratory occasions. It was pure culinary drama, a showstopper that left guests utterly wowed.
But like many elaborate dishes, Baked Alaska gradually drifted into obscurity. Its intricate and somewhat elaborate preparation, combined with the rise of simpler, more convenient, and less time-consuming desserts, pushed it to the sidelines. Modern palates and busy lifestyles often favor quick fixes over grand theatrical displays, no matter how impressive.
Despite its decline in mainstream popularity, the dramatic presentation and unique flavor profile of Baked Alaska still possess the power to impress. Why not attempt this stunning dessert for your next gathering? You’ll not only impress your guests with your culinary ambition but also indulge in a sweet, historical treat. Isn’t it time to bring back a little culinary drama to our dessert tables?
Having journeyed through the quirky, the grand, and the utterly unique dishes that once graced American tables, it’s clear that culinary evolution is a relentless force. Our palates, much like our fashion and music preferences, are ever-changing, always seeking the next big thing or, in some cases, simply moving on from what once was. But the story doesn’t end with just seven disappearing acts. There are more beloved classics that have quietly slipped into the annals of food history, each with its own fascinating tale of rise and fall. Let’s dive deeper into this delicious past and uncover the next set of culinary curiosities that beg the question: “What happened?”

Baked Alaska
Ingredients
Equipment
Method
- Cut the pound cake into desired serving-sized pieces, typically squares or rounds.
- Place each piece of pound cake onto a baking sheet lined with parchment paper.
- Scoop approximately 2 ounces of firm chocolate ice cream onto the center of each pound cake piece, shaping it neatly.
- Immediately transfer the baking sheet to the freezer and freeze for at least 2 hours, or until the ice cream is rock solid.
- In a very clean mixing bowl, combine egg whites and cream of tartar.
- Using an electric mixer, whip the egg whites on medium-high speed until soft peaks form.
- Gradually add the sugar, one tablespoon at a time, continuing to whip until stiff, glossy peaks form. Beat in the vanilla extract.
- Remove the frozen cake and ice cream from the freezer. Working quickly, cover each with a generous layer of meringue, ensuring the cake and ice cream are completely sealed to prevent melting.
- If desired, return the meringue-covered desserts to the freezer for a few minutes to firm up the meringue slightly.
- Using a kitchen blowtorch, carefully brown the meringue until golden all over, or place under a preheated broiler (highest setting) for 1-2 minutes, watching constantly. Serve immediately.
Notes
Read more about: The Digital Witness: An In-Depth Examination of Livestreamed Crimes and Their Unsettling Societal Impact
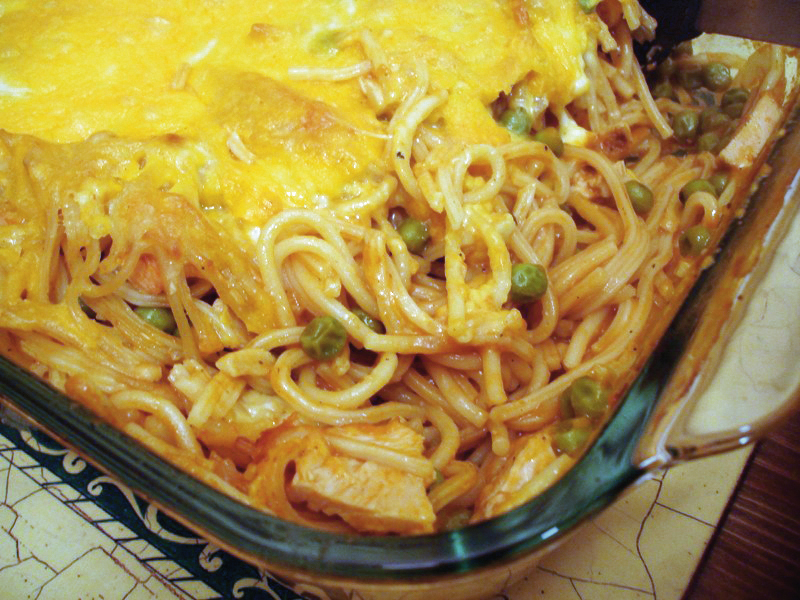
8. **Turkey Tetrazzini**Picture this: the holidays are over, the turkey leftovers are abundant, and you’re wondering how to transform them into something utterly delightful and comforting. For a long time, the answer for countless American households was Turkey Tetrazzini. This creamy, hearty casserole dish was a post-holiday favorite, ingeniously turning leftover turkey into a rich, flavorful experience that brought families together around the dinner table. It was the epitome of resourceful, delicious home cooking.
So, where did this beloved, creamy goodness go? The shift in American culinary trends played a significant role. As preferences began to lean towards fresher, lighter, and often more globally inspired fare, the dense richness of dishes like Turkey Tetrazzini started to feel a bit old-fashioned. It simply lost its prime spot as a go-to meal in a world increasingly focused on quick, healthy, and less ‘heavy’ options. The era of the elaborate casserole, it seemed, was quietly fading.
Yet, for those who grew up with it, or those simply yearning for a taste of true comfort food, Turkey Tetrazzini remains a wonderfully nostalgic option. It’s the kind of dish that wraps you in a warm hug, perfect for a chilly evening or whenever you need a culinary blast from the past. Why not give this classic another whirl in your kitchen? You might just find that sometimes, that old-fashioned comfort is precisely what your soul, and your palate, craves.

Turkey Tetrazzini
Ingredients
Equipment
Method
- Preheat oven to 375°F (190°C) and butter a 9×13 inch baking dish.
- In a large skillet or Dutch oven, melt 2 tablespoons of butter over medium-high heat. Add sliced mushrooms and cook, stirring occasionally, until deeply browned and their liquid has evaporated, about 8-10 minutes. Remove mushrooms and set aside.
- Melt the remaining 3 tablespoons of butter in the same skillet over medium heat. Whisk in the flour and cook for 1-2 minutes, stirring constantly, to create a roux.
- Gradually whisk in the milk, then the chicken broth, and finally the dry white wine. Bring the sauce to a simmer, whisking until thickened and smooth, about 5-7 minutes. Season with salt and pepper to taste.
- While the sauce simmers, cook the spaghetti in a large pot of boiling salted water according to package directions until al dente (slightly firm to the bite). Drain well.
- Stir the cooked mushrooms, chopped turkey, and peas into the prepared sauce. Add ⅔ cup of Parmesan cheese and mix thoroughly.
- Add the drained spaghetti to the sauce mixture and toss gently until everything is evenly coated.
- Transfer the entire mixture to the prepared baking dish. Sprinkle the remaining Parmesan cheese and then the fine fresh bread crumbs evenly over the top.
- Bake for 20-25 minutes, or until the tetrazzini is bubbly and the topping is golden brown.
- Let the tetrazzini rest for 5-10 minutes before serving to allow the sauce to set.
Notes

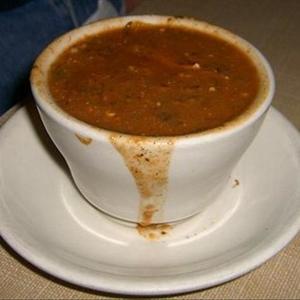
9. **Mock Turtle Soup**Ever encountered a dish so intriguing, so historically rich, that it almost feels like a culinary artifact? Enter Mock Turtle Soup. This fascinating concoction was once a grand favorite, particularly in Victorian times, born out of a desire to mimic the expensive and exotic real turtle soup. Ingeniously, it achieved this feat by using more readily available ingredients, most notably calf’s head, to create a flavor profile and texture that evoked its more exclusive counterpart. It was a testament to culinary cleverness and aspirational dining.
Despite its historical charm, Mock Turtle Soup eventually faded from mainstream popularity. Several factors contributed to its quiet disappearance. Changing culinary tastes certainly played a part, as the very idea of using calf’s head became less appealing to evolving palates. Furthermore, a growing awareness and concern for animal welfare likely contributed to its decline, pushing this once-celebrated dish into the shadows of culinary history.
Today, Mock Turtle Soup offers a truly captivating glimpse into historic dining practices. For the adventurous cook, or anyone with a deep appreciation for culinary history, recreating this dish could be an incredibly exciting challenge. Imagine the stories you could tell, and the conversations you could spark, by bringing a piece of the past directly to your table. Are you brave enough to take on this unique taste of history?
Mock Turtle Soup
Ingredients
Equipment
Method
- Dice the celery, red bell pepper, and yellow onion; mince the garlic. Grate the hard-boiled eggs.
- In a large stockpot or Dutch oven, heat olive oil over medium heat. Add diced celery, bell pepper, and onion, and sauté until softened, about 5-7 minutes. Stir in minced garlic and cook for 1 minute more.
- Add ground beef to the pot, breaking it up with a spoon. Cook until thoroughly browned, then drain any excess fat.
- In a separate small saucepan, melt clarified butter over medium heat. Gradually whisk in the flour to form a smooth roux. Cook, stirring constantly, for 3-5 minutes until the roux is golden brown.
- Slowly whisk the hot roux into the main pot with the beef and vegetables, stirring until fully incorporated and no lumps remain.
- Stir in the crushed tomatoes, chicken broth, wine vinegar, kosher salt, cayenne pepper, and bay leaves. Bring the mixture to a gentle simmer.
- Reduce heat to low, cover the pot, and simmer for at least 30-45 minutes, stirring occasionally, to allow the flavors to meld and the soup to thicken slightly.
- Remove the bay leaves from the soup. Stir in the lemon juice and most of the chopped Italian parsley.
- Gently fold in the grated hard-boiled eggs, stirring just enough to combine and heat through for a few minutes without bringing to a boil.
- Taste and adjust seasoning as needed. Ladle the hot soup into bowls and garnish with the remaining fresh Italian parsley before serving.
Notes
Read more about: Sizzling Summer Styles: 15 Dresses to Flatter Every Figure

10. **Lobster Thermidor**When we talk about dishes synonymous with sheer luxury and an unparalleled dining experience, Lobster Thermidor immediately springs to mind. This opulent creation once dazzled diners in the most prestigious fine restaurants, a true showstopper featuring succulent lobster meat exquisitely prepared in a rich, creamy sauce, often served back in its own shell. It was a dish that unequivocally declared elegance and gastronomic indulgence.
So, what happened to this beacon of fine dining? Its intricate preparation and, let’s be honest, its notoriously high cost, eventually made it less practical for everyday menus and even for many special occasions. In a world where dining trends began to shift towards more accessible, faster, and perhaps less fussy options, the grandeur of Lobster Thermidor became a rare indulgence, reserved for only the most exceptional celebrations.
However, the memory of its rich, deeply satisfying, creamy taste undoubtedly lingers for anyone fortunate enough to have experienced it. For those looking to truly elevate a special occasion at home, why not consider making Lobster Thermidor yourself? It’s an opportunity to experience the very height of gastronomic indulgence and surprise your guests with an undeniable touch of elegance. Indeed, isn’t it high time we brought a little more of that old-school dining grandeur back?

Lobster Thermidor
Ingredients
Equipment
Method
- Preheat your oven to 375°F (190°C).
- Carefully halve the cooked lobster lengthwise. Extract all the meat from the tail and claws, chop it into bite-sized pieces, and set aside. Reserve the lobster shells for serving.
- In a large skillet, melt the butter over medium heat. Add the finely chopped shallot and sauté until softened and fragrant, about 2-3 minutes.
- Deglaze the pan with white wine, scraping up any browned bits from the bottom. Allow the wine to reduce by half.
- Pour in the fresh fish stock and continue to simmer until the liquid is reduced by approximately one-third.
- Stir in the heavy cream and hot English mustard. Continue to simmer gently for about 5 minutes, allowing the sauce to thicken slightly.
- Fold in the chopped lobster meat, fresh parsley, and lemon juice. Season the mixture generously with salt and freshly ground black pepper to taste.
- Carefully spoon the lobster mixture back into the reserved lobster half-shells or into individual oven-safe baking dishes.
- Sprinkle a generous amount of freshly grated Parmesan cheese over the top of each filled shell or dish.
- Bake for 10-15 minutes, or until the cheese is melted and bubbly and the sauce is heated through. For a golden crust, briefly broil for 1-2 minutes, watching carefully to prevent burning. Serve immediately.
Notes
Read more about: 15 Pop Culture Gems: From Instant Hits to Unexpected Cookbooks

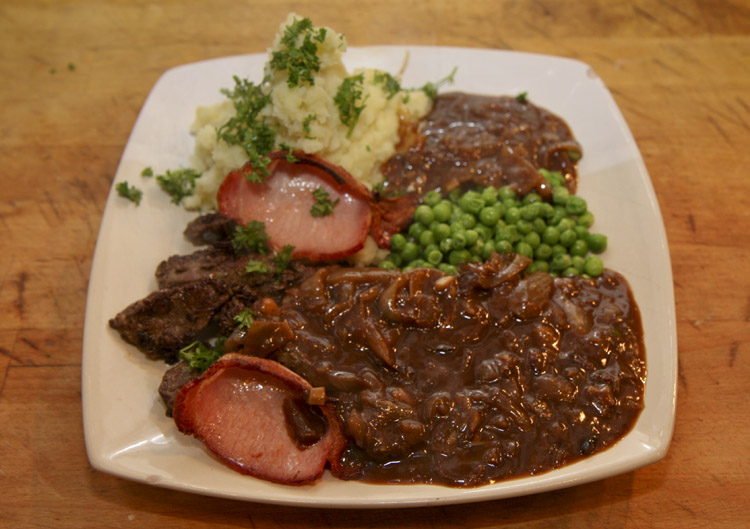
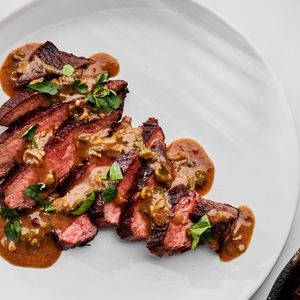
11. **Steak Diane**If you ever dined in a fancy restaurant during the mid-20th century, you might have witnessed the captivating tableside theatrics of Steak Diane. This dish wasn’t just about the exquisite flavors; it was an experience. Prepared with dramatic flair right before your eyes, often involving a dazzling flambé, it embodied culinary sophistication and a sense of occasion. It was rich, flavorful, and undeniably impressive, making it a true classic.
Yet, like many dishes that rely on elaborate tableside preparation, Steak Diane gradually receded from the limelight. Changing dining trends, which increasingly favored simpler, more casual, and less theatrical presentations, contributed to its decline. The rise of quicker, more straightforward kitchen methods meant that the time-consuming and showy aspects of Steak Diane no longer fit comfortably into modern restaurant or home cooking practices.
Despite its fading presence on menus, the rich, deeply satisfying flavor of a perfectly cooked Steak Diane has, quite simply, never gone out of style. For those who enjoy a bit of culinary adventure, reviving this classic in your own kitchen promises an exciting endeavor. The thrill of flambéing, the tantalizing aromas, and the incredible taste could easily ignite your culinary passion. Plus, imagine the delight and surprise of your dinner guests when you present this theatrical masterpiece! Perhaps, just perhaps, it truly is time for a magnificent Steak Diane revival.
Steak Diane
Ingredients
Equipment
Method
- Prepare all ingredients: chop scallions and parsley; measure out liquids.
- Heat 1 tablespoon unsalted butter and 1 tablespoon vegetable oil in a large, heavy-bottomed skillet over medium-high heat until the butter is melted and foaming.
- Season the flatiron steaks generously with salt and black pepper on both sides. Carefully place them in the hot skillet and sear for 3-4 minutes per side for medium-rare, or until a desired internal temperature is reached and a rich crust has formed.
- Remove the seared steaks from the skillet and transfer them to a cutting board to rest, loosely tented with foil.
- Reduce the heat to medium. Add the canned black-bean soup, 1/2 cup water, Worcestershire sauce, Madeira, and Dijon mustard to the same skillet, scraping up any browned bits from the bottom of the pan.
- Whisk the sauce ingredients vigorously until well combined and bring to a gentle simmer, allowing it to thicken slightly for 3-5 minutes.
- Return the rested steaks to the skillet, spooning the warm sauce over them, and allow them to warm through for 1-2 minutes.
- Stir half of the chopped scallions and half of the chopped flat-leaf parsley into the sauce.
- Serve the Steak Diane immediately, garnishing each steak with the remaining fresh scallions and parsley.
Notes

12. **Prune Whip**Hold on a minute, prune whip? For many modern palates, the idea might conjure a quizzical look, but back in the 1950s, this airy dessert was genuinely beloved. It offered a delightful lightness and a subtle sweetness that was a refreshing departure from heavier, richer desserts. Often served chilled, it was a popular choice for those seeking a more delicate, yet satisfying, end to a meal. It championed a different kind of dessert experience.
Its disappearance from the dessert landscape can be attributed to a significant shift in preferences. As the decades rolled on, the collective sweet tooth of America gravitated towards more indulgent, richer, and often chocolate-laden options. The gentle, nuanced charm of prune whip, while once appreciated, simply couldn’t compete with the booming popularity of more decadent treats, leading it to quietly fade from prominence.
However, for those with an adventurous spirit or a desire to explore forgotten flavors, prune whip offers a truly delightful and unique treat. Its light texture and distinct taste are guaranteed to surprise and charm your guests at your next gathering. Whipping up a batch at home is a fun way to connect with a bygone era of desserts and introduce something truly unexpected to your friends and family. Isn’t it wonderful to give these overlooked culinary gems another chance to shine?

Prune Whip Shakes
Ingredients
Equipment
Method
- Combine the 12 pitted prunes with 1 cup of hot water in a small heatproof bowl and let them soak for 10-15 minutes until softened.
- Drain the softened prunes, reserving the soaking liquid. Transfer the prunes to a high-speed blender.
- Add 2-3 tablespoons of the reserved prune soaking liquid to the blender with the prunes. Blend on high speed until a smooth prune paste is formed, adding more liquid a tablespoon at a time if needed to achieve a uniform consistency.
- Add the 2 cups of low-fat plain yogurt, 1 cup of cracked ice, ½ cup of pure maple syrup, and 1 teaspoon of pure vanilla extract to the blender with the prune paste.
- If desired, add 1 teaspoon of dark rum to the blender for an added layer of flavor.
- Secure the lid and blend all ingredients on high speed until the mixture is completely smooth and creamy, with no discernible chunks of ice or prune.
- Taste the shake and adjust the sweetness by adding more maple syrup if preferred. Blend again briefly to incorporate.
- Divide the Prune Whip Shakes evenly among four serving glasses.
- Serve the Prune Whip Shakes immediately to enjoy them at their optimal cold and frothy state.
Notes
Read more about: My Chicago Pączki Journey: Finding the Perfect Bavarian Cream for Fat Tuesday

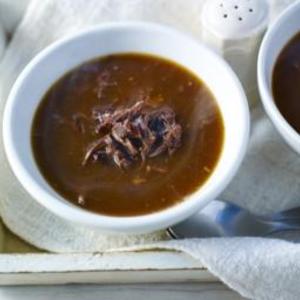
13. **Oxtail Soup**There’s something deeply comforting about a bowl of rich, slow-cooked soup, and for generations, Oxtail Soup was precisely that: a beloved staple in hearty home cooking. This dish, celebrated for its incredibly deep, robust flavors and tender meat, was once a testament to nose-to-tail eating long before it became a trendy concept. It provided sustenance and warmth, making it a cherished part of many family meals.
Why, then, has this wonderfully flavorful soup slowly, almost imperceptibly, faded from the modern table? The primary culprit is undoubtedly its labor-intensive nature. In our increasingly fast-paced lives, where quick meals and convenience often take precedence, the long cooking time required to tenderize oxtail and coax out its incredible flavors simply no longer aligns with most people’s busy schedules.
Yet, for those willing to embrace the process and invest a little time, Oxtail Soup offers an unparalleled reward: deep, incredibly comforting tastes that are undeniably worth the effort. Imagine simmering a pot on a relaxing weekend, filling your home with its inviting aroma, and then savoring each rich spoonful. It’s not just a meal; it’s an experience, a perfect way to truly appreciate the magic of slow cooking and connect with traditional culinary roots. Ready to rediscover this slow-cooked magic?
Oxtail soup
Ingredients
Equipment
Method
- Heat olive oil in a large Dutch oven or heavy-bottomed pot over medium-high heat. Brown the oxtail pieces thoroughly on all sides, then remove and set aside.
- Add the chopped onion, celery, and carrot to the pot. Sauté gently until softened and lightly caramelized, about 5-7 minutes.
- Stir in the tomato purée and cook for 1-2 minutes, allowing it to deepen in color.
- Pour in the red wine, scraping the bottom of the pot with a wooden spoon to deglaze and incorporate any browned bits (fond).
- Return the browned oxtail to the pot. Add the beef stock, bay leaf, thyme sprigs, and black peppercorns.
- Bring the soup to a boil, then reduce the heat to low, cover, and simmer gently for 2.5-3 hours, or until the oxtail is very tender and easily pulls from the bone.
- Carefully remove the oxtail from the pot. Once cool enough to handle, pick the meat from the bones, discarding the bones and any excess fat. Shred the meat and set aside.
- Strain the soup through a fine-mesh sieve into another clean pot or bowl, pressing on the solids to extract all liquid. Discard the cooked vegetables and aromatics.
- Return the strained broth to the pot and add the shredded oxtail meat.
- In a small bowl, whisk the plain flour with a little cold water to create a smooth slurry. Gradually whisk the slurry into the simmering soup to thicken to your desired consistency. Season with salt and pepper to taste before serving.
Notes
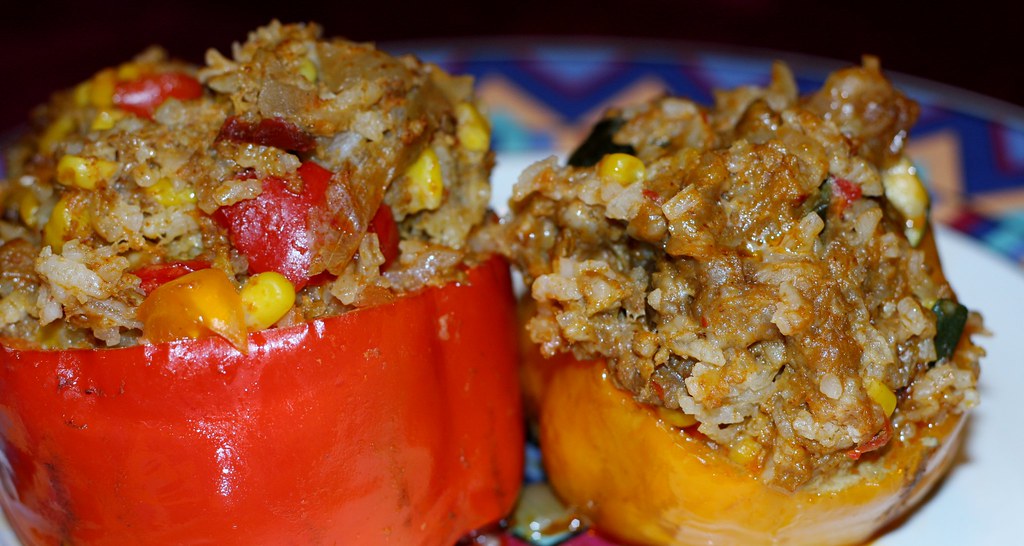
14. **Stuffed Peppers**What could be more satisfying than a vibrant bell pepper, bursting with a savory filling, baked to perfection? Stuffed peppers were, for a very long time, a beloved family meal across America, celebrated for their endless variations and comforting appeal. Whether filled with ground meat, rice, vegetables, or a delightful combination of all three, they were a testament to home cooking creativity and a hearty, wholesome dinner option.
So, why did this versatile and comforting dish begin to fade from the spotlight? As American culinary tastes broadened and diversified, gravitating towards a wider array of international cuisines and faster preparation methods, stuffed peppers, while still delicious, began to seem less “exciting” or perhaps a bit old-fashioned. They were overshadowed by new trends and global flavors that captured the public’s imagination.
Despite this, their inherent versatility remains absolutely unrivaled. Stuffed peppers are truly a culinary canvas, just waiting for your creative touch. They offer a wonderfully comforting taste of home, and you can easily customize them to suit any dietary preference or flavor craving, from classic meat and rice fillings to modern vegetarian twists. Why not bring this adaptable family favorite back to your table and give it a fresh, personalized twist? It’s a delicious way to enjoy both tradition and innovation in one delightful package.
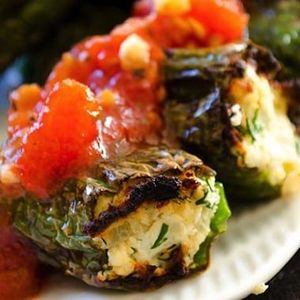
Cheese Stuffed Peppers
Ingredients
Equipment
Method
- Wash and dry the green peppers. Cut each pepper in half lengthwise and carefully remove the seeds and membranes.
- Finely chop the small onion and the fresh dill.
- In a mixing bowl, combine the cottage cheese (or ricotta), finely chopped onion, and fresh dill. Season generously with salt and black pepper.
- Carefully spoon the cheese mixture into each pepper half, ensuring they are well-filled but not overflowing.
- Heat the corn oil in a large skillet or frying pan over medium heat until shimmering.
- Place the stuffed pepper halves into the hot oil, cheese-side up. Do not overcrowd the pan; cook in batches if necessary.
- Fry for 5-7 minutes per side, or until the peppers are tender and slightly charred, and the cheese filling is warmed through and lightly browned.
- Using a slotted spoon or tongs, carefully remove the cooked peppers from the pan and place them on a plate lined with paper towels to drain any excess oil.
- Serve the cheese-stuffed peppers hot, garnished with additional fresh dill if desired.
Notes
Read more about: Beyond the Stars and Stripes: Unmasking the Surprising International Roots of 15 ‘All-American’ Foods
And there you have it – another captivating chapter in our culinary history tour, highlighting dishes that once reigned supreme before gracefully, or sometimes abruptly, making their exit. It’s a fascinating reminder of how intertwined our food choices are with societal shifts, technological advancements, and the simple, yet profound, evolution of our tastes. From the grand and glamorous to the humble and hearty, these foods tell a story of America’s ever-changing kitchen. So, tell us, which of these forgotten favorites would you love to see make a grand comeback? Or perhaps, which ones are you daring enough to try recreating at home, just for old times’ sake? Share your thoughts and let’s keep this delicious conversation going!


