

The 1980s were a truly vibrant decade, weren’t they? Think bold flavors, serious culinary creativity, and a whole vibe that just screamed “good times” right from the kitchen! We’re talking about a time when many dishes became absolutely iconic, deeply etched into our memories and, let’s be real, often onto our dinner plates. So, buckle up, because today we’re taking a total nostalgic journey back in time, directly into the heart of the ’80s kitchen.
Seriously, get ready to explore some classic recipes that perfectly capture the essence of what popular meals looked like back then. From the savory goodness that filled our bellies to the sweet treats that satisfied our cravings, these dishes offer more than just a taste; they offer a delicious, comforting hug of nostalgia. It’s like a culinary time capsule, just waiting to be opened!
Join us now as we rediscover the undeniable culinary charm of the ’80s. Who knows? You might just find yourself reconnecting with an old family favorite, or even spotting a new (old) recipe that you absolutely have to bring back into rotation. Let’s get cooking down memory lane!
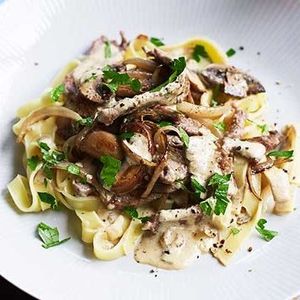
1. **Beef Stroganoff** If the creamy delight of beef stroganoff brings a smile to your face, then you are definitely not alone, because this dish was an absolute dinner table staple throughout the entire ’80s! It was one of those comfort foods that just *got* you, especially on a chilly evening. Imagine, tender strips of beef, perfectly cooked and just waiting to be smothered.
Then comes the magic: a rich, luscious mushroom sauce, lovingly prepared, that just melds everything together into a symphony of flavors. It’s the kind of comforting meal that doesn’t just fill your stomach; it genuinely warms the heart and makes everything feel right in the world, you know?
And here’s the best part: despite how elaborate and fancy it might sound, beef stroganoff is surprisingly simple to prepare. It wasn’t just a restaurant dish; it was totally doable for busy weeknight dinners, which is probably why it became such a hit in homes everywhere.
However, if you wanted to elevate your game and make this dish even more special, a little secret was to add a touch of paprika. That subtle hint of spice just brought out all the savory notes and added an extra layer of deliciousness.
Serve it up with some perfectly buttery noodles, and boom! You’ve got a recipe that’s absolutely sure to be a family favorite all over again, proving that some classics are truly timeless for a reason.
Beef stroganoff
Ingredients
Equipment
Method
- Thinly slice the onion, mince the garlic, slice the mushrooms, and slice the fillet steak into strips. Chop the parsley.
- Heat olive oil in a large frying pan over medium heat. Add the sliced onion and cook until softened, about 5-7 minutes.
- Stir in the minced garlic and cook for another minute until fragrant. Remove the onion and garlic from the pan and set aside.
- Add butter to the same pan. Once melted, add the sliced mushrooms and cook over medium-high heat until deeply browned and their liquid has evaporated, about 5-8 minutes. Remove the mushrooms and set aside.
- Increase heat to high. Sear the sliced fillet steak in batches (if necessary to avoid overcrowding) until browned on all sides, but still pink inside. Remove the beef and set aside.
- Reduce heat to medium. Sprinkle the plain flour into the pan juices and cook, stirring constantly, for 1 minute to create a roux.
- Gradually whisk in the beef stock, bringing the mixture to a simmer and stirring until the sauce thickens.
- Return the cooked onions, garlic, mushrooms, and beef to the pan. Stir well to coat everything in the sauce.
- Remove the pan from the heat. Stir in the crème fraîche and English mustard until fully combined and heated through (do not boil after adding crème fraîche).
- Stir in the chopped fresh parsley just before serving. Taste and season with salt and pepper as needed.
Notes
Read more about: Ditch the Dishes! Uncover 14 Mind-Blowing One-Pot Wonders for Your Busiest Weeknights!
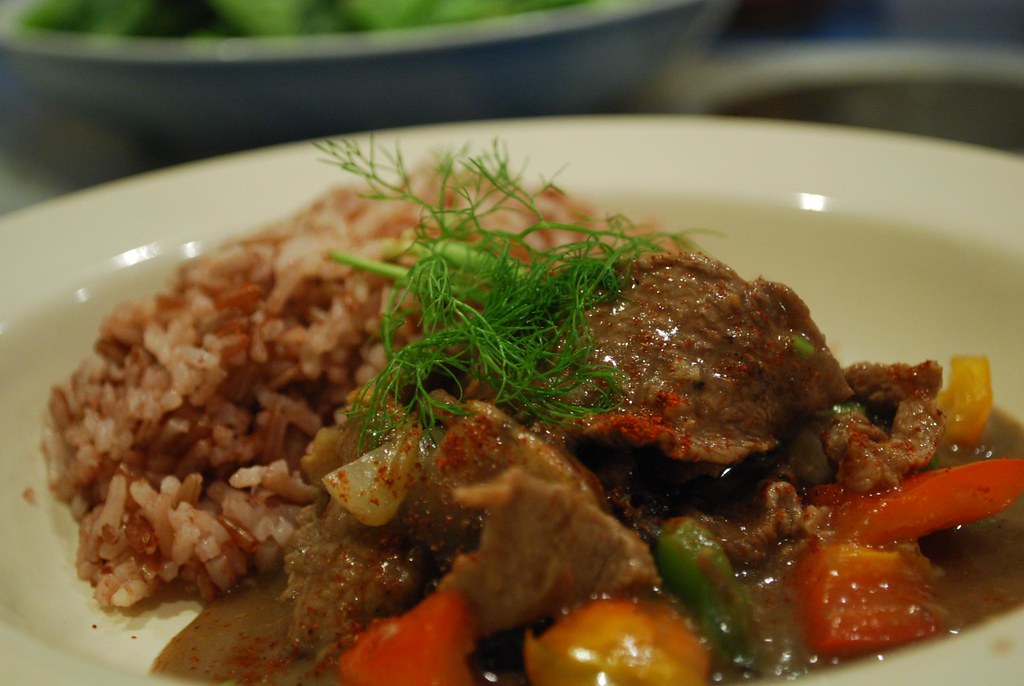
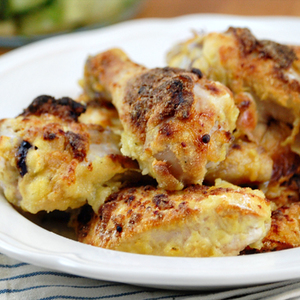
2. **Chicken à la King** How about a truly retro treat that dominated dinner tables back in the day? We’re talking about Chicken à la King, and oh boy, was this creamy, chicken-based dish *all the rage* in the ’80s! It was basically culinary royalty, hence the “à la King” part, and it totally lived up to its regal name.
This wasn’t just chicken and sauce; it was a vibrant, flavorful experience. Loaded with colorful bell peppers – we’re talking bright reds, sunny yellows, and cheerful greens – and tender mushrooms, it offered a delightful explosion of both flavors and textures. Every spoonful was a little party!
But where the real magic happens, the very heart of this dish, is in its incredibly rich and creamy sauce. This velvety concoction perfectly binds everything together, creating a harmonious blend that coated every piece of chicken and vegetable with pure deliciousness. It was the kind of sauce you’d want to spoon generously over everything.
Serving it up was simple yet satisfying, usually over a fluffy bed of rice or perfectly cooked pasta. One bite, and you would instantly transport your taste buds back to a simpler time, when this dish truly was the undisputed king of the dinner table. It’s amazing how food can do that, right?
And guess what? This true classic is also surprisingly easy to master! Even if you weren’t a gourmet chef, you could whip up a fantastic Chicken à la King, which made it a go-to for so many families looking for a comforting yet impressive meal.
Homemade ‘Shake ‘n Bake’ Chicken
Ingredients
Equipment
Method
- Preheat your oven to 375°F (190°C).
- In a large mixing bowl, combine the cornmeal, wholemeal flour, salt, dried parsley, ground pepper, onion powder, garlic powder, and cumin. Mix thoroughly until well combined.
- Place the low-fat yogurt in a separate medium bowl. Dip each piece of chicken into the yogurt, ensuring it is fully coated.
- Transfer the yogurt-coated chicken pieces, one or two at a time, into a large resealable bag containing the dry coating mix. Seal the bag and shake vigorously until each chicken piece is evenly coated.
- Lightly grease a large baking sheet with olive or vegetable oil, or melted butter.
- Arrange the coated chicken pieces on the prepared baking sheet in a single layer, ensuring there is space between each piece for even cooking.
- Bake for 45-50 minutes, or until the chicken is golden brown, crispy, and cooked through.
- To confirm doneness, insert a meat thermometer into the thickest part of a chicken piece (avoiding the bone); it should read 165°F (74°C).
- Remove the chicken from the oven and let it rest for a few minutes before serving.
- Serve hot with your preferred side dishes.
Notes
Read more about: Mastering the Grill: The Ultimate Guide to Avoiding Common Steak Grilling Mistakes for Home Cooks

3. **Quiche Lorraine** Quiche Lorraine, anyone? Oh, you *know* this savory pastry was a total brunch favorite throughout the ’80s, bringing a touch of sophisticated charm to weekend meals! It’s one of those dishes that perfectly blends the humble with the elegant, making it feel special without being fussy.
At its core, Quiche Lorraine is a delightful harmony of simple yet incredibly satisfying ingredients: fluffy eggs, savory cheese, and crispy, flavorful bacon, all nestled within a flaky, buttery crust. It’s the kind of rich, satisfying meal that makes you feel utterly content from the very first bite.
It was often the star of any brunch spread, whether you were hosting a gathering or just enjoying a leisurely Sunday with the family. The combination of textures and flavors was just irresistible, making it a reliable crowd-pleaser that always got rave reviews.
If you were feeling a little adventurous in the kitchen, Quiche Lorraine offered plenty of room for creative flair. You could totally try adding different types of cheeses to amp up the flavor profile, or even sprinkle in some fresh herbs to give it an aromatic kick. The possibilities were pretty much endless!
And here’s a cool secret: it’s a dish that’s as versatile as it is delicious. You could serve it warm, fresh out of the oven, or even cold, and it would disappear quickly from the table either way. Truly a dish that was, and still is, definitely a crowd-pleaser!

Quiche Lorraine
Ingredients
Equipment
Method
- Preheat your oven to 400°F (200°C).
- Prepare your pie dough and fit it into a 9-inch pie dish. Trim and crimp the edges, then refrigerate for 30 minutes.
- Blind bake the pie crust for 15-20 minutes, until lightly golden. Remove from oven and reduce temperature to 375°F (190°C).
- In a large skillet, cook the bacon over medium heat until crisp. Remove bacon with a slotted spoon and drain on paper towels; once cooled, crumble it.
- Scatter the crumbled bacon and grated Gruyère cheese evenly over the bottom of the blind-baked pie crust.
- In a mixing bowl, whisk together the milk, heavy cream, eggs, salt, black pepper, and nutmeg until well combined.
- Carefully pour the custard mixture over the bacon and cheese in the pie crust.
- Bake the quiche for 30-40 minutes, or until the center is just set and the top is golden brown. A knife inserted near the center should come out clean.
- Remove from the oven and let the quiche cool on a wire rack for at least 10-15 minutes before slicing.
- Garnish with chopped chives before serving warm or at room temperature.
Notes
Read more about: Why I Drive Two Hours to Sam’s Club: My Top 10 Must-Have Purchases

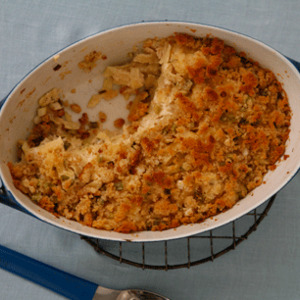
4. **Tuna Casserole** Where comfort food meets sheer convenience, tuna casserole absolutely reigned supreme in the ’80s! This dish wasn’t just popular; it was practically a national treasure in many homes, adored for its incredible ease of preparation and its wonderfully rich, satisfying flavors. It was the ultimate weeknight hero!
The beauty of tuna casserole lay in its simple yet effective combination of ingredients: flaked tuna, tender noodles, and a creamy, dreamy sauce that brought everything together in a comforting embrace. It was the kind of meal that felt like a warm hug, even on the busiest of evenings.
But let’s not forget the grand finale! This incredible concoction was traditionally topped with a generous layer of crispy, golden-brown breadcrumbs. That little crunch on top was the perfect textural contrast to the soft, creamy interior, making every bite an absolute delight.
However, this wasn’t just any ordinary casserole; oh no, it had potential for customization! Many families loved to jazz it up by adding a pop of color and flavor with ingredients like sweet peas or crunchy corn. These additions brought extra texture and made the dish even more wholesome and exciting.
Ultimately, tuna casserole was a dish that was hearty, incredibly satisfying, and had a magical way of bringing back cherished memories of family dinners around the kitchen table. It was a true feel-good meal, delivering a big dose of nostalgic comfort with every single spoonful.
Tuna–Noodle Casserole
Ingredients
Equipment
Method
- Preheat your oven to 375°F (190°C). Grease a 9×13-inch baking dish.
- Bring a large pot of salted water to a boil. Add the flat egg noodles and cook according to package directions until al dente; drain well.
- While noodles cook, melt 4 tbsp. of butter in a large skillet or saucepan over medium heat. Add the chopped scallions and cook until softened, about 3-5 minutes.
- Stir in the flour and dry mustard into the scallions, cooking for 2 minutes to create a roux.
- Gradually whisk in the milk until the sauce is smooth and thickened. Season generously with salt and freshly ground black pepper.
- Remove the sauce from heat and gently fold in the drained tuna chunks and cooked noodles.
- Transfer the noodle mixture into the prepared baking dish, spreading evenly.
- In a small skillet, melt the remaining 6 tbsp. of butter. Add the fresh bread crumbs and cook over medium heat, stirring frequently, until golden brown and crispy.
- Sprinkle the toasted bread crumbs evenly over the casserole.
- Bake for 20-25 minutes, or until the casserole is bubbly and the topping is golden brown. Let rest for a few minutes before serving.
Notes
Read more about: The Great American Pasta Place Duel: Top 15 as Told by Repeat Customer Rates (Prepare to Be Shocked)
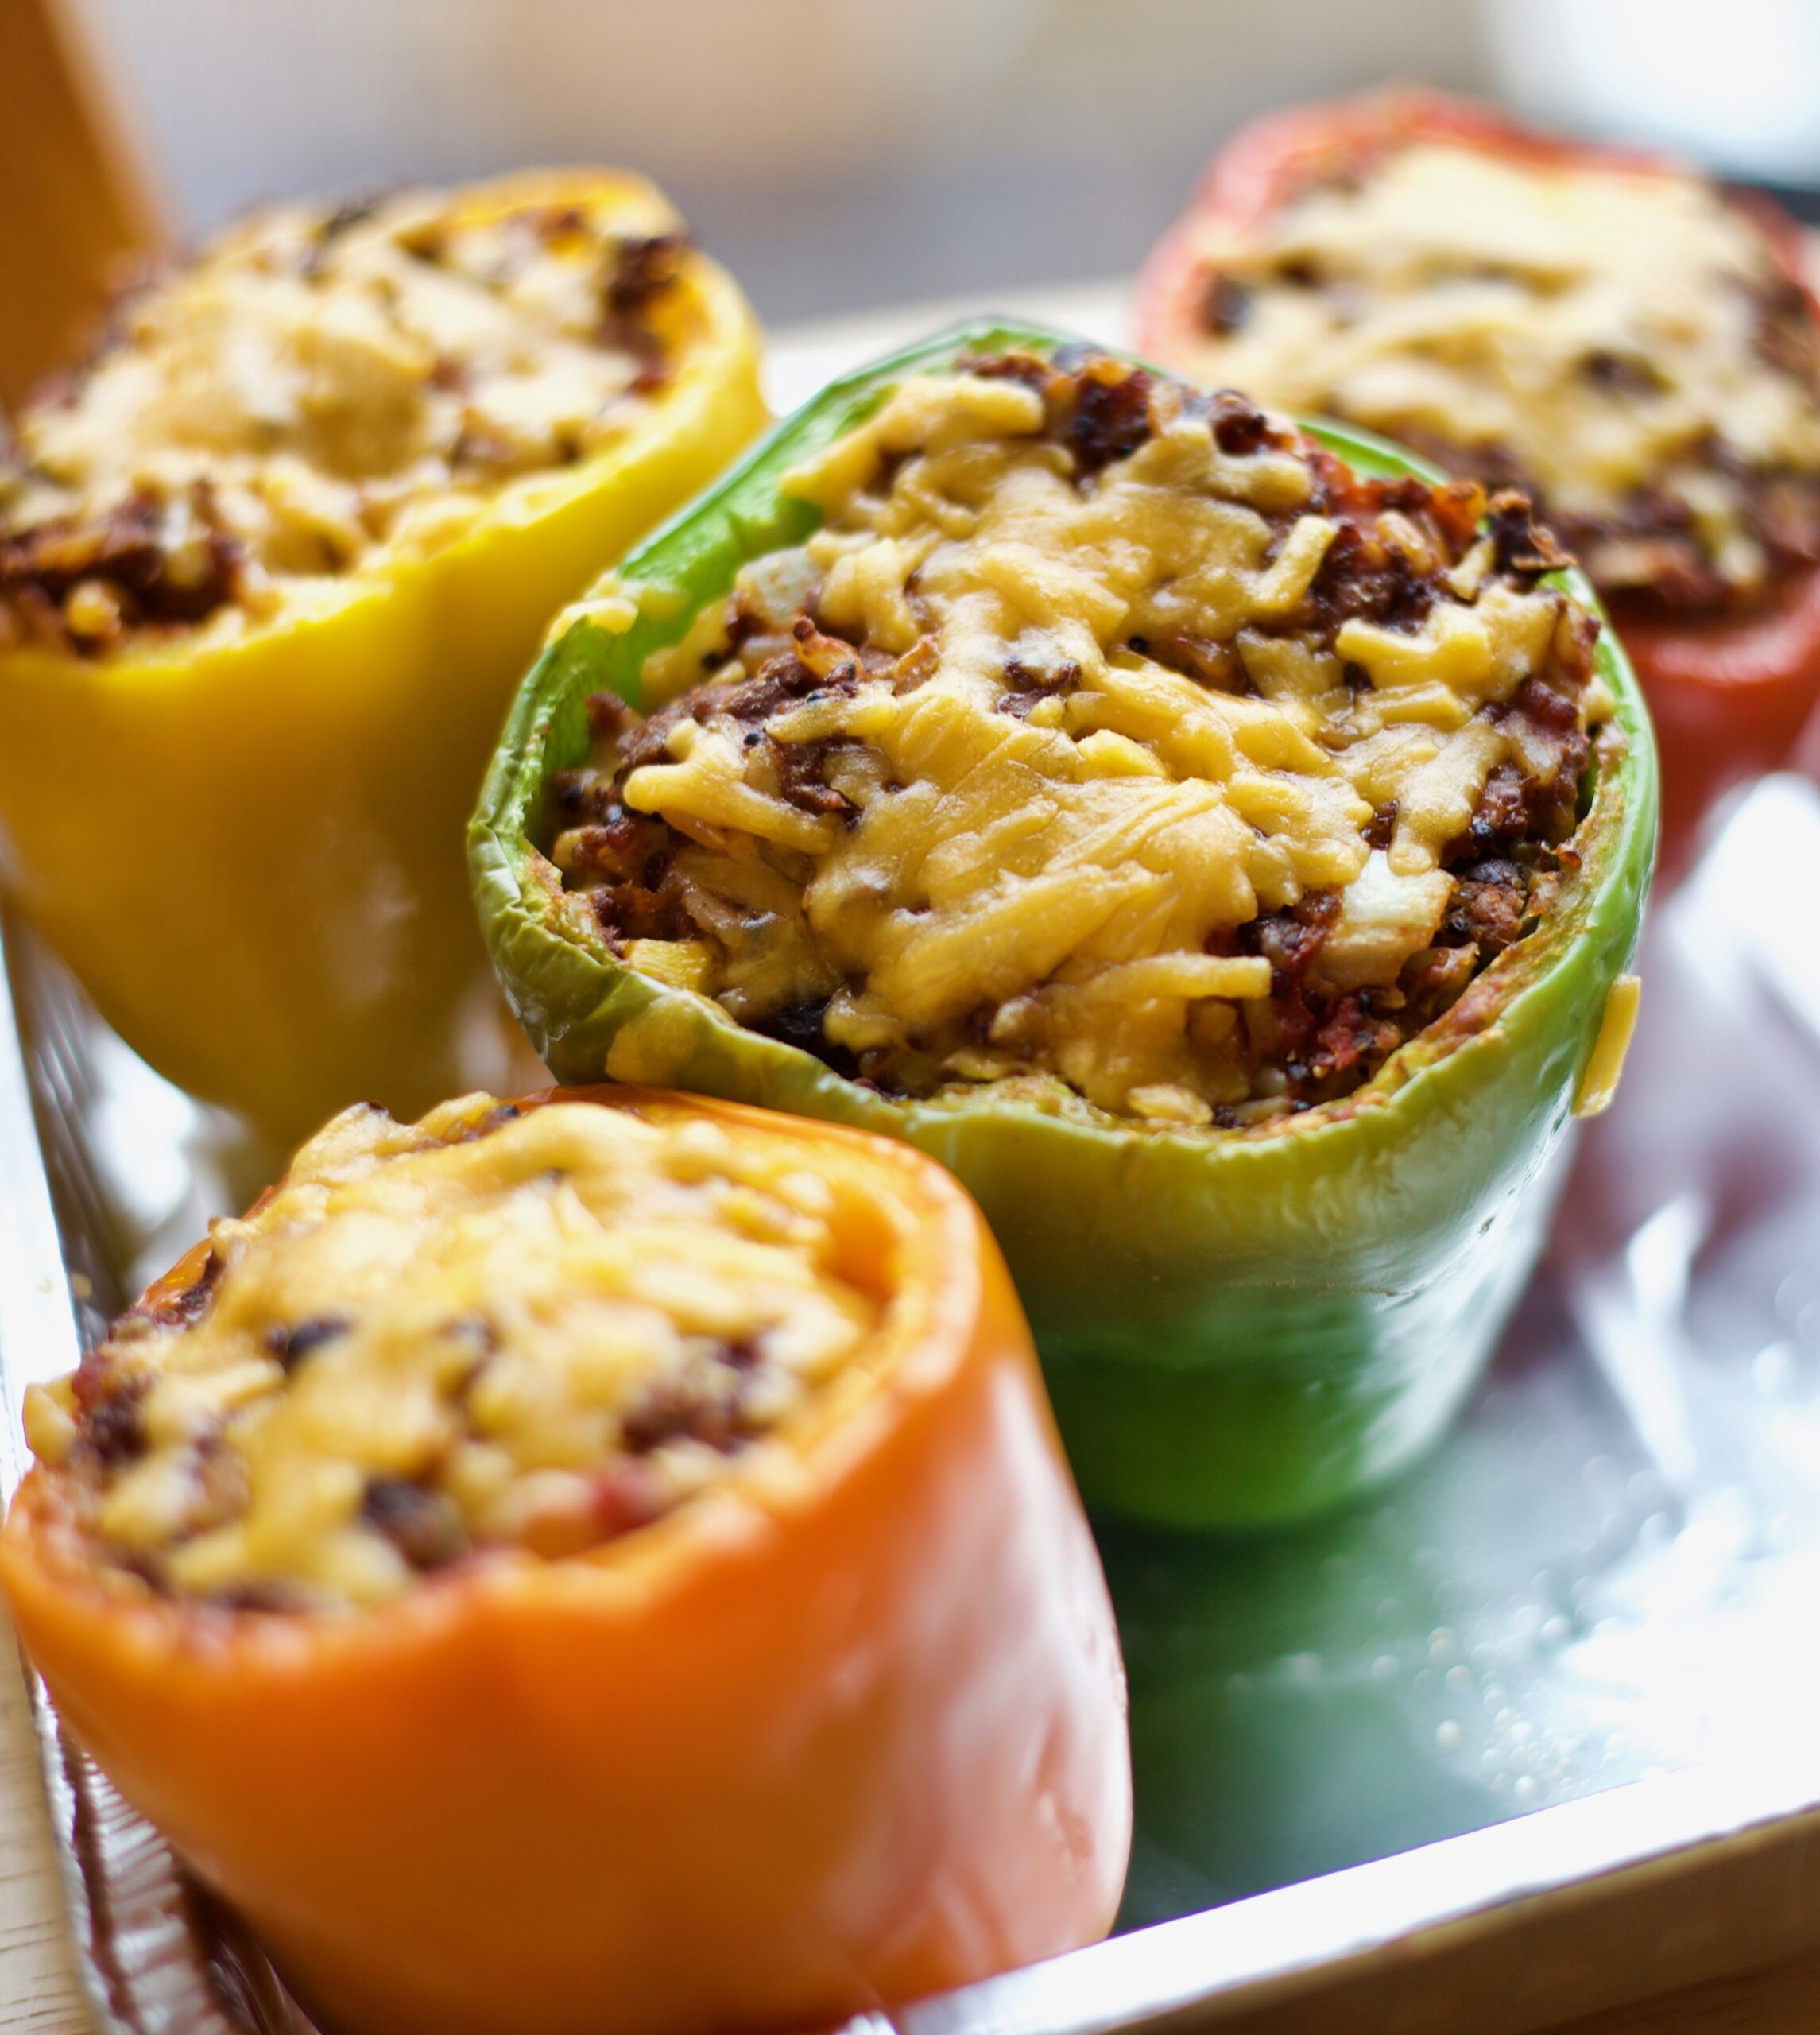
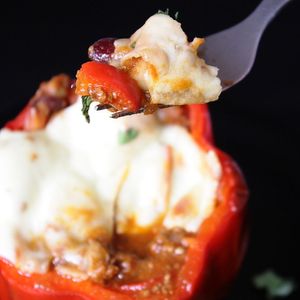
5. **Stuffed Bell Peppers** Talk about a dish that brought a burst of color and flavor to any ’80s meal! Stuffed bell peppers were definitely a vibrant addition, proving that healthy and hearty could also be incredibly appealing. They were like edible art on your plate, totally fun and fabulous.
These beauties came generously filled with a savory mixture that often included rice, seasoned ground meat, and a medley of aromatic spices. This made them not only wonderfully nourishing but also incredibly visually appealing, standing tall and proud on the dinner table.
They were a fantastic way to transform simple ingredients into something special, showing off a little culinary flair without being overly complicated. Each pepper was like its own little edible package of deliciousness, just waiting to be explored.
Hence, they truly offered a great way to get super creative in the kitchen! You could totally experiment with different fillings, perhaps swapping out the meat for something like quinoa or loading them up with an array of colorful vegetables for a vegetarian twist. It was all about making them uniquely *your* own!
Serving them hot, fresh from the oven, was always a treat. Watching those vibrant red, yellow, and green bell peppers light up the dinner table was almost as satisfying as eating them. It was a dish that was truly as fun to make as it was to devour!
Chili Stuffed Bell Peppers with Melted Cheese
Ingredients
Equipment
Method
- Preheat your oven to 375°F (190°C). Halve the red bell peppers lengthwise, remove seeds and membranes, and arrange them cut-side up in a large baking dish.
- In a large Dutch oven or pot, heat olive oil over medium-high heat. Add diced onion and chopped bell pepper, sautéing until softened, about 5-7 minutes.
- Add ground beef to the pot, breaking it up with a spoon. Cook until thoroughly browned, then drain any excess fat.
- Stir in minced garlic, paprika, cumin, cayenne pepper, and cocoa powder. Cook for 1 minute until fragrant.
- Add diced tomatoes, tomato paste, drained and rinsed black, kidney, and white beans, water, and brewed coffee. Season with salt and pepper to taste.
- Bring the chili to a simmer, then reduce heat to low, cover, and cook for at least 30 minutes, or longer for deeper flavor, stirring occasionally.
- Generously fill each prepared bell pepper half with the hot chili mixture.
- Pour about 1/2 cup of water into the bottom of the baking dish to create steam, helping the peppers tenderize.
- Bake for 25-35 minutes, or until the bell peppers are tender. Remove from oven, place a slice of white cheese on top of each stuffed pepper, and return to the oven.
- Continue baking for 5-10 minutes, or until the cheese is melted and bubbly. Garnish with fresh cilantro, if desired, and serve hot.
Notes
Read more about: Remember These? 12 Iconic Fast Food Menu Items We Still Seriously Miss!

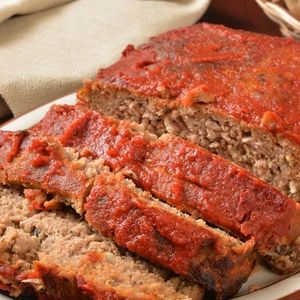
6. **Classic Meatloaf** However you choose to slice it, classic meatloaf is one of those timeless dishes that truly never goes out of style, and it was an undeniable superstar in the ’80s kitchen! It held a special place as a beloved comfort food, a hearty blend that promised warmth and satisfaction.
This iconic dish was built on a foundation of hearty ground meat, perfectly seasoned breadcrumbs, and a secret blend of spices that made every bite incredibly flavorful. It was the kind of meal that just felt like home, evoking a sense of cozy familiarity.
Meatloaf wasn’t just food; it was a reliable, substantial centerpiece for many family dinners. It was straightforward, honest, and delivered on its promise of a satisfying meal that could feed a whole hungry crew without breaking a sweat.
If you were looking to add a little modern twist to this enduring classic, the context suggests trying to incorporate different, fresh herbs or perhaps brushing on a tangy glaze before baking. These little touches could totally elevate the dish and give it a fresh new personality.
And what’s the ultimate pairing for a truly perfect meatloaf? Oh, you know it! A generous serving of creamy, dreamy mashed potatoes alongside. Together, they create a meal that’s not only delightfully nostalgic but also utterly, completely satisfying in every single way.
Meatloaf
Ingredients
Equipment
Method
- Preheat your oven to 350°F (175°C).
- Finely chop the onion, garlic, and fresh parsley as specified.
- In a large mixing bowl, combine the meatloaf mix, cooked oatmeal, chopped onion, parsley, soy sauce, eggs, garlic, dried thyme, and black pepper.
- Gently mix all ingredients until just combined. Be careful not to overmix, as this can result in a tough meatloaf.
- Form the mixture into a uniform loaf shape and place it into a loaf pan.
- Evenly spread the chili sauce over the top of the meatloaf.
- Bake for approximately 60-70 minutes, or until an instant-read thermometer inserted into the center reads 160°F (71°C).
- Remove the meatloaf from the oven and let it rest in the pan for 10-15 minutes before slicing.
- Slice and serve warm, allowing juices to redistribute for a moist result.
Notes
Read more about: Honestly, What Happened? 15 Once-Beloved American Foods That Vanished from Our Tables

7. **Shrimp Scampi** For all the seafood lovers out there in the ’80s, shrimp scampi was an absolute must-have dish! It brought a touch of elegance and lightness to the table, proving that not all comfort food had to be heavy. It was like a little culinary vacation to the coast!
This wonderfully light yet incredibly flavorful dish brilliantly combined succulent shrimp with the aromatic punch of fresh garlic and the bright, zesty tang of lemon. The result? A truly fresh and invigorating taste experience that was both sophisticated and utterly delicious.
Whether it was served as a dazzling appetizer to kick off a party or as a main course gloriously tossed over a bed of pasta, shrimp scampi absolutely never failed to impress. It had that special something that made guests feel instantly spoiled and delighted.
For an extra touch of undeniable elegance, a simple garnish of freshly chopped parsley was all it took to elevate this dish even further. That vibrant green sprinkle not only added visual appeal but also a hint of fresh flavor that completed the picture.
Ultimately, shrimp scampi perfectly embodies both simplicity and sophistication. Its straightforward ingredients come together to create a complex flavor profile, making it a truly standout choice for any occasion, from a casual family dinner to a more formal gathering.
Alright, so we’ve already taken a delicious dive into some seriously iconic ’80s eats, but hold onto your shoulder pads, because our culinary time machine isn’t done yet! We’re rolling right into the next batch of unforgettable meals that absolutely defined the decade. Get ready to explore more beloved comfort foods, party favorites, and international flavors that made mealtime totally, utterly rad. Seriously, these next seven dishes are going to hit you with another wave of delicious nostalgia!

Shrimp Scampi Foil Packets
Ingredients
Equipment
Method
- Preheat your oven to 400°F (200°C) or prepare your grill for medium heat.
- Thinly slice the zucchini, yellow squash, red bell pepper, and red onion, ensuring uniform thickness for even cooking.
- In a large mixing bowl, toss the sliced vegetables together.
- Lay out four large sheets of aluminum foil (approximately 12×18 inches each) on a flat surface.
- Divide the mixed vegetables evenly among the center of the four foil sheets.
- Open the package of SeaPak Shrimp Scampi and distribute the shrimp and sauce evenly over the vegetables in each packet.
- Bring the long sides of the foil together over the ingredients, fold them over twice to create a tight seal, then crimp the short ends tightly to fully enclose each packet, preventing steam from escaping.
- Place the sealed foil packets directly onto the oven rack or grill grates.
- Cook for 15-18 minutes, or until the shrimp are opaque and pink and the vegetables are tender-crisp.
- Carefully open the hot packets (watch for escaping steam) and serve immediately, optionally garnished with a squeeze of fresh lemon and chopped herbs.
Notes
Read more about: Talk About a Lucky Break! 14 Celebrities Who Found Fame By Total Accident
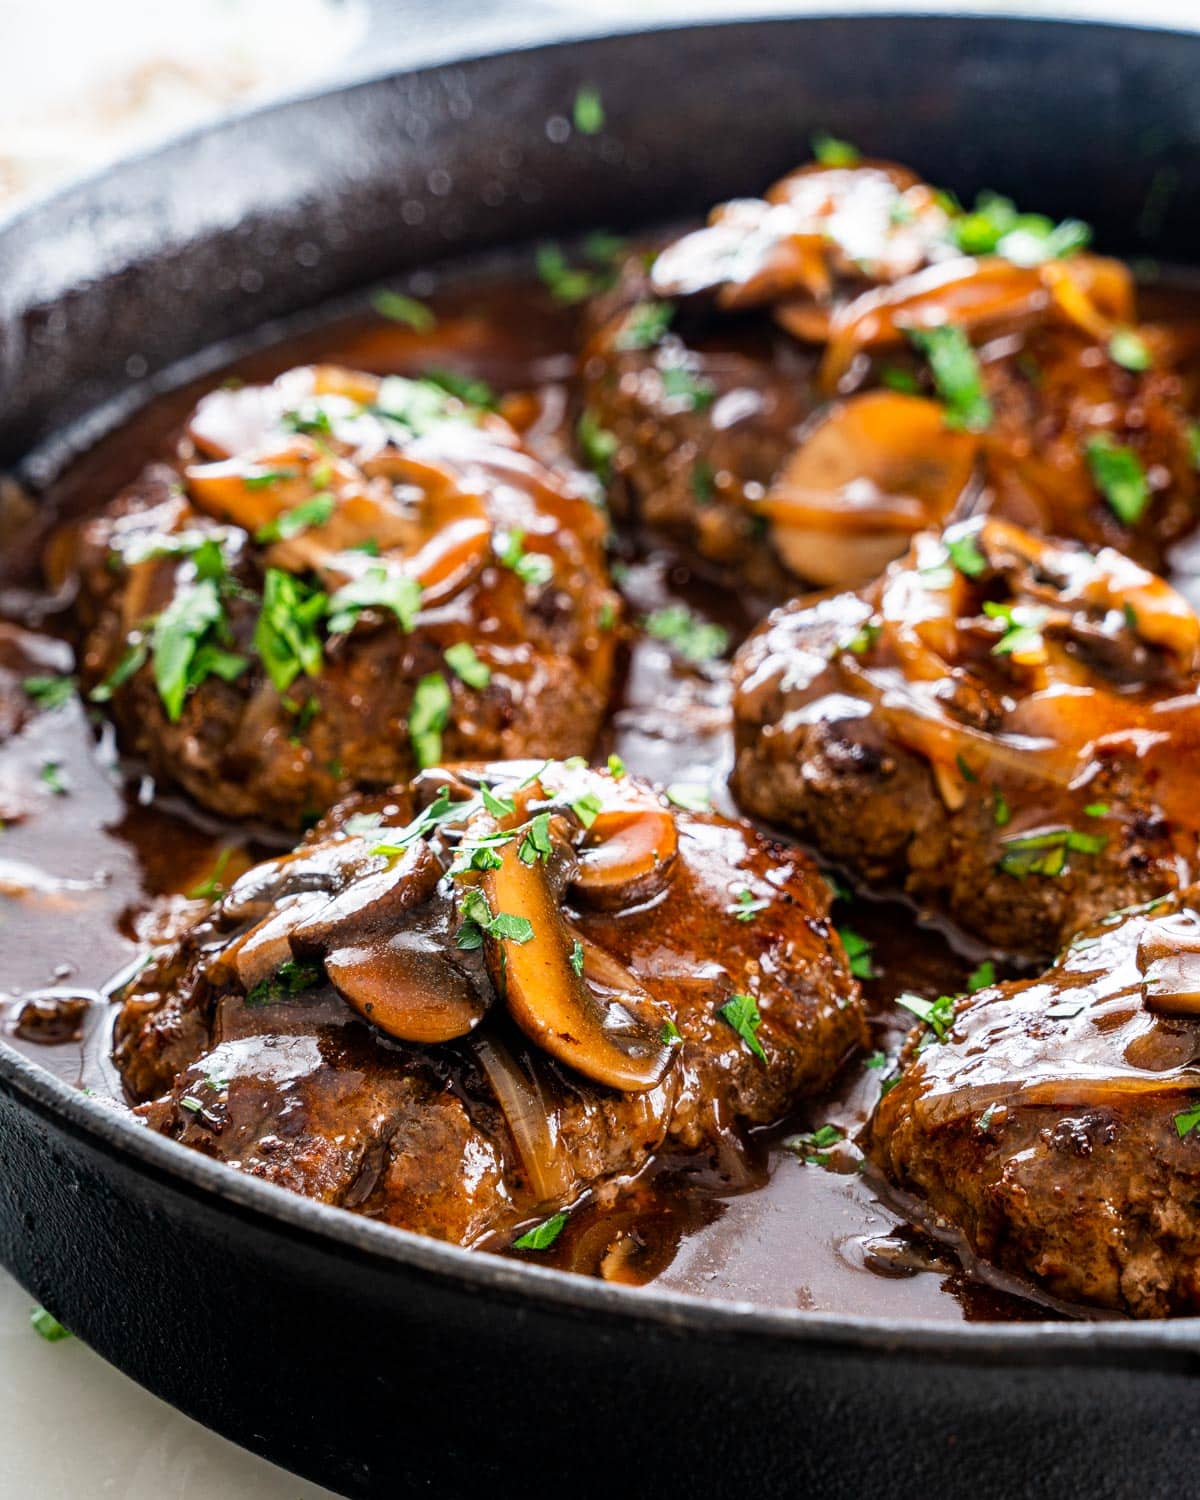
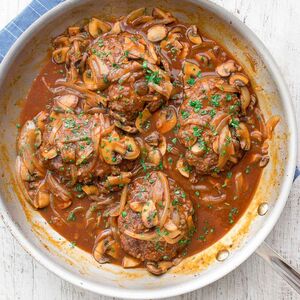
8. **Salisbury Steak**If the mention of Salisbury steak brings a flood of fond memories, then you, my friend, are definitely in for a treat! This dish, often topped with a rich, savory mushroom gravy, was a quintessential classic comfort food that graced countless dinner tables throughout the ’80s. It just had that special something, a hearty charm that always made you feel warm and fuzzy inside.
Now, don’t let its humble appearance fool you, because the flavors packed into Salisbury steak were anything but! Made with perfectly seasoned ground beef, it delivered a satisfying and robust taste that was both familiar and incredibly comforting. It was the kind of meal that promised to fill you up and leave you completely content, every single time.
And what’s the ultimate pairing for a truly classic Salisbury steak? You guessed it: a mountain of creamy, dreamy mashed potatoes! They were the perfect canvas for that rich mushroom gravy, ensuring every bite was loaded with flavor. It’s a combination that truly stands the test of time, delivering warmth and pure satisfaction with every mouthful.
This nostalgic dish isn’t just about the taste; it’s about the feeling it brings. It’s that comforting embrace of simpler times, of family dinners, and of meals that were made with love. So, go ahead, take another bite and let the good vibes of the ’80s wash over you!
Salisbury Steak with Mushroom Gravy
Ingredients
Equipment
Method
- In a mixing bowl, gently combine ground beef, breadcrumbs, egg, salt, and black pepper until just mixed. Do not overmix.
- Divide the mixture into four equal portions and shape them into oval or round patties, about 1/2-inch thick.
- Heat the cooking oil in a large skillet over medium-high heat until shimmering.
- Carefully place the patties in the hot skillet and sear for 4-5 minutes per side, until deeply browned and cooked through. Remove patties to a plate and set aside, reserving the pan drippings.
- Slice mushrooms and add to the same skillet. Sauté until softened and browned, about 5-7 minutes.
- Sprinkle flour over the mushrooms and pan drippings, stirring constantly for 1 minute to cook the raw flour taste.
- Gradually whisk in beef broth, scraping up any browned bits from the bottom of the pan.
- Bring the gravy to a simmer, whisking frequently, until it thickens to your desired consistency. Season with additional salt and pepper to taste.
- Return the seared Salisbury steak patties to the skillet, nestling them into the mushroom gravy.
- Allow the steaks to gently warm through in the gravy for a few minutes before serving hot.
Notes
Read more about: Honestly, What Happened? 15 Once-Beloved American Foods That Vanished from Our Tables
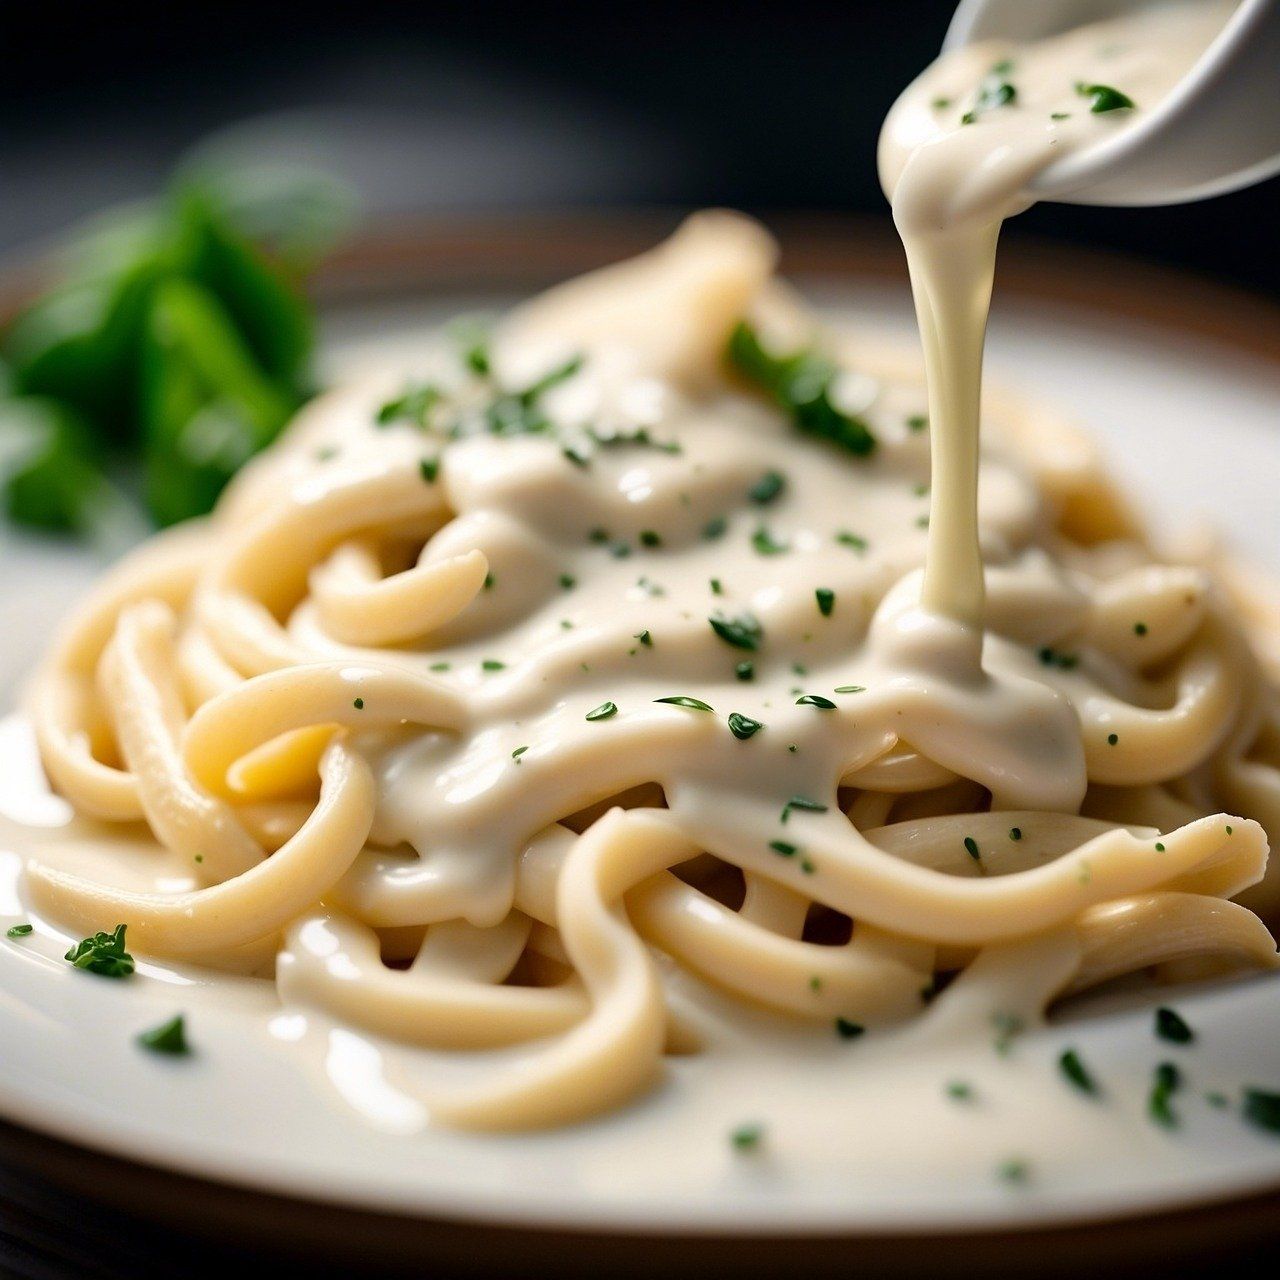
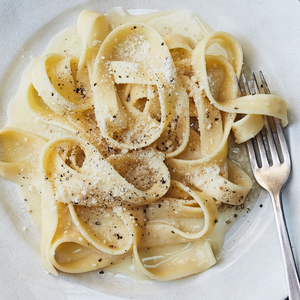
9. **Fettuccine Alfredo**Oh, Fettuccine Alfredo! Just hearing those words probably makes you want to curl up with a big bowl of creamy pasta right now, doesn’t it? This dish was a creamy delight that practically became a sensation in the ’80s, an absolute must-have for anyone craving a taste of pure indulgence. It was the ultimate treat, always.
Seriously, the magic of Fettuccine Alfredo lies in its rich, buttery sauce, which so lovingly enveloped every single strand of tender pasta. It wasn’t just a meal; it was an experience, a symphony of flavors and textures that danced on your palate. Every forkful felt like a luxurious escape, right there in your own kitchen!
But here’s the best part: despite how incredibly decadent it tasted, its true brilliance was in its glorious simplicity. A few key ingredients, expertly combined, created something truly extraordinary. And a generous sprinkle of freshly grated Parmesan cheese? That was the secret weapon that elevated this dish to new, mouth-watering heights.
Whether you were planning a cozy dinner at home for a chill night in or hosting an elegant gathering that needed a touch of flair, Fettuccine Alfredo always delivered. It remained a timeless favorite then, and let’s be real, it still totally is today! Some things are just too good to ever go out of style.
Fettuccine Alfredo
Ingredients
Equipment
Method
- Bring a large pot of generously salted water to a rolling boil.
- Add the fettuccine to the boiling water and cook according to package directions until al dente, usually about 8-10 minutes.
- Before draining, reserve at least 1 cup of the starchy pasta cooking water. This is crucial for the sauce.
- Drain the pasta thoroughly but do not rinse.
- While the pasta cooks, melt the unsalted butter in a large, shallow sauté pan or skillet over medium-low heat.
- Add the drained hot fettuccine directly to the pan with the melted butter. Toss gently to coat the pasta.
- Immediately begin adding the finely grated Parmesan cheese in small increments, tossing continuously. Gradually add a splash or two of the reserved hot pasta water (1-2 tablespoons at a time), tossing vigorously to emulsify the butter, cheese, and water into a smooth, creamy sauce.
- Continue this process, adding more cheese and pasta water as needed, until the sauce is glossy and coats the pasta beautifully. The amount of pasta water may vary.
- Season generously with freshly ground black pepper. Taste and adjust salt if necessary, remembering Parmesan is salty.
- Serve immediately on warmed plates, garnished with additional grated Parmesan and a final grind of black pepper, if desired.
Notes
Read more about: Dan Tana, Hollywood Icon and Restaurateur, Dies at 90
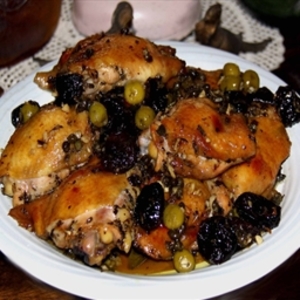
10. **Chicken Marbella**Ready for a dish that sounds fancy but tastes like pure ’80s party perfection? Let’s talk about Chicken Marbella! This incredible concoction was a bona fide staple of ’80s dinner parties, famous for its delightful blend of savory and sweet flavors that totally intrigued the palate. It was daring, it was different, and it was delicious!
Imagine chicken infused with an unexpected, yet utterly delicious, mix of prunes, briny olives, and tangy capers. It sounds wild, we know, but trust us, it worked! This combination created a complex and unforgettable flavor profile that made every bite a pleasant surprise. It was truly a culinary adventure for your taste buds.
The real secret sauce, if you will, behind Chicken Marbella’s undeniable allure lay in its marination process. This crucial step allowed all those incredible ingredients to infuse deeply into the chicken, creating a depth of flavor that was simply unmatched. Baked to absolute perfection, it offered a unique taste experience that guests still rave about.
This dish wasn’t just about feeding people; it was about making an impression! Chicken Marbella was sure to impress everyone at the table and evoke fond memories of those elegant, yet totally fun, ’80s gatherings. It’s a testament to how food can truly transport you back in time to some seriously good moments.
Chicken Marbella
Ingredients
Equipment
Method
- Prepare the chicken: Cut whole chickens into serving pieces or use pre-cut parts, trimming any excess fat.
- Mince the garlic and roughly chop the fresh Italian parsley (set aside half for garnish).
- In a large mixing bowl, combine the brown sugar, white wine, red wine vinegar, olive oil, minced garlic, dried oregano, pitted prunes, olives, capers, and bay leaves.
- Add the chicken pieces to the marinade, ensuring all pieces are thoroughly coated. Cover the bowl and refrigerate for at least 6 hours, or preferably overnight, to allow flavors to meld.
- Preheat your oven to 350°F (175°C).
- Arrange the marinated chicken pieces in a large roasting pan in a single layer, pouring all the marinade over them.
- Bake for approximately 50-60 minutes, or until the chicken is cooked through, tender, and the skin is golden. Baste occasionally with the pan juices to keep the chicken moist and flavorful.
- Once cooked, remove the roasting pan from the oven.
- Garnish generously with the remaining fresh Italian parsley before serving.
- Serve hot, with the rich pan juices, alongside a starch like couscous or rice to soak up the delicious sauce.
Notes
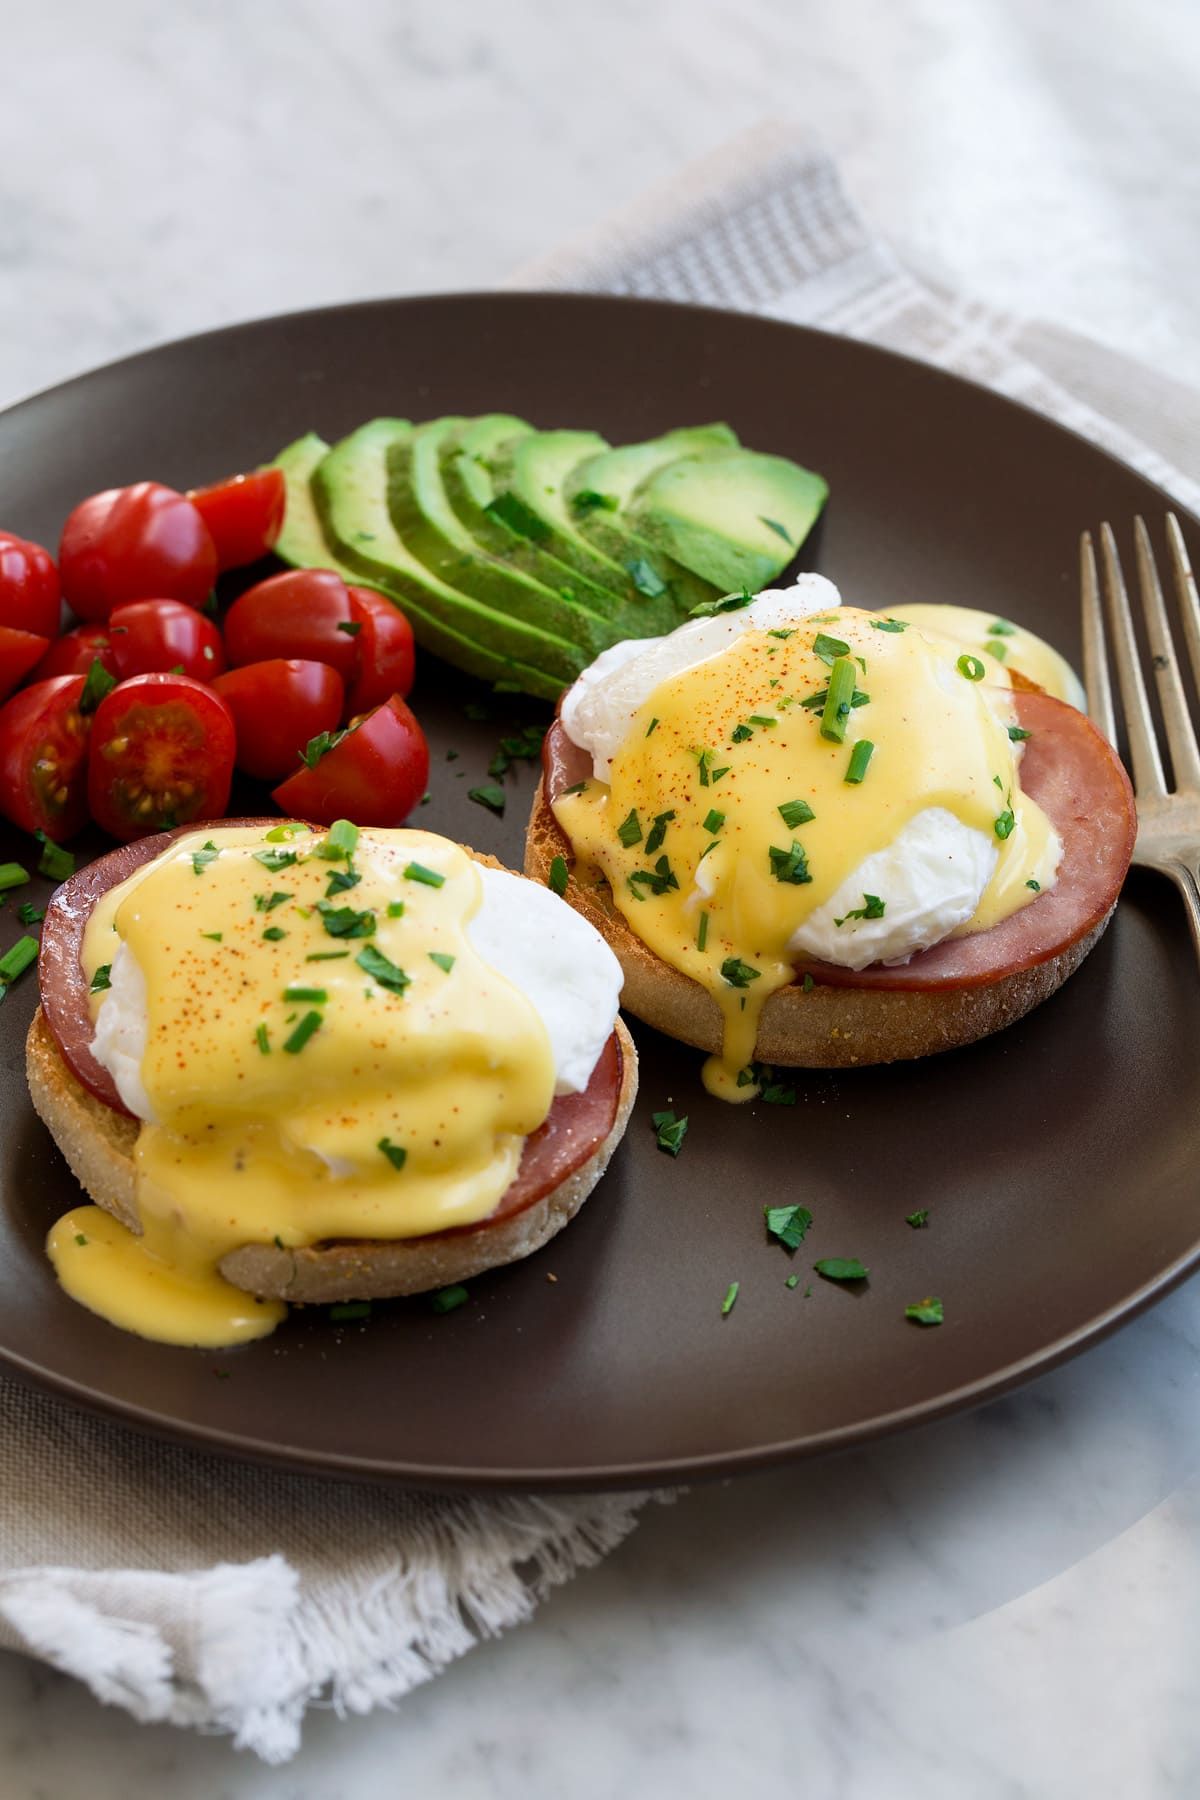
11. **Eggs Benedict**When it comes to brunch, let’s be real, Eggs Benedict absolutely takes the spotlight, and it was no different in the fabulous ’80s! This dish is the ultimate harmonious blend of perfectly poached eggs, savory ham, and that undeniably rich, creamy hollandaise sauce. It’s a breakfast symphony that’s just begging to be devoured.
Every single component of Eggs Benedict works in perfect concert to create a luxurious and utterly satisfying experience. The delicate wobble of the poached egg, the salty kick from the ham, and that luscious, velvety sauce coating everything – it’s a match made in culinary heaven. It transforms breakfast from a mere meal into a truly special occasion.
Now, if you were feeling a little adventurous in the ’80s (or even today!), you could totally try giving this classic a modern twist. Swapping out the traditional ham for some delicate smoked salmon was a game-changer, adding an extra layer of sophistication and flavor. It was all about making it uniquely yours, darling!
Whether you were enjoying a leisurely weekend brunch with friends or aiming for a sophisticated start to your day, Eggs Benedict was, and still is, the go-to choice. It’s a dish that effortlessly combines elegance and comfort, proving that some classics are just too good to ever leave the menu. Brunch goals, right there!

Eggs Benedict
Ingredients
Equipment
Method
- Grill the pancetta slices in a frying pan or on a griddle until they are crisp and golden, then set aside and keep warm.
- Split the English muffins in half horizontally and toast them until golden brown, either in a toaster or the same frying pan.
- Butter the toasted English muffin halves generously and place two halves on each serving plate.
- Fill a large saucepan with water to about 2-3 inches deep and bring it to a gentle simmer over medium heat. Add a splash of white vinegar if desired.
- Carefully crack each of the very fresh eggs into its own small bowl or ramekin.
- Gently slide each egg, one by one, into the simmering water.
- Poach the eggs for 3-4 minutes, or until the whites are set and the yolks are still wonderfully runny.
- While the eggs are poaching, ensure your hollandaise sauce is warm and ready for serving.
- Using a slotted spoon, carefully remove the poached eggs from the water, draining any excess liquid.
- Assemble immediately: place a few slices of crisp pancetta on each buttered muffin half, top with a poached egg, and generously spoon warm hollandaise sauce over each egg to serve.
Notes
Read more about: Jessica Biel’s Journey: Unpacking the Gorgeous Transformation of an A-List Icon Through the Years
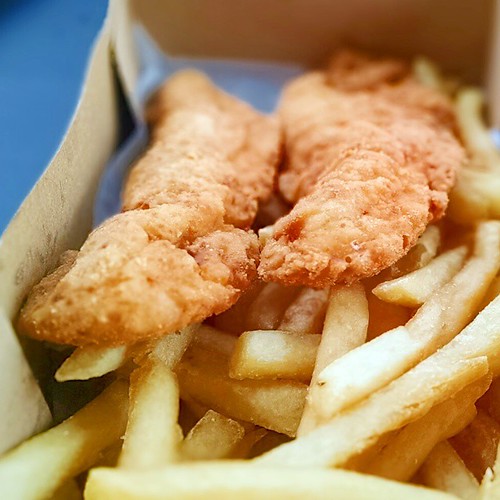
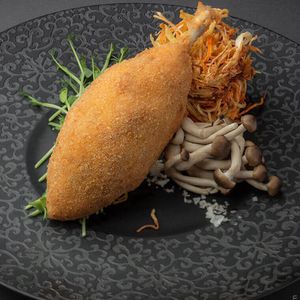
12. **Chicken Kiev**Here’s a dish that truly was a dinner delight in the ’80s and had everyone talking: Chicken Kiev! This culinary superstar was renowned for its irresistibly crispy exterior, which, let’s be honest, already sets the bar pretty high. But then, you cut into it, and boom! A glorious, buttery center awaits you.
That garlic-infused butter that literally oozes out when you slice into the chicken? Oh, that was the true joy of Chicken Kiev! It was a delightful, almost theatrical experience, making every single bite incredibly rich and flavorful. It was the kind of surprise that always put a huge smile on your face.
If you were ever looking to seriously wow your dinner guests back in the day, this dish was *the* way to go. It had that undeniable elegance and a touch of gourmet flair that made any meal feel instantly more special. It wasn’t just dinner; it was a showstopper!
To complete this culinary classic and ensure a perfectly balanced meal, it was often served with a simple side of crisp green beans. This humble addition provided a fresh counterpoint to the rich chicken, making Chicken Kiev a dish that continues to bring a touch of timeless elegance to any table, even now. Seriously delicious!
Chicken Kiev
Ingredients
Equipment
Method
- Prepare the ‘green butter’ by combining softened butter with finely chopped herbs (e.g., parsley, dill, chives) and a touch of garlic, then roll into small logs and chill thoroughly until firm.
- Carefully pound the chicken breast fillets evenly to about 1/4-inch thickness, being careful not to tear the meat.
- Place a log of the chilled green butter in the center of each pounded chicken breast, then carefully fold and roll the chicken tightly around the butter, ensuring no gaps.
- Secure the chicken parcels with toothpicks if necessary to maintain their shape and prevent butter leakage.
- Set up a breading station: one dish with seasoned flour, one with beaten egg, and one with breadcrumbs.
- Dredge each chicken parcel first in flour, shaking off excess, then dip in beaten egg, and finally coat thoroughly in breadcrumbs.
- For extra crispiness and security, repeat the egg wash and breadcrumb coating (double breading), then chill the breaded chicken for at least 30 minutes.
- Preheat oil in a heavy-bottomed pot or deep fryer to 350°F (175°C).
- Carefully fry the chilled chicken parcels for 4-6 minutes until golden brown and crispy.
- Transfer the fried chicken to a baking sheet with a wire rack and finish baking in a preheated oven at 375°F (190°C) for 10-15 minutes, or until the internal temperature reaches 165°F (74°C).
Notes
Read more about: Beyond the Headlines: Discovering the Soul of Ukraine Through Its People, Traditions, and Resilient Spirit

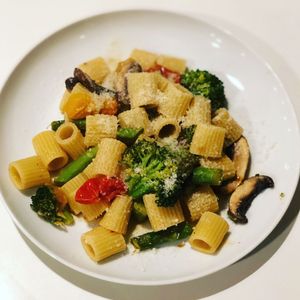
13. **Pasta Primavera**Hello, vibrant veggies and glorious pasta! Pasta Primavera was an absolute favorite during the ’80s, and honestly, it’s not hard to see why. This dish was a celebration of fresh vegetables, proving that eating wholesome could also be incredibly delicious and exciting. It was like a garden party in your mouth!
Picture this: tender pasta tossed with a medley of super vibrant vegetables, creating a dish that was as pleasing to the eye as it was to the palate. From crisp bell peppers to tender broccoli florets, every spoonful was packed with both flavor and fantastic texture. It was fresh, it was light, and it was undeniably good.
Where this dish truly shone, and continues to shine, is in its incredible adaptability. You could literally use whatever vegetables were in season, making it a super versatile choice for any time of year. It meant you could always keep things fresh and exciting, never getting bored with your greens!
Pasta Primavera wasn’t just a meal; it was a testament to the fact that you could enjoy something wholesome without sacrificing an ounce of flavor. It perfectly combined health and deliciousness, solidifying its place as a beloved ’80s classic that still looks, and tastes, amazing today. What a win-win!
Pasta Primavera
Ingredients
Equipment
Method
- Bring a large pot of salted water to a rolling boil. Cook the pasta according to package directions until al dente.
- Before draining, reserve 1 cup of the starchy pasta water. Drain the cooked pasta and set it aside.
- While the pasta cooks, finely mince the garlic and prepare the vegetables: cut broccoli into florets, asparagus into 1-inch pieces, slice mushrooms, and halve the grape tomatoes.
- Heat the olive oil in a large sauté pan or skillet over medium-high heat. Add the minced garlic and red pepper flakes, sautéing for about 30 seconds until fragrant, being careful not to burn the garlic.
- Add the broccoli florets and asparagus to the pan, sautéing for 2-3 minutes until they are bright green and tender-crisp.
- Stir in the sliced mushrooms and grape tomatoes. Continue to sauté for another 3-4 minutes until the mushrooms are lightly browned and the tomatoes begin to soften.
- Pour in the chicken stock, bringing it to a gentle simmer. Cook for 1-2 minutes, allowing the liquid to slightly reduce and the flavors to meld.
- Add the cooked pasta to the sauté pan with the vegetables and sauce. Toss everything together thoroughly to coat the pasta evenly.
- Stir in the Parmesan cheese. If the sauce appears too dry, gradually add a tablespoon or two of the reserved pasta water until a light, cohesive sauce forms, beautifully coating the pasta.
- Taste and adjust seasoning with salt and freshly ground black pepper as needed. Serve immediately, garnished with additional Parmesan cheese if desired.
Notes
Read more about: Beyond the Obvious: 11 Must-Buy Frozen Treasures Hiding in Costco’s Aisles

14. **Chicken Cordon Bleu**Last but certainly not least on our ’80s culinary tour, we have the magnificent Chicken Cordon Bleu! This dish was the definition of a gourmet treat back in the day, a true showstopper that combined succulent chicken with a delectable filling of savory ham and gooey, melted cheese. Talk about flavor town!
The magic didn’t stop there, though. This glorious filling was then encased in a crispy, breaded exterior that added the most delightful crunch to every bite. That contrast of textures – the tender chicken, the soft filling, the crispy coating – was absolutely irresistible and made it a truly memorable meal.
Now, while Chicken Cordon Bleu might have looked and sounded incredibly complex, almost like something only a fancy chef could whip up, the truth is, it was surprisingly accessible for home cooks. With a little bit of love, anyone could create this elegant and satisfying dish right in their own kitchen.
Often paired with a simple, fresh salad, Chicken Cordon Bleu created a meal that was both effortlessly elegant and deeply satisfying. It’s a classic that continues to impress with its timeless appeal, proving that some gourmet treats are simply too good to ever fade from our hearts and our dinner tables. What a way to wrap up our ’80s feast!

Chicken Cordon Bleu
Ingredients
Equipment
Method
- Place chicken breasts between sheets of plastic wrap and pound evenly to about ¼-inch thickness. Season both sides generously with kosher salt and freshly ground pepper.
- On each pounded chicken breast, layer one slice of ham or prosciutto, followed by one slice of Gruyère or Swiss cheese, leaving a small border.
- Carefully roll up each chicken breast tightly, tucking in the sides to fully enclose the filling. Secure each roll with one or two toothpicks if necessary to hold its shape.
- Set up a breading station: Place flour in one shallow dish, the beaten egg in a second, and the breadcrumbs mixed with finely chopped parsley in a third.
- Dredge each rolled chicken breast first in flour, shaking off any excess. Dip it into the beaten egg, allowing excess to drip off, then coat thoroughly in the breadcrumb mixture, pressing gently to adhere.
- Preheat your oven to 375°F (190°C). Heat the neutral oil in a large oven-safe skillet over medium-high heat until shimmering.
- Carefully place the breaded chicken rolls in the hot skillet. Sear for 3-4 minutes per side, turning with tongs, until golden brown and crispy on all sides.
- Transfer the skillet (or move the chicken to a baking sheet) to the preheated oven. Bake for 15-20 minutes, or until the chicken is cooked through and reaches an internal temperature of 165°F (74°C).
- Remove the chicken from the oven and let it rest for 5 minutes before slicing. Carefully remove any toothpicks before serving.
- Serve warm with your preferred side dishes.
Notes
Read more about: Ever Wonder What A-List Stars Really Eat? These 15 Master Chefs Are Bringing the Heat (Right Into Their Homes!)
And there you have it, folks! From creamy classics to gourmet treats, the ’80s truly gave us a culinary landscape that was as diverse as it was delicious. These meals weren’t just about filling our bellies; they were about creating memories, bringing families together, and adding that special, nostalgic sparkle to our everyday lives. So, which of these totally rad dishes are you bringing back to your kitchen first? Let’s keep the ’80s food legacy alive and deliciously well!


