Ingredients
Equipment
Method
- Thoroughly wash and prepare all selected fruits, chopping larger fruits into smaller, blender-friendly pieces.
- Categorize the prepared fruits by color (red, orange, yellow, green, blue, purple) into separate small bowls.
- Working with one color at a time, blend each fruit until it forms a smooth puree. Add a tiny splash of water if needed to aid blending, but avoid making it too thin.
- If desired, strain each fruit puree through a fine-mesh sieve into a clean bowl to remove seeds and pulp, ensuring a silky-smooth consistency.
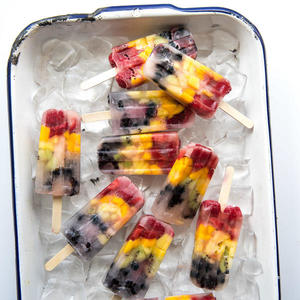
- Pour the first color (e.g., red) into the bottom of each popsicle mold, filling approximately one-sixth of the mold.
- Place the molds in the freezer for 15-30 minutes, or until the first layer is firm enough to support the next without bleeding.
- Carefully pour the next color (e.g., orange) on top of the partially frozen layer, filling another one-sixth of the mold, and return to the freezer.
- Repeat the layering and partial freezing process for the remaining colors (yellow, green, blue, purple) in sequence.
- Once all layers are added and the final layer is poured, insert popsicle sticks into the center of each mold.
- Freeze the popsicles for at least 4-6 hours, or preferably overnight, until completely solid. To unmold, briefly run the molds under warm water.
Notes
1. Always use ripe, fresh fruit for the best flavor and natural sweetness, reducing the need for any added sugars. This also ensures vibrant colors.2. For a smoother, seed-free popsicle, strain each fruit puree through a fine-mesh sieve before layering. This improves texture, especially for berries.3. To achieve distinct, clean layers, partially freeze each layer (about 15-30 minutes) before adding the next. This prevents colors from bleeding.4. Experiment with fruit combinations for unique flavor profiles, such as adding a touch of mint or lime zest to certain layers for a brighter taste.