Ingredients
Equipment
Method
- Day 1 (Initial Mix): In a clean glass jar, combine 50g flour and 50g de-chlorinated water. Mix thoroughly with a spatula until no dry flour remains.
- Cover & Rest: Cover the jar loosely with a breathable lid (e.g., coffee filter or kitchen towel secured with a rubber band) and let it rest at a consistent room temperature (70-75°F / 21-24°C) for 24 hours.
- Day 2 (First Feed): Discard all but 50g of the starter from the jar. Add 50g fresh flour and 50g de-chlorinated water to the remaining starter. Mix well, cover loosely, and rest for 24 hours.
- Subsequent Feedings (Days 3-7+): Repeat the feeding process daily: discard all but 50g of starter, then feed with 50g fresh flour and 50g fresh de-chlorinated water.
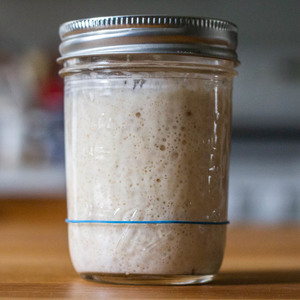
- Observe Activity: Look for small bubbles forming, a significant rise, and a yeasty or slightly sour aroma developing within a few hours of feeding.
- Maintain Consistency: Adjust water or flour slightly if the starter becomes too thick or too thin; it should resemble a thick pancake batter.
- Mark Height: Use a permanent marker to mark the initial height of the starter in the jar after feeding, to better observe its rise.
- Assess Maturity: A starter is considered mature and ready for baking when it consistently doubles in size within 4-8 hours after feeding and smells pleasantly tangy. This usually takes 5-7 days, but can vary.
- Prepare for Storage (Once Mature): Once mature, if not baking immediately, feed the starter and let it become active.
- Refrigerate: Place the active starter in the refrigerator with an airtight lid; feed it once a week for maintenance.
Notes
Consistency is key in developing a robust sourdough starter. Always use a digital scale for precise flour and water ratios; consistency should resemble a thick pancake batter. Opt for bottled, filtered, or de-chlorinated water, as chlorine can inhibit beneficial wild yeasts. Maintain a consistent room temperature, ideally 70-75°F (21-24°C), to encourage steady fermentation. Be patient; a healthy starter can take 5-7 days or more to develop. Regularly discard a portion before feeding to manage volume and strengthen the yeast and bacteria population. Observe for consistent bubbles, a significant rise, and a pleasant, tangy aroma as indicators of a vibrant, active starter. Different flours, especially rye or whole wheat, can kickstart activity more quickly.