

In the bustling theater of our kitchens, where flavors dance and aromas entice, the choice of cooking oil often feels like a background player. Yet, this seemingly simple decision holds profound implications, not just for the taste of our culinary creations but, more importantly, for our health and safety. You’ve probably heard half a billion times that when there’s smoke, there’s fire, and while not every puff from your pan signals an inferno, it invariably signals trouble. Understanding an oil’s ‘smoke point’ is not merely a culinary tip; it’s a foundational pillar of smart, safe, and delicious cooking.
The smoke point, fundamentally, is the temperature at which a cooking oil begins to vaporize and produce visible smoke. This isn’t just an aesthetic inconvenience; it’s a critical indicator that the oil’s fatty acids are breaking down through a process called thermal decomposition. Once you’ve overheated your cooking oil, beyond just a foul, burnt taste that might make you want to extinguish your taste buds, the oxidation of fatty acids can unleash damaging chemical compounds. These compounds are linked with hellish illnesses like Alzheimer’s and Parkinson’s disease, and they release acrolein, a substance that may irritate the eyes and throat. It’s a clear sign your oil is losing its nutritional value and potentially becoming harmful.
While some oils are celebrated for their incredible ability to withstand blistering heat, offering a neutral canvas for searing, browning, or deep-frying without a fiery surprise, many others ‘flat-out refuse’ to reach such high temperatures safely. It’s not a failing on their part, but a characteristic that demands our respect and informed application. This in-depth exploration delves into 14 major cooking oils that, for various intrinsic reasons or under specific conditions, simply cannot or should not be pushed to the highest smoke points. We’ll uncover the science behind their limitations and guide you toward making choices that elevate your cooking both in flavor and in healthful intent, empowering home cooks with practical knowledge and actionable steps, making complex culinary concepts accessible.
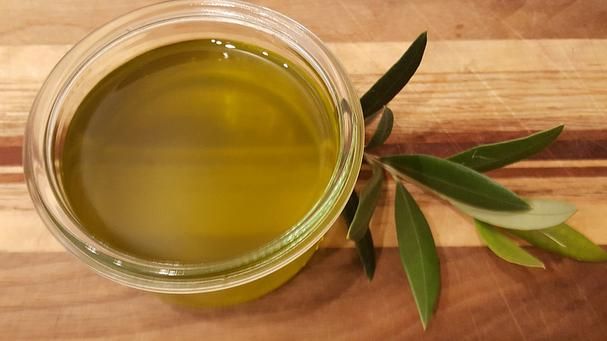
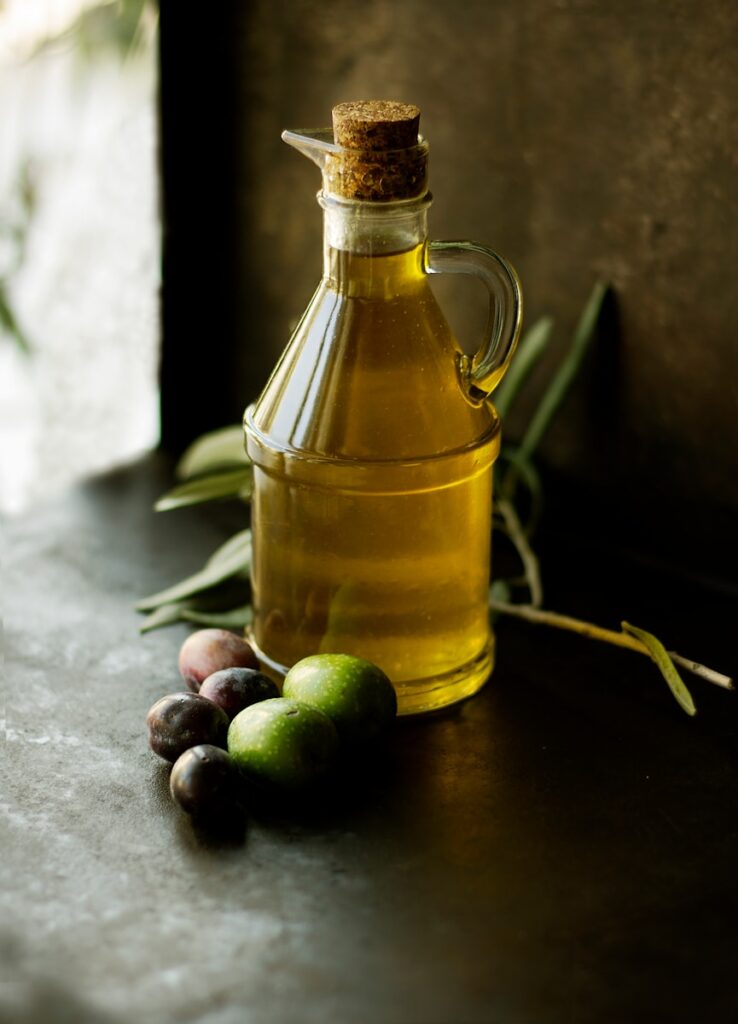
1. **Extra Virgin Olive Oil**Extra virgin olive oil is arguably one of the most revered fats in the culinary world, synonymous with the heart-healthy Mediterranean diet and celebrated for its robust, distinct flavor. It’s a staple for drizzling over salads, finishing dishes, and for many, an everyday cooking oil. However, its widespread affection often leads to a crucial misunderstanding regarding its thermal stability and suitability for all cooking methods, especially high-heat applications.
The smoke point for extra virgin olive oil is about 375°F (191°C), though some sources suggest it can range up to 405°F (207°C). This makes it considerably lower than many refined vegetable oils. The reason for this relatively lower threshold lies in its minimal processing. As a “virgin” oil, it retains more impurities, free fatty acids, and natural compounds, which, while contributing to its rich flavor and antioxidant profile, are also more prone to burning and breaking down at lower temperatures.
Consequently, while extra virgin olive oil is indeed perfect for sautéing at medium temperatures and drizzling over dishes to impart its unique taste, it is explicitly “not suitable for high-heat frying.” Pushing it past its smoke point can result in that unpleasant, bitter, or acrid taste in your food, extinguishing the very flavor you sought to enhance. More critically, the degradation of its fatty acids at high temperatures can unleash potentially harmful compounds, compromising both the quality of your meal and the health benefits it typically offers.
So, for dishes that require vigorous frying, searing, or anything above medium heat, extra virgin olive oil makes a graceful exit, refusing to participate safely. Its true brilliance shines in low to medium-heat cooking, where its unadulterated flavor can truly sing, or in raw applications like dressings, where its health benefits, rich in monounsaturated fats and antioxidants, are fully preserved without thermal compromise.
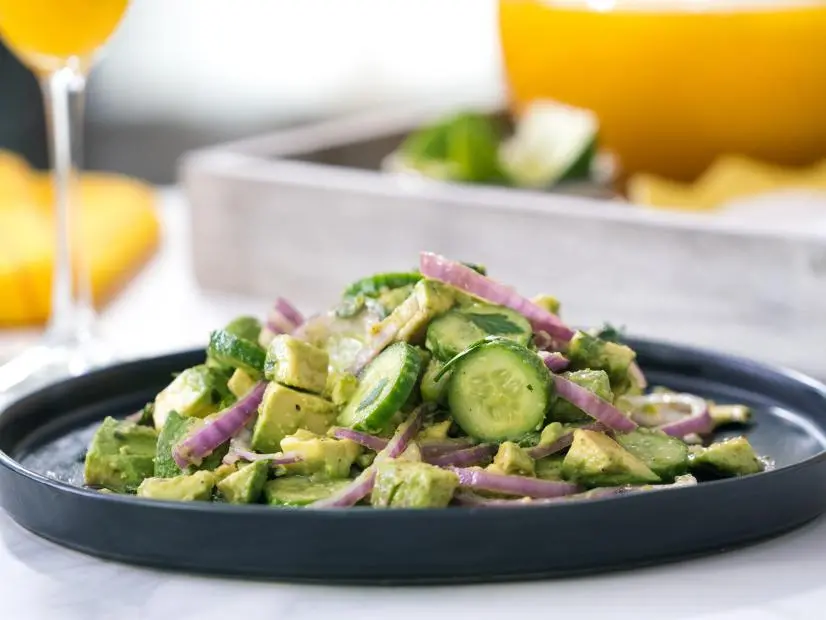
Avocado Salad
Ingredients
Equipment
Method
- For the salad: Peel the avocados, cut into 1-inch chunks and put all but 2 chunks into a large mixing bowl for the salad. Put the remaining 2 chunks into a small mixing bowl and set aside for the dressing.
- Add the parsley, cucumber and onion to the avocado chunks in the large mixing bowl. Sprinkle generously with salt and pepper.
- For the dressing: Mash the reserved 2 chunks of avocado with a fork until smooth. Add the oil, honey, cumin and lime juice and whisk until smooth.
- Pour the dressing over the avocado salad and gently toss with your hands to combine. Serve immediately.
Notes
Read more about: Unmasking the Masters of Deception: 13 Legendary Forgeries That Fooled the Art World and Beyond
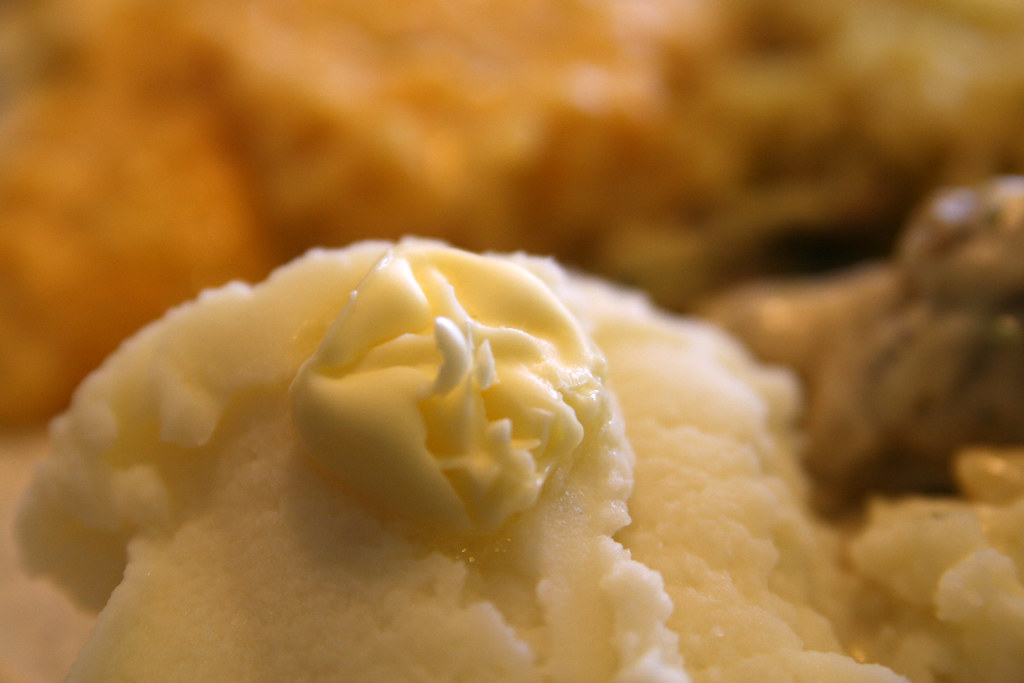
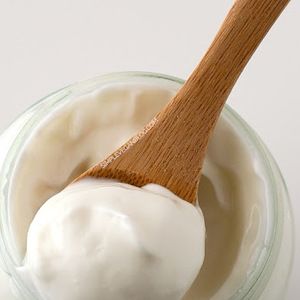
2. **Butter**Butter, with its rich, creamy texture and unparalleled flavor, is a cherished ingredient in countless cuisines, elevating everything from simple toast to complex sauces. It’s a fat that delivers a depth of flavor that many oils simply cannot match. Yet, despite its culinary prowess, butter possesses a notably low smoke point, making it another prime example of an oil that absolutely refuses to reach high temperatures safely for many cooking tasks.
The context explicitly states that cooking fats with a low smoke point like butter are best suited “for gentle sauteeing.” Its smoke point is significantly lower than most cooking oils, often falling below 250°F (121°C). This is primarily due to the presence of milk solids and water within butter. These components begin to burn and brown long before the fat itself would reach a high smoke point, leading to scorched flavors and a pan full of unpleasant black bits.
When butter is heated past its modest smoke point, the milk solids toast and then burn, imparting an acrid, bitter taste to your food. This quick degradation not only spoils the flavor profile of your dish but also means you’re creating those undesirable compounds that compromise health. The delightful nutty aroma of browned butter is a fine line, easily crossed into the realm of burnt, bitter disappointment if not carefully managed.
For high-heat cooking where fats need to remain stable, butter simply cannot compete. Its strength lies in its ability to impart flavor at lower temperatures, such as in light sautéing, basting, or as a finishing fat. Clarified butter, or ghee, which has had the milk solids removed, offers a much higher smoke point, making it suitable for more intense heat. But for regular butter, respecting its low smoke point is essential to harness its beloved flavor without encountering unwanted smoke and degradation, ensuring the desired results in your culinary endeavors.

Air Fryer Lobster Tails with Lemon-Garlic Butter
Ingredients
Equipment
Method
- Prepare lobster tails by cutting down the center of the top shell with kitchen shears, stopping at the tail fin. Gently pull the meat up through the opening, resting it on top of the shell.
- In a small saucepan, melt the butter over low heat. Once melted, remove from heat.
- Stir in the lemon zest, grated garlic, salt, and ground black pepper into the melted butter mixture.
- Preheat your air fryer to 380°F (195°C) for 3-5 minutes.
- Lightly brush the exposed lobster meat with about half of the lemon-garlic butter mixture.
- Place the butterflied lobster tails in the air fryer basket in a single layer, ensuring they are not overcrowded.
- Air fry for 5-7 minutes, or until the lobster meat is opaque and cooked through. Cooking time may vary slightly based on the size of the tails.
- While the lobster cooks, re-warm the remaining lemon-garlic butter if it has solidified.
- Carefully remove the cooked lobster tails from the air fryer.
- Garnish with chopped fresh parsley and serve immediately with the remaining lemon-garlic butter for dipping and fresh lemon wedges.
Notes
Read more about: Beyond the Odometer: 15 Legendary Engines That Defy Time, Powering On Strong Past 200,000 Miles and into Automotive Immortality
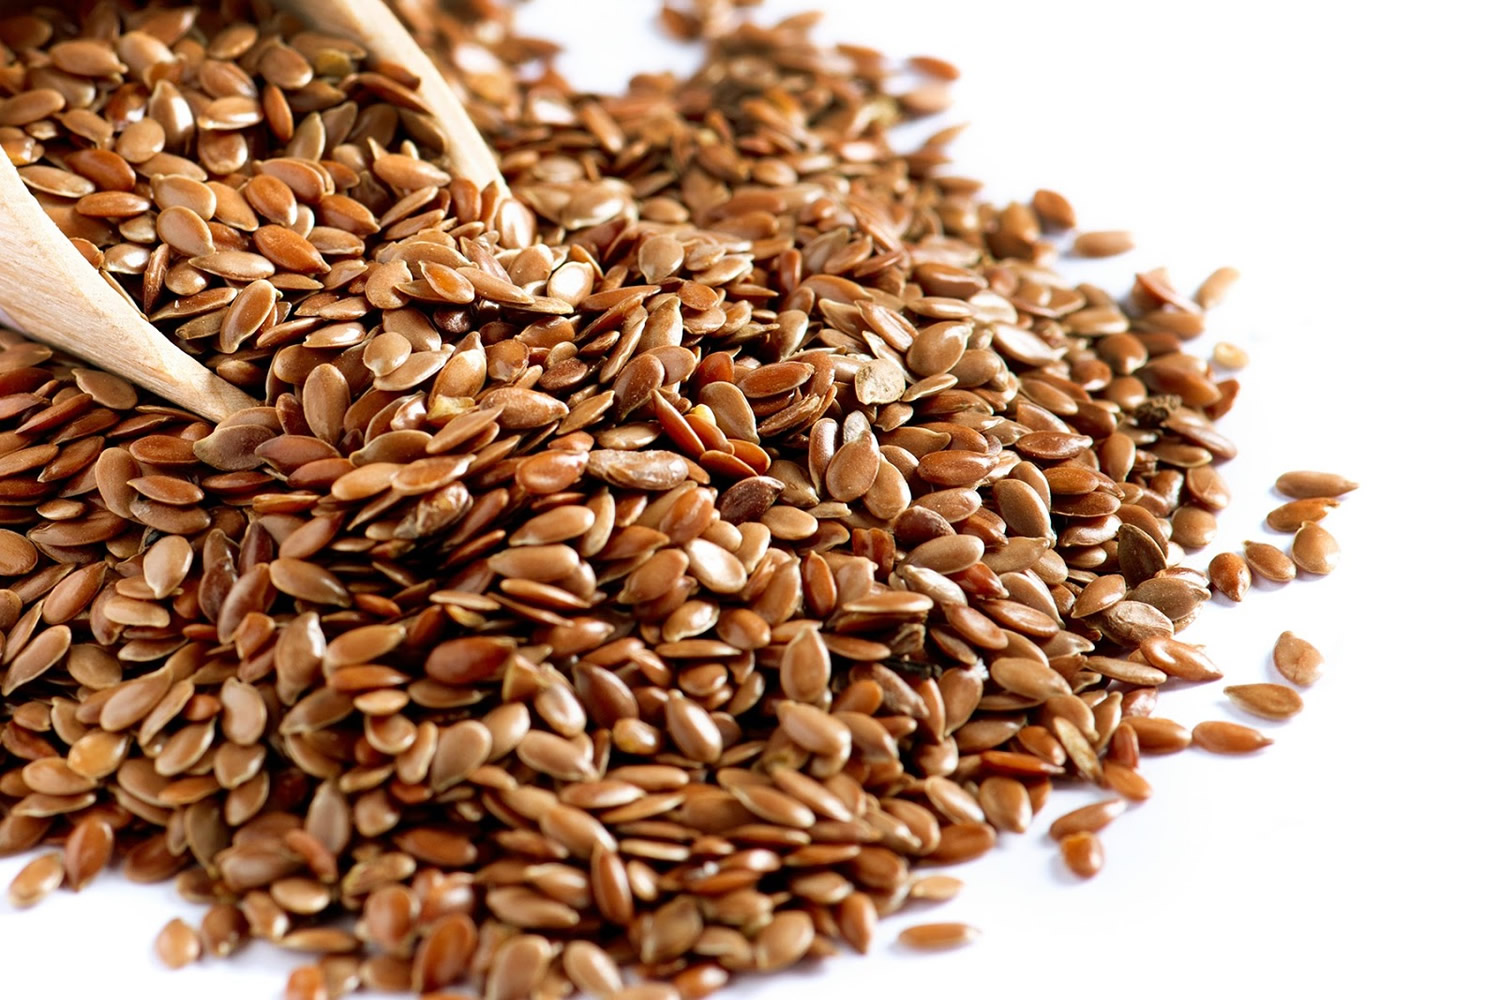
3. **Flaxseed Oil (Unrefined)**Flaxseed oil, particularly in its unrefined form, has garnered considerable attention for its impressive health benefits, primarily its rich content of omega-3 fatty acids. It’s often championed as a dietary supplement or an excellent addition to cold dishes, promoting overall wellness. However, when it comes to cooking with heat, flaxseed oil is a stark reminder that not all oils are created equal, definitively refusing to reach a high smoke point safely.
The context explicitly advises that “unrefined oils such as flaxseed oil and walnut oil… have lower smoke points and can quickly break down, resulting in off-flavors and harmful compounds.” Unrefined flaxseed oil has one of the lowest smoke points among edible oils, often well below 225°F (107°C). This extreme sensitivity to heat is largely due to its high concentration of polyunsaturated fats, particularly alpha-linolenic acid (ALA), and the presence of impurities characteristic of an unrefined state. These delicate compounds are highly susceptible to oxidation when exposed to elevated temperatures.
Heating unrefined flaxseed oil beyond its low smoke point isn’t just a matter of taste; it’s a direct path to nutritional degradation and the formation of potentially harmful free radicals. The valuable omega-3 fatty acids, which are the primary draw of this oil, are highly unstable under heat and quickly oxidize, losing their beneficial properties. This process can lead to an acrid, fishy flavor that will ruin any dish it’s incorporated into, along with generating compounds that are detrimental to health.
Therefore, unrefined flaxseed oil is an oil that should be “best avoided for cooking.” Its utility is found exclusively in cold applications, making it ideal for salad dressings, smoothies, or as a finishing drizzle over cooked dishes just before serving. By understanding and respecting its profound aversion to heat, we can fully capitalize on its exceptional health advantages without compromising safety or flavor, ensuring its delicate nutritional profile remains intact and beneficial.
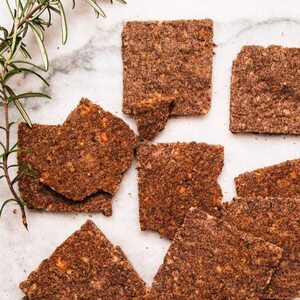
Buckwheat Crackers with Rosemary and Pecans Recipe
Ingredients
Equipment
Method
- Preheat your oven to 325°F (160°C). Line a baking sheet with parchment paper.
- In a food processor, pulse the pecans until finely ground, resembling a coarse meal. Add the buckwheat flour, flaxseed, sea salt, black pepper, and fresh rosemary, pulsing to combine.
- Add the olive oil and water to the food processor and process until a cohesive dough forms. It should be soft but not sticky.
- Divide the dough in half. Place one half between two sheets of parchment paper.
- Using a rolling pin, roll the dough very thinly, about 1/16 inch (1.5 mm) thick. The thinner the dough, the crispier the crackers.
- Carefully peel off the top layer of parchment paper. Using a sharp knife or pizza cutter, cut the dough into desired cracker shapes (e.g., 1×2-inch rectangles or squares).
- Slide the parchment paper with the cut crackers onto the prepared baking sheet. If making multiple batches, reuse the parchment paper for rolling and baking.
- Bake for 15-20 minutes, or until the crackers are golden brown and crisp. Baking time will vary based on thickness and oven.
- Remove from the oven and transfer the parchment paper with crackers to a wire rack. Allow them to cool completely on the rack; they will crisp up further as they cool.
- Once fully cooled, break apart any crackers that are still connected. Store in an airtight container at room temperature for up to one week.
Notes

4. **Walnut Oil (Unrefined)**Similar to flaxseed oil, unrefined walnut oil is celebrated for its distinctive, nutty flavor and a profile rich in omega-3 and omega-6 fatty acids, making it a gourmet choice for enhancing certain culinary creations. It adds a sophisticated depth to salads and cold dishes, embodying the essence of quality ingredients. Yet, much like its flaxseed counterpart, unrefined walnut oil is an oil that categorically “refuses” to withstand high temperatures safely, demanding careful consideration in the kitchen.
The context groups unrefined walnut oil with flaxseed oil, stating that both “have lower smoke points and can quickly break down, resulting in off-flavors and harmful compounds.” This is a critical advisory. Unrefined walnut oil’s smoke point is quite low, often hovering around 320°F (160°C). Its high content of polyunsaturated fatty acids, along with the natural particulate matter present in unrefined oils, makes it particularly vulnerable to thermal degradation. These factors significantly reduce its stability when subjected to heat, making it unsuitable for most cooking methods.
When unrefined walnut oil is heated past its relatively modest smoke point, the delicate fatty acids rapidly oxidize, diminishing its nutritional value and producing bitter, burnt flavors that will quickly overpower and ruin the intended taste of your food. Furthermore, this breakdown generates harmful free radicals and compounds, turning a healthful ingredient into a potential dietary concern. The rich, nuanced flavor that makes it so appealing in cold applications quickly turns foul under heat.
Consequently, the authoritative advice is to “reserve these oils for salad dressings, finishing drizzles, or cold applications where their flavors can shine without being subjected to heat.” Unrefined walnut oil excels when used to dress fresh greens, complement roasted vegetables after cooking, or add a final flourish to baked goods. Embracing its limitations ensures that its exquisite flavor and healthful properties are preserved, making it a valuable, albeit temperature-sensitive, asset in the discerning cook’s pantry.
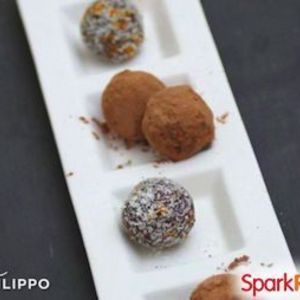
Not-So-Sweet Chocolate Walnut Truffles
Ingredients
Equipment
Method
- Measure out all ingredients precisely for accurate flavor balance.
- Add raw walnuts to a food processor and pulse until finely ground but not yet a butter, approximately 30-60 seconds.
- Add the unrefined coconut oil, cocoa powder, honey, and a dash of Celtic/sea salt to the food processor with the ground walnuts.
- Process the mixture until it comes together into a cohesive, thick paste that is firm enough to roll. Scrape down the sides as needed.
- Transfer the truffle mixture to a bowl, cover, and chill in the refrigerator for at least 30-60 minutes, or until firm enough to handle easily.
- Prepare a small shallow dish with extra cocoa powder for rolling and line a baking sheet with parchment paper.
- Using a small scoop or your hands, form the chilled mixture into bite-sized balls, approximately 1-inch in diameter.
- Roll each truffle in the extra cocoa powder, ensuring it is evenly coated on all sides.
- Place the coated truffles on the prepared parchment-lined baking sheet.
- Chill the finished truffles for at least another 15-30 minutes before serving to fully set their shape. Store in an airtight container in the refrigerator.
Notes
5. **Unrefined Peanut Oil**Refined peanut oil is a popular choice for frying, especially in Asian cuisine, well-regarded for its relatively high smoke point of approximately 450°F (232°C). However, its unrefined sibling tells a very different story, serving as a cautionary tale about the critical difference refinement makes. Unrefined peanut oil decidedly “refuses” to safely reach a high smoke point, posing both flavor and safety challenges that are paramount for any cook to understand.
The context explicitly highlights this distinction: “It is essential to use refined peanut oil, as unrefined peanut oil has a much lower smoke point and can trigger allergic reactions in people with peanut allergies.” This “much lower smoke point” compared to its refined counterpart stems from the presence of natural impurities, proteins, and other compounds that have not been stripped away through the refining process. These elements are highly reactive to heat, causing the oil to smoke and break down at significantly lower temperatures.
Attempting to use unrefined peanut oil for high-heat cooking like stir-frying or deep-frying will quickly lead to visible smoke, a burnt taste, and the formation of undesirable compounds. The characteristic nutty flavor, which can be delightful in its proper context, will turn acrid and unpleasant when the oil degrades. Moreover, the context’s mention of potential allergic reactions, while not directly related to smoke point, underscores a broader safety consideration that sets unrefined versions apart from their refined counterparts in overall usability and risk profile.
Therefore, unrefined peanut oil is best reserved for applications where its lower smoke point won’t be an issue, such as cold dressings, marinades that aren’t cooked, or as a finishing oil where its intense flavor can be appreciated without heat degradation. For any cooking method involving significant heat, the refined version is the only safe and palatable choice, ensuring that the oil remains stable and your dish delivers the intended culinary experience.
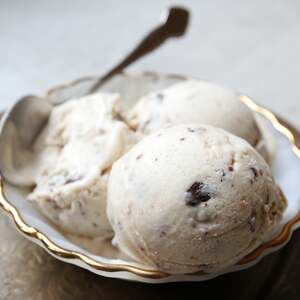
Vegan Peanut Butter and Chocolate Chip Ice Cream
Ingredients
Equipment
Method
- Soak the raw cashews in hot water for at least 30 minutes, or cold water for 4 hours/overnight, then drain well.
- In a high-speed blender, combine the drained cashews with coconut milk and granulated sugar; blend until completely smooth and creamy, scraping down sides as needed.
- In a small saucepan, gently melt the cocoa butter and coconut oil over low heat until fully liquid.
- Pour the melted fats into the blender with the cashew mixture, add the smooth all-natural peanut butter, unrefined peanut oil, and kosher salt.
- Blend again until all ingredients are thoroughly combined and the mixture is silky smooth.
- Transfer the ice cream base to an airtight container and chill in the refrigerator for at least 4 hours, or preferably overnight, until very cold.
- Once thoroughly chilled, churn the mixture in an ice cream maker according to the manufacturer’s instructions until it reaches a soft-serve consistency.
- During the last few minutes of churning, add the finely chopped bittersweet chocolate, allowing it to distribute evenly.
- Transfer the churned ice cream to an airtight freezer container and freeze for an additional 2-4 hours, or until firm.
- Serve scoop by scoop and enjoy this rich, homemade vegan treat.
Notes
Read more about: Mediterranean Diet vs. Keto: Unpacking the Science for Your Ultimate Long-Term Weight Loss Strategy

6. **Unrefined Sunflower Oil**Refined sunflower oil, particularly the high-oleic variety, is a well-known versatile cooking oil, boasting a smoke point of about 450°F (232°C). It’s popular in many kitchens for its mild flavor and light texture, making it suitable for frying, baking, and stir-frying. However, its unrefined counterpart stands in stark contrast, embodying the general principle that unrefined oils simply “can’t take the heat” and therefore refuse to safely reach high smoke points that its refined sibling can endure.
The context broadly informs us that “Raw, or ‘virgin,’ oils offer greater flavor and more minerals. But thanks to their lower smoke points, they can’t take the heat and need to get out of hell’s kitchen.” This principle applies directly to unrefined sunflower oil. Without the purification processes that remove impurities, free fatty acids, and other heat-sensitive compounds, unrefined sunflower oil’s smoke point is considerably lower than 450°F, likely in the range of 225-320°F (107-160°C).
When unrefined sunflower oil is subjected to high temperatures, its delicate compounds quickly break down. This thermal degradation not only produces visible smoke and unpleasant, burnt flavors but also accelerates the formation of free radicals and potentially harmful substances. The very components that contribute to its “greater flavor and more minerals” in its raw state become liabilities under intense heat, compromising both the safety and the palatability of your dish. The oil loses its integrity, and the food cooked in it suffers a similar fate.
For this reason, unrefined sunflower oil is best reserved for culinary uses that do not involve significant heat. It can be a flavorful addition to salad dressings, a base for cold sauces, or a finishing oil where its natural, mild taste and nutritional benefits can be preserved. For any cooking application requiring temperatures above a gentle warmth, opting for its refined version is the only way to ensure both safety and a pleasing outcome, respecting the fundamental difference in their thermal tolerances.
Vegan Mayonnaise recipes
Ingredients
Equipment
Method
- Combine the unsweetened soy milk, apple cider vinegar, and sea salt in a tall, narrow container or a wide-mouthed jar.
- Insert the immersion blender to the bottom of the container, ensuring it fully submerges the liquid ingredients.
- Start blending the mixture on low speed, keeping the blender head at the bottom.
- While blending, slowly and steadily drizzle in the unrefined sunflower oil.
- As the mixture begins to emulsify and thicken, slowly lift the immersion blender head upwards to incorporate all the oil.
- Continue blending, moving the blender up and down slightly, until the mayonnaise is completely smooth, thick, and creamy.
- Taste the mayonnaise and adjust the seasoning with more sea salt or apple cider vinegar if desired.
- Transfer the vegan mayonnaise to an airtight container and refrigerate until ready to use.
Notes
Read more about: Are You Getting Enough of This? The Essential Vitamins Every Woman Over 60 Needs for Optimal Health and Longevity
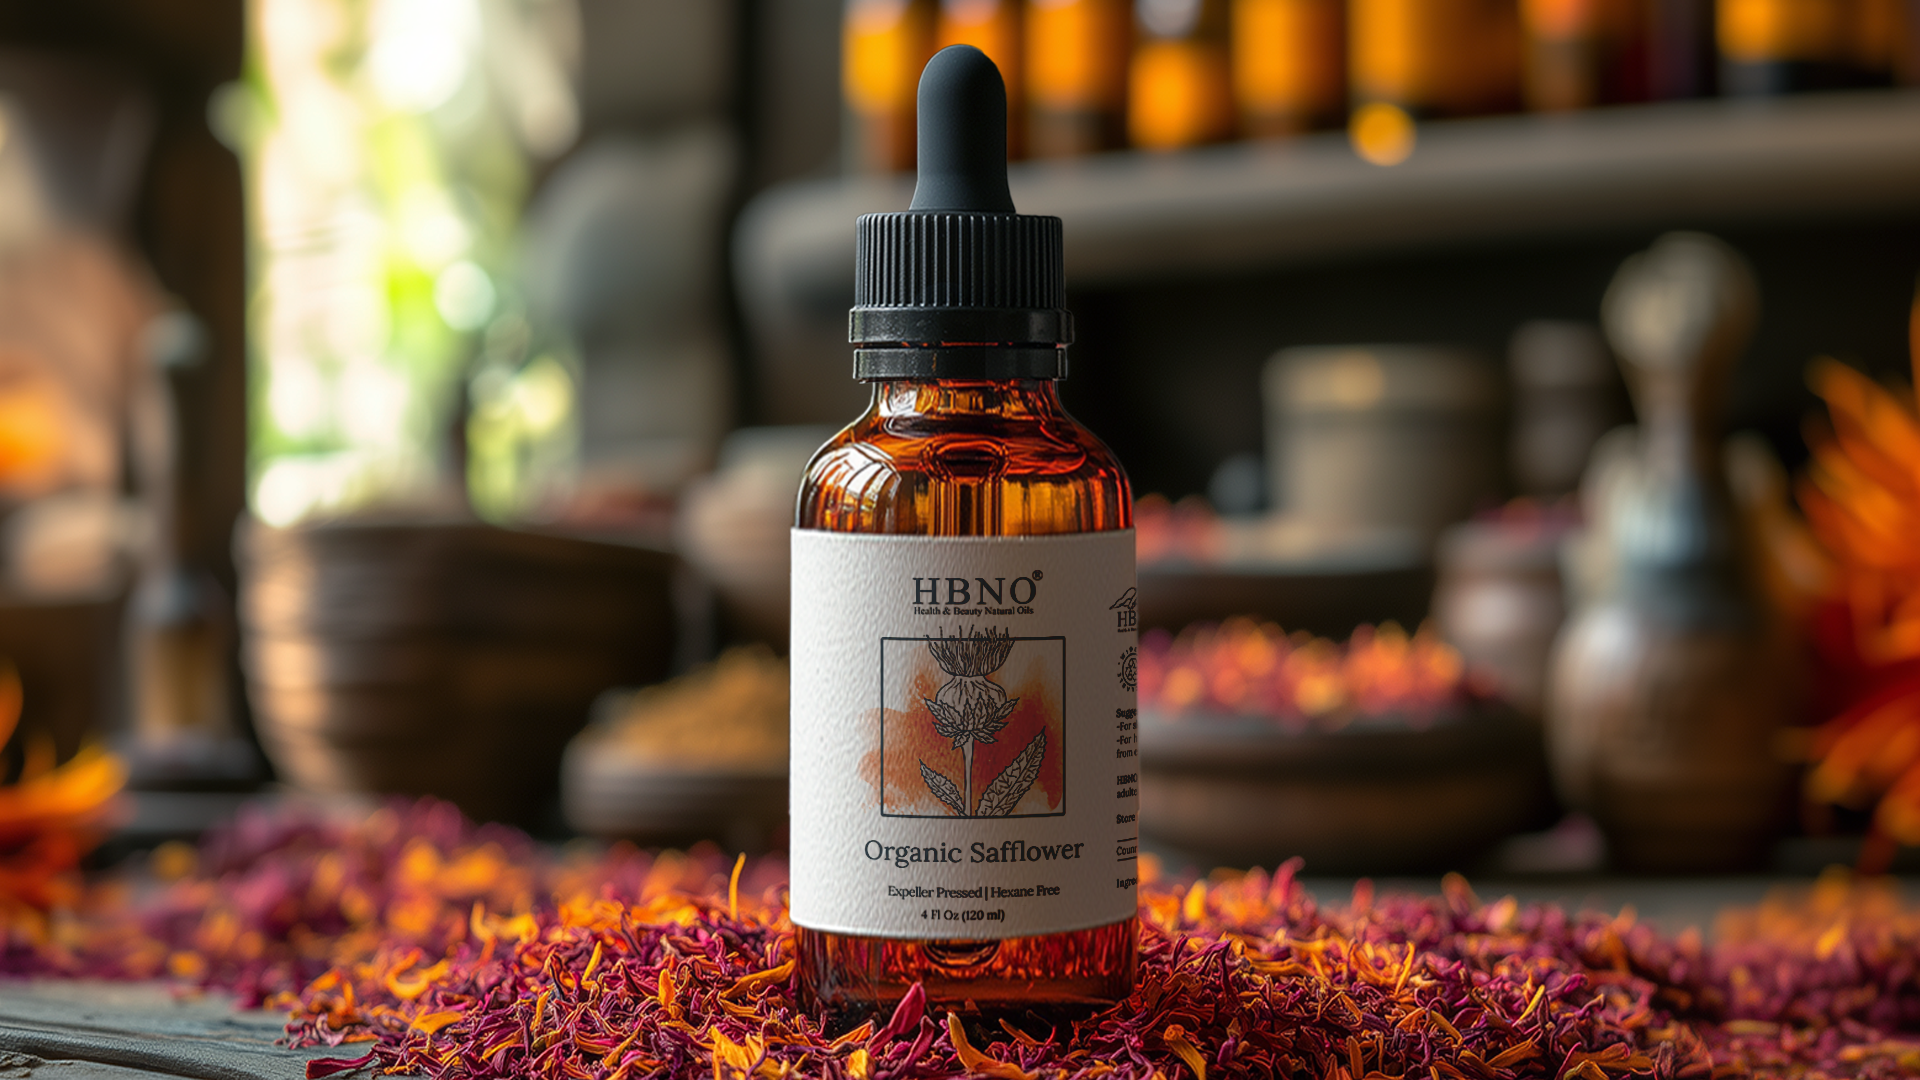
7. **Unrefined Safflower Oil**Refined safflower oil is highly regarded as an excellent option for high-heat cooking, with its smoke point generally falling within the impressive range of 450°F (232°C) to 510°F (266°C). It’s praised for its neutral taste and light texture, making it a versatile, all-purpose oil for deep-frying, stir-frying, and sautéing. Yet, like other unrefined oils, its unrefined version operates under entirely different thermal rules, decidedly “refusing” to safely tolerate the high temperatures its refined counterpart manages with ease.
The overarching theme from the context about unrefined oils applies here: “Raw, or ‘virgin,’ oils offer greater flavor and more minerals. But thanks to their lower smoke points, they can’t take the heat and need to get out of hell’s kitchen.” Unrefined safflower oil retains many of the natural compounds that are removed during the refining process, including phospholipids, pigments, and free fatty acids. These impurities, while sometimes contributing to unique flavors, significantly lower its smoke point, placing it far below the thresholds necessary for high-heat cooking, likely in the 225-320°F (107-160°C) range.
Heating unrefined safflower oil beyond its low smoke point rapidly initiates thermal decomposition. This process not only leads to immediate smoking and the generation of off-flavors but also to the rapid oxidation of its fatty acids. This results in the formation of volatile compounds and harmful free radicals, which compromise the nutritional integrity of the oil and can negatively impact health. The aspiration of using a ‘healthy’ oil is quickly undermined when it’s pushed beyond its thermal limits, producing a bitter and unpleasant culinary outcome.
Therefore, unrefined safflower oil, like other delicate unrefined oils, is best reserved for cold applications. It can be a wonderful component in salad dressings, marinades, or as a finishing oil for cooked dishes, where its subtle flavor can be appreciated without being subjected to heat that would cause it to break down. For any cooking method that requires moderate to high temperatures, relying on the refined version of safflower oil is the prudent and necessary choice to ensure both safety and the optimal taste experience.
Having dissected the oils that inherently shy away from high heat due to their unrefined nature or delicate composition, we now turn our attention to other crucial players. This includes oils with moderate smoke points that, while versatile, simply ‘refuse’ to safely achieve the very highest thermal thresholds needed for intense searing or deep-frying without compromise. We’ll also explore the broader characteristics of unrefined oils, the fundamental impact of fatty acid composition, and external factors like age, storage, and contamination that collectively dictate an oil’s true stability and safety in your kitchen.
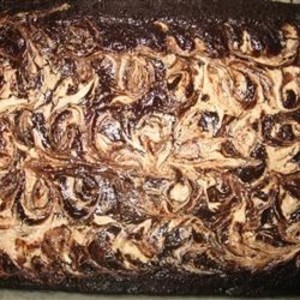
Tofu Fudge Mocha Bars
Ingredients
Equipment
Method
- Preheat oven to 350°F (175°C). Line a 9×13 inch baking pan with parchment paper, leaving an overhang on the sides for easy lifting.
- In a blender or food processor, combine the undrained silken tofu, safflower oil, and vanilla extract. Blend until completely smooth and creamy.
- In a large mixing bowl, whisk together the turbinado sugar, cocoa powder, instant decaffeinated coffee powder, salt, and whole wheat flour.
- Pour the wet tofu mixture into the dry ingredients.
- Using a rubber spatula, mix until the ingredients are just combined and no streaks of flour remain. Be careful not to overmix.
- Pour the batter into the prepared baking pan and spread evenly.
- Bake for 20-25 minutes, or until the edges are set and a toothpick inserted into the center comes out with moist crumbs (not wet batter). The center should still be slightly soft.
- Remove the pan from the oven and let the bars cool completely on a wire rack.
- Once completely cooled, use the parchment paper overhang to lift the bars out of the pan.
- Cut into 24 squares and serve.
Notes
Read more about: Top 15 Hair Oils Chosen by Professional Stylists That You Need to Try

8. **Unrefined Corn Oil**Corn oil, in its refined state, is a common and affordable staple in many kitchens, boasting a smoke point of approximately 450°F (232°C). It’s valued for its neutral flavor, which makes it a workhorse for a wide array of cooking applications, from frying to baking. Yet, just like its unrefined siblings, unrefined corn oil presents a stark contrast to its refined counterpart, demonstrating a clear refusal to safely tolerate the intense heat often demanded in modern cooking.
The fundamental reason for this disparity lies in the very nature of unrefined oils. Without the purification processes that strip away impurities, free fatty acids, and other heat-sensitive compounds, unrefined corn oil retains these elements. These natural components are highly reactive to heat, causing the oil to break down and smoke at significantly lower temperatures than its refined version. While the precise smoke point for unrefined corn oil isn’t always explicitly detailed, it’s definitively much lower than the 450°F of refined corn oil.
Attempting to push unrefined corn oil into high-heat cooking scenarios will quickly lead to visible smoke, an unpleasant, acrid taste permeating your food, and the formation of undesirable compounds. This thermal degradation not only negates any potential health benefits but also compromises the integrity of your dish, leaving behind a bitter aftertaste that overshadows any intended flavor profile. It’s a clear signal that the oil is losing its nutritional value and potentially becoming harmful.
Therefore, unrefined corn oil, like other minimally processed oils, finds its true utility in applications where its lower smoke point is respected. It can contribute a subtle, natural flavor to cold dressings, marinades that aren’t subjected to heat, or as a finishing drizzle over cooked food just before serving. For any culinary endeavor requiring substantial heat, embracing the refined version is paramount to ensuring both safety and a palatable outcome.

Seasoned Coconut-Oil Popcorn
Ingredients
Equipment
Method
- Heat the unrefined virgin coconut oil in a large, heavy-bottomed pot over medium-high heat.
- Add 2-3 popcorn kernels to the pot, cover, and wait for them to pop. This indicates the oil is at the correct temperature.
- Once the test kernels have popped, remove them from the pot. Add the remaining 3/4 cup of popping corn kernels and the 1/2 teaspoon of Adobo All-Purpose Seasoning to the hot oil.
- Stir quickly to ensure all kernels are evenly coated with oil and seasoning.
- Immediately cover the pot with the tight-fitting lid.
- Continue cooking over medium-high heat, gently shaking the pot back and forth every few seconds to prevent scorching and ensure even popping.
- Listen carefully. As the popping intensifies, continue shaking. Once the popping sounds slow significantly (to about 2-3 seconds between pops), immediately remove the pot from the heat.
- Let the pot sit, still covered, for about 30-60 seconds to allow any remaining kernels to pop and steam to dissipate.
- Uncover the pot and pour the freshly popped corn into a large serving bowl.
- Taste and adjust seasoning if desired, then serve immediately for the best texture and flavor.
Notes
Read more about: The Unflinching Truth: 14 Automobiles That Dared to Be ‘Rad’ But Landed in the ‘Regrettable’ Bin
9. **Unrefined Rice Bran Oil**Refined rice bran oil is increasingly recognized as a robust, high-heat cooking oil, often praised for its smoke point of around 450°F (232°C). It’s celebrated for its richness in antioxidants and beneficial compounds like oryzanol, making it a healthful choice for frying and high-temperature methods. However, the story takes a different turn when we consider its unrefined iteration; unrefined rice bran oil, by its very composition, is another contender that adamantly refuses to safely withstand the blistering heat its refined version handles with ease.
The key to understanding this refusal lies in the oil’s processing, or lack thereof. Unrefined rice bran oil contains a higher concentration of natural phospholipids, free fatty acids, and other particulate matter that are typically removed during the refining process. These impurities are precisely what destabilize the oil when exposed to elevated temperatures, drastically lowering its smoke point compared to its 450°F refined counterpart. It’s these delicate compounds that are quick to burn and degrade.
When unrefined rice bran oil is pushed beyond its comparatively low smoke point, the consequences are immediate and detrimental. The oil will visibly smoke, rapidly develop an unappetizing burnt or acrid taste, and critically, its valuable antioxidants and beneficial compounds will degrade. This thermal breakdown not only diminishes the oil’s nutritional profile but also gives rise to undesirable free radicals and potentially harmful substances, making it counterproductive to its healthful reputation.
Consequently, unrefined rice bran oil is best reserved for culinary applications that do not involve significant heat. Its mild, nuanced flavor can be a delightful addition to cold preparations such as salad dressings, light dips, or as a finishing oil, where its natural properties are preserved without thermal assault. For any cooking method demanding medium to high temperatures, the refined version is the unequivocally correct and safe choice to ensure optimal results and maintain the integrity of your meal.
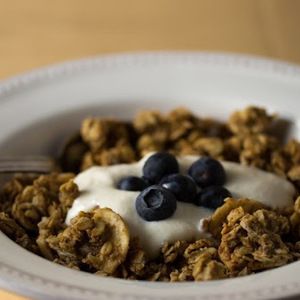
Vegan Banana Walnut Granola recipes
Ingredients
Equipment
Method
- Preheat your oven to 300°F (150°C) and line two large baking sheets with parchment paper or silicone baking mats.
- In a large mixing bowl, thoroughly mash the over-ripe bananas using a fork or potato masher until smooth.
- Add sugar, canola/light olive oil, cashew butter, melted coconut oil, vanilla extract, cinnamon, nutmeg, and salt to the mashed bananas. Whisk until well combined and smooth.
- In a separate large bowl, combine the rolled oats and wheat germ/bran.
- Pour the wet banana mixture into the dry oat mixture. Use a sturdy spatula to mix until all the dry ingredients are evenly coated.
- Gently fold in the chopped walnuts into the granola mixture, ensuring they are well distributed.
- Divide the granola mixture evenly between the prepared baking sheets, spreading it into a thin, uniform layer with the spatula.
- Bake for 30-40 minutes, stirring gently every 10-15 minutes to promote even browning and prevent burning.
- The granola is done when it’s golden brown and feels mostly dry. Remove from the oven and immediately scatter the banana chips over the hot granola.
- Allow the granola to cool completely on the baking sheets without stirring. It will crisp up significantly as it cools. Once cooled, store in an airtight container.
Notes
Read more about: The Unflinching Truth: 14 Automobiles That Dared to Be ‘Rad’ But Landed in the ‘Regrettable’ Bin

10. **Unrefined Soybean Oil**Soybean oil holds a prominent place in global cuisine, particularly in its refined form, lauded for its neutral flavor and a respectable smoke point of around 450°F (232°C). This makes refined soybean oil a go-to for a vast range of cooking techniques, including frying, baking, and sautéing, without imparting its own distinct taste. Yet, the unrefined version of soybean oil stands apart, firmly entrenched in the category of oils that flat-out refuse to safely reach high smoke points, demanding an entirely different approach in the kitchen.
The defining characteristic of unrefined soybean oil, much like other virgin oils, is the retention of natural impurities, phospholipids, and free fatty acids. These components, while potentially contributing to a more ‘natural’ profile, are also the very agents that lower its thermal stability. Unlike refined oils where these elements are stripped away to create a heat-resistant medium, their presence in unrefined soybean oil ensures a significantly reduced smoke point, well below the 450°F of its refined counterpart.
Subjecting unrefined soybean oil to high temperatures triggers a rapid thermal decomposition. This process quickly leads to the oil smoking excessively, producing bitter or burnt flavors that will unfortunately overpower and ruin the taste of your dish. More alarmingly, this breakdown accelerates the formation of free radicals and other potentially harmful compounds, transforming a seemingly benign ingredient into one that could compromise both the safety and the palatability of your food.
To harness unrefined soybean oil effectively and safely, it must be embraced solely for cold applications. It can be an excellent base for emulsified dressings, a component in cold marinades, or a subtle finishing oil, where its mild, natural characteristics can be appreciated without the risk of thermal degradation. For any cooking method that requires moderate to high heat, the refined version is the only practical choice, ensuring stability and a desirable culinary outcome.

11. **Canola Oil**Canola oil stands as one of the most ubiquitous and frequently utilized cooking oils globally, largely due to its versatility, affordability, and acclaimed heart-healthy profile, rich in omega-3 fatty acids and low in saturated fat. Its neutral flavor makes it an excellent choice for a myriad of dishes, allowing the core ingredients to shine. However, despite its widespread adoption and respectable heat tolerance, canola oil, with a smoke point of 400°F (204°C), falls into the category of oils that, while robust for many tasks, ultimately ‘refuse’ to safely achieve the absolute highest thermal thresholds of a true high-smoke-point oil.
At 400°F, canola oil is undeniably suitable for a broad spectrum of medium-high heat cooking methods. It performs admirably in sautéing, stir-frying, and baking, providing a stable medium without a fiery surprise or the introduction of unwelcome flavors. This temperature threshold means it can handle most everyday cooking requirements with grace and reliability, consistently delivering good results and making it a kitchen staple for many discerning home cooks.
The point where canola oil begins to ‘refuse’ to perform safely at the highest thermal thresholds becomes apparent when chefs attempt extremely high-heat searing or deep-frying operations that push beyond its 400°F limit. Exceeding this smoke point, even by a relatively small margin, will initiate the tell-tale signs of thermal decomposition: visible smoke, an acrid odor, and a breakdown of its beneficial fatty acids into potentially harmful compounds. The oil’s integrity is compromised, and the food’s flavor is tainted.
Therefore, while canola oil is an exceptional and highly recommended choice for medium-high heat cooking, respecting its 400°F smoke point is paramount. For culinary adventures demanding temperatures consistently above this, such as intense wok frying or extended deep-frying sessions, turning to oils with genuinely higher smoke points like refined avocado or safflower oil is the more prudent and scientifically sound approach. This ensures both the safety of your food and the optimal preservation of its flavor.
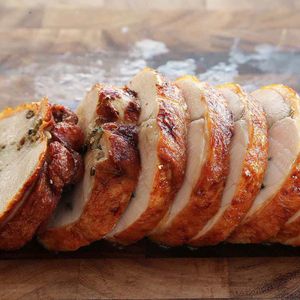
Deep-Fried Sous Vide Turkey Porchetta (Turchetta) Recipe
Ingredients
Equipment
Method
- Ensure the sous vide cooked turkey porchetta is thoroughly patted dry with paper towels.
- Set up your deep-frying station: a large Dutch oven or deep pot with at least 1 1/2 quarts (1.4L) of peanut or canola oil, a deep-fry thermometer, and a sheet pan fitted with a wire rack nearby.
- Heat the oil over medium-high heat until it reaches a steady 350-375°F (175-190°C). If pan-frying, heat 2 tablespoons of canola oil in a large skillet over medium-high heat.
- Carefully lower the porchetta into the hot oil (or place in the skillet).
- If deep-frying, fry until deeply golden brown and crispy on all sides, turning occasionally, about 8-12 minutes.
- If pan-frying, sear all sides until equally golden and crisp, ensuring even browning.
- Using a spider or tongs, carefully remove the porchetta from the oil or skillet.
- Transfer the fried porchetta to the prepared wire rack over the sheet pan to drain excess oil.
- Immediately season generously with kosher salt on all sides while hot.
- Allow the porchetta to rest for a few minutes before slicing into thick rounds and serving.
Notes
Read more about: RFK Jr.’s War on Ultra-Processed Foods: A Deep Dive into What It Means for Your Diet and America’s Health

12. **Grapeseed Oil**Grapeseed oil, gracefully extracted from the byproduct of winemaking, has carved a niche for itself as a refined and versatile cooking oil. Prized for its light, clean flavor and its rich content of polyunsaturated fats and vitamin E, it’s often chosen for its health benefits and its ability to complement rather than overpower dishes. With a smoke point of around 420°F (216°C), grapeseed oil presents itself as a capable contender for many cooking tasks, yet it, too, gently ‘refuses’ to safely push into the domain of the absolute highest thermal thresholds.
Its relatively high smoke point of 420°F positions grapeseed oil as an excellent option for medium-high heat applications such as sautéing, stir-frying, and baking. In these scenarios, it maintains its stability, allowing for effective cooking without the concern of premature smoking or the degradation of its delicate components. The oil’s neutral flavor profile is a significant advantage, ensuring that it acts as an invisible medium, letting the natural tastes of your ingredients truly shine.
However, the “relatively high” smoke point is a nuanced descriptor. When juxtaposed against oils engineered for extreme heat, like refined avocado oil (520°F), grapeseed oil’s 420°F threshold reveals its limitations. Pushing grapeseed oil beyond this temperature, into intense searing or prolonged high-temperature frying, risks the rapid oxidation of its high polyunsaturated fat content. This breakdown not only generates visible smoke and unpleasant flavors but also leads to the formation of undesirable compounds, compromising both the meal and your health.
Thus, understanding grapeseed oil’s thermal boundaries is key to maximizing its culinary potential. It truly excels where its moderate heat tolerance and subtle flavor can be appreciated—in salad dressings, light sautés, or as a base for marinades. For those moments when the recipe calls for truly blistering heat, it’s wise to acknowledge grapeseed oil’s refusal and opt for an oil specifically designed for such rigorous demands, thereby ensuring the safety and quality of your culinary endeavors.

Chive Oil From ‘Daniel’
Ingredients
Equipment
Method
- Wash and thoroughly dry the chives. Trim any discolored ends.
- Bring a medium pot of generously salted water to a rolling boil. Simultaneously, prepare a large bowl with ice water for an ice bath.
- Add the chives to the boiling water and blanch for precisely 10-15 seconds until vibrant green.
- Immediately transfer the blanched chives from the boiling water into the prepared ice bath to stop the cooking process and preserve their color.
- Once completely chilled, remove the chives from the ice bath and squeeze out as much excess water as possible, using your hands or a clean kitchen towel.
- Combine the blanched chives, grapeseed oil, and a pinch of salt in a high-speed blender.
- Blend on high speed until the mixture is completely smooth and appears bright green, approximately 1-2 minutes.
- Set a fine-mesh sieve over a clean bowl. Pour the chive oil mixture into the sieve, allowing the oil to drip through naturally. Gently press on the solids to extract more oil.
- For a clearer oil, line the fine-mesh sieve with a double layer of cheesecloth and strain the oil a second time. Do not squeeze the cheesecloth, just let it drip.
- Transfer the finished chive oil to an airtight container and refrigerate. It can be stored for up to one week, or frozen in ice cube trays for longer preservation.
Notes
Read more about: Unlock Your Inner Star: Budget-Friendly Celebrity Beauty Hacks You Can Actually Try Today
13. **Oils High in Polyunsaturated Fats**The composition of fatty acids within an oil is a foundational determinant of its thermal stability and, consequently, its smoke point. While many vegetable oils are celebrated for their high content of polyunsaturated fats (PUFAs), often marketed as ‘healthy,’ this very characteristic can render them unsuitable for high-heat cooking. In the realm of intense culinary temperatures, oils rich in PUFAs categorically ‘refuse’ to maintain their integrity safely, presenting a unique challenge for the home cook.
Scientific consensus clearly indicates that “oils rich in saturated fats tend to have higher smoke points than those high in polyunsaturated fats.” This is because PUFAs contain multiple double bonds in their molecular structure, making them inherently less stable and more susceptible to oxidation when exposed to heat. This structural vulnerability means their “structure can be compromised at high temperatures,” initiating a rapid breakdown even before a visibly high smoke point is reached.
When oils high in polyunsaturated fats are subjected to heat beyond their modest smoke points, the consequences extend far beyond a mere burnt taste. This thermal assault leads to significant “oxidative stress and harmful byproducts,” including free radicals that are detrimental to health. The very beneficial compounds these oils are lauded for, such as omega fatty acids, are rapidly degraded, transforming a potentially healthful ingredient into one that contributes to dietary concerns.
Given this inherent instability, it becomes crucial for cooks to exercise caution and informed judgment. “Always read labels and opt for oils specifically labeled for high-heat cooking if needed in those applications,” as some PUFA-rich oils may undergo refinement to enhance their thermal tolerance. For the majority of oils naturally high in polyunsaturated fats and not specifically refined for high heat, it’s best to reserve them for cold preparations like salad dressings, mayonnaise, or as a finishing drizzle, safeguarding both flavor and health.
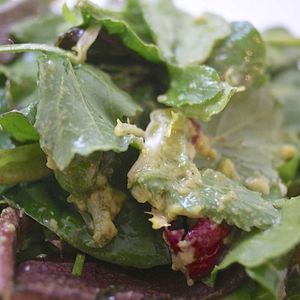
Avocado Vinaigrette
Ingredients
Equipment
Method
- Prepare the avocado by peeling it and carefully removing the pit.
- If desired, mince the shallot and grate the garlic clove.
- Combine the peeled and pitted avocado, minced shallot (if using), grated garlic (if using), red wine vinegar, Dijon mustard, sea salt, and black pepper in a blender or food processor.
- Begin blending the ingredients on a low speed to start breaking down the avocado.
- While the blender or food processor is running, slowly drizzle in the olive oil until the vinaigrette reaches a smooth, creamy, and emulsified consistency.
- Taste the vinaigrette and adjust the seasoning with additional salt, pepper, or vinegar as needed; a touch of lime juice can be added for brightness.
- Transfer the vinaigrette to a serving dish or an airtight container. Serve immediately or store in the refrigerator.
Notes
Read more about: If You Have High Cholesterol: 15 Foods to Rethink for Better Heart Health
14. **The Impact of Oil Age and Contamination**Beyond the intrinsic properties of an oil, such as its refinement level or fatty acid composition, two external factors often overlooked play a profoundly critical role in its actual performance and safety in the kitchen: its age and the presence of contamination. These elements can drastically lower an oil’s effective smoke point, causing even oils with inherently high thermal resistance to ‘refuse’ to perform safely under heat, regardless of their initial potential.
The passage of time and improper storage are silent degraders of oil quality. “Oils that are old or have been improperly stored (e.g., exposed to light and heat) will degrade more quickly and have a lower smoke point.” Over time, oils naturally undergo oxidation, a process accelerated by exposure to oxygen, light, and warmth. This chemical breakdown creates free fatty acids and other compounds that are far more prone to burning at lower temperatures, effectively robbing the oil of its advertised thermal stability. A pristine oil, if aged or poorly kept, can become a smoking hazard in mere moments.
Equally insidious is the factor of contamination. “Contamination with food particles or other substances can significantly lower an oil’s smoke point.” Every time oil is used, tiny food particles, moisture, and debris are introduced. If oil is reused without proper filtering, or if cooking equipment isn’t impeccably clean, these contaminants act as catalysts for degradation, lowering the oil’s smoke point dramatically. This means that a fresh batch of oil might have an impressive smoke point, but subsequent uses without due diligence will see it fail prematurely.
The combined effect of age and contamination means that even a premium, high-smoke-point oil can fail to deliver on its promise if these factors are ignored. A chef relying on its supposed resilience might inadvertently push it past its now-reduced smoke point, leading to unwanted smoke, acrid flavors, and the formation of harmful compounds. Therefore, maintaining vigilance over an oil’s freshness and ensuring cleanliness in its use and storage are not just good kitchen practices; they are foundational pillars for safe, flavorful, and healthful cooking. “It is essential to use clean oil and avoid reusing oil that has been contaminated with food debris,” alongside proper storage, to preserve an oil’s true thermal capabilities.
Read more about: The 21 Most Costly Accidents and Screwups in History
As we conclude this deep dive into the nuanced world of cooking oils and their pivotal smoke points, it becomes crystal clear that the choice of fat in our culinary endeavors is far more intricate than a simple grab from the pantry. We’ve meticulously explored why certain oils—whether unrefined, moderately stable, or compromised by age and contamination—simply cannot be pushed beyond their inherent thermal limits without sacrificing flavor, health, and ultimately, the integrity of our dishes. The science is undeniable: understanding an oil’s smoke point isn’t just a recommendation; it’s a fundamental principle that empowers us to cook smarter, safer, and with unparalleled deliciousness. It’s about respecting the ingredients, honoring the process, and ensuring that every sizzle, sauté, and sear contributes positively to the tapestry of our gastronomic creations. So go forth, armed with this knowledge, and let your kitchen become a haven of informed, exquisite cooking, where every oil is used to its absolute, and safest, perfection. Happy cooking!


