

Maintaining truly good health is rarely a matter of chance; it’s a commitment that involves consistent effort, thoughtful lifestyle choices, and the proactive step of engaging with preventative health measures like regular checkups. While many of us focus intently on our main meals, what we choose to snack on throughout the day plays an increasingly significant role in our overall dietary intake and, crucially, our sustained energy levels. Taking control of these smaller eating occasions can be a game-changer for anyone looking to refine their diet, instill healthier habits within the family, or manage their weight effectively. It’s about making smart choices that support your body’s needs.
A cornerstone of excellent health lies in embracing a diet that is generously rich in vital nutrients. This means prioritizing fiber, incorporating an abundance of whole grains, and loading up on fresh fruits and vegetables. Equally important are the “good” or unsaturated fats, along with essential omega-3 fatty acids. These dietary components are not just beneficial; they are powerful allies in turning down inflammation, a process that can cause damage to tissues, joints, artery walls, and even vital organs over time. Equally critical is reducing reliance on processed foods, especially those laden with refined grains and added sugars, which are notorious for causing rapid spikes in blood sugar. Such spikes can lead to early hunger pangs and are strongly linked to serious conditions like diabetes, obesity, heart disease, and even dementia.
With the understanding that simple, nourishing food can be both delicious and incredibly effective in supporting our health goals, we’ve curated a list of healthy snack ideas designed to keep you feeling full and satisfied throughout your busy day. This selection aims to solve the common dilemma of “there’s nothing to eat in the house” by providing a variety of options that are easy to prepare, incredibly tasty, and packed with the right kind of fuel. No matter your preferences or any dietary considerations, there’s a perfect healthy snack here waiting to become your new favorite. Let’s dive into these wonderful, satisfying choices that prove healthy eating doesn’t have to be hard or complicated.
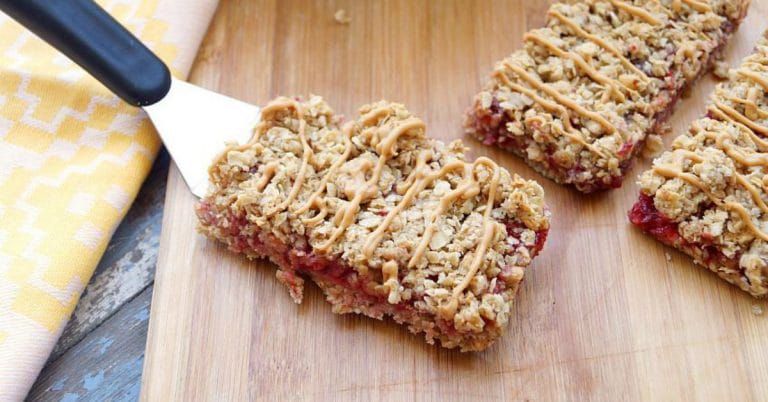
1. **Gluten-Free Peanut Butter Granola Bars**
Granola bars have long been a popular choice for their convenience, and when prepared thoughtfully, they transform into an exceptionally healthy and practical snack. These gluten-free peanut butter granola bars are the epitome of an easy make-ahead option, perfect for those bustling mornings or as a quick pick-me-up before or after school sports or various activities. Their portability makes them an ideal companion for busy schedules, ensuring that a wholesome bite is always within reach, preventing reliance on less nutritious, processed alternatives when hunger strikes unexpectedly.
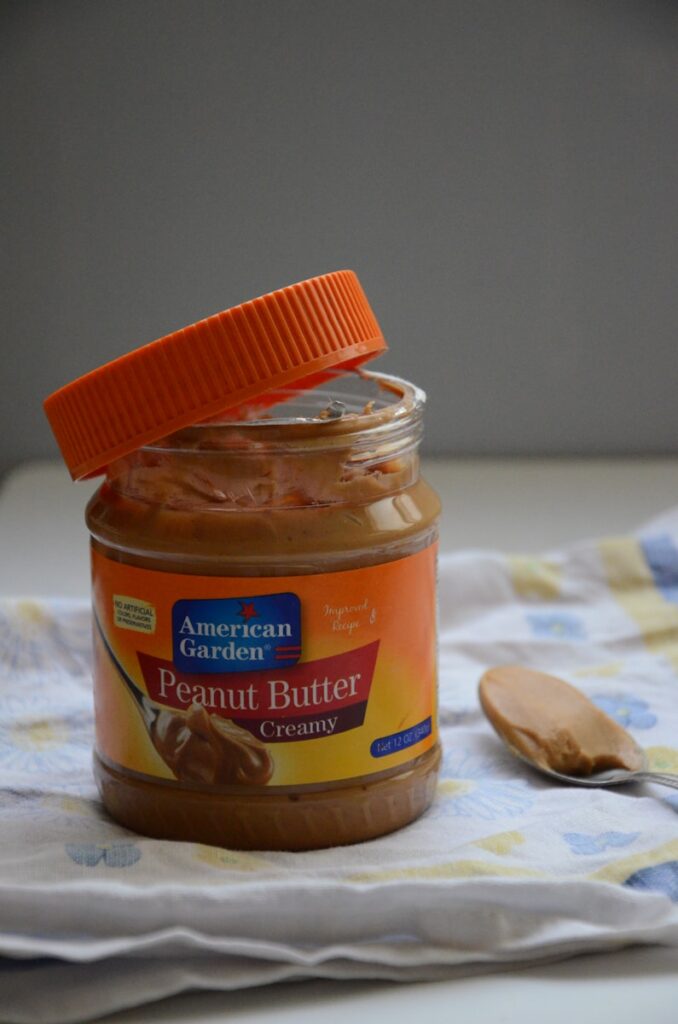
The health benefits of these bars stem largely from their key ingredient: peanut butter. As highlighted in the context, a healthy diet includes “good” or unsaturated fats, and peanut butter is an excellent source of these beneficial fats, alongside a substantial amount of protein. This combination of healthy fats and protein is crucial for promoting satiety, meaning they help you feel full for longer periods. This sustained fullness is vital for preventing the early hunger that can often lead to overeating or reaching for snacks high in refined sugars, which cause undesirable blood sugar spikes. Furthermore, if the base ingredients for these granola bars include gluten-free whole grains, they would also contribute valuable fiber to your diet, another cornerstone of healthy eating that aids digestion and reinforces lasting fullness. This makes them a smart choice for maintaining stable energy levels throughout the day without the sudden crashes associated with sugary snacks.
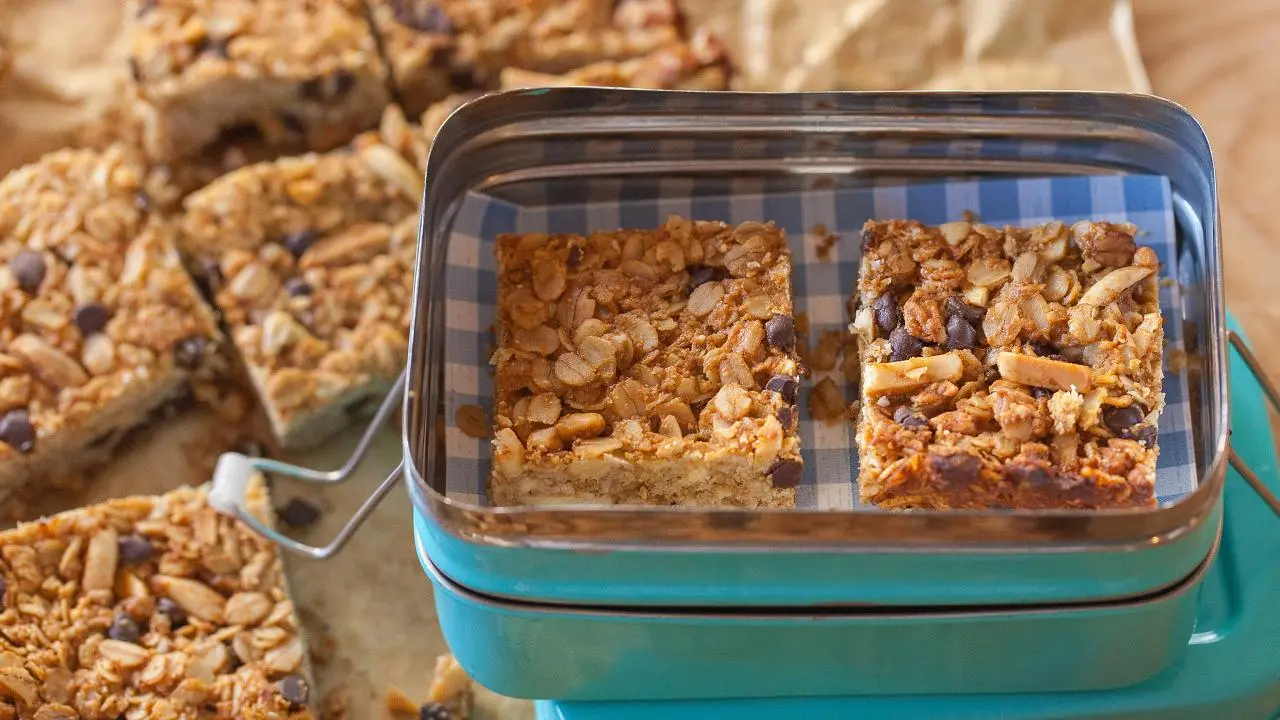
Peanut Butter Granola Bars
Ingredients
Equipment
Method
- Position an oven rack in the middle of the oven. Preheat the oven to 350 degrees F.
- Spray a 7 by 10 3/4-inch nonstick baking pan with vegetable cooking spray. Lay a 6 by 18-inch piece of parchment paper in the pan, allowing the excess paper to hang over the sides. Spray the parchment paper lightly with cooking spray.
- In a medium bowl, using a hand beater, beat the egg white until frothy. Stir in the peanut butter, brown sugar, and honey. Add the melted butter, oats and almonds. Stir to combine, then add the chocolate chips.
- Using a rubber spatula, spread mixture into the prepared baking pan, pressing lightly to form an even layer. Bake until the edge of the mixture begins to brown, about 15 minutes. Remove from the oven and let cool for at least 1 hour. Cut into 1 1/2-inch squares and serve.
- *Cook's Note: To toast almonds, arrange in a single layer on a baking sheet. Bake in a preheated 350 degree F oven until lightly browned, about 8 to 10 minutes.
Notes

2. **Air Fryer Apple Chips**
There’s truly so much to appreciate about apple chips, especially when they’re crafted in an air fryer for optimal crispiness and flavor. They represent a delightful convergence of crunch, natural sweetness, and remarkable versatility, making them a universally appealing snack. Beyond their undeniable tastiness, air fryer apple chips are notably allergy-friendly, offering a safe and enjoyable option for a wide array of dietary needs, which explains why they are loved by virtually everyone who tries them. Their simplicity is part of their charm, proving that healthy eating can indeed be straightforward and incredibly rewarding.
The inherent health benefits of air fryer apple chips are deeply rooted in their primary ingredient: fresh apples. Apples are quintessential examples of fresh fruits, which the context emphasizes as a vital component of a healthy diet, rich in essential nutrients and natural fiber. This abundant fiber content is a significant contributor to satiety, effectively helping to keep you full and content, thereby reducing the likelihood of succumbing to cravings for less wholesome, processed alternatives. Unlike many conventional snack chips that are often fried in unhealthy oils or loaded with refined grains and sugars, these air-fried versions are prepared with minimal added fats and no refined ingredients, aligning perfectly with the advice to “go easy on processed foods.” This method of preparation ensures you enjoy a satisfyingly crunchy texture without the detrimental blood sugar spikes that highly processed snacks can cause, making them an excellent choice for maintaining steady energy and overall well-being.
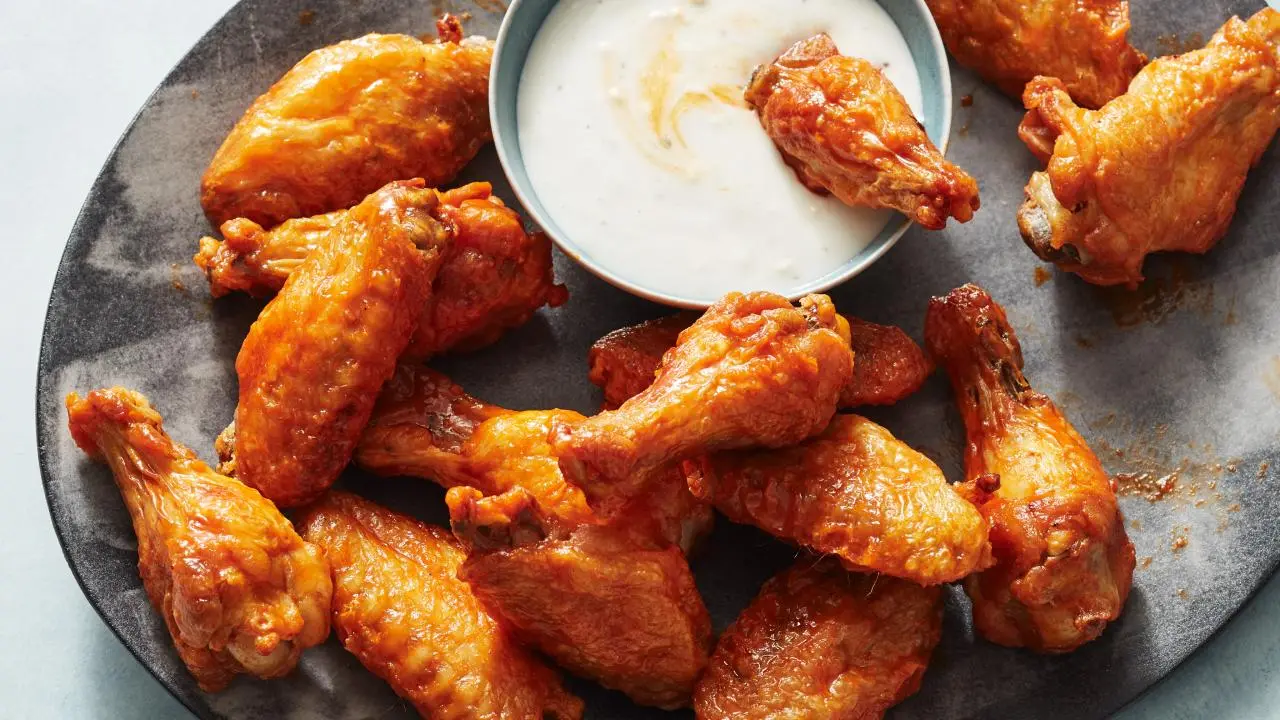
Air Fryer Chicken Wings
Ingredients
Equipment
Method
- Pat the chicken wings dry and sprinkle generously with salt. Place the wings in the basket of a 3.5-quart air fryer so they are not touching (if necessary to fit, line up the drumettes standing upright along the sides). Set the air fryer to 360 degrees F and cook for 12 minutes, then flip the wings with tongs and cook for 12 minutes more. Flip the wings again, increase the heat to 390 degrees F and cook until the outsides are extra-crispy, about 6 minutes more.
- Meanwhile, warm the butter in a microwave-safe bowl in the microwave until melted, about 1 minute. Whisk in the hot sauce.
- Toss the wings with the butter mixture to coat in a large bowl and serve with dressing on the side.
Notes
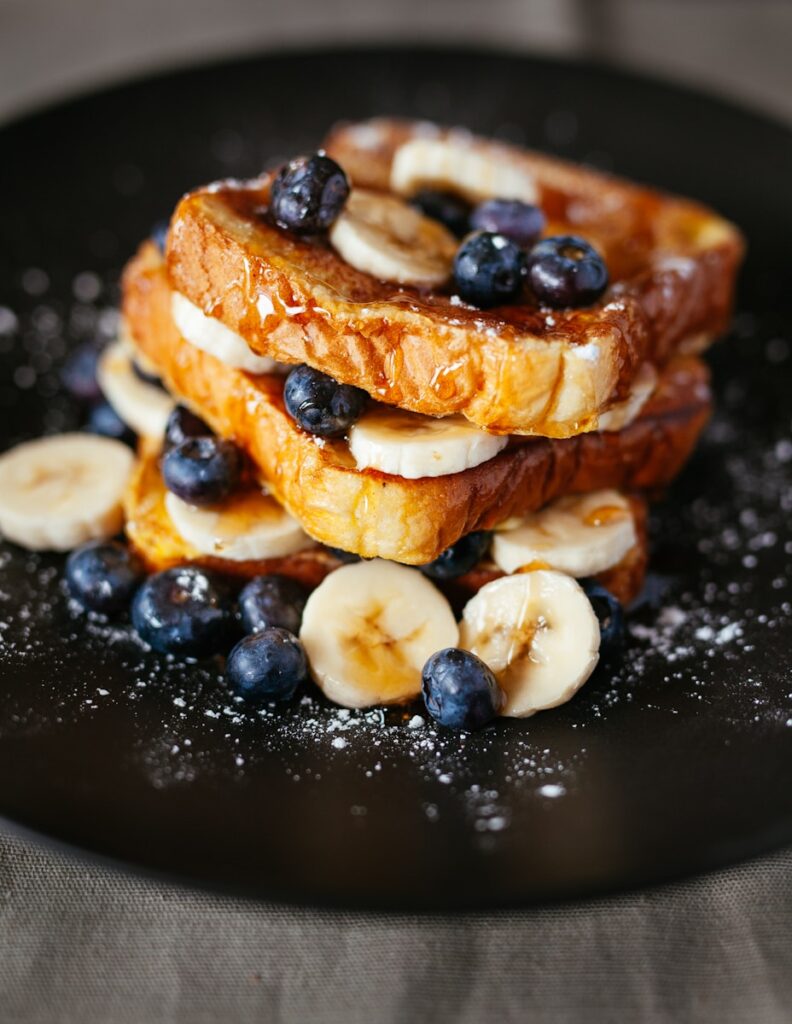
3. **Peanut Butter And Nutella Sushi Rolls**
For a healthy snack that consistently earns enthusiastic requests, look no further than banana, peanut butter, and Nutella sushi rolls. This creative and engaging recipe has a unique way of captivating kids, prompting them to beg for it time and again, which is a major win for parents striving to introduce more wholesome options into their children’s diets. The fun presentation, reminiscent of sushi, adds an element of playful excitement, transforming simple, nutritious ingredients into an irresistible treat. It demonstrates how appealing healthy eating can be when approached with a touch of imagination.
The nutritional prowess of these delightful sushi rolls primarily comes from the banana and peanut butter components. Bananas, as fresh fruits, provide natural sugars along with a wealth of vitamins and minerals, contributing to overall health and providing a quick, yet wholesome, energy boost. When paired with peanut butter, a source of “good” or unsaturated fats and essential protein, this snack becomes a powerhouse for sustained energy and prolonged fullness. The synergistic effect of healthy fats and protein is vital for modulating blood sugar levels, helping to prevent the sharp spikes that typically lead to rapid hunger and subsequent cravings for unhealthy foods. While Nutella adds an undeniably appealing flavor that makes the snack highly desirable, the foundation laid by the fruit and healthy fat-rich peanut butter ensures that this treat still delivers significant satiety and nutritional value, making it a clever way to enjoy a sweet indulgence within a balanced dietary framework.
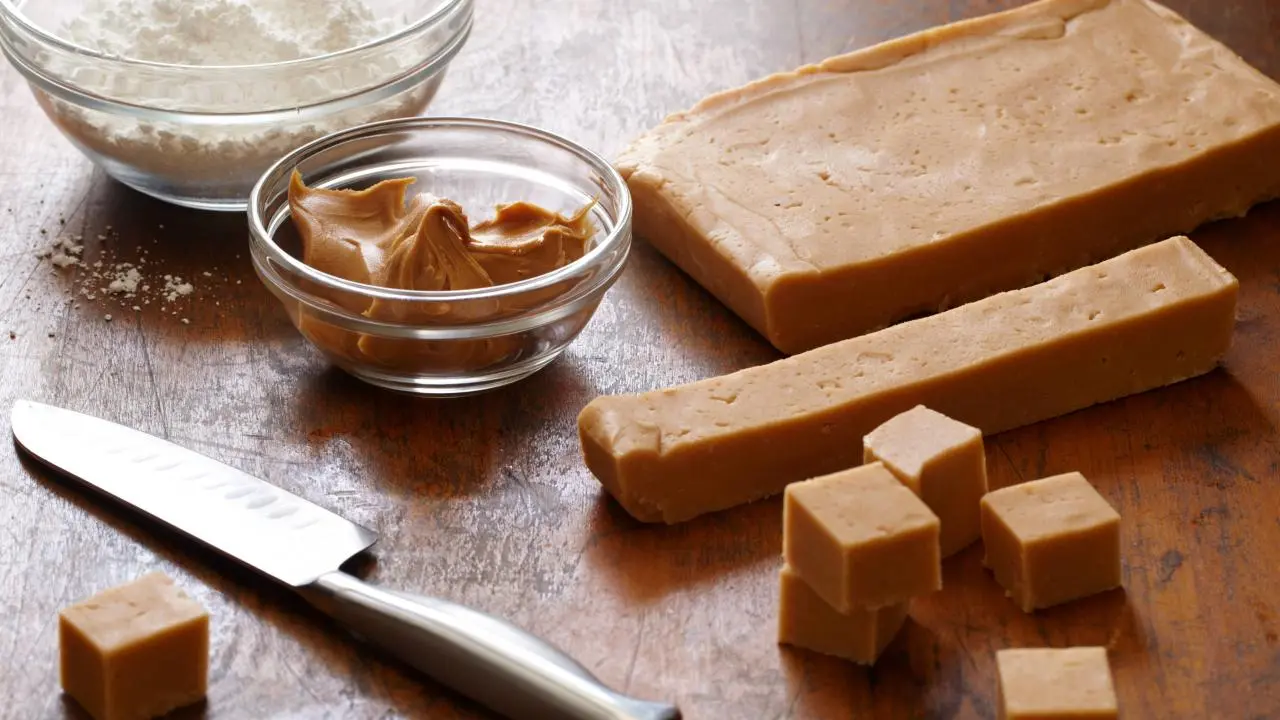
Peanut Butter Fudge
Ingredients
Equipment
Method
- Combine the butter and peanut butter in a 4-quart microwave-safe bowl and cover with plastic wrap. Microwave for 2 minutes on high. Stir and microwave on high for 2 more minutes. (Use caution when removing this mixture from the microwave, it will be very hot.) Add the vanilla and powdered sugar to the peanut butter mixture and stir to combine with a wooden spoon. The mixture will become hard to stir and lose its sheen. Spread into a buttered 8 by 8-inch pan lined with parchment paper. Fold the excess parchment paper so it covers the surface of the fudge and refrigerate until cool, about 2 hours. Cut into 1-inch pieces and store in an airtight container at room temperature for up to a week.
Notes
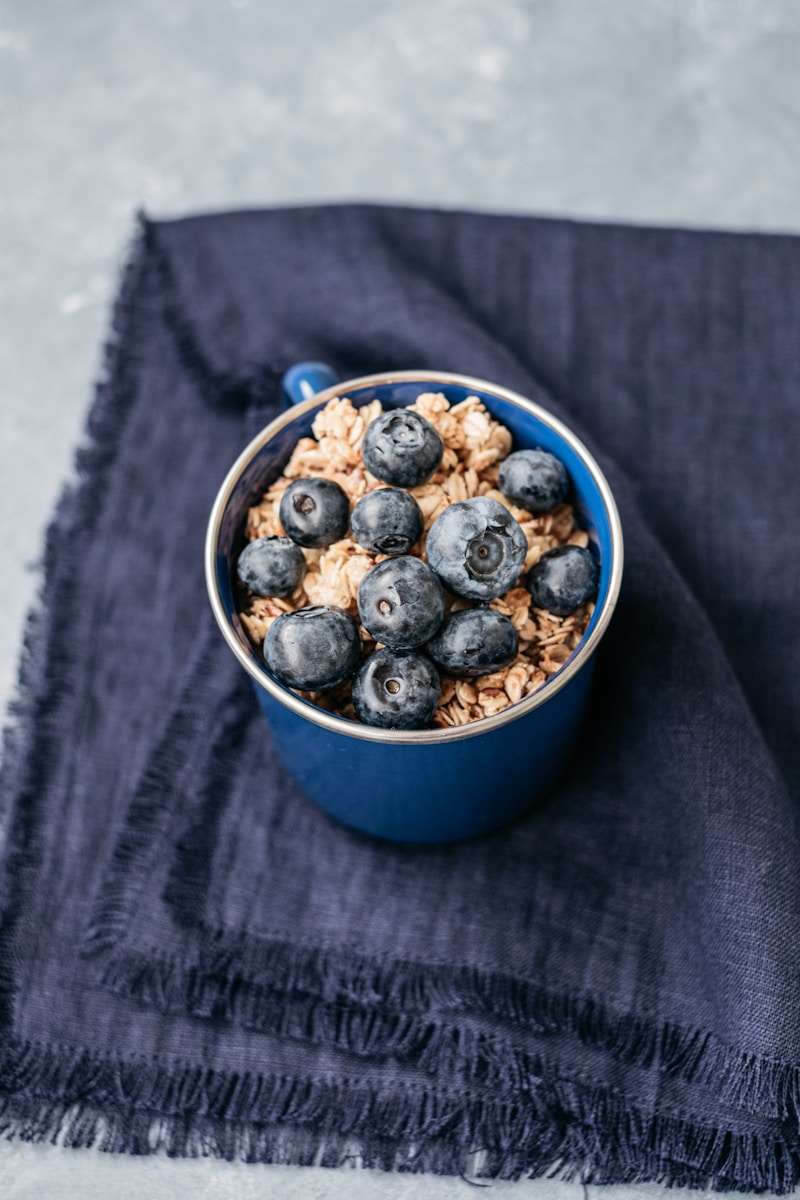
4. **Blueberry Oatmeal Bites**
Blueberry oatmeal bites stand out as a wonderfully hearty and incredibly versatile healthy snack, designed to be a favorite across the entire family. Their robust nature means they truly satisfy hunger, making them an excellent choice for anyone needing a substantial, nourishing bite between meals. The inherent deliciousness, coupled with their ability to appeal to both children and adults, makes these bites an invaluable addition to any healthy eating plan. They encapsulate the ideal balance of taste, texture, and nutritional efficacy, ensuring that everyone can enjoy a truly satisfying and health-promoting treat.
The profound health benefits of these oatmeal bites are largely attributable to their core ingredients: blueberries and oatmeal. Blueberries, as fresh fruits, are celebrated for their natural sweetness and rich content of antioxidants, which are crucial for supporting overall health and combating cellular damage. Oatmeal, derived from oats, is a prime example of a whole grain, a dietary component that the context underscores as vital for a healthy diet due to its high fiber content. This powerful combination of fiber from both the oats and the blueberries plays a pivotal role in promoting fullness and maintaining stable blood sugar levels. By delivering a steady release of energy, these bites effectively ward off early hunger pangs and diminish the temptation to reach for less nutritious, processed snacks. They perfectly illustrate how incorporating whole grains and fresh fruits can lead to the creation of a truly satisfying, balanced, and health-enhancing snack that supports long-term well-being and consistent energy.
Having explored the foundational elements of healthy snacking and uncovered the first four power-packed options that set the stage for sustained energy and wellness, we now continue our vital journey toward optimal health. These next four ideas further demonstrate that nutritious choices need not be complicated or sacrifice flavor, ensuring you remain deeply satisfied and feel truly empowered to make informed decisions about your daily fuel. Each selection has been thoughtfully chosen to provide a wealth of essential nutrients, proactively prevent those nagging unhealthy cravings that can derail progress, and keep you feeling fantastic and energized throughout your busy day. This comprehensive approach proves, unequivocally, that simple, wholesome food is an incredibly powerful and accessible ally in achieving all your health goals.
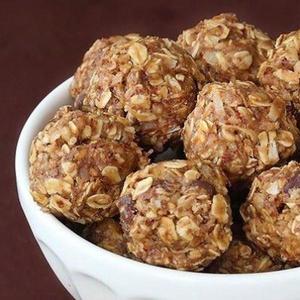
No Bake Oatmeal Energy Bites
Ingredients
Equipment
Method
- Gather all your ingredients and necessary equipment, ensuring everything is pre-measured for efficiency.
- In a large mixing bowl, combine the wet ingredients: peanut butter, honey, and vanilla extract.
- Stir the wet ingredients thoroughly with a rubber spatula or sturdy spoon until they are well combined and smooth.
- Add all the dry ingredients to the bowl: oatmeal, coconut flakes, ground flaxseed, and mini chocolate chips.
- If desired, incorporate optional dried fruits such as cranberries or blueberries at this stage.
- Mix all ingredients together vigorously until everything is evenly distributed and the mixture holds together when pressed.
- Using a small scoop or your hands, roll the mixture into uniform, bite-sized balls, approximately 1 to 1.5 inches in diameter.
- Place the formed energy bites onto a parchment-lined sheet pan or plate, ensuring they are not touching.
- Transfer the sheet pan to the refrigerator and chill the energy bites for at least 30 minutes to allow them to firm up.
- Once firm, store the energy bites in an airtight container in the refrigerator for up to 1-2 weeks.
Notes
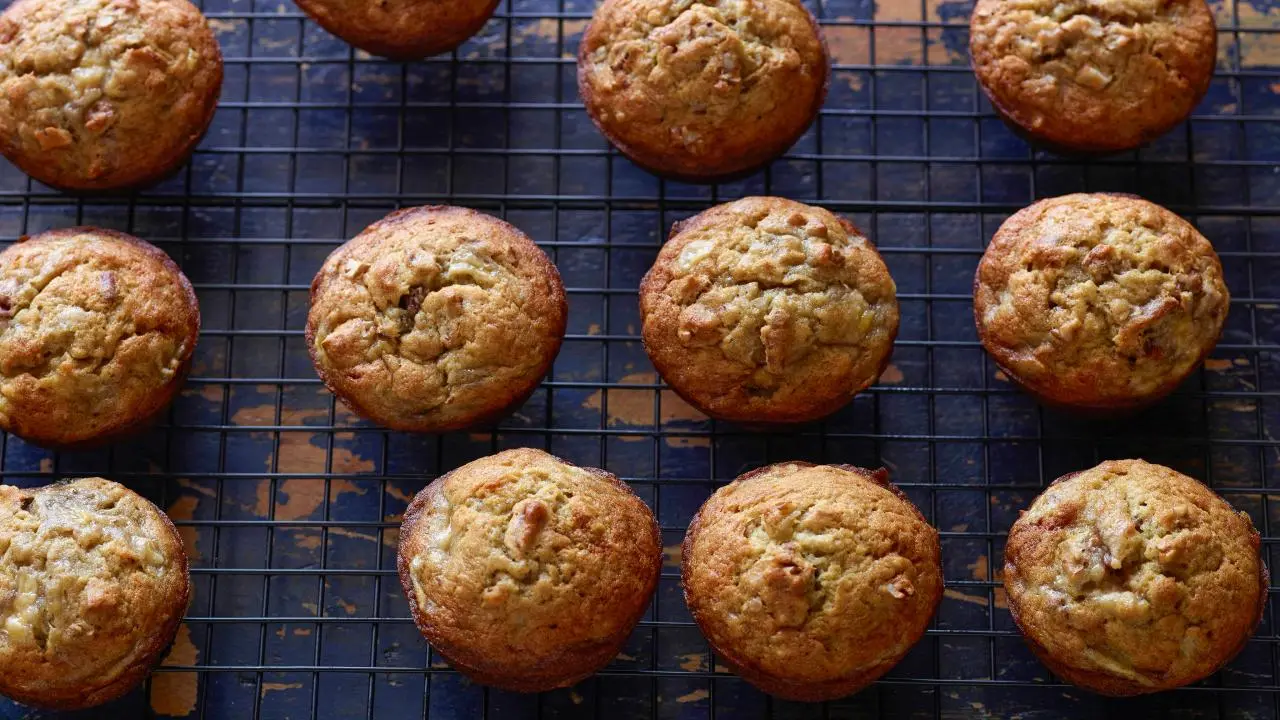
5. **Healthy Banana Protein Muffins**
Among the impressive array of healthy snack recipes available, these banana protein muffins consistently emerge as a go-to choice, seamlessly blending convenience with a comforting, familiar taste. They truly capture the essence of ‘Grandma’s banana bread’ but in a perfectly portioned, hand-held form, making them an ideal on-the-go solution for bustling mornings or as a mid-day pick-me-up. The very concept of transforming a traditionally less healthy, sugar-laden muffin into a nutritionally supportive component of a balanced diet speaks volumes about how creative and effective healthy eating can be when approached with intentionality. Their deliciousness, coupled with their practicality, positions them as an invaluable addition to any healthy eating plan, beloved by the entire family.
The profound health benefits of these muffins are largely attributable to their strategic inclusion of protein, a critical macronutrient that plays an indispensable role in promoting lasting satiety. Protein works synergistically with other nutrients to modulate blood sugar levels, effectively preventing the rapid and undesirable spikes that are notorious for leading to early hunger pangs and an increased desire for less nutritious, processed foods. By ensuring a steady and sustained release of energy, these muffins are instrumental in warding off the common mid-afternoon energy crash, thereby helping you maintain focus, productivity, and a sense of well-being throughout your day. This aligns perfectly with the overarching goal of reducing reliance on processed foods, especially those laden with refined grains and added sugars, which the context highlights as culprits linked to serious conditions like diabetes, obesity, heart disease, and even dementia.
Banana Nut Muffins
Ingredients
Equipment
Method
- Preheat oven to 375 degrees F and lightly butter 2 muffin tins.
- In a large bowl, combine the flour, baking soda, and salt; set aside. Mash 2 of the bananas with a fork in a small bowl so they still have a bit of texture. With an electric mixer fitted with a wire whisk, whip the remaining bananas and sugar together like you mean it, for a good 3 minutes. Add the melted butter, eggs, and vanilla and beat well, scraping down the sides of the bowl once or twice. Mix in the dry ingredients just until incorporated. Fold in the nuts and the mashed bananas with a rubber spatula. Spoon the batter into the muffin tins to fill them about halfway. Give them a rap on the counter to get any air bubbles out.
- Bake until a toothpick stuck in the muffins comes out clean, 18 to 20 minutes. Let cool for a few minutes before turning the muffins out. Serve warm or at room temperature.
Notes

6. **Air Popped Popcorn**
When contemplating truly effective healthy snack recipes, air-popped popcorn distinctly stands out as one of the very few options boasting remarkably low calories while delivering an incredibly satisfying textural experience. Its unique charm lies in its delightful crunch and inherent versatility, allowing for an exciting exploration of flavors simply by changing seasonings, from savory herbs to a hint of spice. This adaptability ensures that your healthy eating journey remains engaging and far from monotonous, successfully warding off the dreaded “snack fatigue.” Air-popped popcorn, with its simplicity and ability to be both crunchy and salty, proves to be a wonderfully satisfying choice, particularly for those committed to cleaning up their diet and consciously moving away from the often detrimental effects of heavily processed snack foods.
The significant health advantages of air-popped popcorn are inherently tied to its preparation method and its foundational nutritional composition. By opting for air-popping instead of traditional oil-frying, you are actively embracing the principle of “going easy on processed foods” and minimizing the intake of unhealthy added fats. Crucially, popcorn, in its purest form, is a whole grain. The context consistently emphasizes that a diet abundantly rich in whole grains is a cornerstone for good health, primarily due to their substantial fiber content. This abundant dietary fiber is paramount in promoting satiety, effectively ensuring you feel full and content for extended periods. This sustained fullness is vital in reducing the likelihood of early hunger pangs, which can often lead to less mindful snacking choices and succumbing to cravings for nutrient-poor alternatives. Unlike conventional snack options that often rely on refined grains and excessive added sugars, which are notorious for causing undesirable blood sugar spikes, the fiber within air-popped popcorn supports remarkably stable energy levels. This makes it an exemplary choice for maintaining consistent vitality throughout your day, preventing the sudden crashes associated with sugary snacks and diminishing the temptation for unhealthy indulgence. This simple snack truly embodies the idea that healthy eating doesn’t need to be hard or complicated to be effective.
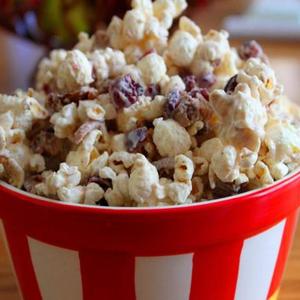
Gluten-Free Tuesday: Cran-Apple White Chocolate Popcorn
Ingredients
Equipment
Method
- Prepare the popcorn: Air-pop 10 cups of popcorn, ensuring it is completely cooled before proceeding. Remove any unpopped kernels.
- Melt the white chocolate: In a large microwave-safe bowl, melt the white chocolate chips in 30-second intervals, stirring thoroughly after each, until smooth and fully melted. Alternatively, use a double boiler.
- Incorporate spices: Stir the ground cinnamon and pumpkin pie spice into the melted white chocolate until well combined.
- Combine popcorn and chocolate: Pour the melted spiced white chocolate over the cooled popcorn in a large mixing bowl.
- Coat evenly: Using a rubber spatula or large spoon, gently fold the popcorn until it is evenly coated with the chocolate mixture.
- Add dried fruits: Sprinkle the chopped dried apple slices and dried cranberries over the chocolate-coated popcorn.
- Mix well: Continue to gently fold until the dried fruits are evenly distributed throughout the popcorn mixture.
- Spread to cool: Transfer the coated popcorn mixture onto a baking sheet lined with parchment paper, spreading it out in a single layer to prevent clumping.
- Allow to set: Let the popcorn cool completely at room temperature or refrigerate briefly until the chocolate is firm.
- Break and serve: Once set, break the popcorn into bite-sized clusters and serve, or store in an airtight container at room temperature.
Notes
2. When melting white chocolate, do so gently. Overheating can cause it to seize and become grainy. Use short intervals in the microwave, stirring well after each, or a double boiler over simmering water.
3. For an enhanced flavor profile, lightly toast the dried apple slices and cranberries in a dry skillet for a few minutes before adding them. This intensifies their fruit notes and adds a subtle nutty depth.
4. A tiny pinch of flaky sea salt sprinkled over the finished popcorn before it sets can beautifully balance the sweetness of the white chocolate and fruits.
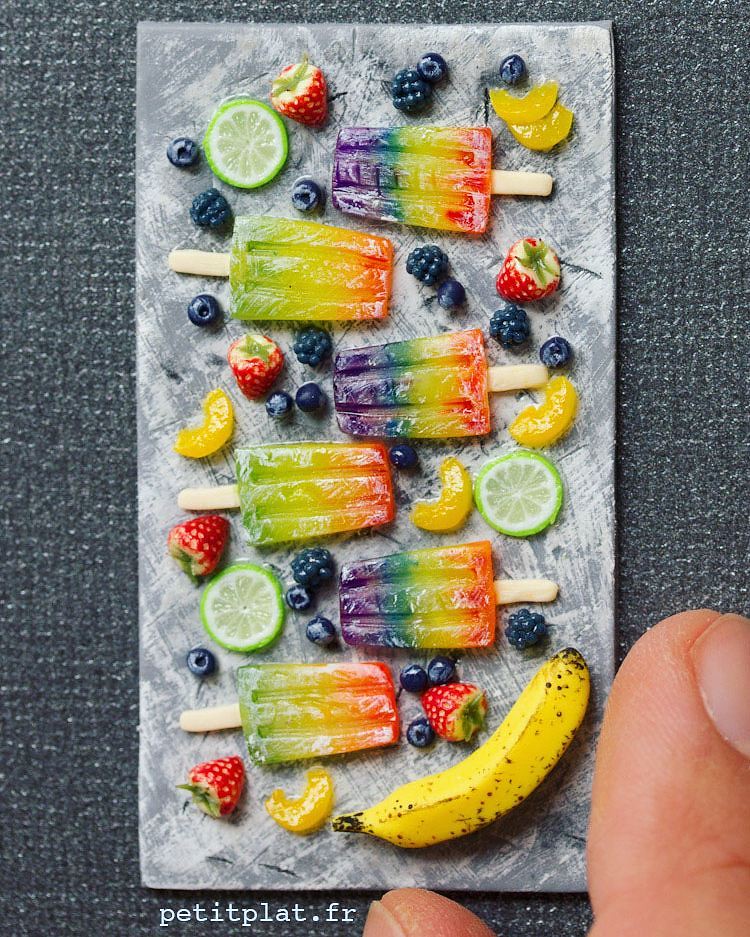
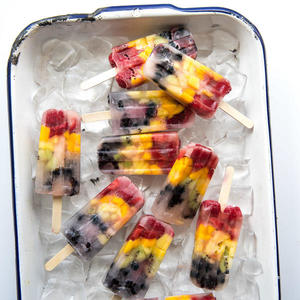
7. **Rainbow Popsicles**Popsicles, often celebrated as a fun and refreshing treat, can indeed transform into an exceptionally healthy snack option, especially when thoughtfully crafted with an emphasis on natural ingredients, much like the vibrant Cocomelon rainbow popsicles. These visually appealing frozen delights are not only a source of pure joy for children, but they are also packed with real fruit, making them an ingenious and beneficial choice for parents dedicated to introducing more wholesome options into their family’s dietary habits. They perfectly exemplify a clever strategy to offer a delightful sweet indulgence that concurrently supports overall health and well-being, providing a welcome and cooling respite, particularly on those warmer days when refreshment is paramount.
Popsicles, often celebrated as a fun and refreshing treat, can indeed transform into an exceptionally healthy snack option, especially when thoughtfully crafted with an emphasis on natural ingredients, much like the vibrant Cocomelon rainbow popsicles. These visually appealing frozen delights are not only a source of pure joy for children, but they are also packed with real fruit, making them an ingenious and beneficial choice for parents dedicated to introducing more wholesome options into their family’s dietary habits. They perfectly exemplify a clever strategy to offer a delightful sweet indulgence that concurrently supports overall health and well-being, providing a welcome and cooling respite, particularly on those warmer days when refreshment is paramount.
The profound nutritional benefits of these rainbow popsicles are directly derived from their primary component: fresh fruit. The overarching context for healthy eating explicitly highlights fresh fruits as an indispensable cornerstone of a robust diet, emphasizing their capacity to provide not just natural sugars, but also a comprehensive wealth of essential vitamins and minerals crucial for optimal bodily function. In stark contrast to many conventional sugary treats or sugar-sweetened beverages, which are widely recognized for causing rapid and often detrimental blood sugar spikes, these fruit-filled popsicles offer a more balanced and sustained release of energy. The natural fibers intrinsically present in the fruit significantly contribute to a prolonged feeling of fullness, effectively aiding in curbing unhealthy cravings and mitigating the overconsumption of less nutritious, processed snacks. By consciously opting for fruit-based options like these popsicles, you are actively aligning with and supporting your body’s fundamental nutritional needs, contributing to a reduction in inflammation, and empowering the establishment of healthier dietary habits within the entire family.
Easy Healthy Rainbow Popsicles
Ingredients
Equipment
Method
- Thoroughly wash and prepare all selected fruits, chopping larger fruits into smaller, blender-friendly pieces.
- Categorize the prepared fruits by color (red, orange, yellow, green, blue, purple) into separate small bowls.
- Working with one color at a time, blend each fruit until it forms a smooth puree. Add a tiny splash of water if needed to aid blending, but avoid making it too thin.
- If desired, strain each fruit puree through a fine-mesh sieve into a clean bowl to remove seeds and pulp, ensuring a silky-smooth consistency.
- Pour the first color (e.g., red) into the bottom of each popsicle mold, filling approximately one-sixth of the mold.
- Place the molds in the freezer for 15-30 minutes, or until the first layer is firm enough to support the next without bleeding.
- Carefully pour the next color (e.g., orange) on top of the partially frozen layer, filling another one-sixth of the mold, and return to the freezer.
- Repeat the layering and partial freezing process for the remaining colors (yellow, green, blue, purple) in sequence.
- Once all layers are added and the final layer is poured, insert popsicle sticks into the center of each mold.
- Freeze the popsicles for at least 4-6 hours, or preferably overnight, until completely solid. To unmold, briefly run the molds under warm water.
Notes
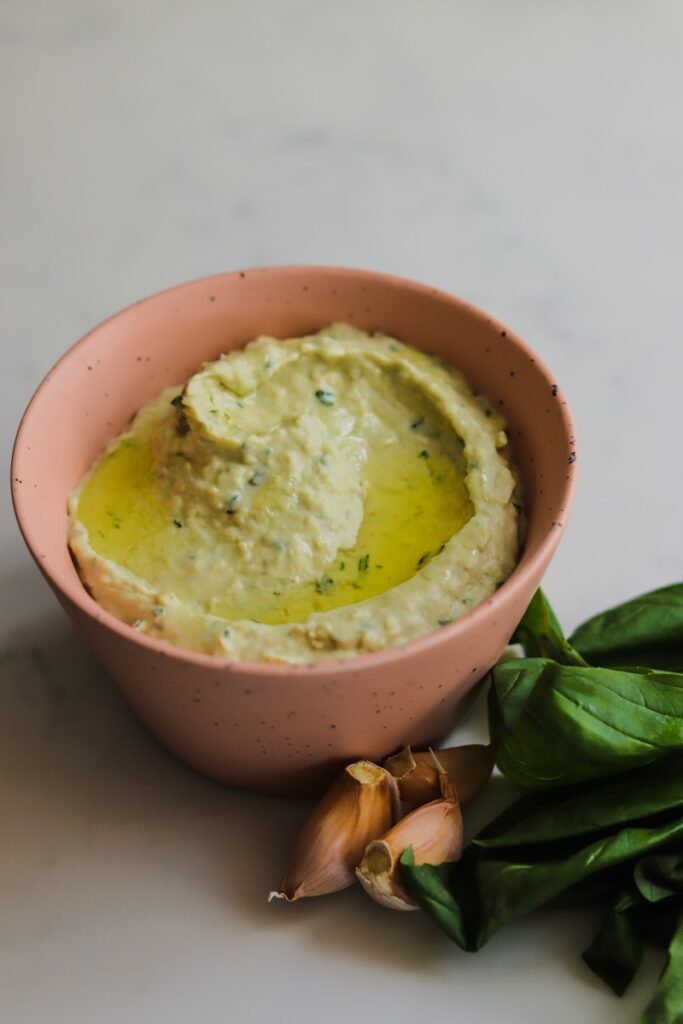
8. **Roasted Garlic Hummus Recipe**Hummus stands as a truly remarkable and indispensable healthy snack idea, earning its place as a personal favorite due to its exceptional versatility and its robust content of protein. Its irresistibly creamy texture and richly savory flavor profile combine to create an incredibly satisfying option that can be effortlessly enjoyed in a multitude of ways. Whether expertly paired with an assortment of dippers to craft a balanced and fulfilling snack experience, or simply savored on its own, hummus offers a convenient, nourishing, and remarkably adaptable solution that seamlessly integrates into any healthy eating plan, making it an essential recipe to cultivate in your culinary repertoire for sustained wellness.
Hummus stands as a truly remarkable and indispensable healthy snack idea, earning its place as a personal favorite due to its exceptional versatility and its robust content of protein. Its irresistibly creamy texture and richly savory flavor profile combine to create an incredibly satisfying option that can be effortlessly enjoyed in a multitude of ways. Whether expertly paired with an assortment of dippers to craft a balanced and fulfilling snack experience, or simply savored on its own, hummus offers a convenient, nourishing, and remarkably adaptable solution that seamlessly integrates into any healthy eating plan, making it an essential recipe to cultivate in your culinary repertoire for sustained wellness.
At the core of roasted garlic hummus’s impressive health prowess lies its main ingredient: chickpeas, which are celebrated as an outstanding source of plant-based protein. As consistently underscored throughout the broader discussion of healthy eating, protein is a critical macronutrient that plays an unparalleled role in promoting profound satiety. It actively ensures you feel full and content for significantly longer periods, thereby substantially reducing the likelihood of succumbing to disruptive early hunger pangs or the insidious pull of unhealthy cravings. This extended feeling of fullness is absolutely vital for maintaining stable blood sugar levels, effectively mitigating the sharp spikes often associated with processed foods and refined grains that can regrettably contribute to the development of serious health conditions such, as diabetes, obesity, heart disease, and even dementia. By embracing protein-rich options like hummus, you are making a proactive choice for metabolic stability and sustained energy.
Furthermore, hummus frequently incorporates healthy fats, notably from ingredients like olive oil, which perfectly aligns with the dietary recommendation to include ‘good’ or unsaturated fats in your daily intake. These beneficial fats are crucial for overall cardiovascular health and are known for their powerful ability to help turn down inflammation throughout the body. The inherent versatility of hummus also uniquely encourages the increased consumption of fresh vegetables as dippers, such as crisp carrot sticks, cool cucumber slices, or vibrant bell pepper strips. This thoughtful pairing further enriches your diet with vital fiber and an extensive array of essential nutrients, reinforcing the principles of a diet generously rich in fresh fruits and vegetables. Ultimately, this makes roasted garlic hummus not merely a delicious snack, but a highly strategic and empowering choice for consistent energy, comprehensive well-being, and a truly fulfilling healthy lifestyle.

Garlic Roasted Potatoes
Ingredients
Equipment
Method
- Preheat the oven to 400 degrees F.
- Cut the potatoes in half or quarters and place in a bowl with the olive oil, salt, pepper, and garlic; toss until the potatoes are well coated. Transfer the potatoes to a sheet pan and spread out into 1 layer. Roast in the oven for 45 minutes to 1 hour or until browned and crisp. Flip twice with a spatula during cooking in order to ensure even browning.
- Remove the potatoes from the oven, toss with parsley, season to taste, and serve hot.


