
")
Let’s be real, folks. Our For You Pages (FYPs) are a wild ride, especially when it comes to food. One minute you’re drooling over a gourmet meal, the next you’re cringing at a concoction that makes you question humanity’s collective tastebuds. TikTok has truly revolutionized how we approach cooking at home, turning quick 15-second clips into a full-blown culinary revolution. But with so many trends exploding onto the scene, it’s easy to get lost in the sauce, wondering which ones are genuinely worth the hype and which are just, well, a bit sorry.
Here’s the thing: while some kitchen trends fizzle out faster than a forgotten soufflé, there are those rare gems that genuinely transform our cooking, delight our palates, and make us wonder how we ever lived without them. These aren’t just fleeting fads; they’re the dishes that stick around, evolving and inspiring new culinary adventures. In 2025, TikTok still dominates food trends, with a whopping 81% of users discovering new food preferences through the app, proving that the platform is a powerhouse for culinary inspiration.
So, if you’re tired of sifting through the duds and are ready to elevate your kitchen game, you’ve come to the right place! We’ve spent countless hours testing, tasting, and, yes, occasionally failing at the internet’s most talked-about dishes to bring you this definitive collection. These aren’t just trending—they’re changing how we think about home cooking, simplifying complex techniques while still delivering restaurant-worthy results. Get ready to dive into the first six viral TikTok recipes that have undeniably earned their place in our 2025 kitchen hall of fame!
1. **Cloud Bread Breakfast Sandwich**This breakfast revolution literally floated onto our screens, spearheaded by @feelgoodfoodie, Yumna Jawad, who boasts an impressive 2.1 million followers. With a staggering 42 million views and a #CloudBreadSandwich challenge that swept the app, this recipe quickly became a morning game-changer. What makes it so special? It brilliantly combines the light, airy cloud bread trend with the classic comforts of a perfectly cooked egg and cheese, offering a protein-packed and surprisingly gluten-free start to your day.
Imagine biting into a breakfast sandwich where the bread is literally a cloud – fluffy, pillowy, and utterly satisfying. The visual presentation alone is captivating, with its appealing pull-apart texture and vibrant yellow center that just begs to be devoured. This isn’t just about cutting carbs; it’s about reinventing the breakfast experience with an innovative twist that feels both gourmet and incredibly accessible, proving that viral can also mean genuinely good for you.
The magic behind this dish lies in its clever preparation. You start by whipping egg whites until they form stiff, majestic peaks, creating that signature cloud-like volume. Then, you gently fold in egg yolks and a touch of cornstarch, baking the mixture until it turns a beautiful golden hue. The result is a truly pillowy bread substitute that’s perfect for cradling your favorite breakfast fillings, from eggs and cheese to creamy avocado slices. Users consistently report that the key to mastering this airy delight is precisely whipping those egg whites – a task made infinitely easier, of course, with the help of a stand mixer.
Read more about: Your Ultimate NYC Foodie Bucket List: 14 Must-Visit Restaurants That Are Absolutely Slaying the Culinary Scene!

2. **Baked Feta Pasta 2.0**Ah, Baked Feta Pasta. The original might just be TikTok’s most famous recipe of all time, a simple yet mind-blowingly delicious dish that launched a thousand imitations. But hold onto your spatulas, because the 2025 version, brought to us by @cookingwithayeh (Ayeh Far, with 2.3 million followers), takes this beloved classic to dazzling new heights. Amassing over 15 million views and sparking the #FetaPasta2025 challenge, this updated iteration proves that even perfection can be improved upon.
Many viral TikTok recipes are celebrated for their ability to use minimal ingredients while still delivering maximum flavor, and this particular rendition is a shining example. What makes it truly special are the thoughtful additions that elevate its complexity: caramelized onions and sun-dried tomatoes. These aren’t just thrown in; they’re integral. The caramelized onions infuse a delightful sweetness, while the sun-dried tomatoes bring a rich, umami depth that many felt was missing from the original, transforming a simple dish into an even more sophisticated culinary experience.
Ayeh’s genius lies in her updated layering technique. She strategically places the creamy feta cheese on the bottom of the baking dish, then surrounds it with a vibrant medley of cherry tomatoes and those wonderfully sweet caramelized onions. A final drizzle of honey over everything before it goes into the oven creates a symphony of flavors that meld together beautifully as they bake. The result is a sauce with incredible, nuanced complexity that clings perfectly to every strand of pasta, making each bite an absolute delight. It’s a testament to how small tweaks can lead to monumental flavor upgrades, keeping a beloved trend fresh and exciting.
Read more about: Inside McDonald’s Secret Menu: Uncovering Off-Menu Hacks and Behind-the-Scenes Insights
-1.JPG)
3. **15-Minute Crispy Smashed Potatoes**Who doesn’t love a good potato? But getting that perfect crispy exterior and fluffy interior usually means a lengthy roasting process. Enter @mxriyum (Mariam Ezzeddine, 1.8 million followers) and her game-changing 15-Minute Crispy Smashed Potatoes, which quickly garnered 22 million views and ignited the #CrispyPotatoChallenge. These viral TikTok dinner recipes are proof that you don’t need to spend hours in the kitchen to create an impressive, mouth-watering meal that tastes like it came straight from a gourmet restaurant.
Mariam’s technique is nothing short of genius, achieving the seemingly impossible: restaurant-quality crispiness in just a fraction of the time. The secret? It all starts with a microwave hack! You begin by microwaving baby potatoes until they’re perfectly tender. Once softened, you give them a good smash, creating those wonderful jagged edges that are ideal for crisping. Then, a quick toss with olive oil and seasonings, and into the air fryer they go until they reach an impossibly crispy perfection. The result truly rivals any restaurant’s offering, but it’s done in minutes, not hours.
But wait, there’s more! What truly makes this recipe stand out and has TikTok users utterly captivated is the finishing touch: a generous drizzle of fragrant garlic-herb oil over the piping hot potatoes just before serving. That sizzle, oh that beautiful sizzle, creates an ASMR moment that’s almost as satisfying as the taste itself. It’s auditory magic combined with culinary delight. Even the most novice home cooks can easily master these TikTok recipes, making them an ideal, fuss-free option for any weeknight dinner when you want something impressive without the effort.

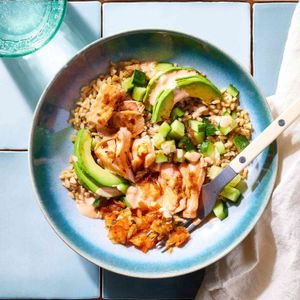
4. **Salmon Rice Bowl**When Emily Mariko (12.4 million followers, no big deal) casually shared her Salmon Rice Bowl, she didn’t just create a recipe; she transformed how millions thought about meal prep and leftovers. With over 60 million views and a ubiquitous #SalmonRiceBowl challenge, this dish remains one of the best TikTok recipes years after its initial viral moment. It’s a masterclass in elegant simplicity, effortlessly introducing many Western audiences to Japanese-inspired flavors in the most approachable way possible.
The genius of Emily Mariko’s Salmon Rice Bowl lies precisely in its straightforward approach. It takes leftover salmon, flakes it over a bed of rice, and then here’s the game-changer: an ice cube placed under parchment paper during reheating. This simple trick creates steam that magically revitalizes the rice, making it fresh and fluffy once more. The dish is then topped with a irresistible trio of soy sauce, creamy Kewpie mayo, and a kick of sriracha, creating a flavor profile that is both comforting and exhilarating.
The accessibility of TikTok recipes has truly democratized gourmet cooking, and this dish perfectly illustrates why. It’s essentially a deconstructed sushi roll, but one that anyone can whip up at home with minimal effort and readily available ingredients. The combination of savory salmon, the rich creaminess of the mayo, and the spicy zing of sriracha creates a perfect umami bomb that is incredibly addictive. This isn’t just a meal; it’s a revelation, proving that simple, smart techniques can lead to profound culinary satisfaction and make a lasting impact on our everyday eating habits.
Salmon Rice Bowl
Ingredients
Equipment
Method
- Cook instant brown rice according to package directions, then set aside.
- While rice cooks, prepare the spicy mayonnaise sauce: in a small bowl, whisk together mayonnaise, Sriracha, tamari, mirin, freshly grated ginger, crushed red pepper, and ⅛ teaspoon kosher salt. Set aside.
- Pat the salmon fillet thoroughly dry with a paper towel and season with the remaining ⅛ teaspoon kosher salt.
- Heat avocado oil in a non-stick skillet over medium-high heat. Once hot, add the salmon skin-side down (if applicable) and cook for 3-5 minutes per side, or until it’s cooked through and easily flakes with a fork.
- Remove the cooked salmon from the skillet and gently flake it into bite-sized pieces using a fork.
- Chop the avocado into desired pieces and chop the cucumber.
- Divide the cooked brown rice evenly between two serving bowls.
- Arrange the flaked salmon, chopped avocado, chopped cucumber, and spicy kimchi artfully over the rice in each bowl.
- Generously drizzle the prepared spicy mayonnaise sauce over the ingredients in both bowls.
- Serve immediately with nori sheets on the side for wrapping the individual bites.
Notes
Read more about: Unleashing Your Inner Foodie: Yelp’s Top 14 All-You-Can-Eat Restaurants, State by State
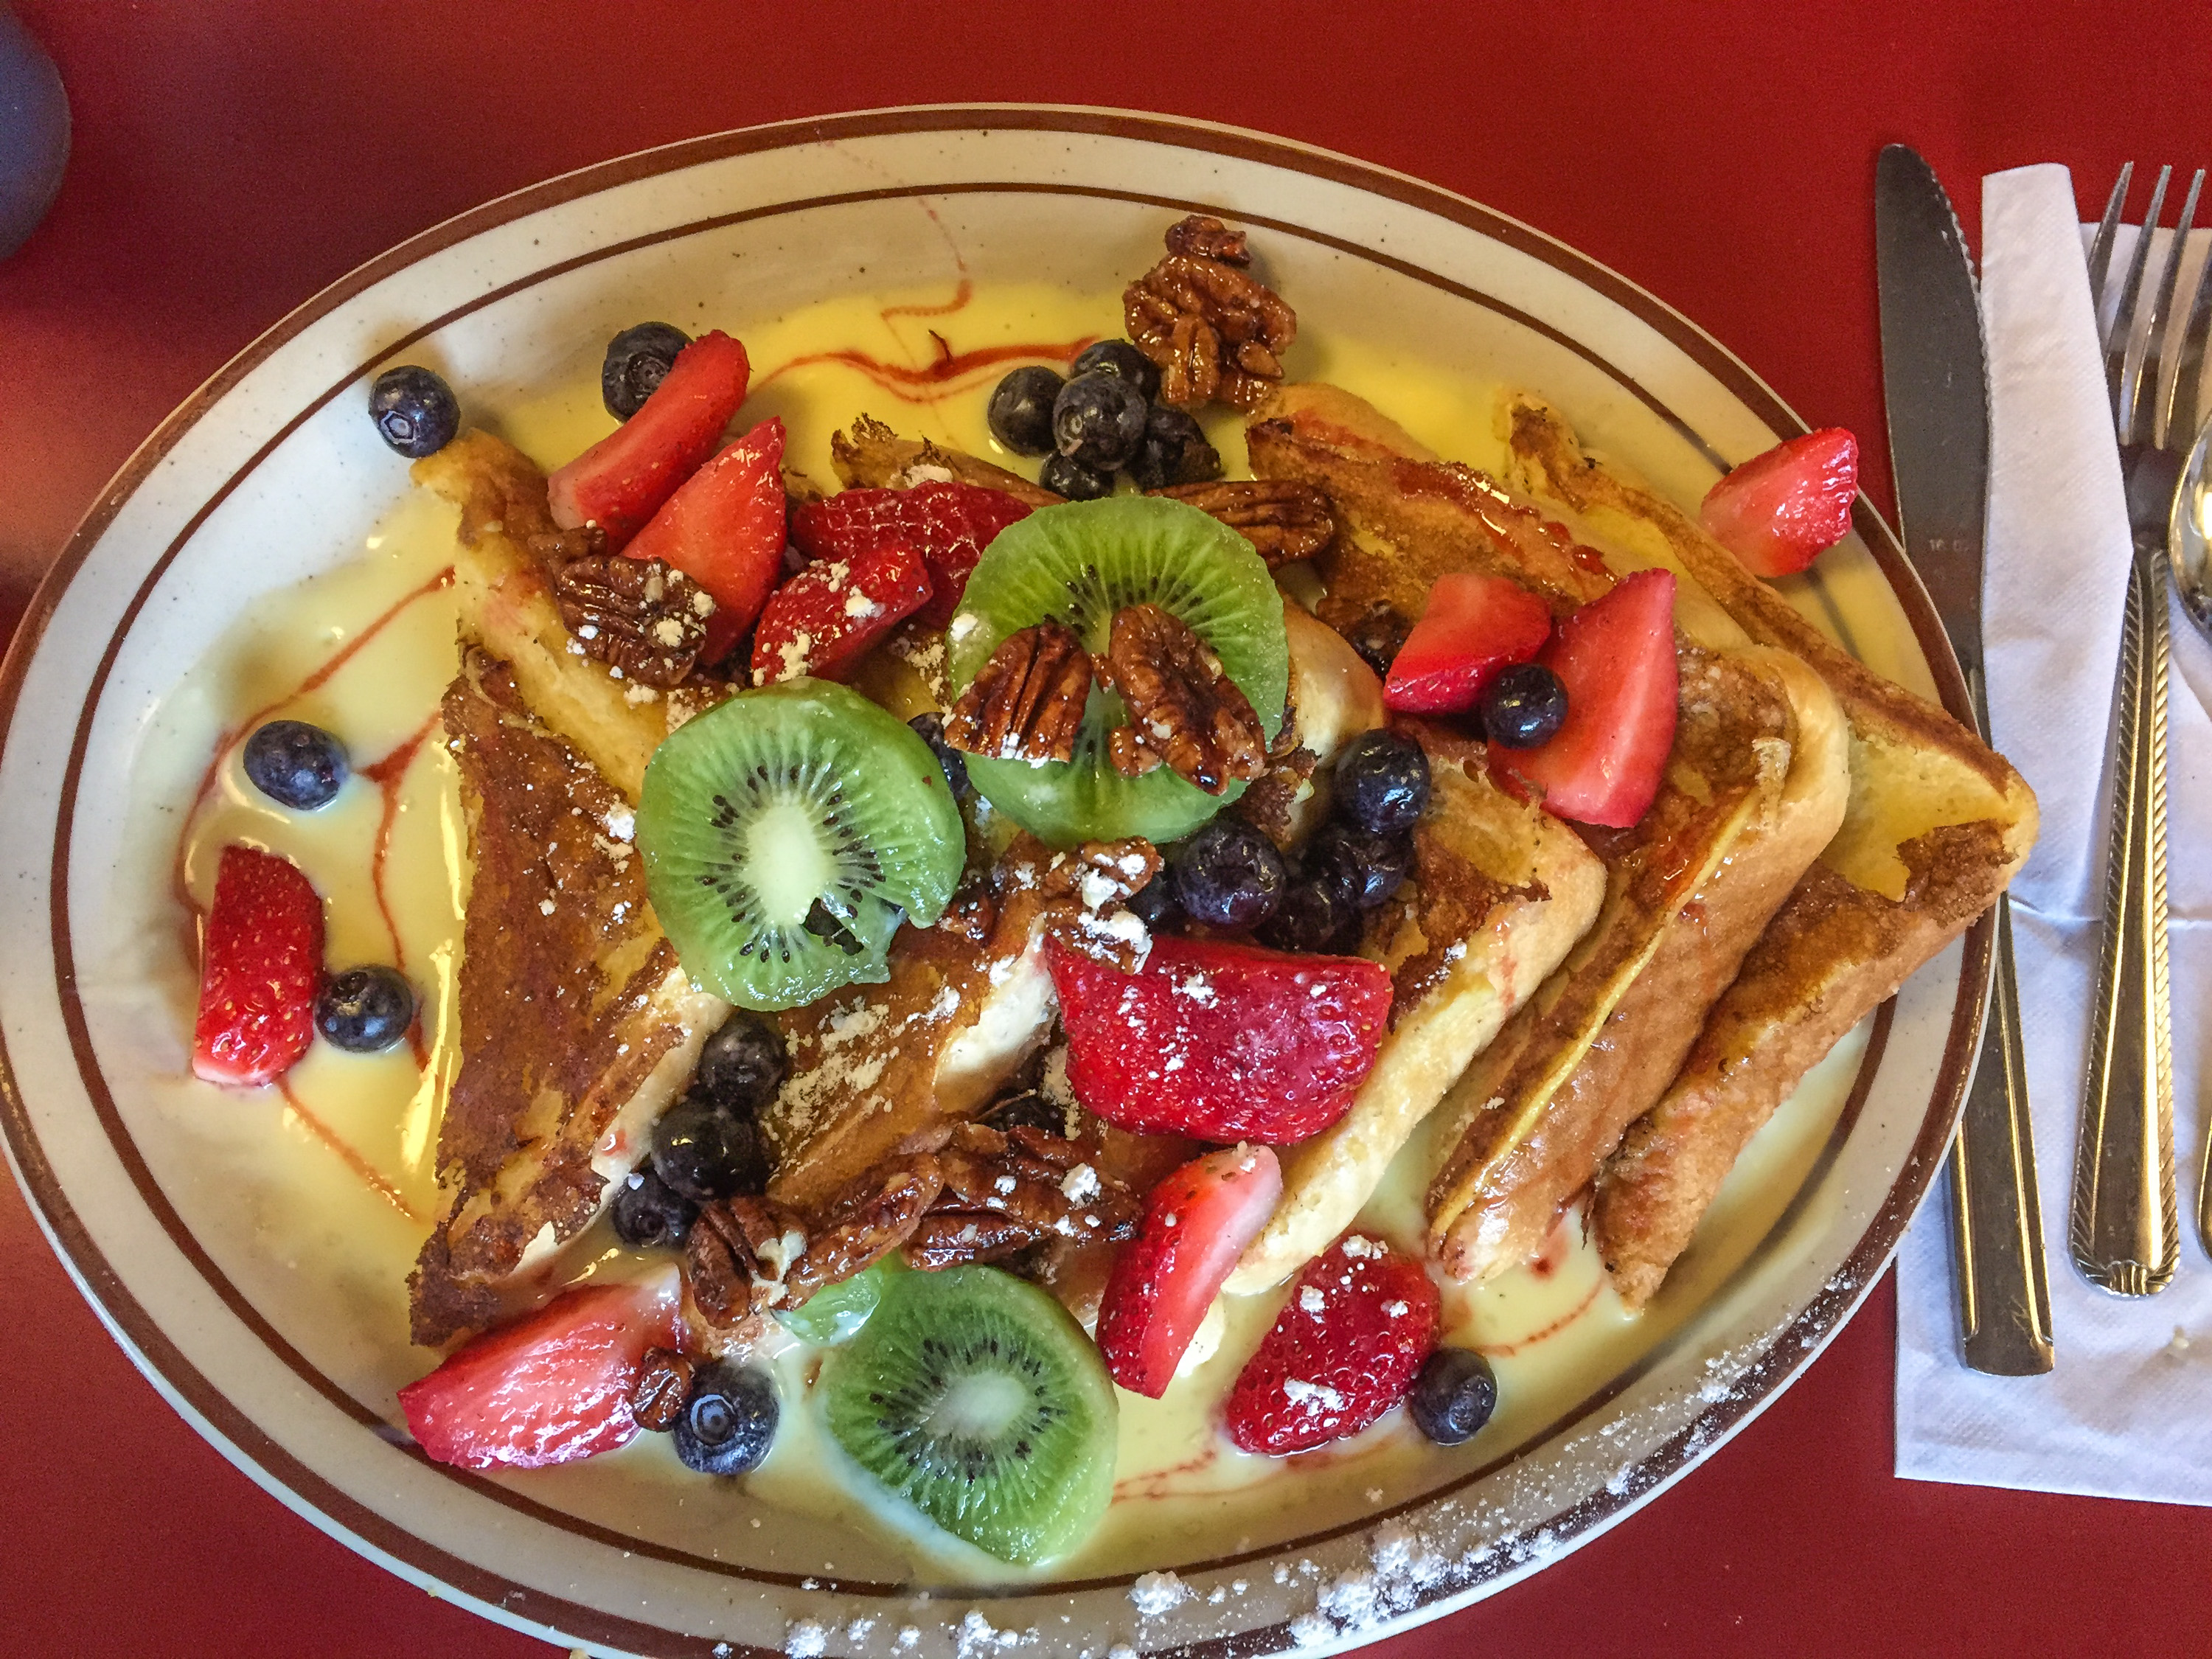
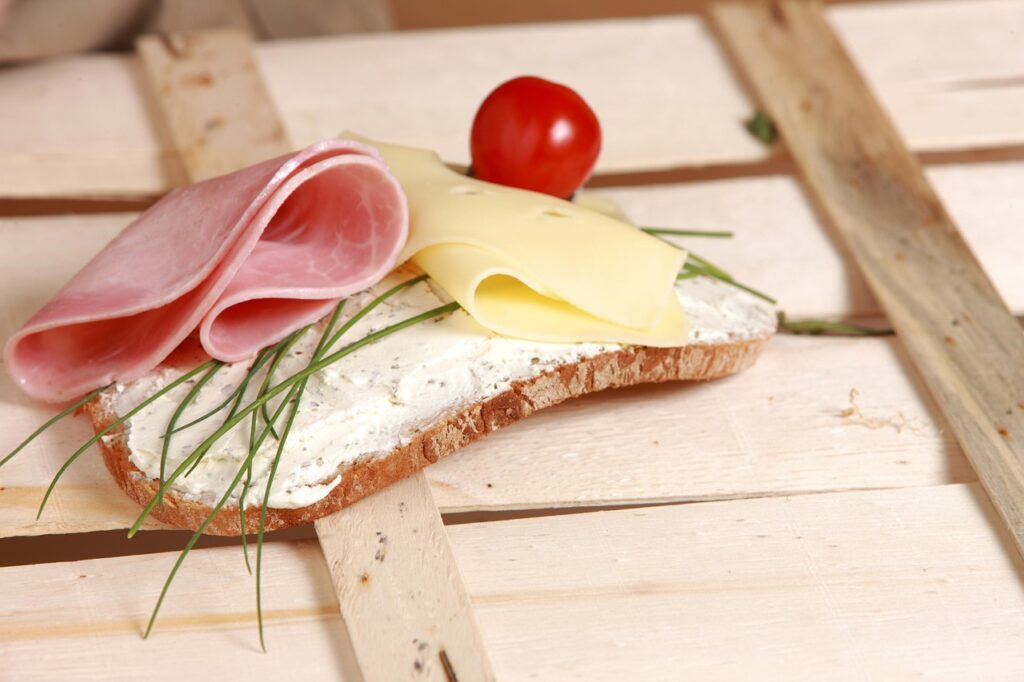
5. **Custard Toast**Prepare to have your breakfast routine gloriously disrupted by Custard Toast, also affectionately known as Yogurt Toast, another brilliant creation from @cookingwithayeh. This viral sensation has racked up 18 million views and inspired countless #CustardToast and #YogurtToast challenges across the platform. What makes it truly special? It’s a miraculous 5-minute breakfast hack that transforms an ordinary slice of bread into a pastry-like treat using incredibly simple ingredients that most of us already have lurking in our kitchens.
Custard toast is a prime example of how viral foods often feature dramatic color contrasts or unusual textures that immediately grab your attention. The concept is brilliantly simple yet utterly effective: you gently create a depression in the center of a slice of bread, forming a little well. This well is then filled with a delectable mixture of yogurt, a whisked egg, and a touch of honey. To add a burst of freshness and flavor, you top it off with your favorite fruits before baking it until the custard is beautifully set and golden. It’s a visual and culinary delight.
The end result is something truly extraordinary – a delightful hybrid that sits somewhere wonderfully between a classic French toast and a delicate Danish pastry. Yet, despite its sophisticated taste and appearance, it takes mere minutes to prepare, making it perfect for busy mornings or an indulgent brunch. The best viral TikTok recipes often combine unexpected ingredients in harmonious ways, and the yogurt-egg mixture here is a stroke of genius, creating a luscious, custard-like texture that is both wonderfully protein-rich and incredibly delicious. It’s an effortless way to feel like a gourmet chef before your first cup of coffee is even finished.

Raspberry Custard Toast
Ingredients
Equipment
Method
- Preheat your oven to 375°F (190°C) and line a baking sheet with parchment paper.
- In a medium bowl, whisk together the Greek yogurt, egg, vanilla bean paste (or extract), and maple syrup until smooth and well combined.
- Using the back of a spoon or your fingers, gently press down the center of each brioche slice to create a shallow well, forming a slight border around the edges.
- Carefully spoon the custard mixture into the wells of each brioche slice, distributing it evenly.
- Sprinkle the freeze-dried raspberries over the custard-filled brioche slices.
- Place the baking sheet with the toast in the preheated oven and bake for 8-10 minutes, or until the custard is set and lightly golden, and the brioche edges are toasted.
- Remove from the oven and let cool slightly on the baking sheet.
- Garnish each toast with a fresh raspberry (if using) and a dusting of powdered sugar (if using) before serving.
Notes
Read more about: 15 Major Spices That Flat-Out Refused to Blend Well in the Kitchen

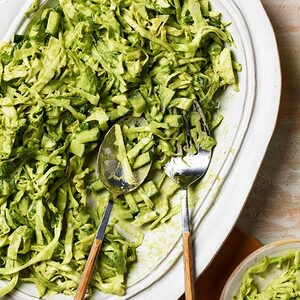
6. **Green Goddess Salad**Forget everything you thought you knew about salads, because the Green Goddess Salad, courtesy of @bakedbymelissa (Melissa Ben-Ishay, 2.7 million followers), is here to fundamentally change your perspective. With over 25 million views and a massive #GreenGoddess challenge, this vibrant, herb-packed creation became a sensation not just for its stunning color, but for its innovative approach to raw vegetables. It literally made salad genuinely craveable, transforming it from a dutiful health choice into a dish you actively look forward to eating.
Food experts often analyze the best TikTok recipes for their culinary merit, and this one consistently stands out for its impressive nutritional profile and surprisingly complex flavor. Melissa’s brilliance lies in presenting this salad as a “dip” – meant to be scooped up and enjoyed with tortilla chips, which instantly makes it more appealing and fun. This playful presentation encourages even the salad-averse to dive in, proving that sometimes, all it takes is a fresh angle to make healthy eating exciting and irresistible.
The salad itself is a textural marvel: finely chopped cabbage, crisp cucumber, and fresh chives create a confetti-like base that is both visually appealing and satisfyingly crunchy. But the true star is the blended dressing, an umami-rich concoction of fresh herbs, wholesome nuts, and nutritional yeast. This potent combination delivers such a powerful flavor punch that it makes the salad utterly addictive, leaving you reaching for just one more scoop. What’s truly remarkable about this recipe is how it introduced countless people to the wonders of nutritional yeast and, more importantly, made the act of “eating your greens” something to genuinely look forward to, turning a chore into a cheerful culinary adventure.
Green goddess salad
Ingredients
Equipment
Method
- Thoroughly wash all vegetables under cold running water to remove any dirt or impurities.
- Use a salad spinner to dry the pointed spring cabbage and iceberg or romano lettuce completely, ensuring no excess water remains.
- On a clean cutting board, finely chop the pointed spring cabbage into small, uniform pieces.
- Finely chop the iceberg or romano lettuce, matching the size of the cabbage for an even texture.
- Finely chop the cucumber.
- Thinly slice the spring onion.
- In a large mixing bowl, combine the finely chopped cabbage, lettuce, cucumber, and thinly sliced spring onion.
- Prepare your chosen Green Goddess dressing (note: dressing ingredients are not included in this recipe).
- Add the dressing to the mixed vegetables and gently toss until all ingredients are evenly coated.
- Serve the Green Goddess salad immediately, or chill for a short period before serving for optimal crispness and flavor.
Notes
Read more about: Your Guide to the 15 Best Fast-Food Salads for a Seriously Delicious and Healthy Meal

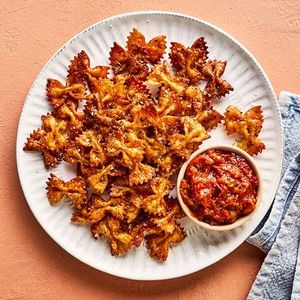
7. **Pasta Chips**Ever looked at a plate of pasta and thought, “This would be amazing as a chip”? Well, someone on TikTok did, and the internet collectively rejoiced! @bostonfoodgram, with 1.2 million followers, brought us Pasta Chips, a snack that has garnered over 30 million views and sparked the #PastaChips challenge. This isn’t just a snack; it’s a full-blown culinary reimagining, turning humble cooked pasta into a crunchy, dippable sensation that’s taken our snack game to a whole new level.
What makes these viral snacks so unbelievably satisfying? It’s all about minimal prep for maximum deliciousness. You simply boil your favorite pasta until it’s al dente, give it a good toss with some olive oil and your go-to seasonings, then pop it into an air fryer or oven until it reaches peak crispiness. The transformation is pure magic, resulting in a snack that’s perfect for anything from a casual movie night to a lively party spread.
The real beauty of Pasta Chips lies in their incredible versatility. Imagine seasoning them with classic Italian herbs for a Mediterranean vibe, or going bold with ranch seasoning for a zesty kick, or even leaning into taco spices for a fiesta in every bite! It’s these kinds of creative twists that make viral TikTok recipes truly shine, proving that familiar flavors can be combined in the most deliciously unexpected ways. Who knew pasta could pull off such an impressive glow-up?
This trend proves that sometimes, the simplest ideas can spark an entirely new food category, and we are absolutely here for it! It’s crunchy, it’s dippable, and it’s infinitely customizable—basically, everything you could ever want in a snack. Get ready to swap out your potato chips, because Pasta Chips are here to stay and revolutionize your snacking habits forever.
Air fryer pasta chips
Ingredients
Equipment
Method
- Bring a large pot of salted water to a rolling boil.
- Add the pasta (such as farfalle) and cook according to package directions until truly al dente, about 7-8 minutes. It should be firm to the bite.
- Drain the cooked pasta thoroughly using a colander.
- Transfer the drained pasta to a large mixing bowl. Add the extra virgin olive oil, smoked paprika, ground cumin, dried oregano, and onion granules. Toss well to ensure all the pasta is evenly coated with the oil and spices.
- Preheat your air fryer to 180°C (350°F) for about 5 minutes.
- Working in batches if necessary to avoid overcrowding, arrange the seasoned pasta in a single layer in the air fryer basket.
- Air fry for 10-12 minutes, shaking the basket or tossing the pasta gently halfway through, until the pasta chips are golden brown and crispy.
- Once cooked, remove the pasta chips from the air fryer.
- Serve immediately as a snack with your favorite dip, such as marinara or a creamy herb sauce.
Notes
Read more about: Your Ultimate NYC Foodie Bucket List: 14 Must-Visit Restaurants That Are Absolutely Slaying the Culinary Scene!
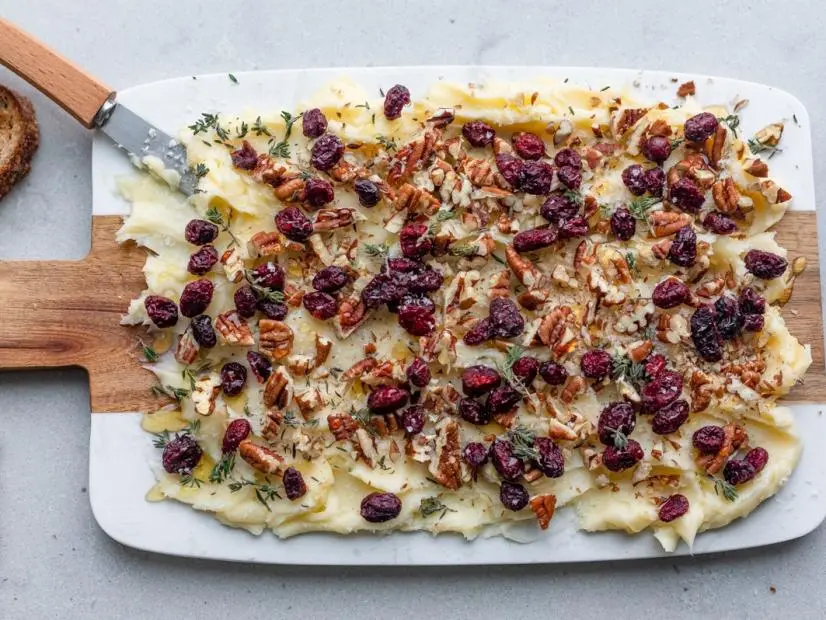
8. **Butter Board**Charcuterie boards? So last year. Enter the Butter Board, a communal appetizer concept spearheaded by @justine_snacks (Justine Doiron, with 900,000 followers) that sent the internet into a frenzy! With over 35 million views and a ubiquitous #ButterBoard challenge, this trend brilliantly reimagined how we serve appetizers, making softened butter the undeniable star of the show. It’s chic, it’s simple, and it offers endless flavor adventures.
Justine’s genius concept is disarmingly simple yet utterly captivating: you spread beautifully softened butter across a wooden board, then adorn it with a delightful array of toppings. Think a decadent drizzle of honey and a sprinkle of flaky sea salt, or perhaps roasted garlic and fragrant herbs for a savory twist. The visual appeal alone is enough to make mouths water, transforming a basic ingredient into a stunning centerpiece.
But the butter board didn’t stop there; it evolved, as all great viral trends do! Users quickly began creating their own spins, leading to delicious variations like sweet dessert butter boards, tangy cream cheese boards, and even vibrant hummus boards. It’s a testament to the creative power of TikTok, where a simple idea can blossom into a multitude of delicious iterations, each one more exciting than the last. This trend perfectly encapsulates how viral foods can truly influence real-world entertaining, making hosts everywhere feel like culinary artists.
This customizable, visually stunning, and highly shareable trend perfectly taps into the psychology behind viral foods. It’s not just about the taste; it’s about the experience, the presentation, and the sheer joy of communal eating and sharing on social media. The butter board isn’t just an appetizer; it’s an interactive edible masterpiece that’s perfect for gathering friends and making memories (and some seriously good toast!).
Butter Board with Cranberries and Pecans
Ingredients
Equipment
Method
- Allow the butter to come to room temperature for at least 15 minutes, then stir in a bowl to loosen it so that it’s spreadable. Layer it in swirls on a small serving board, slowly spreading it over the entire surface. Instead of trying to spread the entire stick of butter at once, I recommend scooping 1 tablespoon at a time with a rubber spatula or small spoon and spreading each tablespoon on its own. It’s faster to spread this way and allows you to create little wells inside the butter.
- Sprinkle the cranberries, pecans and thyme on top of the butter swirls. Drizzle the honey over the butter and garnish with the flaky sea salt. Serve immediately with warm bread.
Notes
Read more about: 13 Meal Prep Fails That Prove Some Time Savers Just Aren’t Convenient — And How to Fix Them!

9. **Crispy Air Fryer Pasta**Leftovers, but make them *fabulous*! @baked_by_melissa (Melissa Ben-Ishay, 2.7 million followers) once again knocked it out of the park with her Crispy Air Fryer Pasta, racking up over 20 million views and sparking the #AirFryerPasta challenge. This recipe isn’t just good; it transforms yesterday’s pasta into a cheesy, crunchy delight that’s infinitely better than it has any right to be. It truly proves that some leftovers deserve a second act, and this one is a standing ovation.
Our criteria for top TikTok recipes include taste, presentation, and ease, and this one scores off the charts on all fronts. The concept is pure genius: take your leftover pasta (sauce and all!), add a generous sprinkle of extra cheese (because, why not?), and then air fry it until the top is gloriously golden and crispy, while the inside remains perfectly gooey and saucy. It’s a textural symphony that’s incredibly satisfying with every single bite.
What makes this trend so appealing is how it breathes new life into otherwise uninspiring leftovers. We all know the struggle of a sad, reheated pasta dish, but this technique elevates it into something truly craveable. The brilliant contrast between the crunchy, almost caramelized exterior and the soft, flavorful interior is what makes this dish an absolute winner. It’s no wonder that TikTok recipes easy to follow have become such a gateway into cooking for many young adults, as this one requires virtually no advanced kitchen skills.
So, if you’ve got some leftover pasta hanging around, don’t just microwave it! Give it the air fryer treatment and prepare to be amazed. This recipe is a testament to how simple tweaks can lead to monumental flavor upgrades and turn an everyday meal into an exciting culinary adventure that will have you actively looking forward to your leftovers!
Read more about: Beyond the Flames: 13 Barbecue Myths Pitmasters Want You to Stop Believing for Safer, Tastier Grilling
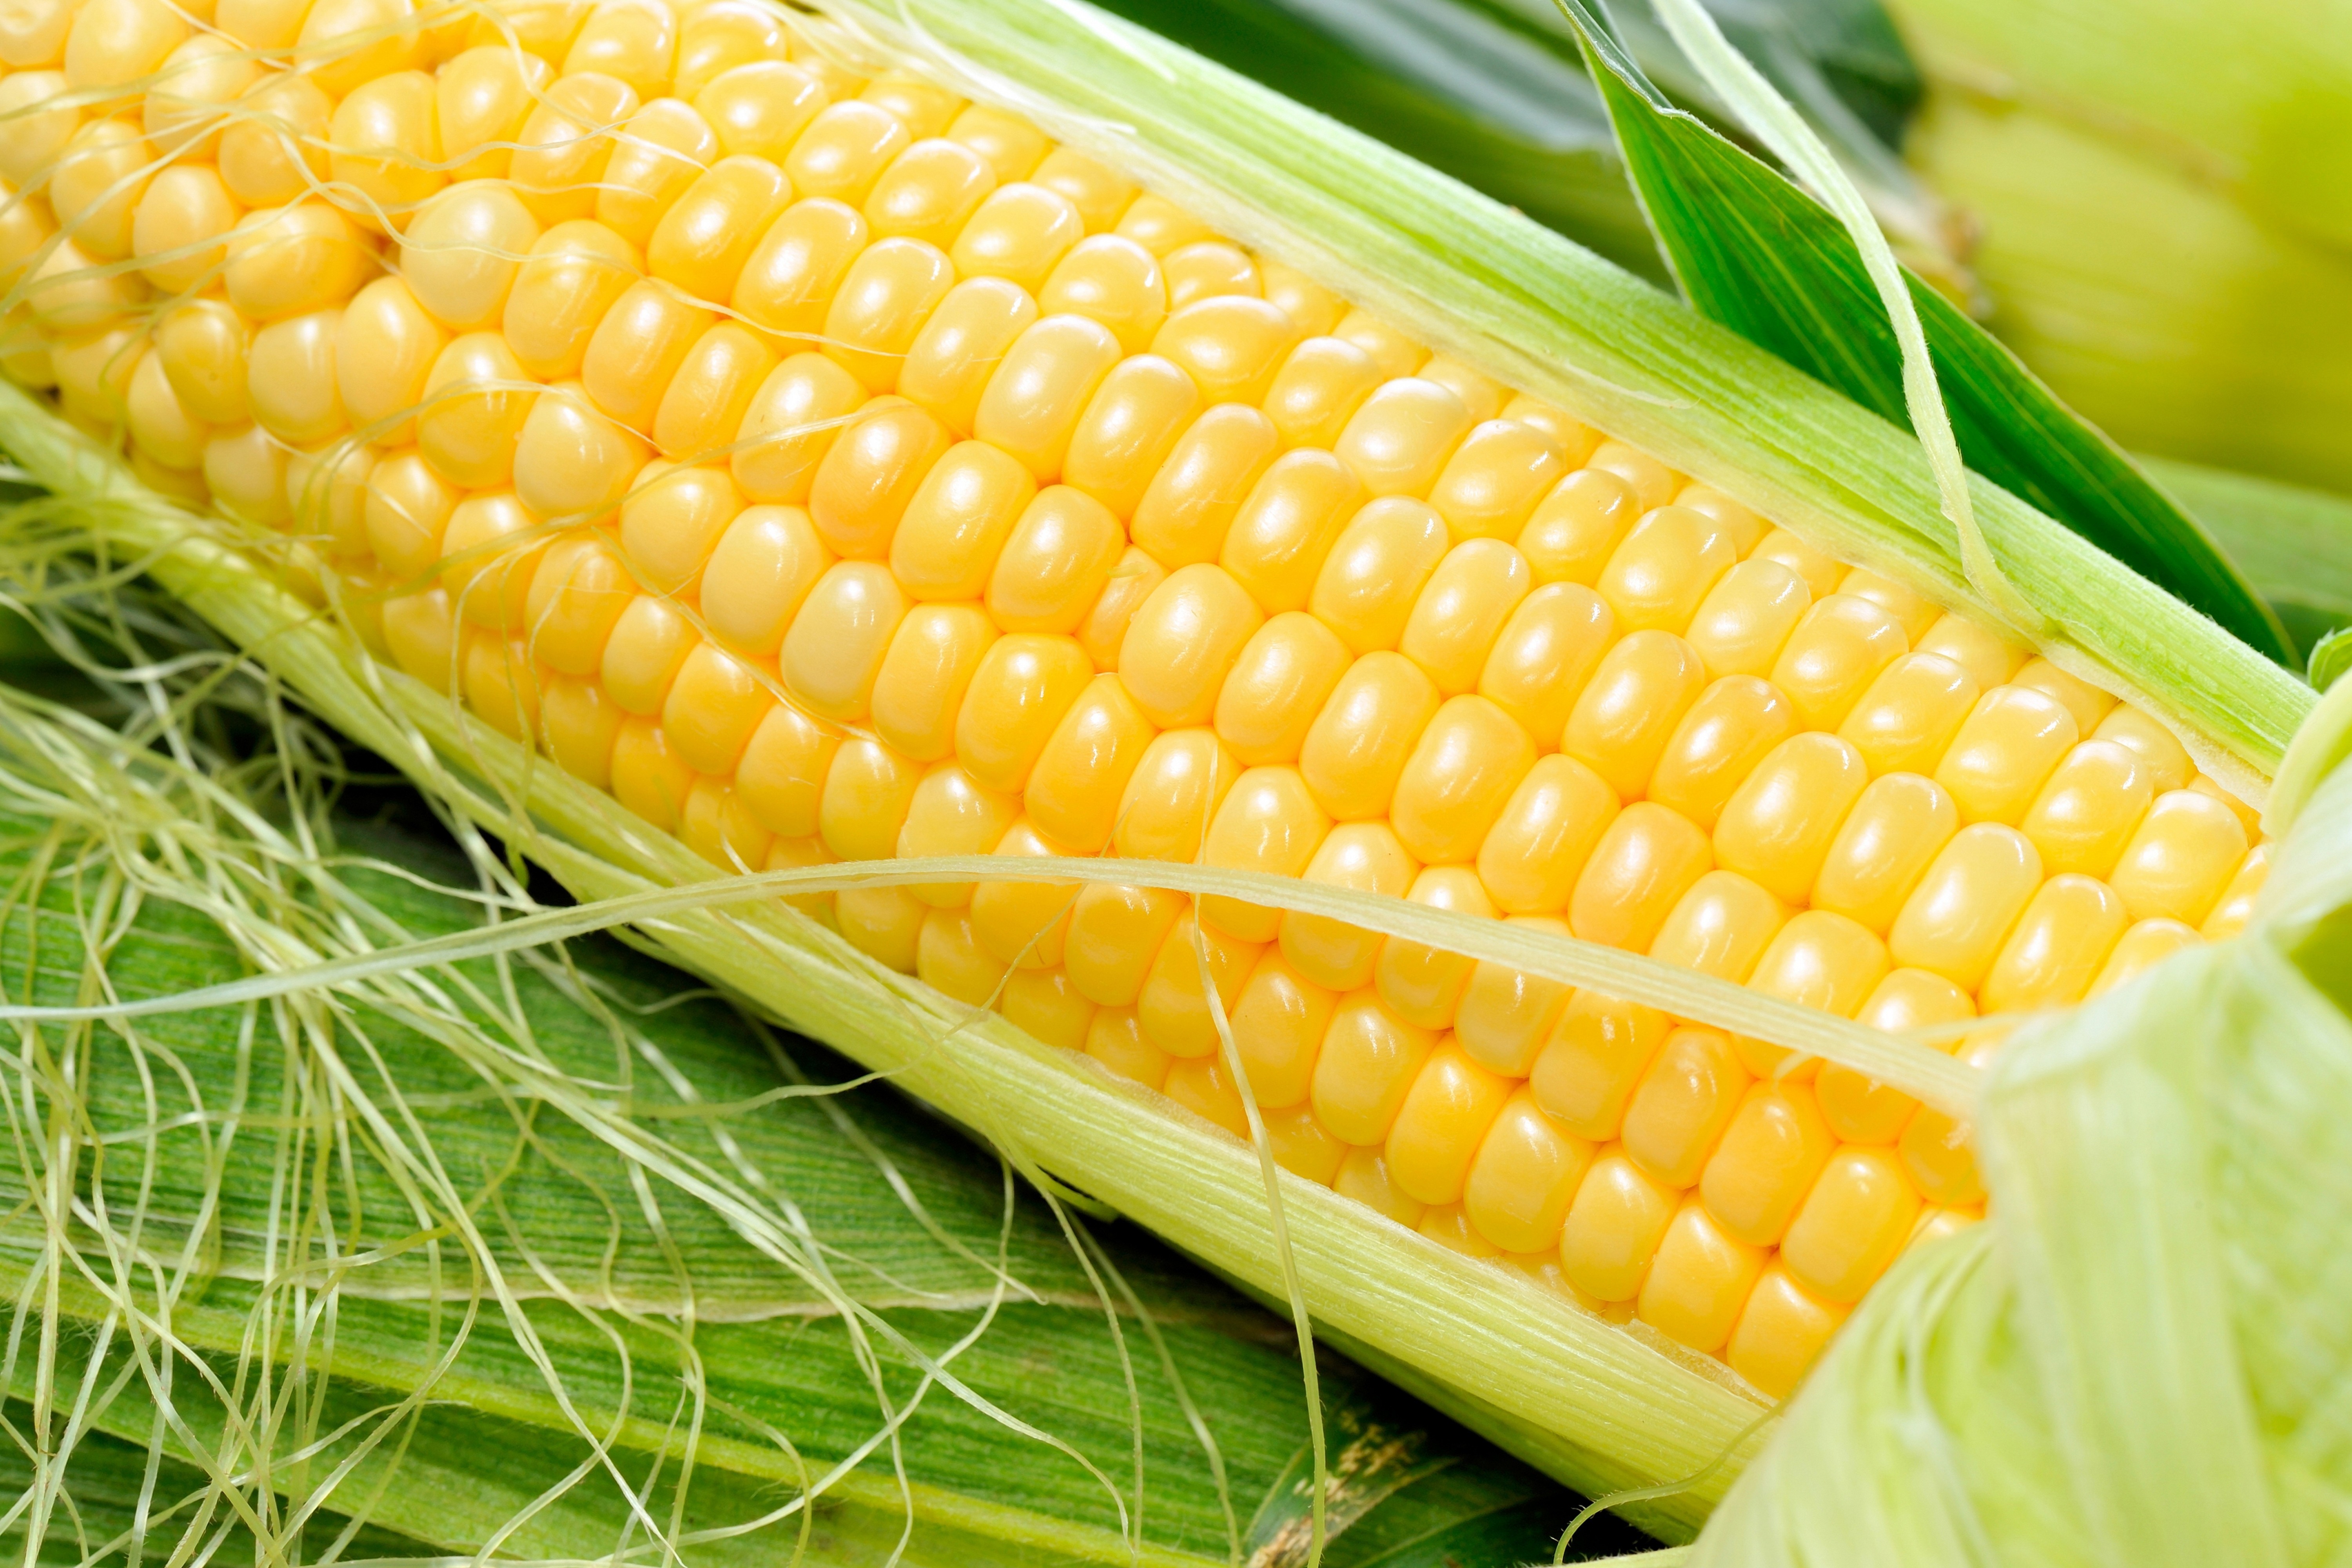
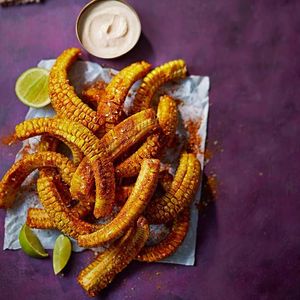
10. **Corn Ribs**Move over, corn on the cob! There’s a new, fun way to eat corn in town, and it’s all thanks to @spicednice, who captivated 1.5 million followers with her viral Corn Ribs, amassing 28 million views and igniting the #CornRibs challenge. This incredibly creative vegetable preparation method takes ordinary corn and transforms it into a handheld, flavor-packed appetizer that’s not just delicious, but genuinely fun to eat. It’s a whole new world for corn lovers!
The magic behind these ‘ribs’ is surprisingly simple yet utterly brilliant. The technique involves carefully quartering corn cobs lengthwise, which can be a bit tricky but is totally worth it. Once you’ve got your ‘ribs,’ you season them generously with your favorite spices, then either air fry or bake them until they curl up into their distinctive, handheld ‘rib’ shapes. The result is a concentrated burst of corn flavor with an irresistible new texture profile.
What truly makes viral recipes pop on TikTok is their visual presentation, and corn ribs absolutely deliver! Their unique curved shape and vibrant yellow color are instantly eye-catching. Plus, the seasoning possibilities are genuinely endless. You can go for an Elote-inspired vibe with creamy cotija cheese and a sprinkle of chili powder, or venture into Asian-inspired territory with a glaze of soy, ginger, and fresh scallions. Each variation is a new adventure for your taste buds!
This trend is a shining example of the creative genius bubbling within TikTok’s food community. It takes a humble vegetable and elevates it into a craveable, interactive snack that encourages everyone to dive in. Corn Ribs aren’t just a side dish; they’re a celebration of flavor and fun, making the act of eating your veggies an absolute blast! You’ll never look at corn the same way again.
Lime & paprika corn ribs
Ingredients
Equipment
Method
- Carefully cut each corn cob lengthwise into four ‘ribs’ using a sharp chef’s knife and a stable cutting board.
- In a medium bowl, combine the all-purpose seasoning, smoked hot paprika, onion granules, and brown sugar, mixing well.
- Add the corn ribs to the seasoning mixture and toss thoroughly to coat all pieces evenly.
- Heat vegetable oil in a deep, heavy-bottomed pot or deep fryer to 170°C (340°F).
- Carefully deep-fry the corn ribs in batches for 3-5 minutes, until golden brown and curled, ensuring not to overcrowd the pot.
- Remove the fried corn ribs using a slotted spoon or spider and transfer them to a wire rack lined with paper towels to drain excess oil.
- While the corn is frying, prepare the dipping sauce: In a small bowl, combine soured cream with lime zest and juice. Stir well to combine.
- Serve the hot lime & paprika corn ribs immediately with the zesty soured cream for dipping.
Notes
Read more about: King James’ Empire: How LeBron Forged Generational Wealth Beyond the Basketball Court

11. **Pesto Eggs**Who knew a simple swap could unlock such incredible flavor? @amywilichowski, with 800,000 followers, gave us the game-changing Pesto Eggs, which quickly amassed over 12 million views and launched the #PestoEggs challenge. This isn’t just a breakfast hack; it’s a revelation that replaces traditional cooking oil with vibrant pesto, infusing your eggs with an explosion of basil, garlic, and cheesy goodness right from the very first sizzle!
The best TikTok recipes often combine unexpected ingredients in the most harmonious ways, and this simple breakfast innovation is a prime example. By cooking your eggs directly in a luscious bed of pesto instead of plain butter or oil, you’re essentially marinating them in flavor as they cook. The result? A wonderfully savory, protein-packed breakfast that tastes incredibly gourmet, all without any extra fuss or effort on your part. Talk about starting your day right!
What truly makes this recipe a standout is its amazing versatility. Whether you prefer your eggs fried with a runny yolk, scrambled into fluffy clouds, or folded into a delightful omelet, pesto eggs adapt beautifully to your preference. It’s so good, in fact, that many restaurant chefs are now drawing inspiration from popular TikTok recipes like this one, with pesto eggs gracefully appearing on trendy brunch menus nationwide. This shows just how impactful a simple, viral idea can be!
This brilliant hack is proof that you don’t need fancy techniques to elevate your everyday meals. It’s all about smart, flavorful choices. Pesto Eggs are a delicious reminder that sometimes, the most unexpected ingredient combinations yield the most satisfying results, making your breakfast routine something genuinely exciting to look forward to. Go ahead, give it a try—your taste buds will thank you!
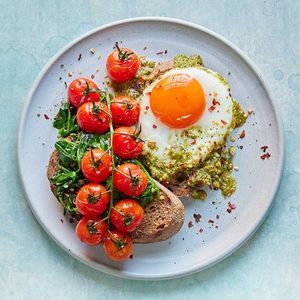
Healthy pesto eggs on toast
Ingredients
Equipment
Method
- Prepare the pesto by combining the garlic clove, basil, pine nuts, rapeseed oil, and parmesan in a small food processor. Pulse until a coarse, well-combined paste forms, then season to taste.
- Toast the rye sourdough slices until they are golden brown and crisp to your preference.
- Heat a non-stick frying pan over medium heat. Crack the eggs into the pan and fry to your desired doneness, ideally with a runny yolk. Season with a pinch of chili flakes (if using), salt, and pepper.
- While the eggs are cooking, quickly sauté the baby spinach and tomatoes on-the-vine in a separate pan or the same pan after removing the eggs. Cook for 1-2 minutes until the spinach wilts and the tomatoes are warmed through.
- Spread a generous layer of the prepared pesto onto each slice of toasted sourdough.
- Evenly distribute the sautéed spinach and tomatoes over the pesto-covered toast.
- Carefully place one or two fried eggs on top of the vegetables.
- Garnish with additional fresh basil leaves or a sprinkle of extra parmesan, if desired.
- Serve the healthy pesto eggs on toast immediately for the best flavor and texture.
Notes
Read more about: The Definitive Wirecutter Guide: Comparing Top Meal Kit Delivery Services for Busy Professionals

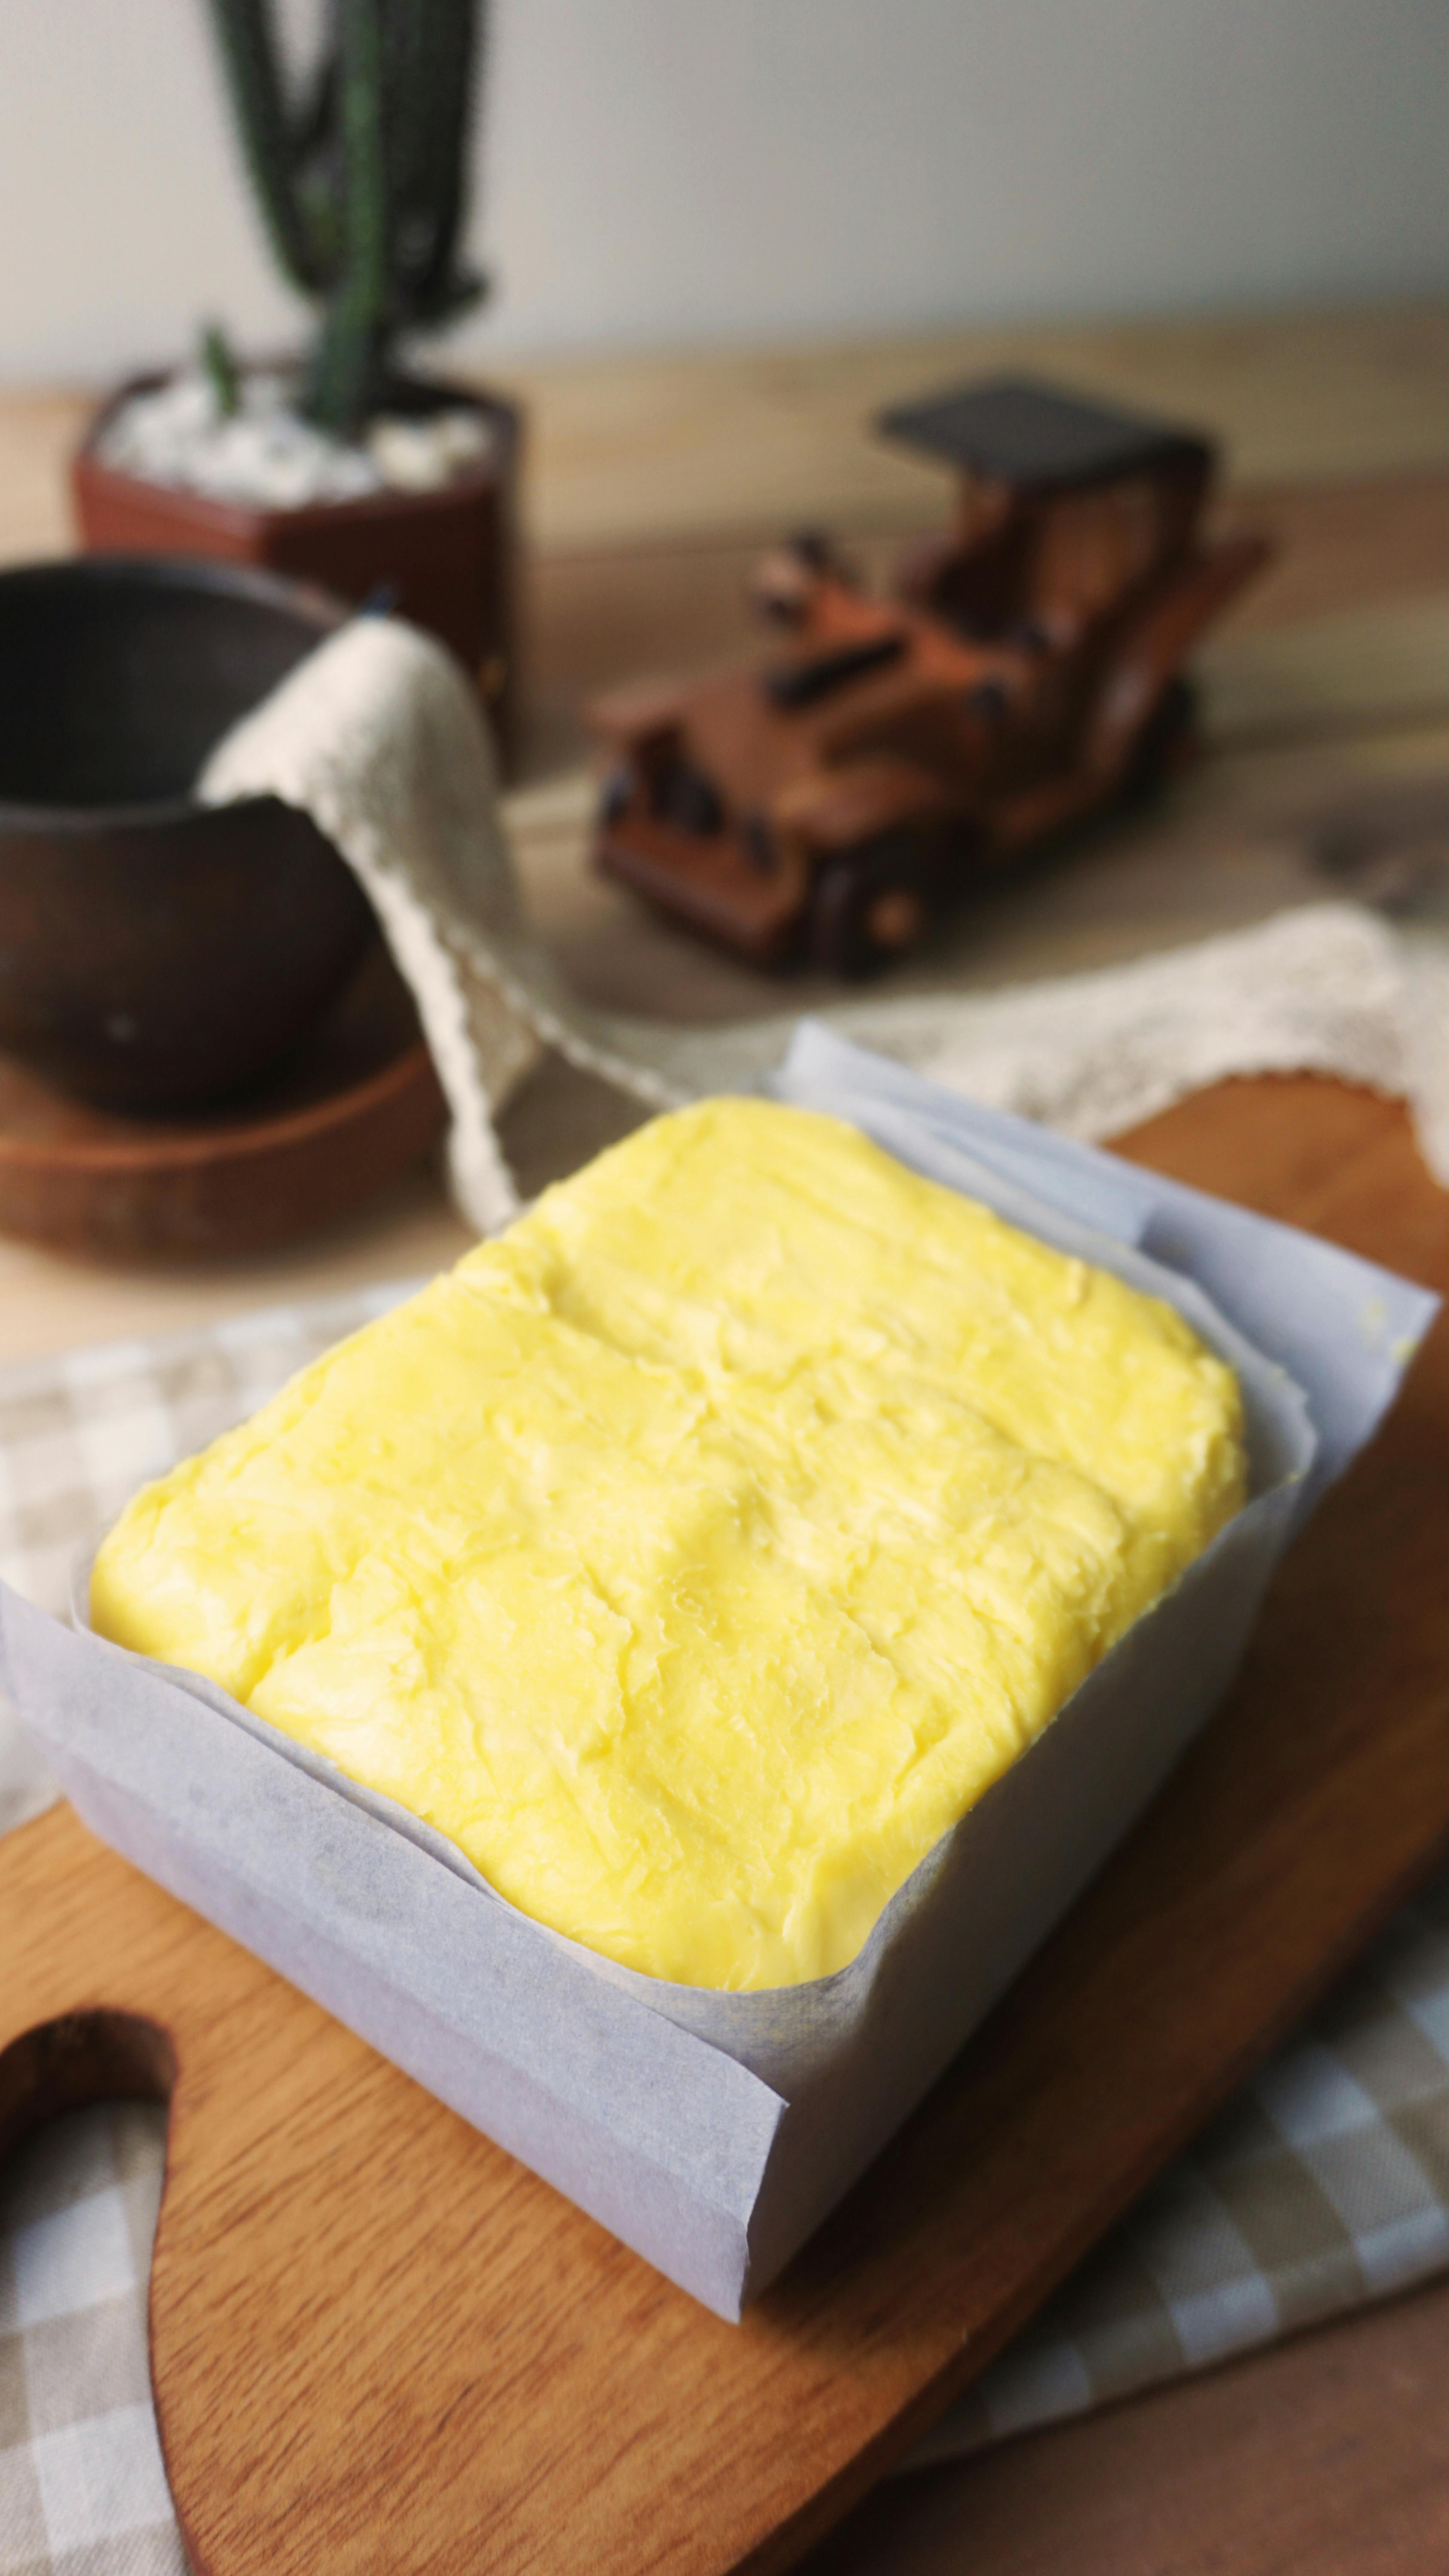
12. **Baked Oats**Bored with your basic oatmeal? Prepare for a breakfast revolution courtesy of @feelgoodfoodie (Yumna Jawad, 2.1 million followers) and her wildly popular Baked Oats, which captivated over 15 million views and ignited the #BakedOats challenge! This ingenious preparation method transforms ordinary, sometimes-monotonous oatmeal into a moist, delicious, cake-like treat that feels like a decadent dessert, yet remains wonderfully nutritious enough for your morning meal. It’s breakfast and dessert all rolled into one!
The core of this trend is brilliantly simple: you blend humble oats into a fine, flour-like consistency, then mix them with a ripe banana, an egg, and your favorite flavorings. This mixture is then baked until it transforms into a beautifully cake-like consistency. It’s a comforting, warm, and deeply satisfying way to start your day, turning a breakfast staple into a truly exciting experience.
What makes Baked Oats so endlessly engaging is the sheer variety of flavors you can create. Fancy a chocolate chip cookie for breakfast? Done! Craving a blueberry muffin, but in oat form? Absolutely! How about a surprisingly wholesome carrot cake? The possibilities are truly limitless, allowing for endless customization to suit any craving. Food critics and home cooks alike have consistently praised baked oats for their impressive nutritional value combined with their undeniable satisfaction factor, earning them a permanent spot on many “must-try” lists.
This breakfast phenomenon has genuinely revolutionized how we think about oatmeal, proving that healthy eating can also be incredibly indulgent and fun. It’s the perfect example of how TikTok inspires us to get creative in the kitchen, turning simple ingredients into something extraordinary. So go on, give your breakfast routine a delicious upgrade with baked oats – it’s a sweet start to any day that you definitely deserve!
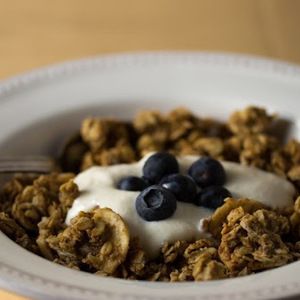
Vegan Banana Walnut Granola recipes
Ingredients
Equipment
Method
- Preheat your oven to 300°F (150°C) and line two large baking sheets with parchment paper or silicone baking mats.
- In a large mixing bowl, thoroughly mash the over-ripe bananas using a fork or potato masher until smooth.
- Add sugar, canola/light olive oil, cashew butter, melted coconut oil, vanilla extract, cinnamon, nutmeg, and salt to the mashed bananas. Whisk until well combined and smooth.
- In a separate large bowl, combine the rolled oats and wheat germ/bran.
- Pour the wet banana mixture into the dry oat mixture. Use a sturdy spatula to mix until all the dry ingredients are evenly coated.
- Gently fold in the chopped walnuts into the granola mixture, ensuring they are well distributed.
- Divide the granola mixture evenly between the prepared baking sheets, spreading it into a thin, uniform layer with the spatula.
- Bake for 30-40 minutes, stirring gently every 10-15 minutes to promote even browning and prevent burning.
- The granola is done when it’s golden brown and feels mostly dry. Remove from the oven and immediately scatter the banana chips over the hot granola.
- Allow the granola to cool completely on the baking sheets without stirring. It will crisp up significantly as it cools. Once cooled, store in an airtight container.
Notes
Read more about: 13 Meal Prep Fails That Prove Some Time Savers Just Aren’t Convenient — And How to Fix Them!
And there you have it, folks – six more viral sensations that have cemented their place in our 2025 kitchen hall of fame! From turning pasta into irresistible chips to making breakfast feel like dessert, these TikTok recipes are more than just fleeting trends. They’re a testament to the platform’s incredible power to inspire creativity, simplify cooking, and bring truly delicious and innovative flavors right into our homes. Whether you’re a seasoned chef or just starting your culinary journey, these dishes offer accessible, exciting ways to spice up your menu and discover new favorites. Happy cooking, and may your FYP always be filled with culinary gold!


