
")

Remember those dishes that always made an appearance at family gatherings, potlucks, or just a Tuesday night dinner? The ones that felt like a culinary hug, a staple of a bygone era? Well, prepare for a trip down memory lane, because we’re about to explore some of America’s once-favorite foods that, for one reason or another, just don’t get the same love they used to. It’s like they vanished into thin air, leaving us to wonder: Seriously, what happened?
Our food landscape is constantly evolving, influenced by everything from economic shifts and technological advancements to changing nutritional awareness and, let’s be honest, whatever’s trending on social media. What was once considered a luxurious treat became an everyday convenience, and what was a weeknight go-to might now be seen as a retro curiosity. This culinary evolution means some once-beloved staples have quietly faded from our collective plates, replaced by new flavors, healthier alternatives, or simply a shift in taste.
So, buckle up, food fanatics! We’re diving deep into the delicious (and sometimes perplexing) history of 12 foods that used to be all the rage but have since lost their sparkle. From creamy concoctions to hearty mainstays and even some forgotten fermented friends, get ready to reminisce, maybe shed a tear, and definitely wonder why we ever let these gems slip away. Let’s uncover the stories behind these vanishing acts, straight from the archives of American culinary history!

1. **Ambrosia Salad**
First up on our nostalgic plate is Ambrosia salad, a dish that has certainly had a journey through time. It initially graced tables in a very simple form in the late 1800s. Back then, it was a surprisingly elegant affair, making use of only three core ingredients: beautifully layered orange slices, a sprinkle of coconut, and a touch of sugar. Imagine the buzz this created!
Its initial appeal was largely due to a sense of exoticism. Oranges and coconuts were, at that time, expensive, tropical fruits. They were commodities that only the wealthier classes could easily afford. This made Ambrosia salad a symbol of luxury and refinement, a dish that spoke volumes about one’s social standing at a dinner party.
As decades rolled on, the recipe evolved, mirroring changes in culinary tastes and ingredient availability. Additional fruits like pineapple and banana were incorporated, adding new layers of flavor and texture. Eventually, it was topped with generous dollops of whipped cream, further cementing its status as a delightful, albeit rich, confection. During the turn of the century, a clever marketing campaign introduced marshmallow whip as the dressing of choice, pushing this “salad” even further into the realm of pure dessert.
By the 1930s, perhaps due to the South’s closer proximity to tropical climates and the association of agricultural cycles (Florida oranges typically reached grocery shelves in December), Ambrosia salad had firmly been deemed a traditional Southern holiday confection. The post-World War years saw canned fruits becoming staples, and Ambrosia salad reached its most recognizable retro form with canned pineapple, maraschino cherries, and mandarin oranges. It persisted into the mainstream, enjoying a robust presence during the buffet boom of the 1980s.
However, its journey has seen a downturn in recent times. Perhaps with a contemporary inclination to avoid salads dressed with preservatives, Ambrosia salad is now viewed with more nostalgia than anticipation. Whether considered a salad or dessert, this dish maintains Southern associations largely because this is the only region where recipes for it persist with any real frequency. What a delicious, sweet, and slightly syrupy ride it’s been!

Ambrosia Salad
Ingredients
Equipment
Method
- Thoroughly drain the 11-ounce can of mandarin oranges in a colander, pressing gently to remove all excess liquid.
- Similarly, thoroughly drain the 8-ounce can of pineapple chunks in the colander, ensuring no residual juice remains.
- In a large mixing bowl, combine the drained mandarin oranges, drained pineapple chunks, 1 cup of miniature marshmallows, and 1 cup of flaked coconut.
- Add 1 cup of sour cream to the bowl with the fruit and marshmallow mixture.
- Using a rubber spatula or large spoon, gently fold all ingredients together until they are evenly distributed and coated with the sour cream. Be careful not to overmix, which can break down the fruit.
- Cover the mixing bowl tightly with plastic wrap to prevent any air exposure.
- Refrigerate the ambrosia salad for at least 1 hour, or preferably 2-4 hours, to allow the flavors to meld and the marshmallows to soften slightly, achieving the optimal texture.
- Before serving, give the salad another gentle stir.
- Transfer the chilled ambrosia salad to a decorative serving bowl.
- Serve cold as a refreshing dessert or a sweet side dish.
Notes
Read more about: Honestly, What Happened? 15 Once-Beloved American Foods That Vanished from Our Tables

2. **Tuna Casserole**
Next on our list is a dish that was once the epitome of convenience and comfort: Tuna casserole. The postwar proliferation of canned foods in the 1950s truly kicked off a culinary phenomenon, paving the way for quick and easy-to-prepare meals that could be whipped up straight from the pantry. Tuna casserole was perfectly positioned to become a household hero in this new era of efficiency.
Campbell’s, a brand synonymous with canned goods, elegantly described Tuna casserole as the “original dump and bake.” This perfectly captures its simplicity and appeal. Many recipes called for just a handful of straightforward ingredients: canned tuna, a can of cream of mushroom soup, some noodles, breadcrumbs for a crispy topping, and a handful of peas. It was a remarkably quick dish to assemble and get into the oven, making it a dream for busy home cooks.
As an easy, fortifying, and relatively hands-off meal, Tuna casserole certainly hasn’t completely disappeared from the 21st-century diet. However, its widespread popularity has undeniably receded, influenced by several modern factors. Andy Mecs, former Vice President of Marketing and Innovation at StarKist, even suggested to the Wall Street Journal that “a lot of millennials don’t even own can openers” as one possible reason for the decline in demand for canned tuna. Ouch, a direct hit to the heart of convenience!
While StarKist’s invention of tuna in vacuum-sealed pouches has been a smart way of marketing this ingredient as even more convenient, the lingering associations between tuna and high mercury levels have also contributed to its moderation in many diets. Concerns about mercury were largely due to environmental hazards that emerged in the 1970s. Moreover, tuna also faced a bad reputation with the eventual understanding that tuna nets often ensnared dolphins in the fishing process. This ethical concern forced tuna brands to change their practices and provide the distinction of “dolphin safe” in order to maintain consumer trust and consumption.
Today’s tuna is generally considered a safer product, with improved fishing practices and clearer guidelines for consumption. However, lingering distrust, combined with a cultural preference toward generally fresher ingredients, has certainly inspired a significant decline in the popularity of tuna-based dishes like the classic casserole. It’s a tale of convenience meeting consciousness, and for now, consciousness seems to be winning.
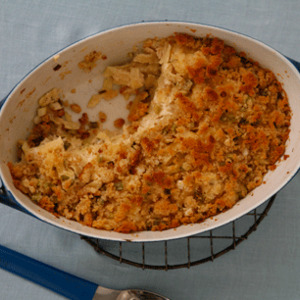
Tuna–Noodle Casserole
Ingredients
Equipment
Method
- Preheat your oven to 375°F (190°C). Grease a 9×13-inch baking dish.
- Bring a large pot of salted water to a boil. Add the flat egg noodles and cook according to package directions until al dente; drain well.
- While noodles cook, melt 4 tbsp. of butter in a large skillet or saucepan over medium heat. Add the chopped scallions and cook until softened, about 3-5 minutes.
- Stir in the flour and dry mustard into the scallions, cooking for 2 minutes to create a roux.
- Gradually whisk in the milk until the sauce is smooth and thickened. Season generously with salt and freshly ground black pepper.
- Remove the sauce from heat and gently fold in the drained tuna chunks and cooked noodles.
- Transfer the noodle mixture into the prepared baking dish, spreading evenly.
- In a small skillet, melt the remaining 6 tbsp. of butter. Add the fresh bread crumbs and cook over medium heat, stirring frequently, until golden brown and crispy.
- Sprinkle the toasted bread crumbs evenly over the casserole.
- Bake for 20-25 minutes, or until the casserole is bubbly and the topping is golden brown. Let rest for a few minutes before serving.
Notes
Read more about: Honestly, What Happened? 15 Once-Beloved American Foods That Vanished from Our Tables

3. **Pineapple Upside-Down Cake**
Prepare for a dessert that literally flips expectations: Pineapple upside-down cake! This topsy-turvy treat first surfaced on palates in the 1920s and initially carried more of a luxury association. Imagine serving this tropical marvel at a gathering when pineapples weren’t as readily available. Talk about making a statement!
Pineapple had only recently achieved a more mainstream status in the 20th century, thanks to the pioneering efforts of Jim Dole’s Hawaiian Pineapple Company. This company revolutionized the industry by efficiently mass-producing canned pineapple, which in turn made this once-exotic tropical ingredient accessible and affordable to a much wider demographic. It was a game-changer for home cooks and dessert lovers across America.
However, Dole soon found himself in a delightful predicament: he was producing canned pineapple in quantities far greater than the current consumer demand. What’s a pineapple mogul to do? He resorted to brilliant advertising strategies in hopes of significantly increasing pineapple consumption. As Revolutionary Pie explains, Dole sponsored a contest for the best pineapple-centric recipe, and the winning creation was none other than a certain Mrs. Robert Davis’s pineapple upside-down cake. And just like that, a star was born!
From that moment, the dessert truly took off, quickly becoming a household favorite throughout the following decade. It offered a tropical twist on a much older dessert phenomenon, as “upside down cakes” have actually been around since the Middle Ages. But Dole’s advertising genius certainly helped the pineapple version reach a far wider pool of consumers, cementing its place in American culinary history.
The dessert experienced another surge in popularity mid-century, perhaps driven by the widespread call for convenience cooking. Home cooks of the 1950s eagerly reached for canned ingredients, and a dessert that used pre-sliced canned pineapple was a dream come true. Today, the dish occasionally makes an appearance at social gatherings, often as a potluck dessert. However, it certainly doesn’t share the widespread popularity of its retro resurgence. The dessert itself may be a fad that rises and falls, but the canned ingredients—and often the bright red maraschino cherries that notoriously garnish it—have been unable to fully transcend a strong retro association. It’s a sweet reminder of simpler, canned times!

Pineapple Upside-Down Cakes
Ingredients
Equipment
Method
- Melt the unsalted butter in a medium, heavy-bottomed skillet over medium heat.
- Sprinkle the light brown sugar evenly over the melted butter. Cook, stirring occasionally, until the sugar melts and forms a bubbly caramel sauce, about 2-3 minutes.
- Carefully arrange the pineapple slices in a single layer over the caramel in the skillet.
- Place the split hamburger bun halves, cut-side down, directly on top of the pineapple slices. Press gently to ensure good contact.
- Reduce the heat to medium-low and continue to cook for 5-7 minutes, or until the buns are warm and lightly toasted, absorbing the caramel flavors.
- Using a spatula, gently check if the pineapple and caramel have set slightly and the buns are warmed through.
- Carefully remove the skillet from the heat.
- Place individual serving plates directly over each bun half in the skillet.
- Working quickly and carefully, invert each bun-pineapple assembly onto the serving plates.
- Serve immediately, optionally topped with a scoop of vanilla ice cream.
Notes
Read more about: Sweet Revival: 12 Vintage-Style Desserts Making a Comeback in 2025 with Nostalgic Tastes and Modern Twists

4. **Meatloaf**
Ah, meatloaf! Just the word conjures images of comfort food, family dinners, and perhaps a certain kind of homey, no-frills cuisine. While the version we know today might feel quintessentially American, meatloaf-like predecessors were actually enjoyed as far back as the days of Ancient Rome. Talk about a long and storied history for a dish often considered humble!
For centuries, the dish was most popular across northern Europe. It was the German-descended Pennsylvania Dutch, for instance, who are often credited with bringing some of the earliest versions of meatloaf to America. This makes it a truly international culinary traveler, evolving and adapting to local ingredients and tastes over time. Its enduring appeal lies in its practicality and versatility, a way to make ground meat go further and feed a crowd.
In American kitchens, particularly throughout the 20th century, meatloaf became a beloved staple. It was an economical and satisfying way to put a hearty meal on the table, especially during times of scarcity. Proteins, as we know, are fundamental building blocks for our bodies, essential for bones, muscles, cartilage, skin, and blood. They also form enzymes, hormones, and vitamins. Meatloaf, in its various iterations, provided a robust source of protein, along with B vitamins, iron, and zinc, all crucial nutrients for maintaining health and supporting body functions.
Meatloaf offered a simple yet effective way to deliver these vital nutrients. It was a canvas for culinary creativity, easily seasoned and mixed with various fillers to stretch its yield and adapt to available ingredients. While it once stood as a proud centerpiece of many American dinners, today’s diverse array of protein choices – from leaner meats and seafood like salmon, rich in omega-3s, to a vast selection of beans, lentils, nuts, and soy products – means that meatloaf, while still existing, often plays a less central role. We’ve broadened our protein horizons, leading to a quieter, more nostalgic presence for this historical dish. What a journey for such a simple loaf!
I Made Chrissy Teigen’s Spicy Meatloaf & Here’s What I Thought
Ingredients
Equipment
Method
- Tear bread into small pieces, place in a large bowl, and pour milk over it; let soak for 5 minutes.
- Add mushrooms, hot Italian sausage (casings removed), ground beef, finely chopped onions, grated carrots, large egg, Worcestershire sauce, kosher salt, red pepper flakes, and black pepper to the bowl with the soaked bread.
- Gently mix all ingredients with your hands until just combined, being careful not to overmix, which can lead to a tough texture.
- Transfer the mixture to a loaf pan or form it into a compact loaf shape on a parchment-lined baking sheet.
- In a small bowl, whisk together the ketchup and brown sugar to create the sweet and tangy glaze.
- Evenly spread the prepared glaze over the top and sides of the meatloaf.
- Bake the meatloaf in a preheated oven (typically 375°F/190°C) until the internal temperature reaches 160°F (71°C).
- Remove the meatloaf from the oven and let it rest for 10-15 minutes before slicing.
- Slice the rested meatloaf into portions.
- Serve hot.
Notes
Read more about: Honestly, What Happened? 15 Once-Beloved American Foods That Vanished from Our Tables

5. **Sauerkraut**
Moving from comforting casseroles to fermented delights, let’s talk about sauerkraut! If you’ve ever topped your hot dog with this tangy, crunchy condiment, you’ve actually been doing your gut a serious favor without even realizing it. Sauerkraut, a true classic, is another food that perhaps doesn’t grace our daily plates as often as it once might have, despite its surprising benefits.
This vibrant, fermented cabbage product is a powerhouse of probiotics, which are those wonderful living microorganisms that help increase the “good” bacteria in our gut. Research from the University of California, Davis, highlights how this tasty side or condiment does more than just add a zing to your meal; it actively protects your gut health. “Fermentation results in postbiotics, non-living metabolites that provide a health benefit when consumed,” explains Keri Gans, R.D.N. These postbiotics help balance the microbiome in our gut and maintain digestive health.
Sauerkraut itself is a fairly simple preparation: cabbage, salt, and time. It’s been a staple in various cuisines for centuries, prized not just for its flavor but also for its ability to preserve vegetables through the winter months. While it remains a popular accompaniment in certain culinary traditions, its broader “beloved” status in general American dining seems to have become more niche. Maybe it’s because other fermented foods have risen to prominence, or perhaps it’s simply fallen out of regular rotation for many households. But the truth is, this unassuming cabbage dish packs a punch for your insides.
Considering the growing awareness of the gut microbiome’s role in overall health – influencing everything from our immune system and metabolism to our mood – sauerkraut should theoretically be having a massive comeback. It’s a testament to the fact that sometimes, even the most beneficial foods can drift into the background. While not a standalone meal, its historical presence as a common condiment and its undeniable health benefits make us wonder why it isn’t enjoying a more prominent spot at the modern table. Give it another chance, your gut will thank you!
Recipe: Sauerkraut Martini
Ingredients
Equipment
Method
- Place two martini glasses in the freezer or fill them with ice water to chill thoroughly.
- Measure 3 ounces of strained sauerkraut liquid and 1 1/2 ounces of your favorite vodka using a jigger.
- Combine the measured sauerkraut liquid and vodka into a cocktail shaker.
- Fill the cocktail shaker generously with fresh ice.
- Secure the lid and shake vigorously for 15-20 seconds until the shaker is frosty cold and the liquid is well-chilled.
- Discard the ice water from the chilled martini glasses, if applicable.
- Place a cocktail strainer over the shaker and strain the martini mixture evenly into the two prepared, chilled martini glasses.
- Optionally, garnish each martini with a small pickle spear, a quality olive, or a lemon twist to enhance flavor and presentation.
- Serve immediately to enjoy the crisp, savory notes of this unique cocktail.
Notes
Read more about: Taste of Tenacity: 14 Cuisines Refusing to Yield Their Soul to Modern Global Techniques

6. **Kefir**
Our final stop for this section brings us to another fermented friend, one that some might consider yogurt’s more adventurous, slightly tangier sibling: Kefir. For many, it’s a food that exists on the fringes of the dairy aisle, perhaps not enjoying the widespread, daily consumption of its more famous cousin, yogurt. Yet, it’s a powerhouse of nutrition and tradition that warrants a second look.
Dr. Rudolph Bedford, a gastroenterologist, is a firm advocate for this probiotic powerhouse. He specifically recommends kefir because it aids in both digestive and immune health, two pillars of overall wellness that are constantly under the spotlight in modern health discussions. Just like yogurt, kefir is teeming with “living microorganisms,” those beneficial bacteria, commonly referred to as “good” bacteria, that contribute to a healthy balance of flora in your gut.
“Anything that is fermented is essentially a good, probiotic-friendly food,” Dr. Bedford explained, and kefir certainly fits that bill. It’s derived from milk, undergoing a fermentation process that gives it its distinctive tart taste and slightly effervescent quality. While it might not be a familiar breakfast drink for every American, its roots run deep in various cultures where fermented dairy has long been celebrated for its health-promoting properties.
In an age where gut health is increasingly recognized as the “center of the universe” for bodily functions, kefir stands out as an unsung hero. While yogurt has soared in popularity, becoming a daily snack or ingredient for many, kefir has remained a bit more niche, perhaps perceived as an acquired taste or a specialty health food. Its historical place as a staple in some diets has likely been overshadowed by newer, trendier health drinks or more palatable, sweeter options on the market. But for those in the know, kefir remains a potent, probiotic-rich food that truly deserves more attention and a return to broader culinary appreciation.
Okay, foodies, are you ready for more culinary ghost stories? We’ve rummaged through some truly classic forgotten dishes, and now it’s time to unearth more of those once-common ingredients and prepared foods that used to grace our tables but now barely get a second glance. Get ready for some eyebrow-raising facts and maybe a little inspiration to bring these powerhouses back! What happened to these culinary relics? Let’s dive in!

Kefir Date Shake Recipe
Ingredients
Equipment
Method
- Ensure Medjool dates are pitted and at room temperature for optimal blending.
- Add the pitted dates, plain whole milk kefir, and plain or vanilla store-bought frozen yogurt into a blender.
- Secure the blender lid and begin blending on a low speed.
- Gradually increase the blender speed to high, processing until the mixture is completely smooth and creamy.
- Ensure no date chunks remain, blending for an additional 30 seconds if necessary.
- Pour the finished shake evenly into two serving glasses.
- Garnish each serving with a sprinkle of cinnamon, if desired.
- Serve immediately to enjoy the shake at its best consistency and temperature.
Notes
Read more about: Mastering Midlife: 12 Key Foods for Men’s Strength and Unwavering Vitality After 40
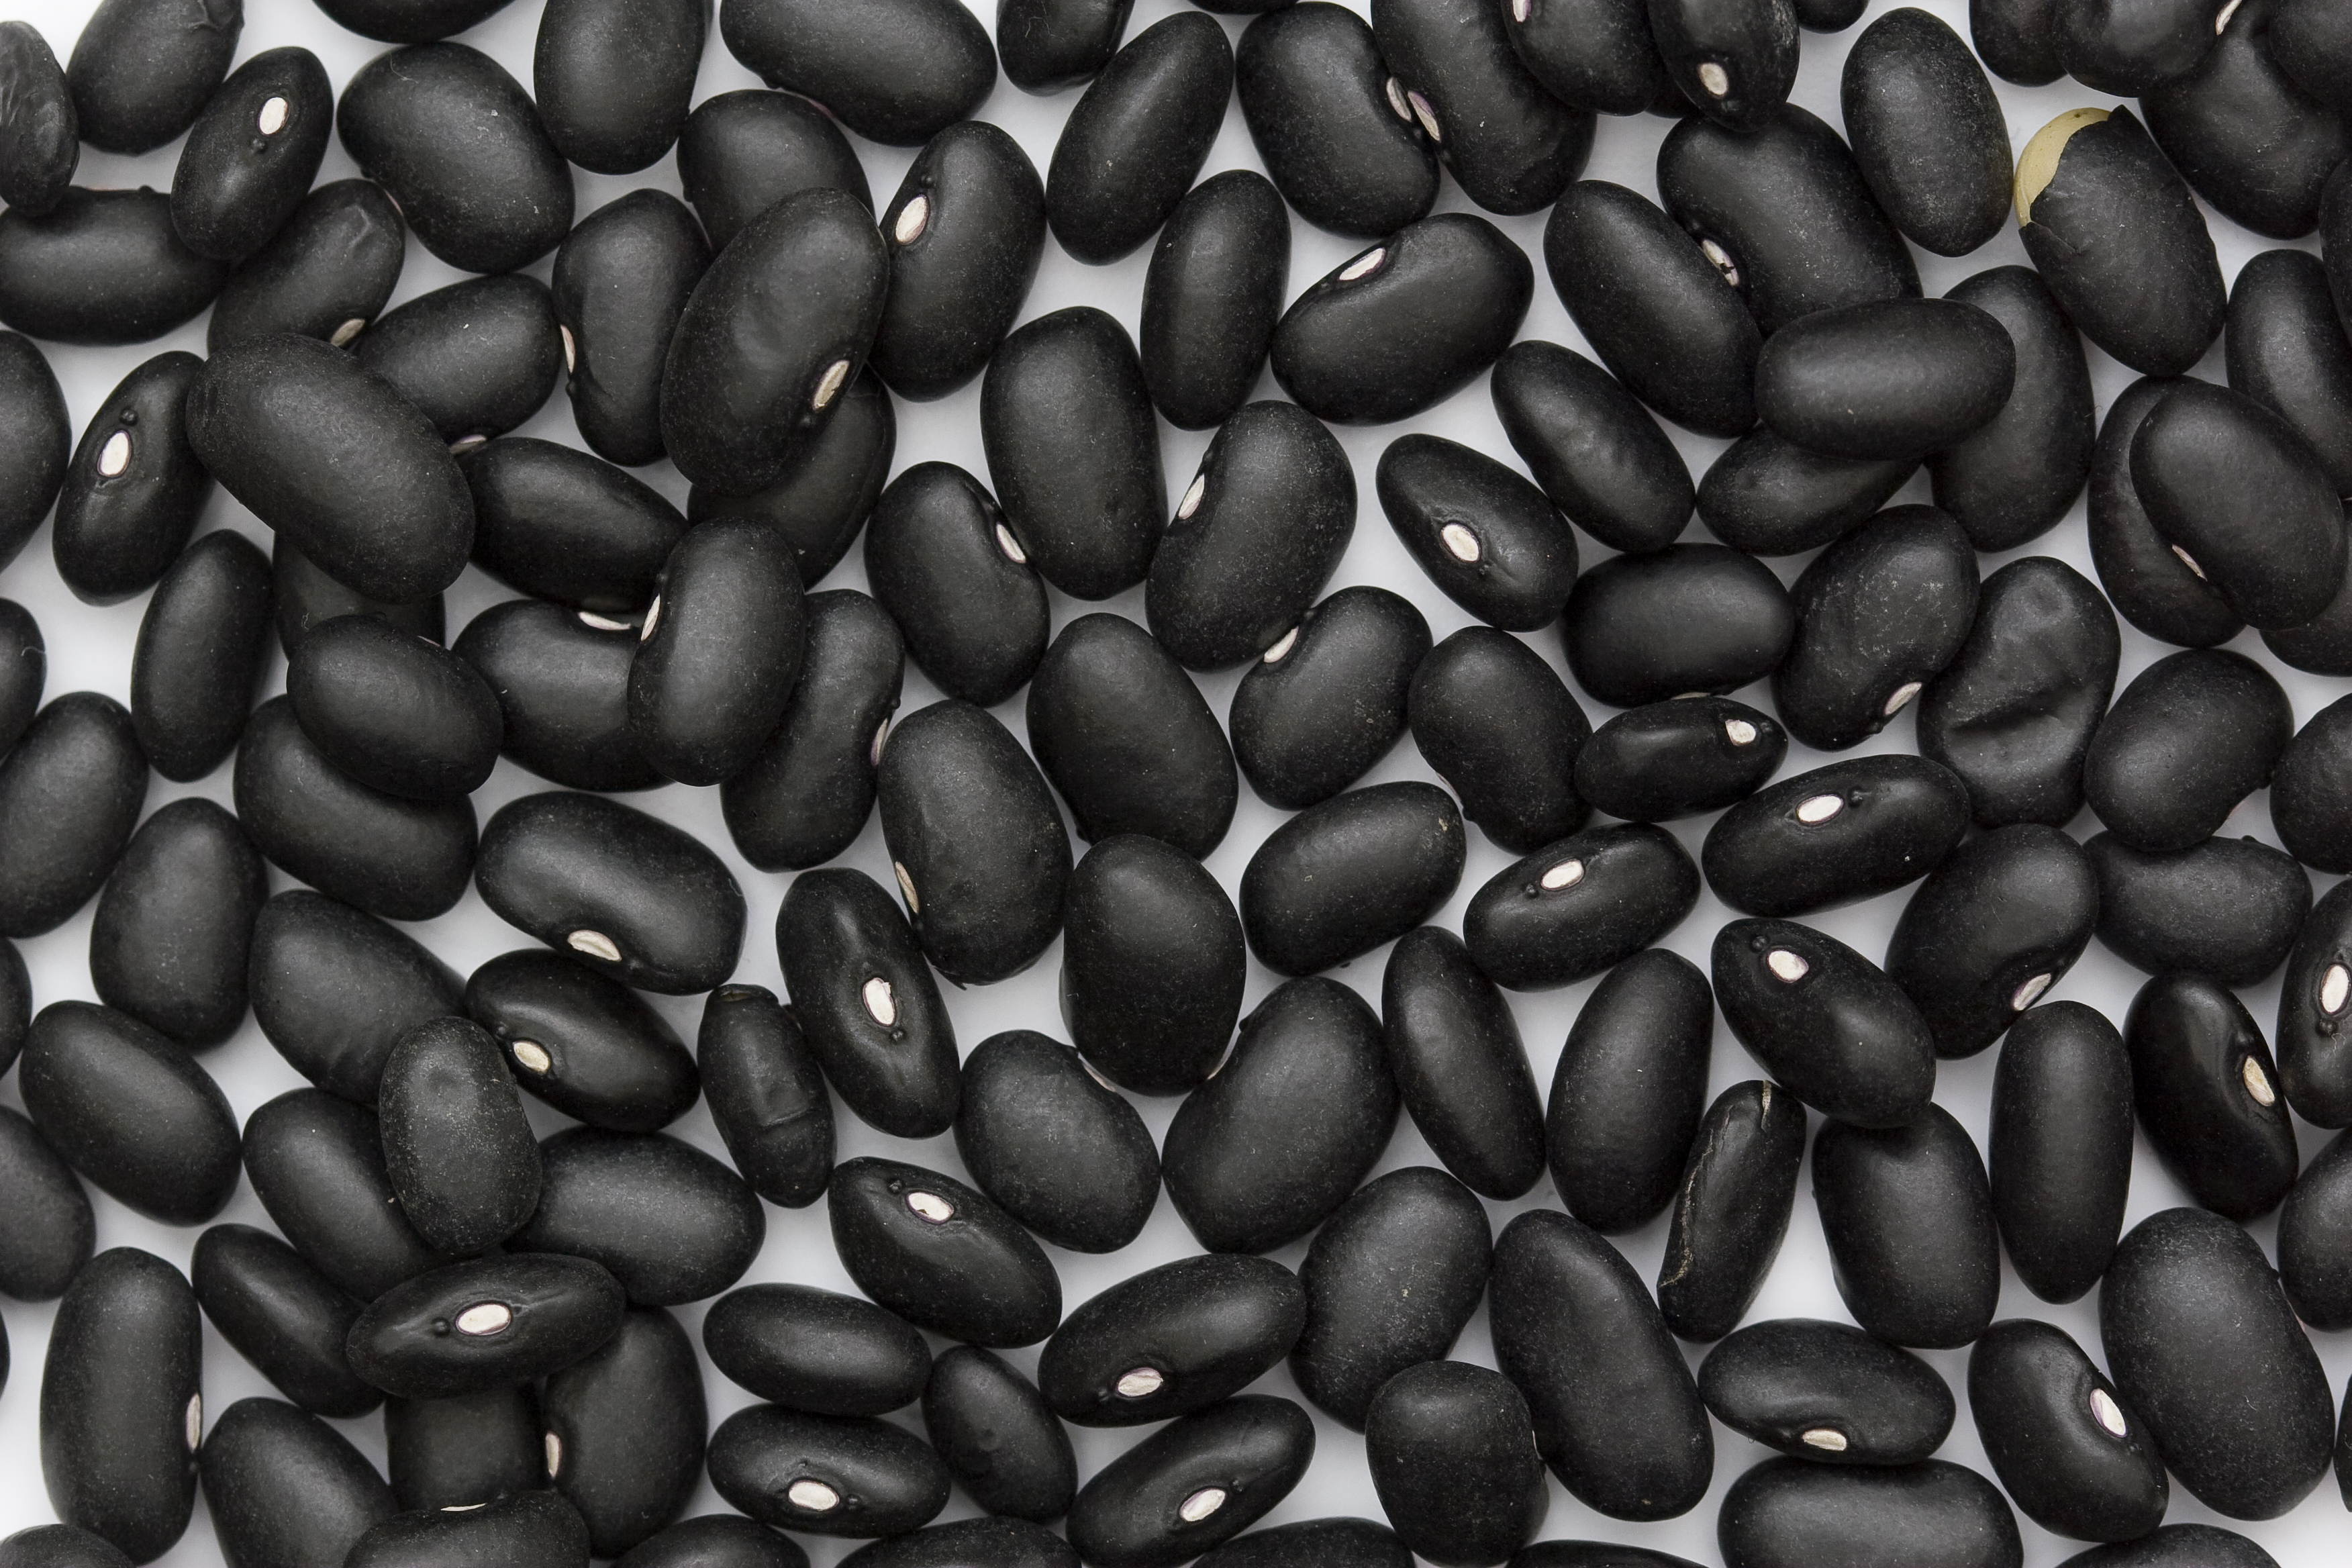
7. **Black Beans**
Alright, let’s talk about black beans. These little powerhouses might still be a staple in some kitchens, but their broader appeal seems to have quieted down. Yet, if you’re looking for an inexpensive source of protein that really packs a punch for your health, black beans are absolutely where it’s at. They’re like the unsung heroes of the legume world!
Seriously, these guys are loaded! According to Keri Gans, R.D.N., black beans are “packed with fiber, both insoluble and soluble.” And why does that matter? Well, that insoluble fiber is your secret weapon against constipation, helping keep things moving smoothly. Beyond just being a digestive superstar, they’re also incredibly versatile, fitting into salads, stir-fries, and rice bowls with ease.
Think about it: 100 grams of black beans gives you a solid 8.86 grams of protein, making them an excellent plant-based option. They fit perfectly into a varied protein routine, whether you’re vegetarian or just looking to mix things up. So, next time you’re planning a meal, don’t just walk past them in the aisle. Give black beans another shot – your gut (and your wallet!) will thank you.
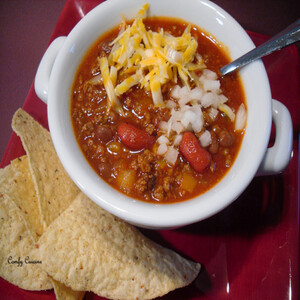
Wendy’s Chili
Ingredients
Equipment
Method
- Brown the ground beef in a large pot or Dutch oven over medium-high heat, breaking it into small crumbles as it cooks. Drain any excess fat.
- Add the diced onions, green chili, and celery to the pot with the browned beef. Sauté until the vegetables are softened, approximately 5-7 minutes.
- Stir in the diced fresh tomatoes, cumin, chili powder, black pepper, and salt. Cook for 2-3 minutes, allowing the spices to bloom and become fragrant.
- Pour in the canned tomato sauce, kidney beans (with their liquid), pinto beans (with their liquid), and water.
- Bring the entire mixture to a gentle boil, then reduce the heat to low.
- Cover the pot and simmer for at least 1.5 to 2 hours, or longer for deeper flavor, stirring occasionally to prevent sticking and ensure even cooking.
- Taste the chili and adjust the seasoning as needed, adding more salt, chili powder, or a pinch of cayenne if a spicier kick is desired.
- Serve the hot chili, optionally garnished with desired toppings such as shredded cheese, sour cream, or fresh cilantro.
Notes
Read more about: From Guilty Pleasures to Health Heroes: 13 ‘Junk’ Foods That Are Surprisingly Good for You
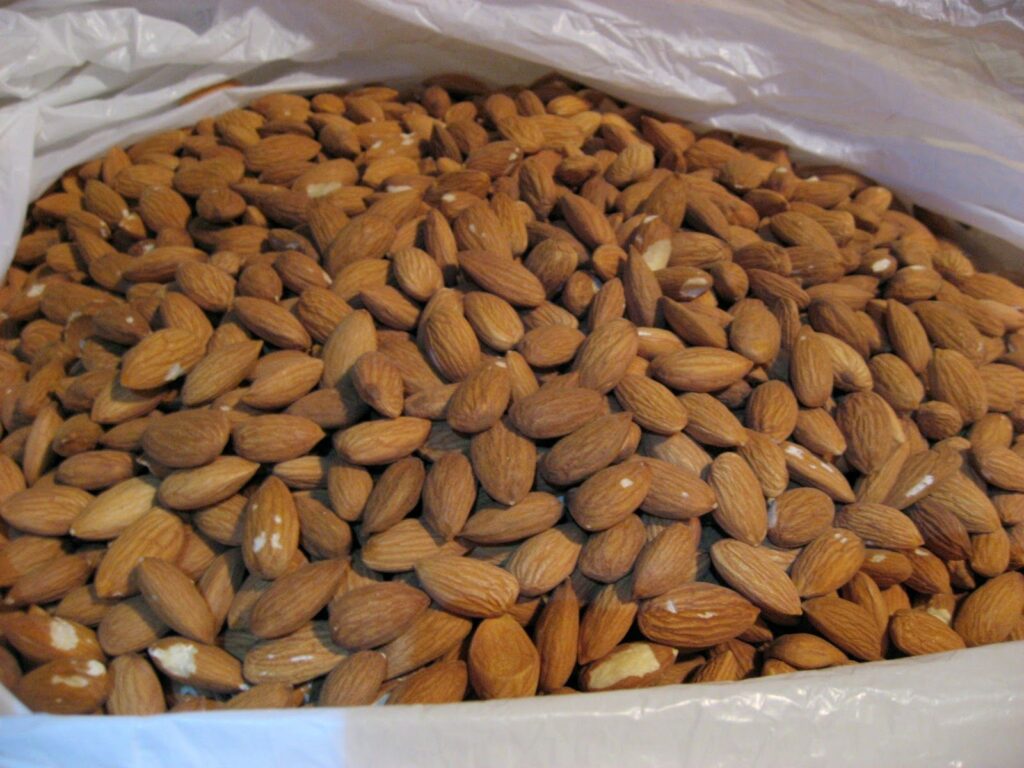
8. **Almonds**
Who doesn’t love a good snack? Almonds used to be that go-to, universally loved crunch, but have they been pushed aside by trendier bites? It’s a shame, because these little nuts are nutritional rockstars. They’re high in healthy fats, fiber, and protein, making them a fantastic option for your overall well-being.
But here’s the kicker: Dr. Rudolph Bedford, a gastroenterologist, notes that almonds “help to support the gut microbiome” and are “definitely good for gut health.” So, not only are they a satisfying snack, but they’re also doing some serious good for your insides. Imagine, a delicious munchie that actually *supports* your gut bacteria! That’s a win-win in our book.
One ounce (that’s about 12 almonds!) counts as an ounce-equivalent in the Protein Foods Group, offering around 21.2 grams of protein per 100 grams. So, whether you’re grabbing a handful for a quick energy boost, sprinkling them over your oatmeal, or tossing them in a salad, almonds deserve a comeback. They’re way more than just a fancy nut; they’re a gut-friendly, protein-packed powerhouse.

Fondue Español
Ingredients
Equipment
Method
- Rehydrate the dried ancho chile in 1 cup of hot water until softened (about 20-30 minutes). Remove seeds and stem, reserving the soaking water.
- Roast bell peppers and tomatoes in the oven until softened and slightly charred, then peel tomatoes if desired.
- Toast slivered almonds and day-old French bread slices until golden brown; set aside.
- In a blender or food processor, combine the rehydrated ancho chile, roasted peppers, tomatoes, toasted bread, minced garlic, toasted almonds, salt, and black pepper. Blend until a smooth purée forms, adding some reserved chile water or red wine vinegar to aid blending if needed.
- Grate the Manchego Curado cheese.
- In a medium saucepan, gently warm the puréed mixture over medium-low heat.
- Gradually add the grated Manchego cheese to the saucepan, stirring continuously with a whisk or wooden spoon until the cheese is completely melted and the fondue is smooth.
- Stir in 1/4 cup dry white wine.
- Adjust the fondue’s consistency by adding additional warm water or white wine, one tablespoon at a time, until it reaches your desired dipping consistency. Taste and adjust seasoning with salt, pepper, or optional cayenne pepper.
- Transfer the Fondue Español to a preheated fondue pot and serve immediately with your choice of dippers.
Notes
Read more about: From Guilty Pleasures to Health Heroes: 13 ‘Junk’ Foods That Are Surprisingly Good for You
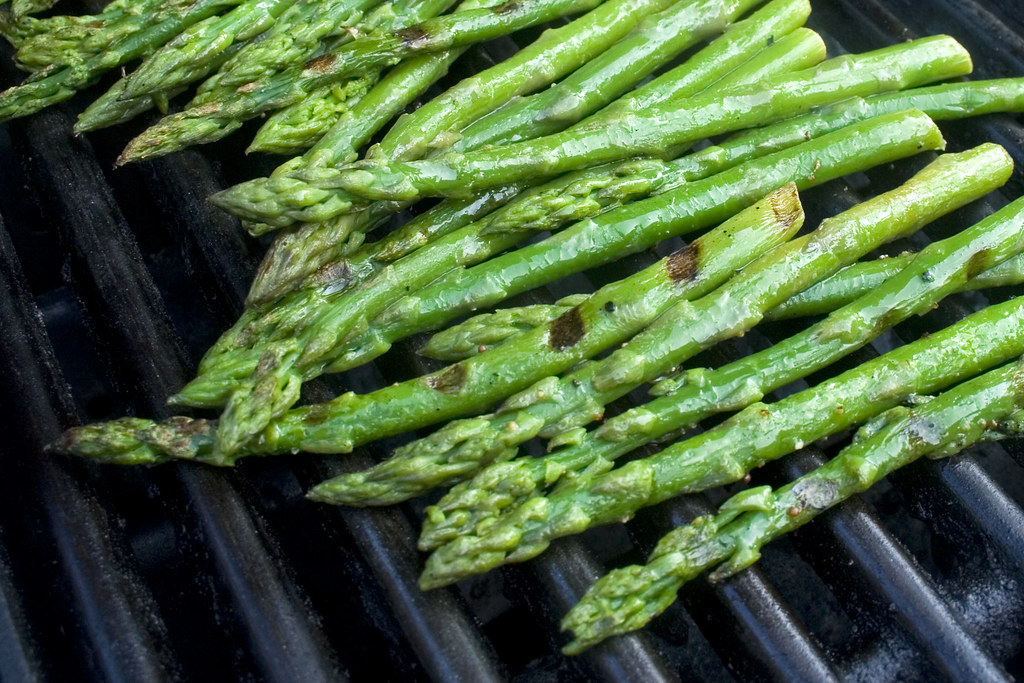
9. **Asparagus**
From crunchy snacks to vibrant greens, next up is asparagus. This slender green stalk might seem like a seasonal treat, but it used to be a more frequent player on American plates. And guess what? It’s another unsung hero for your gut health, making us scratch our heads wondering why it isn’t everywhere these days!
Keri Gans, R.D.N., reminds us that “asparagus is a prebiotic food that is good for your gut.” If you’re wondering what prebiotics are, think of them as the special fuel for the good bacteria already living in your gut. They help those beneficial microbes flourish, keeping your microbiome in tip-top shape and helping maintain a healthy balance.
Beyond its prebiotic prowess, asparagus is pretty impressive nutritionally speaking. It gets over a quarter of its calories from protein, is low in carbohydrates, and is packed with B vitamins. Roughly four boiled asparagus spears provide about 2.4 grams of protein per 100 grams! So, whether you’re roasting it, steaming it, or grilling it, this delightful vegetable is a delicious way to give your gut some love. Let’s get more asparagus back into our regular rotation!
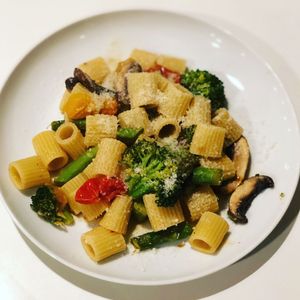
Pasta Primavera
Ingredients
Equipment
Method
- Bring a large pot of salted water to a rolling boil. Cook the pasta according to package directions until al dente.
- Before draining, reserve 1 cup of the starchy pasta water. Drain the cooked pasta and set it aside.
- While the pasta cooks, finely mince the garlic and prepare the vegetables: cut broccoli into florets, asparagus into 1-inch pieces, slice mushrooms, and halve the grape tomatoes.
- Heat the olive oil in a large sauté pan or skillet over medium-high heat. Add the minced garlic and red pepper flakes, sautéing for about 30 seconds until fragrant, being careful not to burn the garlic.
- Add the broccoli florets and asparagus to the pan, sautéing for 2-3 minutes until they are bright green and tender-crisp.
- Stir in the sliced mushrooms and grape tomatoes. Continue to sauté for another 3-4 minutes until the mushrooms are lightly browned and the tomatoes begin to soften.
- Pour in the chicken stock, bringing it to a gentle simmer. Cook for 1-2 minutes, allowing the liquid to slightly reduce and the flavors to meld.
- Add the cooked pasta to the sauté pan with the vegetables and sauce. Toss everything together thoroughly to coat the pasta evenly.
- Stir in the Parmesan cheese. If the sauce appears too dry, gradually add a tablespoon or two of the reserved pasta water until a light, cohesive sauce forms, beautifully coating the pasta.
- Taste and adjust seasoning with salt and freshly ground black pepper as needed. Serve immediately, garnished with additional Parmesan cheese if desired.
Notes
Read more about: Beyond the Hype: 14 Enduring Food & Health Myths That Men Need to Stop Believing Right Now

10. **Collard Greens**
Speaking of glorious greens, let’s talk about collard greens! While they might evoke images of traditional Southern cooking, these leafy giants once held a more prominent place in American diets. And for good reason, because they are absolutely bursting with benefits, especially for your digestive system.
If you’re constantly on the hunt for ways to boost your fiber intake, collard greens are a stellar choice. They are, as you might have guessed, high in fiber! But that’s not all—they also boast a high water content, which works synergistically with the fiber to aid in digestion. It’s like a superhighway for your system, keeping everything moving smoothly and efficiently.
Dr. Bedford points out that green leafy vegetables, like collard greens, are “full of various vitamins and antioxidants that are certainly important to not only gut health, but also your overall health.” So, these aren’t just a tasty side dish; they’re a nutrient-dense powerhouse that contributes to your overall well-being. Don’t let their traditional reputation limit your imagination—collard greens are ready for a modern revival in stir-fries, stews, or even as a hearty bed for roasted veggies. Your body will thank you for choosing these vibrant, nutrient-packed leaves.
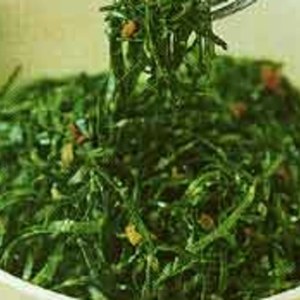
Collard Greens Miniera
Ingredients
Equipment
Method
- Thoroughly wash the collard greens. Halve them lengthwise, discard the tough stems and center ribs, then coarsely chop the greens into bite-sized pieces.
- Finely chop the three slices of bacon into small, even pieces.
- In a large pot or Dutch oven, cook the chopped bacon over medium heat until it is crisp and has rendered most of its fat.
- Using a slotted spoon, carefully remove the cooked bacon bits from the pot and set them aside, leaving the rendered bacon fat in the pot.
- Add the chopped collard greens to the pot with the hot bacon fat. Stir well to ensure all the greens are coated.
- Add a splash of water (approximately 1/2 to 1 cup, or enough to create a little steam at the bottom) to the pot, cover, and reduce the heat to low.
- Simmer the collard greens for 45-60 minutes, or until they are very tender. Stir occasionally and add more liquid if necessary to prevent the greens from drying out.
- Once the greens are tender, remove the lid and increase the heat to medium-high to reduce any excess liquid, if desired, concentrating the flavorful ‘pot liquor’.
- Return the reserved crisp bacon bits to the pot and stir them into the collard greens to combine.
- Taste the collard greens and adjust seasoning as needed, keeping in mind the saltiness from the bacon. Serve warm.
Notes
Read more about: The High Stakes Kitchen: 14 Celebrity Restaurant Ventures That Crumbled Against the Odds

11. **Lima Beans**
Okay, deep breaths everyone, we’re talking about lima beans. Yes, *those* lima beans! They might have a bit of a notorious reputation, inspiring more groans than cheers at the dinner table for some. But seriously, what happened to a bean that was once common enough to be a dietary staple? Perhaps it’s time to rethink this polarizing legume!
Despite any childhood memories, lima beans are actually pretty fantastic when it comes to nutrition. They are a good source of protein, with a 100-gram serving of canned lima beans providing about 4.93 grams. That’s a decent boost of plant-based power, making them a worthy contender in your meal planning, especially if you’re looking for diverse protein sources.
And let’s not forget their versatility! The context suggests that lima beans “can add variety to types of salad, stir fry, and rice bowls.” So, instead of thinking of them as just a bland, mushy side, imagine them as a creamy, savory addition to a vibrant salad or a hearty stir-fry. Maybe it’s not the lima bean itself that fell out of favor, but rather the way we’ve been preparing it! It’s time to give these underrated beans a second chance and discover their hidden deliciousness.
No-Cook Lima Beans
Ingredients
Equipment
Method
- Remove the package of frozen lima beans from the freezer.
- Place the frozen lima beans in a bowl or a colander.
- Thaw the lima beans thoroughly using one of the following methods: overnight in the refrigerator, by running cold water over them in a colander, or by microwaving on a defrost setting until tender but still firm.
- Once thawed, if desired, gently pat the lima beans dry with a clean kitchen towel or paper towels to remove excess moisture.
- Transfer the thawed lima beans to a medium mixing bowl.
- Drizzle the olive oil over the lima beans.
- Season generously with salt and freshly ground black pepper to taste.
- Toss gently to ensure the lima beans are evenly coated with the olive oil, salt, and pepper.
- Taste and adjust seasoning if necessary.
- Serve immediately as a simple side dish or a light component of a larger meal.
Notes
Read more about: From Priceless to Pocket Change: 14 Everyday Items That Were Once Exclusive Luxuries of the Wealthy Elite
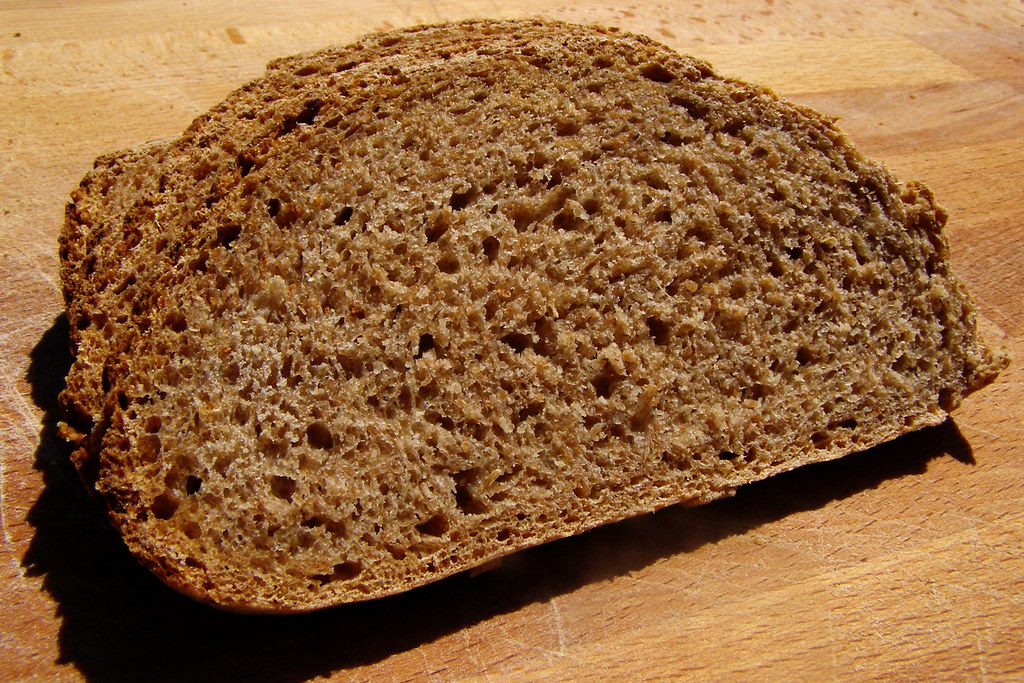
12. **Spelt**
And finally, rounding out our list of “seriously what happened?” foods, we have spelt! This ancient grain might not ring a bell for everyone, but it’s a fascinating example of a food that had its moment, faded into the background, and is now, perhaps, making a glorious comeback. For those who love exploring grains beyond wheat, spelt is truly something special.
Spelt is a type of hulled wheat, and one of its most impressive attributes is its “very high protein content.” In an era where many are looking for more plant-based protein sources and nutritious ancient grains, spelt fits the bill perfectly. While it might have been overshadowed by more common grains for a while, its unique nutritional profile and robust, nutty flavor are definitely attracting attention again.
The context notes that spelt “has risen in popularity and is often available with specialty flours.” This suggests a delightful resurgence for this once-forgotten food. It’s a fantastic reminder that sometimes, what goes around really does come around, especially in the culinary world. So, if you haven’t tried spelt in your baking, or as a hearty grain in salads and side dishes, now might be the perfect time to get reacquainted with this ancient powerhouse. You might just discover your new favorite old food!
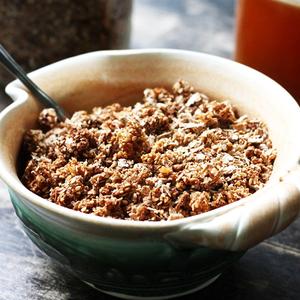
Spelt, Honey and Sesame Granola
Ingredients
Equipment
Method
- Preheat your oven to 300°F (150°C). Line a large, rimmed baking sheet with parchment paper for easy cleanup and to prevent sticking.
- In a large mixing bowl, combine the spelt flakes, sesame seeds, and a big pinch of salt. Stir thoroughly to ensure all dry ingredients are evenly distributed.
- In a separate small bowl, combine the honey and sunflower or vegetable oil. If the honey is very thick, gently warm the mixture for 10-15 seconds in the microwave to make it more fluid and easier to mix.
- Pour the warmed honey-oil mixture over the dry ingredients in the large bowl.
- Using a sturdy spatula or wooden spoon, mix all ingredients thoroughly until every spelt flake and sesame seed is evenly coated with the honey mixture.
- Spread the granola mixture onto the prepared baking sheet in an even, thin layer. Avoid overcrowding the pan to allow for proper air circulation and crisping.
- Bake for 25-35 minutes, stirring the granola every 10-15 minutes with your spatula to promote even browning and prevent any areas from burning.
- The granola is ready when it appears golden brown and smells fragrant. Remove the baking sheet from the oven.
- Allow the granola to cool completely on the baking sheet. It will crisp up significantly as it cools and form clusters.
- Once fully cooled, break the granola into desired clusters and transfer it to an airtight container for storage. It will keep fresh for several weeks.
Notes
Read more about: Why Gen Z is Passing on These Iconic Classic Cars: Understanding the Generational Shift in Automotive Preferences
And there you have it, a deep dive into 12 foods that used to be American dinner table fixtures. From forgotten casseroles to overlooked fermented friends and even some misunderstood grains, it’s clear that our plates are a constantly evolving canvas. While some of these might still make an occasional appearance, their widespread reign has definitely dwindled. But hey, learning about their past glory and surprising benefits just might inspire us to dust off some old recipes or try these culinary gems with a fresh perspective. Who knows, maybe your next favorite dish is actually a blast from the past!


